Table of Contents
Advertisement
Read all instructions BEFORE
assembly and USE of product.
KEEP INSTRUCTIONS FOR
FUTURE USE.
Lea todas las instrucciones ANTES
de armar y USAR este producto.
CONSERVE LAS INSTRUCCIONES
PARA USO FUTURO.
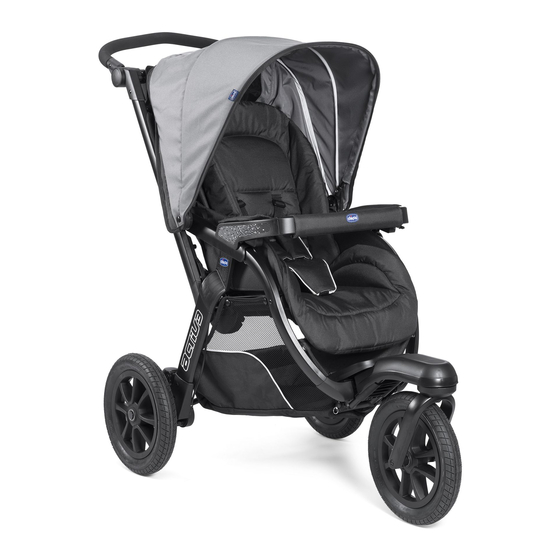
Activ3
TM
Jogging Stroller
Owner's Manual
Manual del propietario
©2013 Artsana USA, INC. 08/13
IS0097.2ES
Advertisement
Table of Contents

Related Manuals for Chicco Activ3


Summary of Contents for Chicco Activ3
-
Page 1: Jogging Stroller
USE of product. KEEP INSTRUCTIONS FOR FUTURE USE. Lea todas las instrucciones ANTES de armar y USAR este producto. CONSERVE LAS INSTRUCCIONES PARA USO FUTURO. Activ3 Jogging Stroller Owner's Manual Manual del propietario ©2013 Artsana USA, INC. 08/13 IS0097.2ES... - Page 2 • TO PREVENT A HAZARDOUS, To carry infants 0-6 months you • NEVER LEAVE CHILD UNSTABLE CONDITION, do not MUST use a Chicco KeyFit infant UNATTENDED. Always keep child place more than 10 lbs (4.6 kg) in car seat properly attached to the in view while in the stroller.
- Page 3 COCHECITO se utilice como asiento de seguridad infantil al adicionales y pueden provocar juguete. cochecito que no sea el Chicco una pérdida de control e • SUSPENDA EL USO DEL KeyFit. Utilizar este cochecito con inestabilidad. COCHECITO si se daña o se asientos de seguridad infantil de •...
- Page 4 Chicco recomienda que los niños tengan al menos 6 meses antes de utilizar in a Jogging stroller without a Chicco KeyFit car seat. With the addition of the un cochecito para jogging sin un asiento de seguridad infantil Chicco KeyFit. Al Chicco KeyFit car seat, newborns may be able to ride in the stroller.
- Page 5 Components Components Componentes Componentes A. - Stroller Frame E. - Canopy A. - Estructura de la silla de paseo E. - Capota F. - Pin and Ring B. - Front Wheels F. - Clavija y arandela B. - Ruedas delantera C.
- Page 6 How to Assemble Stroller How to Assemble Stroller Cómo armar el cochecito Cómo armar el cochecito WARNING ADVERTENCIA 2. Line up the holes of the Front Swivel Mount with the holes on the When opening the Stroller, ensure Al abrir la silla de paseo, asegúrese Stroller Frame as shown.
- Page 7 How to Assemble Stroller How to Assemble Stroller Cómo armar el cochecito Cómo armar el cochecito 3. Secure the Metal Pin into position with the Metal Ring. Insert the one end of the Metal Ring into hole on the Metal Pin and rotate the Metal Ring through the hole (as shown).
- Page 8 How to Assemble Stroller How to Assemble Stroller Cómo armar el cochecito Cómo armar el cochecito 6. Insert a Rear Wheel into the corresponding attachment point on the Stroller Frame, push until the axel locks into position. Repeat for the other side. Pull on each Wheel to check that it is securely attached.
- Page 9 How to Open Stroller How to Open Stroller Cómo abrir el cochecito Cómo abrir el cochecito 7. Once the Wheels are in place and 8A. Locate and grasp the Fold/ the Stroller Frame is in an upright Release Handle. position. Rotate the Push Handle up until it clicks into the first position.
- Page 10 How to Open Stroller How to Assemble Parent Tray Cómo abrir el cochecito Como armar la bandeja para padres 9. While twisting the Fold/Release 10. Locate the Hook and Loop Tabs Handle. Pull up and back on the on the underside of the Parent Fold/Release Handle in a rocking Tray.
- Page 11 How to Assemble Parent Tray To Attach Canopy Como armar la bandeja para padres Sujeción de la capota 11. Fold the Parent Tray Cross Bar 12. To attach the Canopy, fasten cover over the Cross Bar and secure the Canopy Clip to stroller frame as the hook and loop tab underneath the shown.
- Page 12 To Attach Canopy Canopy Sujeción de la capota Capota Locate the hook and loop strips 14. To open the Canopy, pull the front along back edge of the Canopy, edge of the Canopy forward. Reverse 1 section on the top and 2 sections this step to close the Canopy.
- Page 13 Canopy To Attach Wrist Strap Capota Sujeción de la correa para las muñecas 15. To Extend the Canopy, unzip the 16A. Wrap the Wrist Strap around the Push Handle and thread the Parent back section on the Canopy and release the extension. Loop through the Handle Loop end and tighten.
- Page 14 Front Wheel Swivel Lock Brakes Traba de la rueda delantera giratoria Frenos 17. To engage the Front Wheel Swivel Lock 18. To engage the Brakes on the on the Stroller. Locate the lever on the LEFT Stroller. Locate the lever on the side of the Push Handle.
- Page 15 How to Adjust the Backrest How to Adjust the Backrest Cómo ajustar el respaldo Cómo ajustar el respaldo The Backrest can be adjusted to 4 20. To raise the Backrest, pull or push it up until the desired position has positions.
- Page 16 A child under 6 months old must Se recomienda que sólo niños ride in a Chicco KeyFit® infant car menores de 6 meses de edad utilicen 22A & 22B. First insert the ends of seat as part of the travel system.
- Page 17 How to Use the Safety Harness How to Use the Safety Harness Cómo utilizar el cinturón de seguridad Cómo utilizar el cinturón de seguridad 23. Cover the Harness Buckle with 24. To release the Harness, press the Cover Strap, attach it to the back on the Harness Buckle Buttons to side of the Harness Buckle using the release the 5-point Harness Buckle as...
- Page 18 Adjustable Rear Suspension To Attach Bumper Bar Suspensión trasera ajustable Installation du Barra de protección 25. Stroller has 2 Suspension Modes. WARNING ADVERTENCIA Flip the Lever up for smooth surfaces Bumper Bar is required to be La barra de protección debe estar and flip the Lever down for rough attached when using Stroller with sujetada cuando se utiliza el...
- Page 19 To Attach Bumper Bar To Attach Bumper Bar Installation du Barra de protección Installation du Barra de protección 27. When installing Bumper Bar, place 27. Al instalar la barra de protección, coloque las lengüetas de plástico entre the Plastic Tabs in between the Arm el apoyabrazos y la tela del asiento (A).
- Page 20 28. To remove the Bumper Bar, press WARNING ADVERTENCIA the two buttons located under the ONLY USE a Chicco KeyFit® UTILICE ÚNICAMENTE un asiento Bumper Bar as shown, then tilt up infant car seat with this product. de seguridad infantil Chicco KeyFit®...
- Page 21 Using the KeyFit Infant Seat Using the KeyFit Infant Seat Cómo utilizar el asiento de seguridad infantil KeyFit Cómo utilizar el asiento de seguridad infantil KeyFit 29A. With the Bumper Bar attached, 30. To remove the KeyFit® infant Place the KeyFit® infant carrier into carrier, squeeze the Release Handle the Stroller Frame.
- Page 22 How to Close the Stroller How to Close the Stroller Cómo cerrar la silla de paseo Cómo cerrar la silla de paseo WARNING ADVERTENCIA When folding the Stroller, make sure Al plegar la silla de paseo, asegúrese that your child and other children de que su hijo y otros niños se are at a safe distance.
- Page 23 How to Close the Stroller How to Close the Stroller Cómo cerrar la silla de paseo Cómo cerrar la silla de paseo 33. Push in the Push Handle side Buttons and rotate the Push Handle down into a folded position as shown.
- Page 24 How to Remove Front Wheel How to Remove the Rear Wheels Cómo quitar la rueda delantera Cómo quitar las ruedas traseras 36. Lay the Stroller down. To Remove the Rear Wheels, pull up on the Spring Release Button on the inside hub of the Wheel Mount as shown.
- Page 25 How to Remove the Seat Fabric How to Remove the Seat Fabric Cómo quitar la tela del asiento Cómo quitar la tela del asiento 37. To remove the Seat Fabric, 38. Release the Fabric Harness Waist remove the Bumper Bar and Canopy Strap at the back of the Seat Pad from the Stroller.
- Page 26 How to Remove the Seat Fabric How to Remove the Seat Fabric Cómo quitar la tela del asiento Cómo quitar la tela del asiento 39. Reveal the 2 Fabric Tabs at the 40. Using a Phillips Screw driver back of the Stroller Seat Bottom and remove 3 screws from the Plastic thread the folded Fabric Tabs through Plate on the frame down tube as...
- Page 27 How to Remove the Seat Fabric How to Remove the Seat Fabric Cómo quitar la tela del asiento Cómo quitar la tela del asiento 41. At the front of the Stroller, undo the hook and loop strip fastened to the Basket. Reveal the 2 Fabric tabs on the Stroller Seat Bottom and thread the Folded Fabric Tabs through the opening on the seat bottom on...
- Page 28 Limpieza y mantenimiento Cleaning and Maintenance Las operaciones de limpieza y mantenimiento deben ser efectuadas exclusivamente por un adulto. This product requires regular maintenance. The cleaning and maintenance of the stroller must only be carried out by an adult. LIMPIEZA CLEANING La silla de paseo se puede desenfundar (consultar la sección "Cómo colocar/quitar la funda").
- Page 29 For More Information Más información If you have any questions or comments about this product, or are missing any of the parts, please contact us in one of the following ways: By phone (toll free): (877)-424-4226 By e-mail: info.usa@artsana.com By mail: 1826 William Penn Way Lancaster, PA 17601 Si tiene preguntas o comentarios sobre este producto o le falta alguna de las partes, comuníquese con nosotros por alguno de los siguientes medios:...
- Page 30 www.chiccousa.com...
Need help?
Do you have a question about the Activ3 and is the answer not in the manual?
Questions and answers