Advertisement
Available languages
Available languages
USER MANUAL
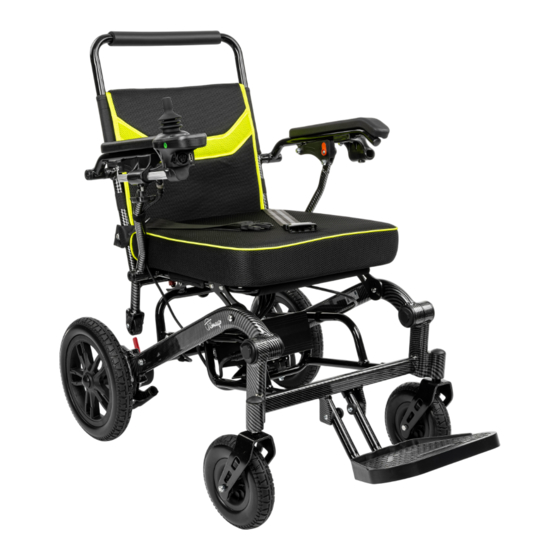
Electric wheelchair
Product code: FLASH-TIM
1. Security information
• Read the manual before first use.
• Do not use the wheelchair until fully assembled.
• Use of the wheelchair by people who are unable to operate it
independently is not recommended.
• Maximum load capacity must not exceed 120 kg.
• The wheelchair can only be used by one person at a time.
• It is recommended to keep your feet on the footrest and your
forearms on the armrests when driving.
• Always check the battery level on the control panel before use.
• This electric wheelchair should only be used on a flat surface or at
low elevations. It should not be ridden on a surface inclined at an
angle of more than 8 degrees.
• Do not drive the wheelchair at maximum speed when going uphill
or downhill.
• Do not use the wheelchair on soft and slippery surfaces such as
mud, sand etc.
• Do not ride the wheelchair sideways on highly elevated areas.
• Do not put any additional load such as a trailer etc. on the
wheelchair.
• Do not repair or modify the construction of the wheelchair by
yourself. Use only original spare parts provided by the
manufacturer.
• Do not stand up or sit down on the wheelchair when the control
module is switched on.
• Do not use the wheelchair without anti-tip wheels.
• When the freewheel (manual) mode is on, do not get on or off the
wheelchair without assistance.
1
Advertisement
Table of Contents

Related Manuals for Timago FLASH-TIM


Summary of Contents for Timago FLASH-TIM
- Page 1 USER MANUAL Electric wheelchair Product code: FLASH-TIM 1. Security information • Read the manual before first use. • Do not use the wheelchair until fully assembled. • Use of the wheelchair by people who are unable to operate it independently is not recommended.
- Page 2 • Do not lean forward to grab items laying in front, on the side or behind the wheelchair. Do not stand on the footrest. It might result in the wheelchair falling over. • Avoid rapid changes of the direction while driving on elevations. •...
- Page 3 A. ELEMENTS OF THE WHEELCHAIR Handle Backrest Seat Armrest Control module Support wheel for transportation Rear wheel 12” Front wheel 8” Footrest Security buckle Mounting screw Folding button Lithium battery Engine (mode) levers...
-
Page 4: Product Characteristics
B. PRODUCT CHARACTERISTICS • Aluminium, folding frame • Solid rear 12” and front 8” wheels • Control module: on/off button, steering joystick, horn button, speed adjustment, battery level indicator, mute button • Safe and reliable electromagnetic brake • Fully closed, maintenance-free battery •... - Page 5 Safety Classification type B Important! Read the user manual Protection against access to hazardous parts with a tool, protection against foreign solids IP44 with a diameter of 1 mm and larger, protection against water spray from any direction Fragile This side up Protect from humidity and moisture 4.
-
Page 6: Control Module Functions
5. Operation A. CONTROL MODULE FUNCTIONS • Joystick – used to control the speed and direction. The further the joystick is pushed away from the middle, the faster the wheelchair will move. It will lose speed automatically after the joystick is released. •... - Page 7 • Battery level indicator • Mute button • USB port and module with flashlight LED display Status Description All LED lights are turned Wheelchair is turned off or in sleep mode. Wheelchair is turned on. Lights’ colour shows the All LED lights are turned battery level.
- Page 8 Wheelchair is in manual (freewheel) mode. Turn off the control module and All LED lights are blinking change the mode using the dedicated levers. Turn on the module again to use the wheelchair in electric mode. B. MANUAL AND ELECTRIC MODE SWITCHING To use the wheelchair in manual mode, move down the left and right engine levers located at the back.
-
Page 9: Directions For Use
• Wheelchair should only be used on flat surfaces. Driving on muddy or uneven surfaces can cause control system damage. 6. Technical data Product code FLASH-TIM Overall height 93 cm... - Page 10 Overall width 62 cm Overall length 90 cm Seat height from the 46 cm ground with cushion: 54 cm Backrest height 41 cm Seat cushion dimensions 45 x 45 x 8 cm Battery weight 3,30 kg Maximum capacity 120 kg Wheelchair weight 19,10 kg front: solid, 8’’...
- Page 11 5) Charge it regularly to expand its lifespan. 6) Used batteries should be utilized according to local environmental regulations. 9. Storage and transport conditions A. TRANSPORTATION • Take caution during transportation. Do not throw, turn over or put pressure on the product and its packaging. •...
- Page 12 Battery/charger Check if the power cords are tightened. failure Left engine Check if power cords connected to the left failure engine are tightened. Right engine Check if power cords connected to the right failure engine are tightened. Check if power cords connected to the left brake Failure of left are tightened.
- Page 13 INSTRUKCJA OBSŁUGI Wózek inwalidzki elektryczny Kod produktu: FLASH-TIM 1. Informacje dotyczące bezpieczeństwa • Należy zapoznać się z instrukcją obsługi przed użyciem wózka. • Nie należy używać wózka przed wykonaniem wszystkich czynności dotyczących rozłożenia i montażu. • Nie zaleca się używania wózka przez osoby z dysfunkcjami uniemożliwiającymi samodzielne korzystanie.
- Page 14 • Nie należy wsiadać i zsiadać z wózka bez asekuracji osoby trzeciej, gdy włączony jest tryb manualny. • Nie należy wychylać się zbytnio z wózka w celu podniesienia przedmiotu leżącego z przodu, z boku lub z tyłu wózka, ponieważ grozi to przewróceniem wózka. •...
-
Page 15: Elementy Składowe
Wózek inwalidzki elektryczny przeznaczony jest dla osób: • niepełnosprawnych, mających problem z samodzielnym poruszaniem się, • z dysfunkcjami i ograniczeniami ruchowymi, • z chorobami serca i układu krążenia, • z osłabieniem organizmu spowodowanym zaawansowanym wiekiem. A. ELEMENTY SKŁADOWE B. CECHY PRODUKTU Uchwyt Oparcie Siedzisko... -
Page 16: Parametry Techniczne
Torba Klamra zabezpieczająca Pokrętło montażowe Przycisk regulacji podłokietników Akumulator litowy Silniki oraz dźwignie zmiany trybu pracy • Wydajne silniki o dużej mocy 2x150 [W] • Aluminiowa składana rama • Pełne koła tylne o średnicy 12” oraz przednie o średnicy 8” •... - Page 17 3. Maksymalne obciążenie: do 120 [kg] 4. Droga hamowania na płaszczyźnie poziomej (przy prędkości maksymalnej): ≤0,8 [m] 5. Zasięg: 20-25 [km] 6. Akumulator: litowy 24[V] x 12[Ah] 7. Czas ładowania akumulatora: ok. 6 godzin 8. Maks. bezpieczne nachylenie: ≤ 8° 9.
- Page 18 Delikatne Tą stroną do góry Chronić przed wilgocią 4. Rozpakowywanie i instalacja • Rozkładanie: Należy wyjąć wózek elektryczny z opakowania. Chwytając za uchwyt ramy wózka rozłożyć go do momentu kliknięcia. Podłączyć kabel zasilający do baterii. • Składanie: złożyć wózek należy odciągnąć...
- Page 19 • Wyciąganie akumulatora: aby wyjąć akumulator należy nacisnąć klips blokujący znajdujący się pod akumulatorem z przodu wózka i powoli wysunąć akumulator do przodu. 5. Zasady użytkowania A. FUNKCJE MODUŁU STEROWANIA • Joystick – służy do kontroli prędkości i kierunku jazdy (przód, tył, skręt).
- Page 20 • Przycisk włączania/wyłączania • Wskaźnik prędkości 5 biegów (C): 1 – najwolniejszy, 5 – najszybszy. • Klakson – naciśnij przycisk, aby użyć klaksonu. • Przyciski przyspieszania i zwalniania – biegi zmieniają się automatycznie po naciśnięciu przycisku (+/- o jeden wyżej/niżej). •...
- Page 21 Akumulator wózka jest w trakcie ładowania. Gdy wózek jest blisko Światła LED zapalają się pełnego naładowania, kolejno od lewej do częstotliwość mrugania prawej światełek LED zwalnia. Wszystkie światła w kolorze zielonym oznaczają pełne naładowanie. Światła LED świecą się od lewej do prawej, w zależności od stopnia Wózek jest w trakcie jazdy.
-
Page 22: Sposób Użycia
Tryb elektryczny Tryb manualny C. ŁADOWARKA • Zestaw zawiera ładowarkę z wyjściem dla akumulatora 24[V] x 12[Ah]. • Czas ładowania baterii to ok. 6 godzin. • Wtyczkę ładowarki należy włożyć do gniazda ładowania w module sterowania lub bezpośrednio podpiąć do akumulatora: •... - Page 23 • Za pomocą przycisku regulacji prędkości na module sterowania należy dostosować prędkość maksymalną do stanu fizycznego użytkownika i warunków drogowych. • Wózka należy używać na płaskich powierzchniach. Podczas jazdy po błotnistych lub nierównych nawierzchniach może dojść do uszkodzenia układu sterowania. 6. Dane techniczne Kod produktu FLASH-TIM...
- Page 24 Wysokość całkowita 93 cm Szerokość całkowita 62 cm Długość całkowita 90 cm Wysokość siedziska od 46 cm podłoża z poduszką: 54 cm Wysokość oparcia 41 cm Wymiary poduszki do 45 x 45 x 8 cm siedzenia Waga akumulatora 3,30 kg Maksymalne obciążenie 120 kg Waga wózka...
- Page 25 3) Akumulator ma określoną żywotność. Jeżeli akumulator zużyje się, należy wymienić go na nowy. 4) Akumulator powinno się utrzymywać w czystości, z dala od zasięgu dzieci. Należy unikać narażania akumulatora na uderzenia. 5) Regularne ładowanie akumulatora zapewnia jego dłuższą żywotność. 6) Zużyte akumulatory należy zutylizować...
- Page 26 Użytkownik przekroczył wyznaczony limit. Wózek nie uruchamia się. Błąd użytkowania Puścić joystick i przywrócić go do oryginalnej, środkowej pozycji. Błąd wyświetlacza na module sterowania. Uszkodzenie panelu Skonsultuj się z Sprzedawcą w celu wymiany sterowania panelu. Ładowarka lub bateria mogły ulec uszkodzeniu.
- Page 27 Sprawdzić włącznik hamulców pod kątem uszkodzeń lub złego styku włącznika. Sprawdź czy okablowanie nie jest Błąd modułu poluzowane. sterowania Skonsultuj się ze Sprzedawcą. 10. Dane dotyczące gwarancji • Wszystkie produkty dystrybuowane przez naszą firmę objęte są gwarancją, której warunki zostały opisane w karcie gwarancyjnej, jaką...
Need help?
Do you have a question about the FLASH-TIM and is the answer not in the manual?
Questions and answers