Table of Contents
Advertisement
Quick Links
Advertisement
Table of Contents
Troubleshooting

Related Manuals for ElectrIQ EAH20LEDWB


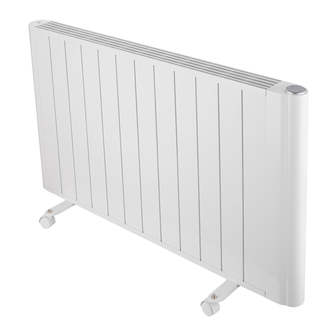
Summary of Contents for ElectrIQ EAH20LEDWB
- Page 1 USER MANUAL PORTABLE OR MOUNTABLE PANEL HEATER EAH20LEDWB EAH20LEDWW Thank you for choosing electriQ Please read the manual before using this heater and keep it safe for future reference. Visit our page, www.electriQ.co.uk, for our entire product range.
-
Page 3: Table Of Contents
CONTENTS SAFETY WARNINGS PARTS ATTACHING THE FEET WALL INSTALLATION OPERATION SETTING UP THE APP CLEANING AND STORAGE TECHNICAL SPECIFICATION TROUBLESHOOTING SUPPORT PRODUCT FICHE... -
Page 4: Safety Instructions
SAFETY INSTRUCTIONS IMPORTANT • Carefully read the instructions before operating the unit • This appliance is for indoor use only. • Rating: This unit must be only connected to a 220-240 V / 50 Hz earthed outlet. • Installation must be in accordance with the regulations of the country where the unit is used. •... - Page 5 • Do not move or tilt the unit. • Avoid keeping the unit in direct sunlight for a long period of time. • The heater is designed to be used at temperatures above -20°C. If it is exposed to temperatures below this, it must be allowed to warm above this level before operation.
-
Page 6: Parts
PARTS PART IMAGE Hangers Plug and Screws Hook Plug and Screws Screws Screws Feet ATTACHING THE FEET 1. Rest the heater upside down on a soft cotton cloth or carpet. 2. Fix the feet to the base of the heater using the four screws provided. 3. - Page 7 3. Drill two holes with a diameter of 10mm and a depth of 60mm. These are for the support brackets at the bottom of the heater. 4. Insert the two wall plugs (B) and secure the two hooks (C) with the two screws (B). 5.
-
Page 8: Operation
OPERATION ON / OFF button FUNCTION DESCRIPTION Power Press the ON/OFF button once to turn it on and once to turn it off. When turned on, the display will light up with the current temperature of the room. Temperature Selection Use the increase and decrease buttons to change the desired temperature in 1-degree increments. -
Page 9: Setting Up The App
SETTING UP THE WIFI APP This is designed as a general guide to the setup. There may be differences in the interface and features available due to product development and features of the model. BEFORE YOU START • Ensure your router provides a standard 2.4 GHz connection. •... -
Page 10: App Connection
APP CONNECTION Due to continuous product improvement, some images may differ from the current app. You can NOTE: download it from the Apple or Google Play Store. 1. Press the register button at Read the Privacy policy and 3. Enter your email address the bottom of the screen. - Page 11 SETTING UP YOUR HOME WITHIN THE APP The app allows you to have multiple homes, rooms, and devices, so you will need to set up at least one to get started. 1. Select ‘Me’ at the bottom of 2. Create and name your home, 3.
-
Page 12: Connecting To The Unit
CONNECTING TO THE UNIT Quick Connection: Hold down the decrease button for 3 seconds to turn the intelligent control on. 3. On the app, select the 'Add' button in Turn the heater on using Follow the steps in order. the top corner. Then, select 'Add the power button. - Page 13 CONTROLLING THE DEVICE VIA THE APP HOME SCREEN Voice Control: Press to give verbal Add Device: Add a device instructions for operation. to the app and go through the setup process. Name of Heater: Press to enter the Device Screen Home: Return to home screen from the Smart Scene and Profile screens...
- Page 14 DEVICE HOME SCREEN Device Name Back: Returns to the Home Screen Current Temperature: Desired Displays what the Temperature: current temperature Displays what has been set as the target room temperature. Increase Desired Decrease Desired Temperature Temperature Temperature range 5- 40⁰C Temperature range 5-40⁰C Schedule: Set up a...
-
Page 15: Profile Tab
PROFILE TAB The profile tab allows you to edit both your details and use the added features of the unit. HOME MANAGEMENT Home Management provides options for managing your TUYA account, such as adding a home, adding and removing rooms, and sharing devices with family. -
Page 16: Cleaning And Storage
• Do not run the unit until completely dry. • Place the heater in its original box or cover to protect it from dust when not in use. • Store it in a cool, dry place. TECHNICAL SPECIFICATIONS Model EAH20LEDWB EAH20LEDWW Voltage 220-240V~ Frequency... -
Page 17: Support
UK SUPPORT www.electriQ.co.uk/support For your convenience, please make these simple checks before calling the service line. If the unit still fails to operate, call 0330 390 3061 or complete the online form. 1. Is the unit plugged into the mains? 2. -
Page 18: Eu Declaration Of Conformity
Compliance and Quality Manager, Buy It Direct, Huddersfield August 2024 EU DECLARATION OF CONFORMITY Hereby, electriQ declares that these air conditioners are in compliance with Directive 2014/53/EU. The full text of the EU declaration of conformity is available at the following internet addresses: https://www.electriq.co.uk/content/DOC/EU/EAH20LEDWB.pdf https://www.electriq.co.uk/content/DOC/EU/EAH20LEDWW.pdf... -
Page 19: Product Fiche
Yesa detection with distance control option with adaptive start control with working time limitation with black bulb sensor Contact electriQ, Unit 2A, Trident Business Park, Neptune Way, Huddersfield, Details HD2 1UA The Black Church St Marys Place, Dublin 7. V20240829SS...
Need help?
Do you have a question about the EAH20LEDWB and is the answer not in the manual?
Questions and answers