Table of Contents

Related Manuals for ElectrIQ eiQEWMR


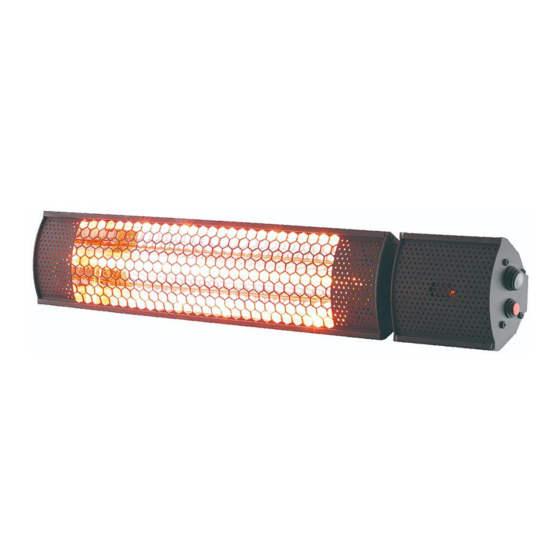
Summary of Contents for ElectrIQ eiQEWMR
- Page 1 USER MANUAL OUTDOOR WALL AND CEILING HANGING HEATER eiQEWMR Thank you for choosing electriQ Please read the manual before using this heater and keep it safe for future reference. Visit our page www.electriQ.co.uk for our entire product range...
-
Page 2: Table Of Contents
CONTENTS SAFETY INSTRUCTIONS PARTS LIST ASSEMBLY INSTALLATION DIAGRAMS OPERATION REMOTE CONTROL TROUBLESHOOTING CLEANING AND MAINTENANCE TECHNICAL SPECIFICATIONS SUPPORT... -
Page 3: Safety Instructions
SAFETY INSTRUCTIONS IMPORTANT • Carefully read the instructions before operating this unit. • This appliance is for outdoor use only. • Rating: This unit must be only connected to a 220-240 V / 50 Hz earthed outlet. • Installation must be in accordance with the regulations of the country where the unit is used. •... - Page 4 • Keep the heater clean. Do not allow any object to enter the ventilation or exhaust opening as this may cause electric shock, fire, or damage to the heater. • Do not use the appliance for anything other than its intended use. •...
-
Page 5: Parts List
PARTS LIST PARTS PART PART NAME L shape bracket Wall plugs Screws PA5mm*25mm Screws M6mm*12mm M6mm locking nut Washer M6mm*12mm screw ASSEMBLY Tools Needed: Pencil Hammer Spirit Level Screw Driver Drill A wall mounting bracket is provide with the heater which has been specifically designed to allow this product to be fitted to a ceiling or wall. -
Page 6: Installation Diagrams
INSTALLATION DIAGRAMS... -
Page 7: Operation
INSTALLATION WITH TRIPOD STAND - (OPTIONAL) Contact the supplier to purchase the tripod. Please reference the product code “eiQEWMR” and “Tripod” when contacting the supplier. OPERATION 1. Plug the unit into a plug socket, make sure the power supply is the same as rated. -
Page 8: Remote Control
INSERTING BATTERIES Insert 2 AAA type batteries into your remote control 1. Flip the backside of your remote control and pull out battery cover. Insert the batteries in accordance with the instructions and polarity the batteries. 2. Change the batteries in the same way depicted above. NOTICE: 1. -
Page 9: Technical Specifications
67.5*10.5*7.2cm Weight (KG) 1.7kg Tripod dimensions 1.1-1.8m electriQ UK SUPPORT www.electriQ.co.uk/support Please, for your own convenience, make these simple checks before calling the service line. If the unit still fails to operate call: 0330 390 3061 or complete the online form 1.
Need help?
Do you have a question about the eiQEWMR and is the answer not in the manual?
Questions and answers