Table of Contents
Advertisement
Quick Links
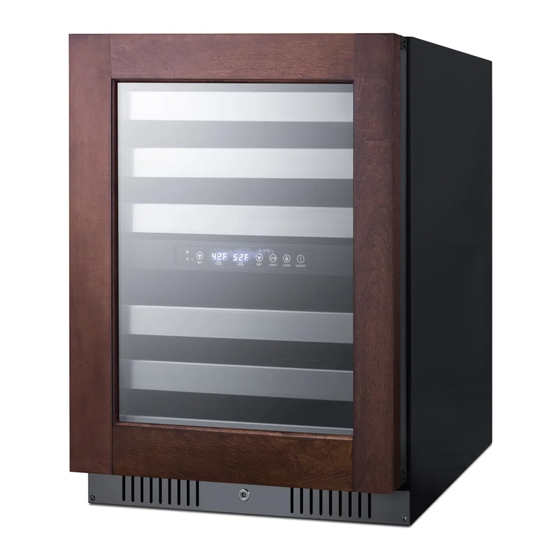
TWO-ZONE WINE CELLAR
ALWC532PNR
SWC532BLBISTPNR
DBWC24133
DBWC24134ADA
User Manual
BEFORE USE, PLEASE READ AND FOLLOW ALL SAFETY RULES AND OPERATING INSTRUCTIONS.
Write Model and Serial Numbers here:
Felix Storch, Inc.
An ISO 9001:2015 registered company
Model No.:
770 Garrison Ave
Bronx, New York 10474
Serial No.:
www.summitappliance.com
Advertisement
Table of Contents

Related Manuals for Summit DREAMBILT ALWC532PNR


Summary of Contents for Summit DREAMBILT ALWC532PNR
- Page 1 TWO-ZONE WINE CELLAR ALWC532PNR SWC532BLBISTPNR DBWC24133 DBWC24134ADA User Manual BEFORE USE, PLEASE READ AND FOLLOW ALL SAFETY RULES AND OPERATING INSTRUCTIONS. Write Model and Serial Numbers here: Felix Storch, Inc. An ISO 9001:2015 registered company Model No.: 770 Garrison Ave Bronx, New York 10474 Serial No.: www.summitappliance.com...
-
Page 2: Table Of Contents
TABLE OF CONTENTS Appliance Safety Important Safeguards Location of Parts Installation Instructions 6-11 Before Using the Appliance Installation of your Appliance Electrical Connection Built-in Under-counter Instructions Anti-tip Bracket Installation Installation of the Handle Reversing the Door Swing Panel Ready Installation 10-11 Operating your Appliance 12-13... -
Page 3: Appliance Safety
APPLIANCE SAFETY Your safety and the safety of others are very important. We have provided many important safety messages in this manual and on your appliance. Always read and obey all safety messages. This is the Safety Alert Symbol. The symbol alerts you to potential hazards that can kill or injure you and others. - Page 4 Air the room in which the appliance is located for several minutes, and Contact the Service Department for advice. • The more coolant there is in an appliance, the larger the room in which it should be installed. In the event of a leakage, if the appliance is in a small room, there is the danger of combustible gases building up.
-
Page 5: Location Of Parts
CALIFORNIA CARB/SNAP DISCLOSURE This product uses eco-friendly hydrocarbon refrigerant and fully complies with California CARB regulations. However, we are required by California law to provide the following disclosure statement in every product sold in California: "This equipment is prohibited from use in California with any refrigerants on the 'List of Prohibited Substances' for that specific end-use, in accordance with California Code of Regulations, title 17, section 95374. -
Page 6: Installation Instructions
INSTALLATION INSTRUCTIONS Before Using Your Appliance • Remove the exterior and interior packing. • Before connecting the appliance to the power source, let it stand upright for approximately 2 hours. This will reduce the possibility of a malfunction in the cooling system from handling during transportation. -
Page 7: Built-In Under-Counter Instructions
The appliance should always be plugged into its own individual electrical outlet, which has a voltage rating that matches the rating label on the appliance. This provides the best performance and prevents overloading house wiring circuits, which could cause a fire hazard from overheating. Never unplug the appliance by pulling on the power cord. -
Page 8: Anti-Tip Bracket Installation
Models: SWC532BLBISTPNR, DBWC24133 Anti-Tip Bracket Installation To reduce the risk of tipping the appliance by abnormal usage or improper loading, the appliance must be secured by properly installing the anti-tip bracket packed with the appliance. 1. Place the anti-tip bracket on the floor as shown in the figure to the right. -
Page 9: Installation Of The Handle
Installation of the Handle (Optional) If you are not installing a panel over the door frame and would like to use the provided handle on the stainless steel door trim, follow the instructions below: 1. Place the handle② over the 2 mounting studs① on the door frame with the set screws③... -
Page 10: Panel Ready Installation
Panel Ready Installation The appliance is designed to be panel ready. To install a custom panel on the front of the doors of your appliance, follow the steps below: Overlay Panel Dimension: Door Panel Width: 587mm ( 23 1/8" ) Door Panel Height: 742mm ( 29 1/4"... - Page 11 Included in the bracket kit Phillips self-tapping Phillips screw Top bracket (1) Bottom bracket (1) screw (6) Installing the Bracket & Full Overlay Panel Installation 1. Lay the wooden panel (3) on a flat surface. 2. Place the top bracket and bottom bracket along the edge of the panel. 3.
-
Page 12: Operating Your Appliance
OPERATING YOUR APPLIANCE Recommended Temperatures for Chilling Wine Red Wines: 59 ~ 64.4°F (15 ~ 18°C) Dry / White Wines: 48.2 ~ 57.2°F (9 ~ 14°C) Sparkling Wines: 41 ~ 46.4°F (5 ~ 8°C) The cabinet temperature may vary slightly depending on whether or not the interior light is ON or OFF, and whether the bottles are located in the upper/middle or lower section of the cabinet. -
Page 13: Temperature Conversion
Temperature Conversion The appliance has the capability to display temperature in either Celsius or Fahrenheit. To change the and LIGHT buttons simultaneously for approx. 3 seconds. temperature scale, press and hold both the Indicator light illuminates to signify the cooling mode is currently in operation. LOCK If illuminated, indicates the control panel is locked. -
Page 14: Care And Maintenance
CARE AND MAINTENANCE Cleaning Your Appliance • Turn off the power, unplug the appliance, and remove all items. • Wash the inside surfaces with a warm water and baking soda solution. The solution should consist of about 2 tablespoons of baking soda to a quart of water. •... -
Page 15: Troubleshooting
TROUBLESHOOTING You can solve many common problems easily, saving you the cost of a service call. Try the suggestions below to see if you can solve the problem before calling the servicer. PROBLEM POSSIBLE CAUSE REMEDY Appliance does not operate. The appliance defrosts automatically in Connect the appliance. -
Page 16: Limited Warranty
LIMITED WARRANTY ONE-YEAR LIMITED WARRANTY Within the 48 contiguous United States, for one year from the date of purchase, when this appliance is operated and maintained according to instructions attached to or furnished with the product, warrantor will pay for factory-specified parts and repair labor to correct defects in materials or workmanship. Service must be provided by a designated service company.
Need help?
Do you have a question about the DREAMBILT ALWC532PNR and is the answer not in the manual?
Questions and answers