Ipevo Point 2 View Manual
- User manual (28 pages) ,
- Quick start manual (2 pages) ,
- Quick start manual (2 pages)
Advertisement
Package Contents
Your Point 2 View product package should contain these items:
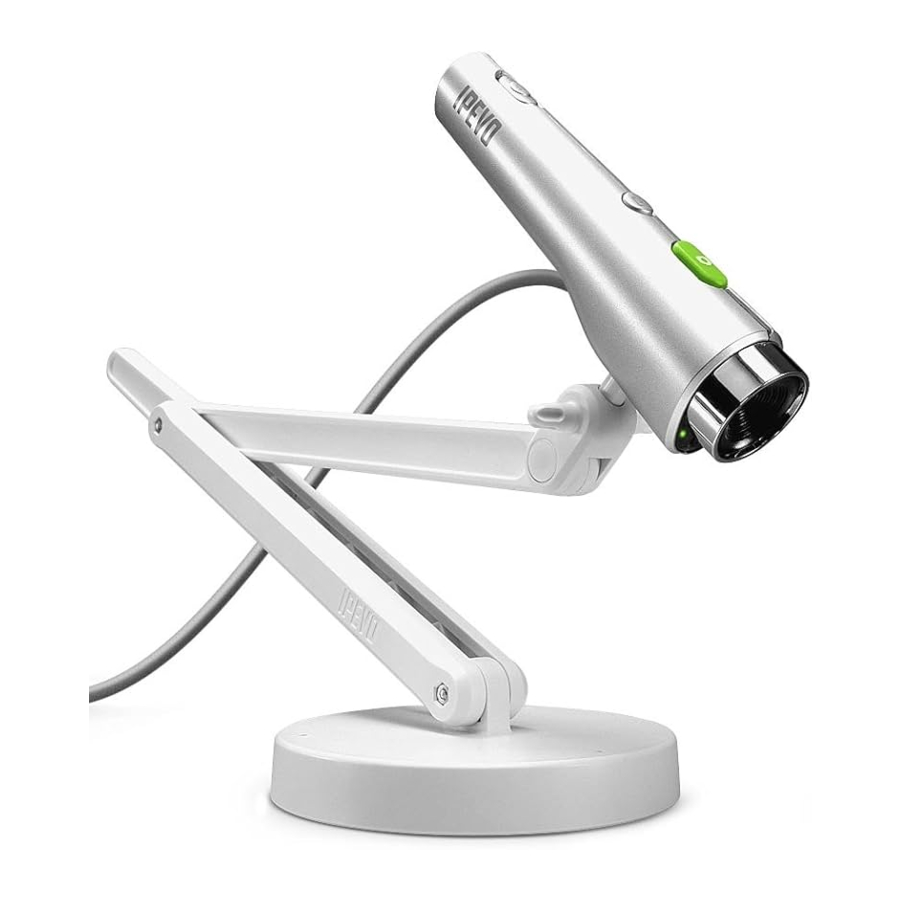
- Point 2 View USB Camera
- Weighted stand with adjustable arm
- Universal clip (for laptops & monitors)
- CD with P2V software and user manual
- Quick-start guide (this document)
Installing P2V Software
Follow these easy steps to install P2V (Point 2 View) software.
Step 1:
Insert the CD-ROM into your computer's drive and follow the instructions in the setup program.
Step 2:
Connect Point 2 View to a USB port on your computer.
Step 3:
Activate the software. A live video image should appear in the screen.
The Software Interface at a Glance
Switch between the three modes shown below using the Mode tabs at the left of the window.
Camera Mode (default)
Shows the live video image and allows you to focus and take snapshots

- Use menus to adjust view: zoom, mirror, resolution, etc.
- A focus frame at the center guides you when bringing Point 2 View into focus
- Click on-screen icons to focus and take snapshots
Review Mode
Shows your snapshots and allows you to easily view and organize them

- Use menus to adjust view (zoom, rotate) or edit photos (copy, delete)
- The latest photo appears in the main screen
- Use thumbnails for quick overview
Full Screen Mode
Shows the live video image in full screen and allows you to share the image in presentations

- Esc button returns the screen to Camera mode
- Click on the screen to hide the icons and provide an unobstructed image. Click again to bring the icons back
- Focus/Snapshot icons are available in this mode also
Taking Snapshot
Follow these steps to learn how to bring Point 2 View into focus and take a snapshot.
Overview of controls

Step 1: Bring Point 2 View into focus
Before taking a snapshot, make certain that you are in Camera mode and the image is in focus. Toggle the AF switch or press the Focus key to bring Point 2 View into focus, if necessary.
Step 2: Take snapshot
Press the Snapshot key. A shutter sound will be generated and the screen will freeze for a moment, giving you an instant preview.
Step 3: Review the photo
Go to Review mode. The newly taken photo will appear in the screen. You can also view previous snapshots using the thumbnails at the bottom.
Positioning Point 2 View
Attach Point 2 View to the stand and bend, rotate, or stretch it to obtain the best position for an optimum view. You may also use your hand to point the camera, or clip it to a monitor and tilt or rotate it there.
Show what you see

...Or hold Point 2 View in your hand. You can get as close as 2˝ (5cm) distance.

Show yourself

...Or attach Point 2 View to monitors using the clip.

Share with others

You can use the side connectors at the head of the stand to position Point 2 View for viewing documents.
Customer Service (International)
Email: service@ipevo.com
Tel: +886-2-5550-8686
Customer Service (USA)
Email: cs@ipevo.com
Tel: +1-877-269-4738
Documents / Resources
References
Download manual
Here you can download full pdf version of manual, it may contain additional safety instructions, warranty information, FCC rules, etc.
Advertisement


Need help?
Do you have a question about the Point 2 View and is the answer not in the manual?
Questions and answers