Advertisement
- 1 Product Features
- 2 Technical Parameters
- 3 Control Panel
- 4 INKBIRD APP Setting
- 5 Controlling Function Description
- 6 Abnormal Situation
- 7 APP Q&A
- 8 Technical Assistance
- 9 Troubleshooting Guide
- 10 Documents / Resources
Please keep this manual properly for reference. You can also scan the QR code to visit our official website for product usage videos. For any usage issues, please feel free to contact us at support@inkbird.com.


- KEEP CHILDREN AWAY
- TO REDUCE THE RISK OF ELECTRIC SHOCK, USE ONLY INDOORS
- RISK OF ELECTRIC SHOCK. DO NOT PLUG INTO ANOTHER RELOCATABLE POWER TAPS OR AN EXTENSION CORD
- USE ONLY IN DRY LOCATION
Product Features
- Plug and play, easy to use
- Dual relay controlling, one for control output, another for abnormal protection
- Support Celsius and Fahrenheit reading
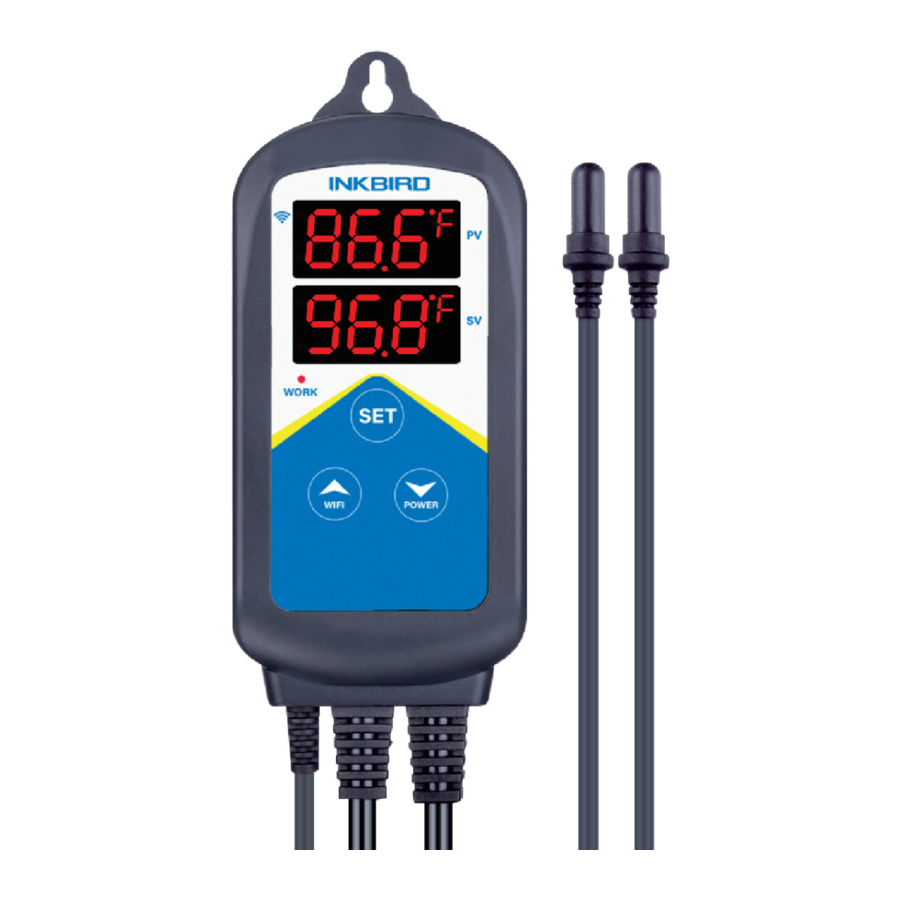
- Dual display window for simultaneous display of measured temperature and stop heating temperature
- Dual temperature probes to ensure the accuracy Of the water temperature
- Temperature calibration
- High and low temperature alarm
- Probe abnormal alarm
- Continuous heating time alarm
Technical Parameters
- Voltage: 100~240Vac 50/60Hz
- Current: 10A Max
- Wattage: 1200W(120Vac), 2200W(220Vac)
- Type of temperature probe:
![]()
![]()
- Temperature control range: 0.0C~45.0C/32.0F~113F
- Temperature measurement range: -40.0C~100C/40.0F~212F
- Temperature display accuracy: 0.1C/F (<100C1/F), 1C/F (>=100C/F)
- Temperature measurement accuracy:

- Display unit: Celsius C or Fahrenheit F
- Ambient temperature: -20C~40C/-4.0F~104F
- Storage environment:
Temperature: 0C~60C/32F~140F;
Humidity: 20~80%RH (Unfrozen or condensation state) - Warranty: Controller 2 years, probe 1 year


Control Panel

- PV:In the normal mode, it displays current temperature; in the setting in the setting mode, it displays menu code
- SV: In the normal mode, it displays the temperature value when stopping heating; in the setting mode, it displays menu setting.
- Red indicator: ON- heating output is turned on; OFF- heating output is off.
- & 5. Output socket
- Setting button (SET), Increase button(
![]() ), Decrease button(
), Decrease button(![]() )
)
 ), Decrease button(
 )
)Please refer to the button description for more details.
INKBIRD APP Setting
Download the APP
Search the keyword " INKBIRD " in Appstore or Google Play, or scan the following QR code to download and install the APP.


Scan QR code to download INKBIRD APP
Pair with your phone
- Open the app, it will ask you to register or log in your account on the APP. Select the country and enter your email to finish the registration. Then press "Add Home" button to create your home.

- Tap "+" or "add device"button in homepage of the APP to add the device
- If the controller is in the normal working state, you can long press
![]() 2 seconds to reset the WIFI. It will enter the Smartconfig configuration state by default. You can short press
2 seconds to reset the WIFI. It will enter the Smartconfig configuration state by default. You can short press ![]() to switch the Smartconfig configuration state and the AP mode. If you change the WIFI state, it will take about 5 seconds to display the corresponding LED symbol and state, because of the WIFI module data processing.
to switch the Smartconfig configuration state and the AP mode. If you change the WIFI state, it will take about 5 seconds to display the corresponding LED symbol and state, because of the WIFI module data processing.

 2 seconds to reset the WIFI. It will enter the Smartconfig configuration state by default. You can short press
 Add device in quick connection:
- Plug the device in the socket and make sure that the device is in the Smartconfig.
- Configuration state (the LED symbol is flashing, interval flashing 250ms).
Click "Confirm indicator rapidly blink" and then select Wi-Fi network, enter Wi-Fi password, click "confirm" to enter connection process. - The device only supports 2.4GHz Wi-Fi router.


Add device in AP mode:
- Plug the device in the socket and make sure that the device is in the AP Configuration State(the LED symbol is flashing slowly, interval flashing 1500ms).
- Click "Confirm indicator slowly blink" and then select Wi-Fi network, enter Wi-Fi password, click "confirm" to enter connection process.
- Press "Connect now" and it will go to your WLAN Setting in your smart phone, select the "SmartLife-XXXX" to directly connect to the router without putting in password.
- Go back to app to enter into the automatic connection interface.


- Click "Done"after adding device successfully and enter into device controlling interface.
- In the temperature control mode, user can set control function via APP.


Controlling Function Description
Button Description
Restore to Factory Settings
Press and hold the decrease button  to power on, the buzzer w
ill beep once, that all parameters will restore to the factory settings.
Power Button
In any case, press and hold for 2 seconds to turn off, there will be no output. After power off, short press to turn on the power. In the power on state, short press to turn on or pause the socket power. In the paused state, PV displays the current temperature, SV displays "P", there will be no output.
Quickly Set the Control Temperature Mode
Tap "SET" button to enter the quick setting control temperature mode, SV displays the temperature setting value1 and flashes. At this time, press  or to increase or decrease the setting value. Long press and hold the or button to increase or decrease the setting value quickly. Then press again SET button, SV displays the temperature setting value2 and flashing, At this time, press or to increase or decrease the setting value. Long press and hold the or button to increase or decrease the setting value quickly, press SET button again to confirm and exit. If there is no operation, it will automatically exit after 10 seconds and save the set value.
Button Function in Setting Mode
When the controller is working normally, press and hold the SET button for 2 seconds to enter the setting mode. PV displays the code TS1 and SV displays the corresponding setting value. Press the SET button to scroll down the menu and save the parameters of the previous menu item, or press the or button to change the current setting value. If there is no button operation within 30 seconds or long press the SET button for 2 seconds in the setting state, it will exit and save the setting state, then return to the normal working mode.
Menu Setting Flow Chart

Changing Settings

Control Function Description
When the controller is working normally, the controller will automatically select the smaller temperature value Of the two settings TS1 and TS2 to start the heating, and will stop heating when the temperature reach the larger one (the minimum absolute value of TS1 and TS2 is 0.3C or 0.5F), PV displays the current temperature measurement value, and the SV displays the temperature at which heating stops.
High/Low Temperature Alarm (AH,AL)
When measured temperature the setting value of high temperature AH, it will alarm and turnoff heating output. The screen will rotate to display "AH" and current temperature, buzzer will "bi-bi-Biii", until the temperature < AH, buzzer will be off and return to normal display and control. Or press any button to only turn the buzzer alarm off.
When measured temperature  the setting value of low temperature AL it will alarm. The screen will rotate to display"AL"and current temperature, buzzer will "bi-bi-Biii", until the temperature > AL buzzer will be off and return to normal display and control. Or press any button to only turn the buzzer alarm off. High and low temperature alarm will be pushed to mobile APP and remind the customer that the product is in alarm state.
Continuous Heating Time Alarm (CT)
When measured temperature the starting heating temperature, the output control is turned on. If the continuous heating time arrives, but the measured temperature has not risen to the stop heating temperature, at this time the heater is abnormal or the probe is abnormal, and the output is forcibly turned Off. PV will show E5, the buzzer keeps ringing, and the alarm status is pushed to the mobile APP to remind the customer that the product is in an alarm state and need to check in time.
When CT = 0,it means that the continuous heating alarm function has been cancelled.
Temperature Correction (CA)
When the measured temperature deviates from the standard temperature, the temperature calibration function can be used to calibrate the measured value consistent with the standard value. The calibrated temperature = the measured temperature value + the calibration value.
Fahrenheit or Celsius Setting (CF)
Support setting Fahrenheit or Celsius. The default temperature unit is Fahrenheit. If you need to display the unit in Celsius, please set the CF to C and note that when the CF is changed, all setting values will be restored to the default setting and the buzzer will beep once.
Abnormal Situation
Abnormal Temperature
The temperature difference between the two temperature probes is greater than or equal to 3C/5F
Probe Abnormal
Either the probe is not plugged in properly, or there is a short circuit inside Or inside the probe.
 Note:
Note:
When the product is abnormal, the PV will show as follows:
Er. Both probes have problems at the same time
El or E2: Temperature Probe Abnormal
E4: The temperature difference between the two temperature probes is greater than or equal to 3C/5.0F
E5: Continuous Heating Time Alarm
APP Q&A
| Status | Possible Reason | Preliminary Solution |
| Login failed | Password or account entry error | Double check the account and password |
| Network server maintenance | Try again later | |
| Connection failed | Improper steps (ignoring some important steps) | Confirm the correct steps and try again |
| WiFi password input error | Plain-text input WiFi password | |
| Poor network | Try again or change the network environment later | |
| Phone model and system version | Please change to another mobile phone to try again | |
| Fail to load data | Network server maintenance | Try again later |
| APP Blank Screen | App running in the background occupy too much memory | Clear App running in the background |
| Incomplete installation | Uninstall Inkbird Pro App and re-install |
Technical Assistance
If you have any problems installing or using this controller, please carefully and thoroughly review the instruction manual. If you require assistance, please write us to support@inkbird.com. We will reply your emails in 24 hours from Monday through Saturday. You can also visit our web site www.inkbird.com to find the answers of the common technical questions.
Troubleshooting Guide
| Issues | Causes | Solutions |
Can not connect to WIFI. |
|
|
The probe reading incorrect |
|
|
Heating output will not turn on |
|
contact customer service. |
Heating output will not turn off |
|
|
 ' button ( do not press the '
 ' button). The 'work' indicator and output should activate.
Shenzhen Inkbird Technology Co.,Ltd.
support@inkbird.com
Consignor: Shenzhen Inkbird Technology Co., Ltd.
Office Address: Room 1803, Guowei Building, No.68 Guowei Road, Xianhu Community, Liantang, Luohu District, Shenzhen, China
Manufacturer: Shenzhen Inkbird Technology Co., Ltd.
Factory Address: 6th Floor, Building 71 3, Pengji Liantang Industrial Area, No.2 Pengxing Road, Luohu District, Shenzhen, China
Documents / Resources
References
![www.apple.com]() App Store - Apple
App Store - Apple![play.google.com]() Google Play
Google Play![www.inkbird.com]() Inkbird | Smart Temperature Controllers, Food Thermometers & More – INKBIRD
Inkbird | Smart Temperature Controllers, Food Thermometers & More – INKBIRD
Download manual
Here you can download full pdf version of manual, it may contain additional safety instructions, warranty information, FCC rules, etc.
Advertisement


Need help?
Do you have a question about the ITC-306A and is the answer not in the manual?
Questions and answers