VeriFone V400m Manual
- Installation manual (51 pages) ,
- User manual (38 pages) ,
- Setting up (9 pages)
Advertisement
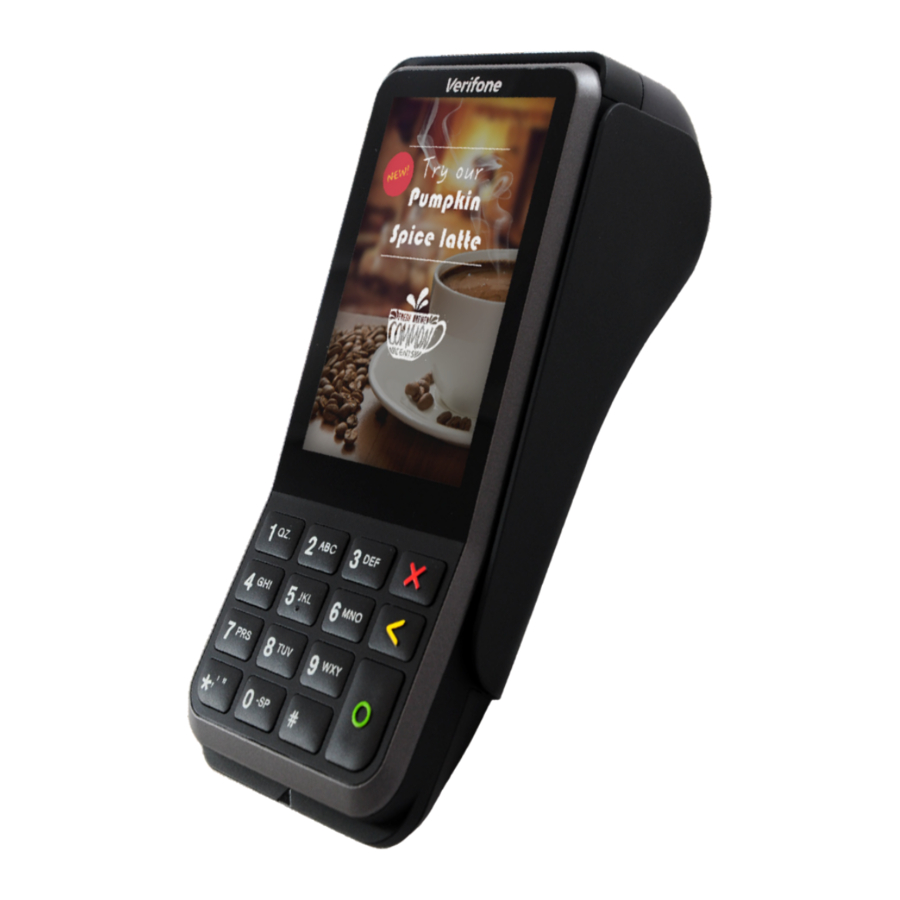
PINpad features
Key Features


- Capacitive touch LCD display and contactless (CTLS) tap area
- Smart card reader
- Magnetic stripe reader
- Integrated thermal printer
- Secure alpha-numeric keypad
- Additional function keys ( '#', '*' )
Alpha-numeric keypad:
In order to use an alpha character the button must be pressed repeatedly in quick succession, until the correct character is shown on the display. The options will cycle through uppercase and lowercase versions of the alpha characters.

- Micro SD slot
- Dual MSAM slots to support stored-value card programs or other merchant card requirements
- Dual SIM Card compartments (SIM is supplied for standalone-only customers)
- USB-C port for file loading/retrieval
Accessories available with Wpay V400m
- Power supply (also known as barrel jack adapter)
- Battery 5V DC, 2.2A (typically already fitted inside)
- Optional charging base
Connectivity
The V400m is normally connected through WiFi to the POS but if the terminal is to be used in standalone mode it may be connected to the Internet using WiFi or alternatively, the 4G cellular network. The 4G option requires a SIM card which will have been pre-installed and configured where required.
If guidance is required on the setting up of WiFi, or troubleshooting WIFi or 4G connectivity, refer to the V400m Terminal - Installation Guide - see Other Reference Material in the Appendices.
The V400m does not require a cable except during charging. The cable may be connected to the terminal or to the base.
Basic Functionality
| Basic Functions | Action |
| Power On | To turn the terminal on connect it to a power supply using the power supply cable or by placing it on a base that has a power supply cable connected. |
| Power Off | To turn the terminal off hold down the red X (Cancel) key and select Shutdown. Note - you will need to press the green O (Enter) to restart after a shutdown. |
| Restart | Hold down the red X (Cancel) key and select Reboot. |
| Cancel | Press the red X button to cancel, or to go back a screen. |
| Idle State | If there is no activity on the terminal for some time the terminal will return to the Idle screen. |
Configuration settings that govern the way that the terminal manages transactions are set in the terminal management system, e.g. allowed transaction types, management of offline situations, surcharge or tipping functionality, passwords, etc. Changes to these settings can be made by users with appropriate permissions or by request to Wpay.
Software Installation
Software must be installed before a V400m terminal can be used. This is typically done before the terminals are shipped but if installation is required refer to the relevant sections in the Wpay Software Installation Guide for information about installation and installation procedure - see Other Reference Material in the Appendices.
Initialisation
After powering up a PINpad it will go through a series of steps. This may take a few minutes but the steps will all be executed automatically.

The sequence may end showing that is necessary to perform a logon:
A "W" in the bottom right corner indicates that a logon to the Wpay Switch is required and an "R" in the bottom right corner indicates that an Security (RSA) logon is required. These may be initiated from the POS or by pressing #, entering the password 4648 and pressing Enter (green O button). This will initiate whichever logons are required.
Where a logon receipt is printed or shown on the computer screen, you can check the receipt to make sure the store name and number are correct for the store. These details are shown at the top of the logon slip.

Logons
There are 3 types of logons:
- Wpay Switch logon
A PINpad must logon to the Wpay Switch in order to be able to transact. These logons occur automatically from time to time. - RSA logon
A security logon delivers encryption keys from the Wpay Switch to the PINpad and loads them into the PINpad. It can be triggered on the POS, or on the PINpad by pressing #, entering the password 4648 and pressing Enter (green O button). - TMS logon
A terminal management system logon allows the PINpad to check for new software versions and to download a newer one where necessary. It can be triggered on the POS, or on the PINpad by pressing the # button and entering the password 3696 and pressing Enter (green O button).
Transaction Methods
- Contactless reader
The contactless card reader is located behind the PINpad screen. Payments may be processed by bringing the card close to the screen.
![]()
- Chip reader
The chip reader is located at the bottom of the PINpad. After the payment amount is determined, the cardholder needs to insert the card with the chip leading and leave the card in the reader.
![]()
- Magnetic stripe reader
The magnetic stripe reader is located on the right side of the PINpad. After the payment amount is determined, the cardholder needs to pass the magnetic stripe through the slot, facing towards the terminal.


Transaction Types and Functions
The following section describes the transaction types that may be performed on a Wpay V400m terminal. The actual terminal screens may differ slightly but will be similar to those shown in the transaction sections below.
Note that transaction types apart from Purchase and Refund are only enabled by arrangement with Wpay.
On standalone terminals transactions may be initiated from the Main Menu on the terminal itself. The Main Menu may be accessed by pressing Enter.
The options that show up on the Main Menu will vary depending on which have been enabled. The Main Menu will likely have a few pages since a maximum of 3 options can appear on one screen. Use the Next (or #) and Prev (or *) buttons to move through the screens. The last option on the last page will always be Admin Menu.

- Purchase
A purchase transaction is the most basic and frequently used transaction. It is used when goods or services have been totaled in price and prompts the customer to present their card to authorise the transaction.
| Terminal screen | Actions |
 | A purchase transaction can be initiated from the POS or in the case of a standalone terminal, from the Main Menu. The Main Menu is accessed by pressing Enter and then a Purchase transaction can be initiated by pressing 1 or selecting option 1 PURCHASE. The Purchase function can also be accessed from the Idle screen by using the shortcut of pressing 1 since Purchase is item 1 on the Menu. |
 | Key in the purchase amount and press Enter. If Cashout has been enabled then opportunity to enter a cashout amount will follow. Enter the amount or press Enter to bypass this. See more on Cashout below if required. |
 | At this screen customers can choose whether to tap, swipe or insert their card. Manual entry of a card number may be initiated at this screen if it has been configured as an allowed transaction type. See more at the Manual Entry section. |
 | Where applicable, account-type options will be displayed in accordance with what is available on the customer's card. This screen does not display if the contactless method is chosen. To select an option press the corresponding number on the PINpad keys or press the option on the screen. |
 | If requested the customer should use the keypad to enter their PIN and press Enter. This screen does not display if the contactless method is chosen, unless the transaction total is above the limit for contactless. |
 | An EFT message is sent to the card Issuer to verify that the customer's card is valid and the amount is available and a response of Approved or Declined will be returned. See more on managing Declines in the Declines and Errors section.  |
- Refund
Refunds can be issued when the item/s purchased or service provided is approved for a refund according to the terms set by the merchant. Refunds of purchases paid for by card must be processed on the same card and not with cash.
The ability to process refunds can be protected by use of a password. This is set in the terminal management system.
| Terminal screen | Actions |
 | A refund can be initiated from the POS or in the case of a standalone terminal, from the Main Menu. The Main Menu is accessed by pressing Enter. Then select the REFUND option or press the number corresponding to Refunds - 3 in this example. The Refund function can also be accessed from the Idle screen by using the shortcut of pressing the option number for Refunds - 3 in this example. |
 | If requested, key in the password and press Enter. This is dependent on whether a Refund Password has been configured in the terminal management system or not. |
 | Enter the amount to be refunded. |
 | The customer may choose whether to tap, swipe or insert their card. |
 | If a customer has swiped or inserted their card they may have to select the account to which the refund will be processed. To select an option press the corresponding number on the PINpad keys or press the option on the screen. |
 | After processing, the customer may need to enter their PIN or provide a signature before the transaction response is received. |
The card issuer will return the refund amount as a credit to the customer's account. The funds are deducted from that day's settlement to the merchant.
- Surcharge
By arrangement with Wpay merchants can enable surcharges on card payment transactions to support recovering the costs applied by the card schemes. It is the responsibility of the merchant to understand the cost of acceptance and ensure that any surcharges are in line with this amount.
The amount to be applied as a surcharge is set at a scheme level and when enabled, the surcharge is calculated by the PINpad and is added automatically. The rate for each scheme with surcharging enabled must be set via the terminal management system.
It is necessary to inform customers that making a card payment will incur a surcharge if the merchant has enabled it.
A surcharge can be defined for the following schemes:
- VISA
- Mastercard AMEX
- eftpos
- UPI (China Union Pay)
- Diners
- JCB
Note the following about surcharging:
- A surcharge is not applied to a Refund transaction. Should the merchant need to refund the surcharge amount as well, they will need to create a refund amount that includes the surcharge amount.
- A surcharge may be added to a cashout in a Purchase-with-Cashout transaction. The ability to to do this is managed by a setting in the terminal management system. It cannot be applied to standalone cashout transaction.
- The surcharge may be calculated on the transaction value including or excluding a tip where a tip was applied. This is managed by a setting in the terminal management system.
- The transaction amount including the surcharge, is displayed on the terminal after the card details and account have been confirmed.
- The transaction amount and the surcharge amount is displayed both separately and combined on the customer and merchant receipts.
![]()

- Tipping
A tip may only be applied to a Purchase or a Purchase-with-Cashout transaction. Tipping is enabled by a setting in the terminal management system.
A maximum % of the transaction value may also be set, or 0% for 'no maximum' applies.
| Terminal screen | Actions |
 | When Tipping is enabled three options will be displayed before the card is presented at the terminal. Select which tip method is to be used by pressing the relevant number on the keypad and Enter, or by pressing on the option. If option 1 - Percentage Tip is selected, the terminal will present 3 more options. |
 | Select which % tip to apply by pressing the relevant number on the keypad and Enter, or by pressing on the option. If option 1 or 2 is selected the terminal will calculate: Purchase Amount x 5 or 10%, rounded down to nearest cent. The calculated tip amount will be added to the original cost. |
 | If option 3 - Add other % tip is selected a new screen is presented. Enter a value of up to 99. This will be checked against the Tip Max Percentage, if set. If the Tip Max was exceeded the terminal will return to the first tipping menu to begin again, otherwise the calculated tip amount will be added to the original cost. |
 | Once the tip has been added a screen confirming that the tip has been applied will automatically display for 2 seconds. |
 | It will be followed by Present Card screen with the new total amount and the normal purchase process steps follow. |
- MOTO and MOTO Refund
MOTO (Mail Order Telephone Order) refers to transactions in which a business can process payments by entering customer provided card details without the customer being present.
A password may be set in the terminal management system to restrict the use of MOTO if required.
Refunds by MOTO require both a refund and a MOTO password to be set in the terminal management system. When a MOTO refund is invoked the refund password will be required first, followed by the MOTO password. The PINpad will then prompt for the card number, expiry, and CVV (optional).
| Terminal screen | Actions |
 | A MOTO transaction can be initiated from the POS or in the case of a standalone terminal, from the Main Menu. The Main Menu is accessed by pressing Enter and then pressing MOTO SALE or the number of the MOTO Sale option, 1 in this example. Note that you may need to use the Next button (or press #) if the MOTO Sale option is not on the first page of the Main Menu. |
 | If a MOTO Password has been set in the terminal management system the PINpad will prompt for the MOTO password. |
 | Select the type of MOTO by pressing the number of the option or pressing the option itself. Key in the purchase amount and press Enter. |
 | When prompted, key in the card number and press Enter. |
 | Key in the Expiry Date and press Enter. |
 | Key in the CVV and press Enter. If CVV entry has not been configured as mandatory in the terminal management system you may be able to press Enter to bypass CVV entry. |
 | A MOTO Refund can be initiated by finding and selecting the MOTO REFUND option on the Main Menu. For a MOTO Refund the Refund password will be required before the MOTO password. |
- Shift totalling
Shift Totals provide a merchant with a running transaction count and value, at a terminal level. This allows the totals on a terminal to be reset independently of any other terminal or settlement window. The end of a shift can therefore be controlled by the merchant and can assist with POS reconciliation and tip payout processes.
There is no limit to the duration of a shift and there are no limits on how many times a shift can be cleared in a day.
Shift Totalling is enabled for all merchants but use of the reporting function is optional. Note however, that shift totals can only be cleared, i.e. reset to zero, after printing, and, if shift totals are not cleared, the totals will continue to accumulate.
Shift Totals are always sent to a print queue and are not visible on the terminal.
The schemes and transaction types reported on, will reflect only those that are supported by the merchant.
Printing and Clearing of Shift Totals is initiated as follows.
| Terminal screen | Actions |
 | The Shift Totals function is on the Admin Menu which can be accessed from the last page of the Main Menu. Press Enter to open the Main Menu and select Next (or press #) if necessary, to find the ADMIN MENU option. Select ADMIN MENU or press the relevant number on the keypad. |
 | Select Next (or press #) to open the second page of the Admin Menu if the SHIFT TOTALS option does not appear on the first page. Select SHIFT TOTALS or press the relevant number on the keypad. The terminal will send a print command to the local printer immediately. |
 | After printing, a prompt to Reset Shift Totals will be displayed. If No is selected shift totals will not be reset and any further transaction counts and values will continue to accumulate indefinitely. If Yes is selected shift totals will be reset to zero and once reset, there is no ability to retrieve prior Shift Totals. |
NOTE: If Shift Totals are not cleared the terminal will accumulate totals up to $999,999,999 and will then roll back to zero. The report includes the following elements.

- Transaction counts and values of non-reversed transactions, by transaction types
- The transaction types shown depend on the types that are configured in the terminal management system PA Open refers to uncompleted Pre-Auths
- The NET Count total includes whichever apply from: Purch + Cash Out + Tips + Refunds + Deposits
- The NET Value includes whichever apply from: Purch + Cash Out + Tips - Refunds - Deposits
- Transaction counts and values of non-reversed transactions, by Scheme - this is the net settlement position expected by Scheme
- Pre-Authorisation
A pre-authorisation transaction places a temporary hold for the amount on the customer's account, until the transaction is completed by the merchant. Enabling pre-authorisation functionality is done via the terminal management system and is currently only available for the V400m terminal in standalone mode.
| Terminal screen | Actions |
 | A pre-authorisation can be initiated from the POS or in the case of a standalone terminal, from the Main Menu. The Main Menu is accessed by pressing Enter. Select PRE AUTH or press the number corresponding to Pre Auth. Select Next (or press #) to open the second page of the Main Menu if the Pre Auth option does not appear on the first page. |
 | Key in the purchase amount and press Enter. |
 | At this screen customers can choose whether to tap, swipe or insert their card. |
 | If requested the customer should use the keypad to enter their PIN and press Enter. This screen may not display if the contactless method is chosen, unless the transaction total is above the limit for contactless. An EFT message is sent to card Issuer to verify that the customer's card is valid and the amount is available, and a hold will be put on the funds. |
 | To complete the transaction Access the Main Menu by pressing Enter. Select Completion and follow the terminal prompts |
- Manual Entry
This process is used to manually enter a card number where the terminal has failed to read the magnetic stripe or chip on the card successfully. This function is only available for credit cards and it is only possible if a password has been set via the terminal management system.
The cardholder will be required to provide a signature to authorise the transaction.
| Terminal screen | Actions |
 | To initiate a Manual Entry press the # key when Present Card is displayed on the terminal. Key in the password and then press Enter. |
 | Key in the card number and press Enter. |
 | Key in the card expiry date and press Enter. |
 | Press Enter to confirm and proceed with the transaction. |
 | The customer will be required to provide a signature to authorise the transaction. |
- Cashout
A customer can ask for a cash payout if it has been configured in the terminal management system. A cashout can be done with or without a purchase transaction.
| Terminal screen | Actions |
 | To add a cashout to a purchase transaction initiate a purchase transaction as usual from the POS or from the Main Menu on the PINpad. Key in the purchase amount and press Enter. If the Cashout function has been enabled in the terminal management system a prompt for the cashout amount will follow. Enter the amount or press Enter. |
 | For a Purchase-with-Cashout the cashout amount will be added to the purchase amount and increase the transaction total. |
 | To initiate a standalone Cashout transaction press Enter to bring up the Main Menu and then select the Cashout option or press Next if it is not on that screen. Key in the cashout amount and press Enter. |
 | Key in the cashout amount and press Enter. |
 | The customer will need to present their card and follow the next steps as required, including entering their PIN. |
Printing Receipts
When a terminal is set-up in Integrated mode it normally has an external printer that is connected via the POS. Customer receipts are printed by the POS and include the financial data that is transmitted to the POS by the terminal.
In standalone mode, after a transaction is processed an option to print a customer copy of the receipt will appear on the terminal and the customer can opt to receive the receipt or not. Copies of customer receipts are stored in the RCP file regardless.
When a v400m terminal is on-base it is assumed that the customer is near enough to the POS to pick up the full receipt. When a terminal is off-base EFT receipts may be printed from the terminal itself. This local print option is commonly used in scenarios such as paying at a restaurant table or an outside pickup.
At the prompt asking whether a Customer Copy is required or not, the No or Yes options can be selected using the touchscreen or by using the Enter or Cancel keys on the PINad. If no selection is made within 30 seconds, the terminal will time out and return to idle without printing.
From software version 735 upwards, the prompt asking whether an additional Customer Copy is required may be disabled or re-enabled by pressing #PRINT (#77468) on the PINpad. #PRINT does not affect the customer copy sent to the POS, only the option to print a local copy of the receipt, on the terminal printer, on an integrated terminal in an off-base scenario.
Reprinting a receipt is a manual option that is useful in a situation where the receipt has failed to print, e.g. when the printer runs out of paper or another copy of the receipt is required by the merchant or customer. To get a copy customer receipt, use the Get Last Receipt function on the POS.
Entering #77 on the terminal will reprint a local copy of the EFT receipt.
If a terminal is in standalone mode receipts are always printed on the terminal itself. There will be a merchant copy and the option to print a customer copy.
Note that the option to print a customer copy cannot be disabled by using #PRINT when in standalone mode.

Loading a Paper Roll
A paper roll may be loaded into a V400 terminal as follows:
- Unlock the paper compartment by pulling up the latch and swinging the door downwards.

- Load the paper roll with the edge of the paper on top of the roll.
![]()
- Pull a length of paper up over the serrated cutter and close the compartment.
![]()


Declines and Errors
A transaction may be declined when there is a user error, lack of funds or other card related problem, or a connection issue during processing. Some of the more frequently seen errors are described below. The codes are printed on the receipts.
| Error | Code | Next Steps |
| Declined Contact Issuer | 01 | Retry, try alternative form of payment |
| Declined Contact Bank | 04 | Try alternative form of payment |
| Declined Invalid Amount | 13 | Check allowed amount with issuer / Change the amount |
| Declined Invalid Card Number | 14 | Try alternative form of payment |
| Declined Contact Bank | 51 | Insufficient funds for selected account |
| Declined No Savings Account | 52 | Try alternative account / form of payment |
| Declined No Savings Account | 53 | Try alternative account / form of payment |
| Declined Expired Card | 54 | Try alternative form of payment |
| Declined Incorrect PIN | 55 | Retry PIN or begin transaction again |
| Declined Over Card Limit | 61 | Try alternative form of payment |
| Declined Exceed PIN Tries | 75 | Try alternative form of payment |
| Declined Bank Unavailable | 91 | Try alternative form of payment |
| Declined Contact Issuer | Z1 | Try alternative form of payment |
| Declined Contact Issuer | Z3 | Try alternative form of payment |
| Declined Contact Issuer | Z4 | Try alternative form of payment |
| Declined System Error | nn | System error, retry / call Helpdesk |
Support Contacts
Call the Wpay Hub: 1300 10 9729 (1300 10 wpay)
Email: support@wpay.com.au
Log a ticket in the Merchant Portal: https://flow.wpay.com.au/
The following sort of information is helpful when raising a support request:
- Merchant name
- Store number
- Site Name
- Contact point
- Description of issue
- Referencing Merchant Support Ticket Number (if available)
- How often does the issue occur
- Steps to reproduce
- POS logs
- Screenshots of error
- Copy of the Receipt
- Supporting evidence
PINpad Function Codes
| During Idle mode | |
| #99 | Reboot Terminal (with full contactless initialisation), or hold down the Cancel key |
| #3696 | TMS logon- can also be forced through a terminal reboot |
| #4648 | RSA logon- Look for a R or W in the bottom right corner of the terminal screen to indicate which logon is required |
| #667 | Print EMV Diagnostic Receipt |
| #74438 | Shift totals print |
| #11112227 | Configure Terminal Comms to POS: TCP/IP or Serial or USB |
| #3824 | Terminal information- submenu selection below 0 - Show s/w versions 1 - show TID 2 - show MID 3 - show PPID 4 - show Loyalty dB status 6 - show stored SAFs ( EFT and QC ) 7 - show Loyalty dB log o/p 8 - show h/w type ( P400, V400m etc. ) |
| #2667 | Display Current Comms setup |
| #9434 | Wifi Setup |
| #28 | Get bluetooth status |
| #44583 | Get mobile data from SIM (APN etc) |
| #11112222 | Swap mode- integrated to standalone + reverse |
| #77468 | Enable/disable off base option for customer receipt print (integrated mode only) |
| #2288 | Get battery status |
| #2284 | show preauth records |
| During "Present Card State" | |
| #9999 | Manual Entry of Card Number |
| #4438 | Entry of Electronic Gift Card Number (#GIFT) |
Glossary
| CTLS | Contactless |
| CVV | Card Verification Value, usually a 3-digit code on the back of a card |
| EFT | Electronic funds transfer |
| EMV | A payment method based on a technical standard for chip cards. EMV stands for "Europay, Mastercard, and Visa", the three companies that created the standard. |
| LCD | Liquid Crystal Display |
| LFD | Local File Download |
| Micro SD | Micro Secure Digital - commonly used to expand the storage system of smartphones, drones, gaming devices and cameras |
| MOTO | Mail Order Telephone Order |
| MSAM | Multiple Secure Access Module |
| PAN | Primary Account Number |
| POS | Point of Sale |
| RSA | RSA is an encryption key system used for secure data transmission. "RSA" comes from the surnames of Rivest, Shamir and Adleman, who described the algorithm. |
| RTM | Remote Terminal Management |
| TMS | Terminal Management System |
Documents / ResourcesDownload manual
Here you can download full pdf version of manual, it may contain additional safety instructions, warranty information, FCC rules, etc.
Advertisement


Need help?
Do you have a question about the V400m and is the answer not in the manual?
Questions and answers