Kozyard Alexander Assembly Manual
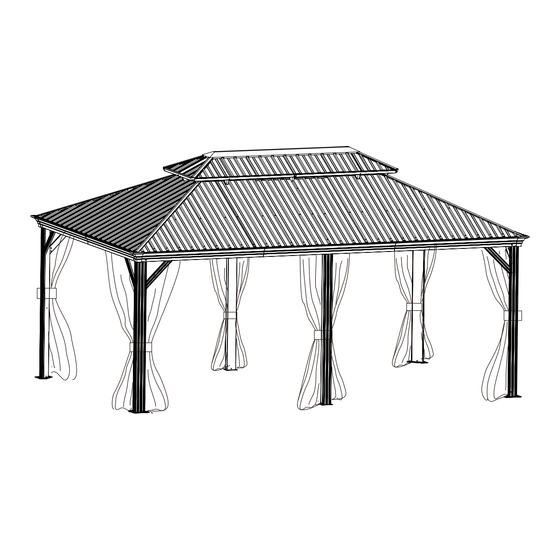
12'x18' hardtop gazebo with double roof
Hide thumbs
Also See for Alexander:
- Assembly manual (28 pages) ,
- Assembly manual (28 pages) ,
- Assembly manual (24 pages)

Related Manuals for Kozyard Alexander


Summary of Contents for Kozyard Alexander
- Page 1 12‘x18’ alexander hardtop gazebo with double roof Assembly Manual Kozyard LLC Products © Copyright 2016 - 2022 Kozyard LLC. | All Rights Reserved.
-
Page 2: Warnings And Cautions
WARNINGS AND CAUTIONS Please read and follow this Assembly and Operation Guide to reduce personal injury and/or damage to your gazebo. Do not discard any of the packaging until you have verified all parts and packs are included. Weight Capacity for Gazebo roof is 2000 pounds maximum. Sidewalls and nettings should be off or in the opened position and tied to poles when winds are over 30 MPH to avoid damage. - Page 3 Inside Roof Connector H2 x1 H1 x6 H x6 Outside Roof Connector Plate Plate J1 x4 J2 x4 Short Corner Roof Bar Corner Roof Bar Roof Bar L1 x2 L x4 Roof Bar Roof Bar Alexander 12’X18’ assembly manual page 1...
- Page 4 Roof Panel Roof Panel Roof Panel V11 x2 V12 x2 Roof Panel Roof Panel Roof Panel Roof Panel Roof Panel Roof Panel V84 x2 V x4 V85 x2 V86 x2 V83 x2 Roof Panel Alexander 12’X18’ assembly manual page 2...
- Page 5 Bracket Bracket 4# x144+2 Bracket Screws 317+5 Screws 28+2 1# x317+5 16+2 Screws Hook 144+2 2# x28+2 Screws 92+2 Screws Screws 44+2 3# x16+2 Screws 28+2 φ12x20+M6x12 Screws 16+1 Screws 5# x92+2 12+2 Washer Alexander 12’X18’ assembly manual page 3...
- Page 6 Once assembly has been completed : Be sure to reinforce as shown above if Gazebo is installed in a high wind area, are prone to strong winds during bad weather or when wind scale reaches Level 5 or above. page 4 Alexander 12’x18’ assembly manual...
- Page 7 1. Connect (Part C6, B6) into one beam using union bar (Part F) with #1 screws. Short Beam Overall: 2. Connect (Part C6,E9,B6) into one beam using union bar (Part F) with #1 screws. Long Beam Overall: TIP: Place parts on carpet or rug to avoid scratches in assembly page 5 Alexander 12’x18’ assembly manual...
- Page 8 Parts (C6) using #1 screws as screws as shown in diagram. shown in diagram 3. Connect parts (E91L,E91R) to Parts (E9) using #1 screws as shown in diagram. Place parts on carpet or rug to avoid scratches in assembly Alexander 12’x18’ assembly manual page 6...
- Page 9 ② Three people suggested for this step. ② ③ ① ③ 2. Connect Joint Bars (Part E92L,E92R) to Beam (Part E9) using #1 screws as shown in diagram. ④ E92L E92R page 7 Alexander 12’x18’ assembly manual...
- Page 10 STEP 5: Connect solidifying Bars with Beams and Poles Affix the frame with corner solidifying bars (Parts J1, J2) using #1 screws as shown in diagram. TIP: Measure DIAGONALLY from posts to posts to assure alignment so all materials fit as planned. Alexander 12’x18’ assembly manual page 8...
- Page 11 (Part G) and #9 screws as shown in diagram. ① ① ② ① ② ② ② ① ② ② ① ② 2.Affix middle beams using joint cover (Part H) and #9 screws as shown in diagram. Alexander 12’x18’ assembly manual page 9...
- Page 12 1. Seal seams with Silicone Rubber after Step 6 to prevent water leakage. 2. There is no need to seal the cap screws of the roof panel with silicone rubber if the screws (attached through Spacer part S) are properly fixed on roof panels. page 10 Alexander 12’x18’ assembly manual...
- Page 13 Install 7 hooks to each slot of sidewall track Part C62 and 4 hooks to each slot sidewall track Part E92L. ② E92L ③ Install 4 hooks to each slot of sidewall track Part E92R and 7 hooks to each slot sidewall track Part B62. E92R Alexander 12’x18’ assembly manual page 11...
- Page 14 (Part M2) using #1 screws and #12 washer . The combination will be called “Part M3” in following steps. M3=M1+M2 Tip: TIP: Place parts on carpet or rug to avoid scratches in assembly. Alexander 12’x18’ assembly manual page 12...
- Page 15 #1 screws as shown in diagram. ⑤ ② ③ ⑤ ④ 2.Attach corner roof bar (Part M3) and roof bar (Part N1,N2,N3) to main frame using #1 screw as shown in diagram. Two people suggested for this step. Alexander 12’x18’ assembly manual page 13...
- Page 16 1.Attach finishing bar (Part P2,Q7 ,Q8) with finishing end bars (Part N2, N3) using #1 screws as (Part R) using #1 screws to corner roof bar (Part M3) shown in diagram. as shown in diagram. Alexander 12’x18’ assembly manual page 14...
- Page 17 Parts Required: K18 x1 Upward View STEP 12: Connect Outside Roof Connector Attach outside roof connector (Part K18) to inside roof (Part K8) using screws 1# as shown in diagram. Alexander 12’x18’ assembly manual page 15...
- Page 18 In order to avoid Z-clips (plastic brackets) from sliding off prior to assembly, add double-sided adhesive tape (Part H3) to the bottom edge of the roof panels where the brackets (Part Z,Z1,Z2,Z3,Z4) are supposed to attach. page 16 Alexander 12’x18’ assembly manual...
- Page 19 1. Insert Roof Panels (Part V11,V12,V83,V84,V,V,V85,V86) to Upper Roof as shown in diagram. 2. Attach Finishing Bars (Part T2, T7 ,T8) to Upper Roof with Finish End (Part R, Part R1) using #1 screws as shown in diagram. V85 V86 page 17 Alexander 12’x18’ assembly manual...
- Page 20 If the holes on Solidifying Bar (part U1, U7, U8) and the hole of the roof panel cannot be aligned, adjust or loosen #1 screws until the screws of the roof panel fall in place. ② ① ③ Alexander 12’x18’ assembly manual page 18...
- Page 21 2. In order to avoid Z-clips (plastic brackets) from sliding off prior to assembly, add double-sided adhesive tape (Part H3) to the bottom edge of the roof panels where the brackets (Part Z) are supposed to attach. Alexander 12’x18’ assembly manual page 19...
- Page 22 2. In order to avoid Z-clips (plastic brackets) from sliding off prior to assembly, add double- sided adhesive tape (Part H3) to the bottom edge of the roof panels where the brackets (Part Z, Z3, Z4) are supposed to attach. Alexander 12’x18’ assembly manual page 20...
- Page 23 TIP: For fastening roof panels easily, (Part W14 ,Part X86), glue Part S (Spacer) onto Panel (Part W14, Part X86) by using double-sided adhesive tape in advance to avoid Part S sliding down during assembly. Part S with adhesive tape W14 , X86 The back view of Panels Alexander 12’x18’ assembly manual page 21...
- Page 24 THEN TIGHTEN all screws to lock the roof panels in place. ② ② ① ① ② ① ③ ④ ④ ③ ④ ④ ③ ④ Two people suggested for this step. Alexander 12’x18’ assembly manual page 22...
- Page 25 Attach Net Frame (Part P12, Q17, Q18) to Finishing Bar(Part P2, Q7, Q8) using #1 & #11 screws as shown in diagram. Upward View Perspective: TIP: The perspective drawing is for demonstrating how to better assemble final step that sets up Parts (P12,Q17 ,Q18) Alexander 12’x18’ assembly manual page 23...
- Page 26 Y8 x2 S8 x2 STEP 20: Assemble Net and Sidewall Hang up Mosquito Net on inner rails and Solid Sidewalls on outer rails as shown in diagram. Y7,Y8 S7,S8 10 11 12 13 Sidewall page 24 Alexander 12’x18’ assembly manual...
-
Page 27: Care And Warranty
Roof, frame, bolts, and nuts are guaranteed to be free from defects in material and workmanship for one year of purchase date. Privacy curtain and mosquito netting are warranted for only 90 days. For a detailed warranty policy, kindly refer to www.kozyard.com. Note that warranty terms are subject to change without prior notice. - Page 28 Welcome to the Kozyard Family! Enjoy! Kozyard LLC West Distribution Center: 7351 McGuire Ave. Dock #38-48 - Fontana, CA 92336 East Distribution Center: 100 Ethel Rd West - Piscataway, NJ 08854 © Copyright 2016 - 2023 Kozyard LLC. | All Rights Reserved.
Need help?
Do you have a question about the Alexander and is the answer not in the manual?
Questions and answers