Kozyard Alexander Assembly Manual
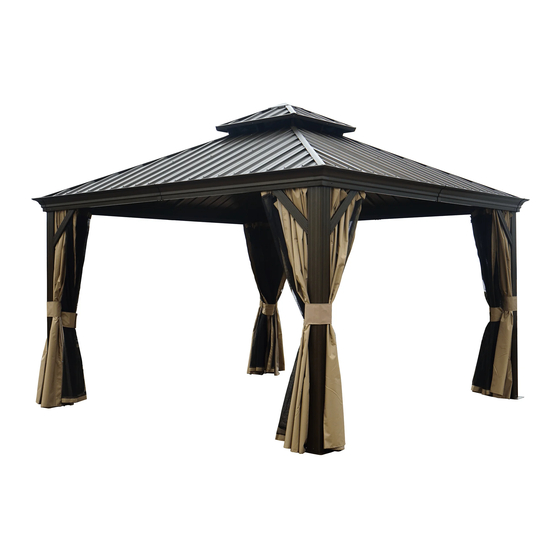
Hardtop gazebo with double roof
Hide thumbs
Also See for Alexander:
- Assembly manual (28 pages) ,
- Assembly manual (28 pages) ,
- Assembly manual (24 pages)

Related Manuals for Kozyard Alexander


Summary of Contents for Kozyard Alexander
- Page 1 12’x16’ Alexander hardtop gazebo with double roof Assembly Manual Kozyard LLC Products © Copyright 2016 - 2022 Kozyard LLC. | All Rights Reserved.
- Page 2 1.Three or more people are required 5.Use the hex keys in the box. for assembly. 6.Please use a Phillips screwdriver. 2.You will need one or more stepladders. 7.Do not fully tighten screws prior to 3. Wearing protective gloves is complete assembly. recommended.
- Page 3 A x4 K16 x1 B6 x2 K6 x1 B61 x2 L x4 B62 x2 M1 x4 C6 x2 M2 x4 C61 x2 N1 x4 C62 x2 N3 x4 ITEM DESCRIPTION Pole D8 x2 Beam Joint Bar D81R x2 Sidewall Track Beam D81 x2 Jointer Bar...
- Page 4 P12 x2 P2 x2 Q6 x2 ..W11 x2 W12 x2 W17 x2 W18 x2 Q16 x2 Q15 x2 R x8 S x136+2 T2 x2 W13 x2 W14 x2 W15 x2 W16 x2 T6 x2 ITEM DESCRIPTION U1 x4 Finishing Bar Net Frame U2 x4 Finishing Bar...
- Page 5 6# x8+1 7# x40+2 ..X61 x2 X69 x2 X70 x2 X62 x2 9# x24+2 10# x4+1 11# x12+1 12# x12+2 X63 x2 X64 x2 X65 x2 X66 x2 X67 x2 X68 x2 Allen key S5 x2 S6 x2 Wrench ITEM DESCRIPTION Roof Panel...
- Page 6 Step 1: Parts Required: Set up poles (Part A) with stand plates (Part L) using screws 1# as shown in diagram. L x4 A x4 page 4...
-
Page 7: Parts Required
Parts Required: C6 x2 B6 x2 F x4 E8 x2 D8 x2 Step 2: 1. Connect (Part C6) and (Part B6) into one beam using union bar (Part F) with screws 1# as shown in diagram. ③ 2.Connect (Part E8) and (Part D8) into one beam using union bar (Part F) with screws 1# as shown in diagram. - Page 8 Parts Required: x104 B61 x2 C61 x2 B62 x2 C62 x2 D81R x2 E81L x2 E81 x2 D81 x2 D82 x2 E82 x2 Step 3 : D81R E81L 1. Connect parts (C61,C62,E81,E82,E81L) to Parts (C6 , E8) using screws 1# as shown in diagram.
- Page 9 Parts Required: Step 4 : Use screws (2# , 3#) to connect poles and beams together as shown in diagram. ① ① ② ② Tip: At least two people for this step. page 7...
- Page 10 Parts Required: J1 x4 J2 x4 Step 5: Affix the frame with corner solidifying bars (Part J1,J2) using screws 1# as shown in diagram. Tips: Please measure between posts to posts (DIAGONALLY),to assure it is squared up so that all of the pre-manufactured materials fit as planned.
- Page 11 Parts Required: H x4 G x4 ① ② Step 6: Affix middle beams using joint cover (Part H) and screws 9# as shown in Finish connecting beams using diagram. corner covers (Part G) ① and screws 9# as shown in diagram. ②...
- Page 12 Parts Required: H2 x1 Step 7: 1.Please seal the seams with silicone rubber after finishing this step,it will prevent any water from leaking. 2.by the way , there are no need to seal the cap screws of the roof panel with this silicone rubber, as long as the screws (passing through spacer part S) are properly fixed on the roof panels.
- Page 13 Parts Required: H1 x4 4# x128 ① ② ② ① Step 7: After finish hooks into tracks, then put H1 to lock them. The quantity of hooks for each slot as below: ① hooks to each slot of sidewall track (part C62,Part B62) ②...
- Page 14 Parts Required: M1 x4 M2 x4 Step 8: Connect the short corner roof bar (Part M1) with the corner roof bar (Part M2)using screws 1# and washer 12#. Tip: The combination will be called “Part M3” in following steps. M3=M1+M2 Tip: page 12...
- Page 15 Parts Required: R x4 P2 x2 K6 x1 Q6 x2 Step 9: Set up roof frame ① Upward View 1.Connect the inside roof connect(Part K6) with ③ the corner roof bar (Part M3)using screws 1# ① ③ ② 3.Attach finishing bar (Part P2 , Q6)with finish end (Part R) using screws 1# to corner roof bar (Part M3)
- Page 16 Parts Required: N1 x4 N3 x4 Upward View hole Step 10: ② ① Attach roof bar (Part N1,N3)to main frame using screw 1#. ② ① ① ② ① ② ① ② Tip: At least two people for this step. page 14...
- Page 17 Parts Required: K16 x1 Step 11 :Connect outside roof connctor (Part K16)to inside roof (Part K6)using screw 1# as shown in diagram. page 15...
- Page 18 Parts Required: Step 12: Snap brackets (Part Z,Z1,Z2) to roof panel edges as shown in diagram. (with snaps facing upwards) Tips: 1. Wearing protective gloves is recommended. 2.Please stick double-sided adhesive tape to the down side edge of the roof panels where the brackets (part Z, Z1,Z2) are supposed to attached in order to avoid these plastic brackets from sliding off prior to assembly.
- Page 19 Parts Required: T2 x2 R x4 V 66 V 65 V 64 V 63 V 11 V 11 V 12 V 63 V 66 Step 13 : 1.Push the roof panels (PartV11,V12,V63,V64,V,V,V65,V66) to upper roof as shown in diagram. 2.Attach finishing bar (Part T2,T6)to upper roof with finish end (Part R) using screws 1#as shown in diagram.
- Page 20 Parts Required: U2 x4 U3 x4 U4 x6 U1 x4 U5 x2 ② ② ③ ② ① ② ① ③ ② ② ① Attention: If the holes on Solidifying Bar (part U1, U2, U5) and the hole of the roof panel cannot be aligned, please adjust or loose screw 1#, until the screws of the roof panel in place.
- Page 21 Parts Required: W11 x2 W12 x2 W13 x2 W14 x2 W15 x2 W16 x2 W17 x2 W18 x2 Step 15: Snap brackets (Part Z) to roof panel edges as shown in diagram. (with snaps facing upwards) Tips: 1. Wearing protective gloves is recommended. 2.
- Page 22 Parts Required: Z x28 Z3 x4 Z4 x4 X61 x2 X62 x2 X63 x2 X64 x2 X65 x2 X66 x2 X67 x2 X68 x2 X69 x2 X70 x2 Step 16 : Snap brackets (Part Z,Z3,Z4) to roof panel edges as shown in diagram. (with snaps facing upwards) Tips: 1.
- Page 23 Overall roof assembly: Please put the panels on the frame anti-clockwisely X 61 W 18 W 17 W 16 W 15 W 14 X 65 W 13 W 12 X 68 X 69 X7 0 W 11 X 69 X7 0 W 12 X 67 X W 13...
- Page 24 Parts Required: S x136 Step 17: Affix roof panels using screws and spacers (Part S) as shown in diagram. ATTENTION – VERY IMPORTANT! Align all roof panels and screw LOOSELY (DO NOT TIGHTEN ANY SCREWS until all roof panels of one side are aligned accordingly), And then ②...
- Page 25 Parts Required: Q16 x2 Q15 x2 Upward View Step 18: Attach net frames (Part P12,Q15,Q16) to finishing bars(Part P2 , Q6) using screws (1#,11#) as shown in diagram. Q 16 Perspective: Q 15 Tip: The perspective drawing is for demonstrating how to assemble final step that set up Parts (P12,Q15,Q16) better.
- Page 26 Parts Required: Y5 x2 Y6 x2 S5 x2 S6 x2 Step 19 : Hang up mosquito sidewalls and solid sidewalls as shown in diagram. S5 or S6 Y5 or Y6 Y5 or Y6 page 24...
- Page 27 Parts Required: SY x4 Step 20: When you close the curtain,please refer to below steps to fix with poles as shown in diagram. ① ② ③ S5 or S6 S5 or S6 Y5 or Y6 S5 or S6 Y5 or Y6 ④...
- Page 28 Kozyard LLC 10808 6th ST, Unit 100, Rancho Cucamonga,CA 91730 © Copyright 2016 - 2022 Kozyard LLC. | All Rights Reserved.
Need help?
Do you have a question about the Alexander and is the answer not in the manual?
Questions and answers