
Subscribe to Our Youtube Channel
Related Manuals for Prestigio Multiboard Light+


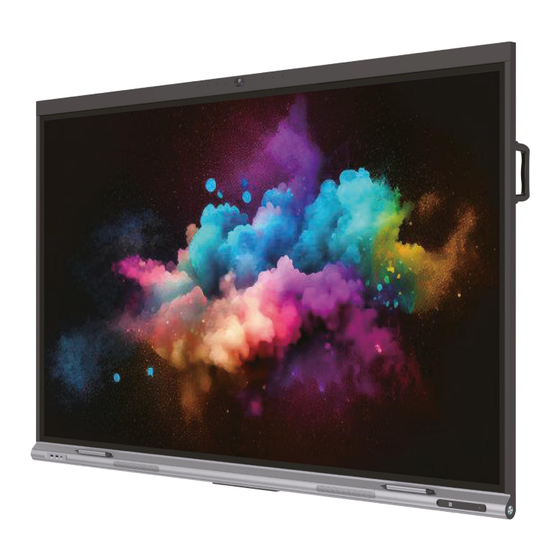
Summary of Contents for Prestigio Multiboard Light+
- Page 1 Multiboard Light+ Interactive Panel Models: PSMB068P650, PSMB068P750, PSMB068P860, PSMB068P980 Installation and Operation Manual Version 1.0.6 | May 2024...
- Page 3 Multiboard Light+ Interactive Panel Installation and Operation Manual Introduction Multiboard Light+ Interactive Panel (hereinafter – "interactive panel", "device") is designed to organize conference calls, training events, presentations. It combines a high-resolution (Ultra HD) touch screen with hardware and software that enables you to play multimedia files, connect external devices, and receive and transmit data over a network and wired connections.
- Page 4 ASBIS). All other similar trademarks and their names as well as logos and other symbols are the property of their respective owners *. The materials appearing under the name Prestigio Solutions and contained in this manual are protected under international and local laws, including copyright and related rights laws.
- Page 5 If you have any technical questions, please contact your local Prestigio Solutions authorized representative or contact technical support at prestigio-solutions.com. The most common problems are described in section 11 of this document and at prestigio- solutions.com, where you can also download the latest version of this manual.
- Page 6 Electronic versions of the certificates and reports received can be found at prestigio-solutions.com/certificates-of-compliance * Waste Electrical and Electronic Equipment, or WEEE, means used electrical or electronic equipment, including all components, assemblies, consumables that are part of the equipment at the time it is taken out of service (including supplied batteries/rechargeable batteries (if any), components containing mercury, etc.).
- Page 7 Hereby, ASBISC declares that the device is in compliance with Directive 2014/53/EU. The full text of the Declaration Conformity available following address: prestigio- solutions.com/certificates-of-compliance. Limitations and warnings Please read the information in this section of the document carefully before you start installing and operating the device. Warning symbols and signs...
- Page 8 Multiboard Light+ Interactive Panel Installation and Operation Manual To avoid damage, do not drop the device Protect from moisture, store only in a dry place Fragile load. Danger of damage due to strong mechanical impact The contents of the package need to be handled with the utmost care Correct vertical position of the product.
- Page 9 Multiboard Light+ Interactive Panel Installation and Operation Manual Safety Operation Rules For proper and safe use of the Multiboard Light+ interactive panel and accessories, you must follow the instructions and safety precautions provided in this user manual. The manufacturer is not responsible for damage caused by improper use of the devices. Use the device only in a domestic environment and in the manner described in this user manual.
- Page 10 Multiboard Light+ Interactive Panel Installation and Operation Manual Operation • Observe the temperature operation mode of the device as specified by the manufacturer; • Use original cables and accessories; • Locate cables where there is no risk of unintended external interference (if possible, in protective cable ducts).
- Page 11 If you have any questions about servicing your device, please contact technical support. Only authorized service centers (see prestigio-solutions.com for centers’ addresses) may repair your device. Document version: 1.0.6 © ASBISC Enterprises PLC. All rights reserved...
- Page 12 Multiboard Light+ Interactive Panel Installation and Operation Manual Contents Introduction ....................................3 Copyright ....................................... 4 Responsibility and Technical Support..........................5 Standards compliance ................................6 Simplified declaration of conformity ..........................7 Limitations and warnings ................................ 7 Warning symbols and signs ............................... 7 Safety Operation Rules ................................
- Page 13 Multiboard Light+ Interactive Panel Installation and Operation Manual 5.5 Language setting ................................61 5.6 Power setting.................................. 62 5.7 Security setting ................................62 5.8 More settings ................................. 63 5.9 Device information ............................... 64 6 Software ....................................65 7 Maintenance and repair ..............................67 8 Warranty obligations ................................
- Page 14 Multiboard Light+ Interactive Panel Installation and Operation Manual Figure 29 – Date and time settings............................ 61 Figure 30 – Language settings ............................61 Figure 31 – Power settings ..............................62 Figure 32 – Security settings ..............................62 Figure 33 – More settings ..............................63 Figure 34 –...
- Page 15 Multiboard Light+ Interactive Panel Installation and Operation Manual 1 General description and characteristics 1.1 Purpose of the device The Multiboard Light+ interactive panel is designed for conference calls, presentations, training sessions, and multimedia file playback. It is used in conjunction with conferencing devices (e.g., video cameras, speakerphones) as well as external data sources (e.g., computers, external storage devices).
- Page 16 Multiboard Light+ Interactive Panel Installation and Operation Manual 1.2 Design elements and their purpose Figure 1 – Front view NOTE. The images are for illustrative purposes only. © ASBISC Enterprises PLC. All rights reserved Document version: 1.0.6 Page 16 of 80...
- Page 17 Multiboard Light+ Interactive Panel Installation and Operation Manual Table 1 – Front panel elements Element Purpose Video display, touch control of the device, creation of graphic Touch screen objects Microphones Capturing sound at the interactive panel installation site Camera Capturing image at the interactive panel installation site Magnetic surface Attaching accessories (such as styluses) High-frequency speakers...
- Page 18 Multiboard Light+ Interactive Panel Installation and Operation Manual Figure 2 – Left view © ASBISC Enterprises PLC. All rights reserved Document version: 1.0.6 Page 18 of 80...
- Page 19 Multiboard Light+ Interactive Panel Installation and Operation Manual Table 2 – Elements of the left panel Element Purpose 10 Handles Moving the device Internal PC slot with JAE (80 pin) Connecting the internal PC to the interactive panel connector USB Type B 3.0 (Touch-USB) Control signal transfer to an external computer connectors Receives high-definition (up to 3840×2160, 30 Hz) digital...
- Page 20 Multiboard Light+ Interactive Panel Installation and Operation Manual Figure 3 – Right view Table 3 – Elements of the right panel (see figure above) Element Purpose Switching the interactive panel to standby mode and to operation mode (press once in each case). Indication of the device status: - glows blue –...
- Page 21 Multiboard Light+ Interactive Panel Installation and Operation Manual Figure 4 – Bottom view Table 4 – Elements of the bottom panel (see figure above) Element Purpose 21 Power toggle switch Turning the interactive panel power on and off 22 SD card slot Expanding the device memory with an SD card Transmitting digital audio signal to external speakers with a S/PDIF 23 S/PDIF connector...
- Page 22 Multiboard Light+ Interactive Panel Installation and Operation Manual Figure 5 – Back side of the panel Table 5 – Rear panel elements (see figure above) Element Purpose Protection of electronic components from the external 31 Metal cover environment 32 Slot for internal PC Internal PC installation and connection 33 Low-frequency speaker Audio playback...
- Page 23 Multiboard Light+ Interactive Panel Installation and Operation Manual 1.3 Technical specifications Table 6 – Main technical specifications of Multiboard Light+ Parameter Value Model PSMB068P650 PSMB068P750 PSMB068P860 PSMB068P980 Power supply Power supply Input 100–240 V (alternative current), frequency 50/60 Hz voltage 300.0 W 380.0 W 460.0 W...
- Page 24 Multiboard Light+ Interactive Panel Installation and Operation Manual Parameter Value Model PSMB068P650 PSMB068P750 PSMB068P860 PSMB068P980 Connection interfaces AUDIO IN AUDIO OUT DP IN HDMI IN HDMI OUT JAE (80 pin) MIC IN RS232 IN SD card slot 1 (cards up to 128 GB are supported) S/PDIF USB Type A 2.0 USB Type A 3.0...
- Page 25 2 years + 1 year of free service * Service life 3 years * Free service does not include shipping charges or the cost of replacement parts (see prestigio-solutions.com/warranty for details). Document version: 1.0.6 © ASBISC Enterprises PLC. All rights reserved...
- Page 26 Multiboard Light+ Interactive Panel Installation and Operation Manual 1.4 Remote control unit The basic functions of the Multiboard Light+ are controlled using the remote control (RC unit) included in the package (see figure below). The remote control operates on 2 AAA batteries. Batteries are not included and must be purchased separately.
- Page 27 Multiboard Light+ Interactive Panel Installation and Operation Manual 1.4.1 Installing the batteries into the remote control unit Step 1. Remove the cover on the back of the remote control by sliding it in the direction of the arrow (see figure below). Step 2.
- Page 28 Multiboard Light+ Interactive Panel Installation and Operation Manual 30° 30° ≤ Figure 8 – Using the RC unit NOTE. Do not use the RC units of different devices near the interactive panel at the same time, as their emissions can interfere with each other. If the range of the RC unit is noticeably reduced, replace the batteries.
- Page 29 Multiboard Light+ Interactive Panel Installation and Operation Manual 1.5 Multifunction pen Unlike styluses, which are designed only for creating graphical objects (inscriptions, marks) on the screen of the interactive panel, the multifunction pen additionally allows you to control presentations shown on the screen.
- Page 30 Multiboard Light+ Interactive Panel Installation and Operation Manual Colour changing tip for Creating graphic objects in a colour different from tip 1 (pre-select writing and drawing colours from the S-write application menu) 1.5.1 Installing the battery into the multifunction pen Step 1.
- Page 31 Multiboard Light+ Interactive Panel Installation and Operation Manual 1.5.2 Using the multifunction pen Pair the multifunction pen with the interactive panel. In the panel system settings menu, under "Device Management" (see below), select the "Active Pen" option. On the pen, press and hold the "Down" button (see table above).
- Page 32 Multiboard Light+ Interactive Panel Installation and Operation Manual 1.6 Scope of supply The Multiboard Light+ scope of supply includes the following devices and accessories: 1. Multiboard Light+ interactive panel (1 pc.) 2. Remote control unit (1 pc.) 3. Power cable with E/F type plug (3 m) (1 pc.) 4.
- Page 33 Multiboard Light+ Interactive Panel Installation and Operation Manual 1.7 Types of electrical sockets and plugs Since electrical socket standards vary from country to country, several plug options have been provided for the interactive panel, depending on the country where the device is sold. E/F type plug: G type plug: for E/F type sockets:...
- Page 34 Multiboard Light+ Interactive Panel Installation and Operation Manual 2 Installation WARNING! Unpacking, installation and subsequent dismantling of the interactive panel should only be carried out by qualified installers (at least two people). Do not attempt to install or dismantle the device yourself! Unpack the Multiboard Light+ interactive panel.
- Page 35 Multiboard Light+ Interactive Panel Installation and Operation Manual NOTE. The Multiboard Light+ interactive panel can only be mounted on solid wood, brick, concrete walls or solid wood beams. WARNING! Installation involves drilling into the wall. To avoid emergencies, first make sure that there is no electrical wiring, water pipes, heating pipes, etc.
- Page 36 Multiboard Light+ Interactive Panel Installation and Operation Manual Step 3. Secure the mounting frame to the wall with screws and dowels. To do this: A. Place the mounting frame against the wall at the chosen installation location. Check the accuracy of the positioning with a spirit level (not included).
- Page 37 Multiboard Light+ Interactive Panel Installation and Operation Manual C. Place the mounting frame against the wall so that the mounting holes in the frame line up with the holes drilled in the wall. Holding the frame in this position, screw the screws into the dowels, sealing the connection with washers (e.g., with a screwdriver or electric screwdriver) (see the figure below).
- Page 38 Multiboard Light+ Interactive Panel Installation and Operation Manual Step 4. Install the interactive panel by aligning the vertical guides with the mounting frame (see the figure below). To evenly distribute the weight of the interactive panel on the wall mount, observe symmetry when mounting it.
- Page 39 Multiboard Light+ Interactive Panel Installation and Operation Manual Step 5. Additionally fix the device to the mounting frame. To do this, screw the bolts with spring washers into the holes on the flat tabs of the vertical guides (see figure below). The bolts should run into the surface of the mounting frame.
- Page 40 WARNING! It is recommended to use a stand designed for installation of interactive panels. For the list of stands recommended by the manufacturer, see prestigio-solutions.com/multiboard. When using a stand that is not one of the recommended models, always make sure that its size and load capacity match that of the Multiboard Light+.
- Page 41 Multiboard Light+ Interactive Panel Installation and Operation Manual Figure 19 – Installing the interactive panel onto the stand Step 5. Additionally fix the device to the mounting frame with the bolts from the mounting kit (as in subparagraph 2.2.1 above). Make sure that the bolts are tightened securely. Document version: 1.0.6 ©...
- Page 42 Multiboard Light+ Interactive Panel Installation and Operation Manual 3 Connecting devices The Multiboard Light+ has a wide range of connectors for interfacing with various devices. It is also possible to connect devices wirelessly. WARNING! For your safety and to protect your device, do not plug it in before connecting the cables. Connect external devices according to the connector assignment on the Multiboard Light+.
- Page 43 Multiboard Light+ Interactive Panel Installation and Operation Manual External data storage SD memory card (SD card) Data input devices (keyboard, mouse) External audio output devices (headphones, speakers) Network router Communication device (speakerphone) Transmitted signal Directions of signal transmission between devices in a wired connection (outgoing, incoming, two-way transmission) Directions of signal transmission between devices in a wireless connection (outgoing, incoming, two-way transmission)
- Page 44 Multiboard Light+ Interactive Panel Installation and Operation Manual Transferring files for processing and storage Digital audio signal Digital video signal Analog audio signal Analog video signal Converting analog signal to digital Control signal for interactive panel Control signal for external computer Power supply Charging the battery and powering external devices ©...
- Page 45 Multiboard Light+ Interactive Panel Installation and Operation Manual 3.1 Front panel connectors USB Type A External input devices (e.g., keyboard, mouse) are connected to control the operation of the Multiboard Light+. When portable drives are connected, data is read and exchanged through the interactive panel file manager.
- Page 46 Multiboard Light+ Interactive Panel Installation and Operation Manual High-definition digital audio and video (up to 4K at 60 Hz) is transmitted from an external device (e.g., computer, TV decoder) and played back on the interactive panel. High-definition digital audio and video (up to 4K at 60 Hz) is transmitted from an external device (e.g., computer, TV decoder) and played back on the interactive panel.
- Page 47 Multiboard Light+ Interactive Panel Installation and Operation Manual USB Type A External input devices (e.g., keyboard, mouse) are connected to control the operation of the Multiboard Light+ with an internal PC (Windows OS). When portable drives are connected, data is read and exchanged through the interactive panel file manager.
- Page 48 Multiboard Light+ Interactive Panel Installation and Operation Manual AUDIO OUT The analog audio signal from the Multiboard Light+ is transmitted to external audio output devices (e.g., headphones, speakers) without conversion to digital signal. … The high-definition digital audio and video signal is transmitted to an external computer or monitor, then, via HDMI, to the next computer or monitor, and so on.
- Page 49 Multiboard Light+ Interactive Panel Installation and Operation Manual The analog video signal from an external device (e.g., a computer) is transmitted to the Multiboard Light+ without conversion to digital signal. NOTE. Simultaneous connection via the AUDIO IN interface for audio signal transmission is required. AUDIO IN The analog audio signal from an external device (such as a computer) is transmitted to the Multiboard Light+ without conversion to digital signal.
- Page 50 Multiboard Light+ Interactive Panel Installation and Operation Manual 3.4 Wireless connection Wireless input devices (keyboard, mouse) are connected to the Multiboard Light+ to control the operation of the interactive panel. Communication devices (speakerphone) that support BT connection are connected for conference calls. BT access radius depends on the characteristics of the devices. Multiboard Light+ connects to a public Wi-Fi network to communicate with other users and devices.
- Page 51 Multiboard Light+ Interactive Panel Installation and Operation Manual 4 Basic operations 4.1 Turning on and off To operate the Multiboard Light+, use a power supply with 100–240 V AC. Use the toggle switch on the bottom of the device to turn the power on and off. The toggle switch has two positions: I – "ON", O – "OFF".
- Page 52 Multiboard Light+ Interactive Panel Installation and Operation Manual Figure 20 – Home page and sidebar menu The icons in this menu are used to perform basic Multiboard Light+ operations. Table 11 – Sidebar menu icons' purpose A step back in the menu Access the Android Home page Access the signal source menu Shift the workspace of the screen down to access the top...
- Page 53 Multiboard Light+ Interactive Panel Installation and Operation Manual 4.5 Signal sources After turning on the interactive panel, when the operating system interface (Android Home page) appears on its screen, you can select a signal source connected to the Multiboard Light+. The signal sources are switched in the following ways: •...
- Page 54 Multiboard Light+ Interactive Panel Installation and Operation Manual In the Signal Source Menu, you can configure additional settings. To do this, press the "Source settings" button (see the figure above). Figure 22 – Source setting menu Here you can configure the following settings: •...
- Page 55 Multiboard Light+ Interactive Panel Installation and Operation Manual Figure 23 – Audio setup menu For example, in the "Audio settings" tab (see the figure above), you can configure the following settings: • speakers ON/OFF • volume; • right and left channels balance; •...
- Page 56 Multiboard Light+ Interactive Panel Installation and Operation Manual 5 User setup The interactive panel needs its parameters to be configured correctly, to meet the maximum of user needs. The System Settings Menu sets and displays all the main operating parameters of the Multiboard Light+: •...
- Page 57 Multiboard Light+ Interactive Panel Installation and Operation Manual Figure 24 – Wireless connection settings Step 3. Select your desired network from the list, enter the password to connect to it, and then tap "Connect". Wired network setup Connect the interactive panel to the network router with a LAN cable (see section 3 above). After entering the menu, perform the following steps: Step 1.
- Page 58 Multiboard Light+ Interactive Panel Installation and Operation Manual Setting up an access point (hotspot) for a wireless connection Multiboard Light+ can serve as a Wi-Fi access point for devices in the same room as the interactive panel. To use Multiboard Light+ as an access point, follow these steps: Step 1.
- Page 59 Multiboard Light+ Interactive Panel Installation and Operation Manual Figure 26 – Connecting to an access point (using a smartphone as an example) NOTE. In order to protect your data, set the password as strong as possible. It must contain at least 10 characters: Latin letters (A-z, including at least one uppercase letter), Arabic numerals (0–9) and punctuation marks.
- Page 60 Multiboard Light+ Interactive Panel Installation and Operation Manual In this tab you can customize the operation of the internal and external microphones and cameras, as well as the multifunction pen (optional). 5.3 Desktop layout Click the "Wallpapers" tab in the system settings menu. Figure 28 –...
- Page 61 Multiboard Light+ Interactive Panel Installation and Operation Manual 5.4 Date and time setting Click the "Date and time" tab in the system settings menu. Figure 29 – Date and time settings In this tab, you can set the time manually or automatically update it via the network, set the format of time display, date, time zone.
- Page 62 Multiboard Light+ Interactive Panel Installation and Operation Manual In this tab, you can set and change the data input and display language. 5.6 Power setting Click the "Power settings" tab in the system settings menu. Figure 31 – Power settings Here you can set the operating mode of the interactive panel and the schedule for turning it off.
- Page 63 "888888" to reset the password. NOTE. If you need to change the password, be sure to remember it. If you have forgotten your password, contact after-sales service to reset the password (see the feedback form at prestigio- solutions.com). If you select the "NFC" option for authorization, the system will prompt the user to bind an NFC card.
- Page 64 Multiboard Light+ Interactive Panel Installation and Operation Manual In this tab, you can lock or unlock the use of the RC unit. This can be done with the switch on the screen (see figure above). 5.9 Device information Click the "About" tab in the system settings menu. Figure 34 –...
- Page 65 Multiboard Light+ Interactive Panel Installation and Operation Manual 6 Software The Multiboard Light+ has pre-installed software and the option to install third-party applications. Third-party applications should be installed from a USB flash drive or from online resources. Figure 35 – Preinstalled software Table 12 –...
- Page 66 OfficeSuite Files viewing, converting, annotating in various formats mozaik3D Conducting training sessions using 3D models Prestigio Monitoring of lessons, evaluation and analysis of progress mTeacher WARNING! Check regularly for updates to the installed software and firmware of the device. NOTE. The list of applications is subject to change. Check the exact list of applications before purchasing the interactive panel.
- Page 67 In case of warranty repair or replacement, contact the retailer with the receipt and the purchased device. For more information on repairing and replacing the interactive panel, please contact your local representative or technical support through the special form at prestigio-solutions.com. Document version: 1.0.6 ©...
- Page 68 2. The retailer's stamp is required, with their details also shown in the warranty card. Prestigio Solutions brand products are warranted only in the country of purchase. The limited warranty extends only to the original purchaser of the Prestigio Solutions product and is not transferable or assignable to any subsequent purchaser.
- Page 69 Installation and Operation Manual 8.2 Limitation of liability Prestigio Solutions brand products are not eligible for free warranty service if the following damage or defects are found: • damage caused by force majeure, accidents, negligence, intentional or careless actions (omissions) of the purchaser or third parties;...
- Page 70 Multiboard Light+ Interactive Panel Installation and Operation Manual NOTE. ASBISC Enterprises PLC does not manufacture products related to critical equipment. Critical equipment includes life-support systems, medical devices and implantable devices, commercial transportation equipment, equipment for nuclear facilities or systems, and equipment for other applications where device failure could result in personal injury or death, or damage to property.
- Page 71 Multiboard Light+ Interactive Panel Installation and Operation Manual 9 Storage, transportation and disposal rules Observe the storage and operating conditions stated by the manufacturer (see "Safe operating rules", "Technical specifications" above). Long-term storage of the device is allowed only in the original packaging, in dark, dry, clean, well- ventilated closed rooms.
- Page 72 Tel.: +357-25-85-70-00, asbis.com Information about the organization providing warranty service A list of warranty organizations is available at prestigio-solutions.com/warranty. Information on the certificates and declarations of compliance obtained is available at prestigio- solutions.com/certificates-of-compliance. © ASBISC Enterprises PLC. All rights reserved Document version: 1.0.6...
- Page 73 Multiboard Light+ Interactive Panel Installation and Operation Manual 11 Troubleshooting The table below lists typical errors and problems that occur during operation of the device, as well as ways to correct them. Table 13 – Typical errors and solutions Problem Possible causes Solution 1 Nothing appears on...
- Page 74 Set a new password and remember it If the problem is not solved or if you have other questions, contact support. Use the contact form at prestigio-solutions.com. © ASBISC Enterprises PLC. All rights reserved Document version: 1.0.6 Page 74 of 80...
- Page 75 Multiboard Light+ Interactive Panel Installation and Operation Manual 12 Glossary AAA (battery) – size of galvanic batteries and rechargeable batteries. Length 44.6 mm, Ø 10.5 mm, weight about 12 g. Voltage from 1.2 to 1.6 V. Capacity from 300 to 1250 mAh. Direct LED –...
- Page 76 Multiboard Light+ Interactive Panel Installation and Operation Manual Conference call (video conferencing, VCS) – telecommunications technology for interactive cooperation between multiple remote subscribers, in which they can exchange audio and video information in real time with the help of hardware and software computing technology. Multitouch –...
- Page 77 Notes and information during operation...
- Page 80 prestigio-solutions.com...
Need help?
Do you have a question about the Multiboard Light+ and is the answer not in the manual?
Questions and answers