Advertisement
Quick Links
Advertisement

Subscribe to Our Youtube Channel
Related Manuals for Modular Closets ALTO


Summary of Contents for Modular Closets ALTO
- Page 1 ALTO ASSEMBLY INSTRUCTIONS...
- Page 2 We are committed to providing you with a seamless and efficient storage solution that enhances the organization and functionality of your space. Before you embark on assembling your new Alto closet system, we want to emphasize a crucial step to ensure a smooth and successful installation.
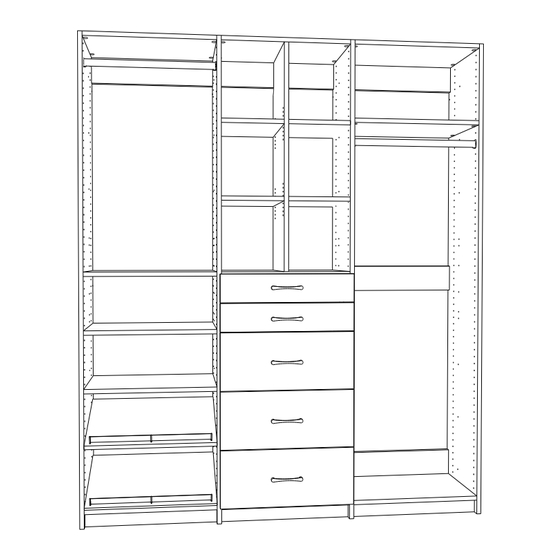
- Page 3 Assembly and Installation Manual The base units will be built and installed first in the following steps, and on page 24 starts the interior components assembly...
- Page 4 Assembly and Installation Manual Boxes Needed ALT-SP Alto Side Panel Pack There are no Right and Left as each panel is built to be able to go on either side. ALT-FS Alto Fixed Shelf Pack For combined units ALT-CP Alto Center Panel...
- Page 5 Assembly and Installation Manual Hardware Packs Needed ALT-HRDP-FS wedgefix rafix screw dowel shelf pin with locking mechanism anchor screws (H4) x 2 leveling we leveling wedge Tools needed Philips screw Stud finder Rubber mallet Drill Level driver 2 person assembly suggested...
- Page 6 Assembly and Installation Manual Step 1 From Box ALT-FS take 2 shelves and the toe kick and insert the rafixes as shown below. rafix...
- Page 7 Assembly and Installation Manual Step 2 For the 3rd fixed shelf, insert 2 rafixes in the holes closer to the unfinished edge, and 2 wedgefixes in the holes closer to the finished edge. wedgefix rafix rafix Unfinished edge wedgefix Finished edge This will be used as the bottom fixed shelf...
- Page 8 Assembly and Installation Manual Step 3 Insert wedgefixes into 2 (or for tall hanging, 3) cleats. wedgefix The third cleat will only be used in a tall hanging configuration Repeat the above 3 steps for all the fixed shelf packs...
- Page 9 Assembly and Installation Manual Step 4 Next, open the side panel pack ALT-SP and insert the screws on the first panel as shown below. Shelf pin Screw dowel Right There are no specific Right and Left, as each panel is built to be able to go on either side.
- Page 10 Assembly and Installation Manual Step 5 Insert the screws into the second panel as shown below. Shelf pin Screw dowel Left Finished edge Bottom Shelf pin here...
- Page 11 Assembly and Installation Manual Step 6 If using Center Panels: From box ALT-CP take the side panel and insert screw dowel as shown in step 4. Then flip it over, and insert dowels as shown in step 5. Shelf pin Screw dowel...
- Page 12 Assembly and Installation Manual Step 7 Line up the panels along the wall in the order that the panels will be installed. Side panels will be on each end with center panels in the middle. Set up piles with the fixed shelves and cleats in between the panels, in order to have them on hand during the installation.
- Page 13 Assembly and Installation Manual Step 7b Remove the moldings from your space so the closet should be flush against the wall, this can done with a hammer and flat head screw driver as shown.
- Page 14 Assembly and Installation Manual Step 8 Connect the left-most side panel to the adjacent center panel by attaching 1 of the fixed shelves (rafixes only) onto the top of the panels, as shown below. (refer to your closet plan to ensure the correct shelf size)
- Page 15 Assembly and Installation Manual Step 9 Hold steady and connect the cleat to the panels by simply clicking the wedgfixes into the screw dowels on each side.
- Page 16 Assembly and Installation Manual Step 10 Using a Philips screw driver, tighten and secure all 4 rafixes...
- Page 17 Assembly and Installation Manual Step 11 Insert the bottom fixed shelf (with 2 rafixes and 2 wedgefixes from step 2) and insert the back 2 rafixes into the screw dowels as shown below.
- Page 18 Assembly and Installation Manual Step 12 Hold the shelf at an angle and tighten and secure the rafixes on either side...
- Page 19 Assembly and Installation Manual Step 13 Insert the toe kick by securing then tightening the rafixes.
- Page 20 Assembly and Installation Manual Step 14 Swing down the shelf to rest on the front 2 screw dowels.
- Page 21 Assembly and Installation Manual Step 15 Connect Bottom cleat by simply clicking the wedgfixes into the screw dowels on each side.
- Page 22 Assembly and Installation Manual Step 16 You have now completed the first base unit! Simply repeat steps 8-15 for the remaining units.
- Page 23 Assembly and Installation Manual Step 17 Ensure that the base units are in their final place and leveled. You can also swing open the bottom shelf to place wedges.
- Page 24 Assembly and Installation Manual Step 18 Using a stud finder, search for the studs in the wall and drill the screws through the top and bottom cleats in each unit into the studs. If there is only one stud, drill two screws into each cleat, one on top of the other. install screws...
- Page 25 Assembly and Installation Manual...
- Page 26 Assembly and Installation Manual Interior component assembly Refer to your closet plan for the interior components and follow the manual for assembly. The default configurations shown here are just examples and may not always match your custom design. Tall hanging Cubby assembly Drawer assembly assembly...
- Page 27 Assembly and Installation Manual...
- Page 28 Assembly and Installation Manual Tall Hang assembly Parts needed Shelf Rod Pack Third Cleat & Middle Shelf from ALT-FS Alto Fixed Shelf Pack...
- Page 29 Assembly and Installation Manual Step 1 Insert screws in the middle cleat holes on panels on both sides and simply click in the 3rd cleat Screw dowel...
- Page 30 Assembly and Installation Manual Step 2 Insert screw dowels in holes on panels on both sides and then connect and secure the middle shelf by turning the rafixes Screw dowel 12th hole including top. (Suggestion only)
- Page 31 Assembly and Installation Manual Step 3 Connect the rod flanges on either side and insert shelf rod...
- Page 32 Assembly and Installation Manual Cubbies assembly Boxes needed ALT-CIN Alto cubby insert pack ALT-CIN Alto cubby shelf pack Hardware Packs Needed ALT-HRDP- CIN wedgefix push dowel screw dowel...
- Page 33 Assembly and Installation Manual Step 1 Start by inserting the middle shelf by inserting screw dowels as shown and securing the shelf with the rafixes Screw dowel Holes are on same level with top of cleat holes...
- Page 34 Assembly and Installation Manual Step 2 Insert wedgefixes in to all 4 cubby shelves wedgefix...
- Page 35 Assembly and Installation Manual Step 3 Insert screw dowels on each side of the cubby insert screw dowel...
- Page 36 Assembly and Installation Manual Step 4 Slide in the cubby insert (for bottom half of base unit simply flip over so cut out goes over bottom cleat) and insert the push dowels parallel to screw dowels push dowel...
- Page 37 Assembly and Installation Manual Step 5 Starting with the top right shelf simply click in each shelf as shown.
- Page 38 Assembly and Installation Manual Drawer assembly Boxes Needed ALT-DF Alto Drawer Front ALT-DFS Alto Small Drawer Front (There are 1 pack and 2 pack boxes) ALT-DB Alto Drawer Boxes ALT-DBS Alto Small Drawer Box (There are 1 pack and 2...
- Page 39 Assembly and Installation Manual Hardware Packs Needed ALT-HRDP-DB campost x4 wooden dowel x8 camlock x4 screws for slide x4 lock for slides R,x1, L,x1 screw for lock x4 How to use the Cam lock system 180°...
- Page 40 Assembly and Installation Manual Step 1 Removing the parts from ALT-DB(s), insert cam locks, cam posts and wooden dowels in the drawer sides and back as shown below. wooden dowel camlock x4 campost...
- Page 41 Assembly and Installation Manual Step 2 Connect the side panals to the back.
- Page 42 Assembly and Installation Manual Step 3 Tighten both cam locks by turning them 180°...
- Page 43 Assembly and Installation Manual Step 4 Slide the drawer bottom in...
- Page 44 Assembly and Installation Manual Step 5 Using the parts from ALT-DF, if using a bar pull, drill a hole through the two outside guide holes. If using a knob, drill a hole through the middle guide hole. Drill bit...
- Page 45 Assembly and Installation Manual Step 6 Insert cam locks and camposts into drawer front as shown below. wooden dowel campost...
- Page 46 Assembly and Installation Manual Step 7 Connect drawer front to drawer box.
- Page 47 Assembly and Installation Manual Step 8 Tighten cam locks on both sides.
- Page 48 Assembly and Installation Manual Step 9 Flip over the drawer and put the lock for slides in each corner and screw in as shown. Repeat steps 2 - 9 for all drawers. screw for lock x4 lock for slides R,x1, L,x1...
- Page 49 Assembly and Installation Manual Step 10 Insert the middle shelf by inserting screw dowels as shown and securing the shelf with the rafixes Screw dowel Holes are on same level with top of cleat holes...
- Page 50 Assembly and Installation Manual Step 11 Attach the drawer slides on either side as shown screws for slide x4...
- Page 51 Assembly and Installation Manual Step 12 Repeat for remaining drawer slides. Please note the different placements for the 4 drawer and 5 drawer configuration as shown below. for 2 small and 3 for 4 large large...
- Page 52 Assembly and Installation Manual Step 13 Start with the bottom drawer slide. Slide out the drawer slide and insert the drawer...
- Page 53 Assembly and Installation Manual Step 14 From the underside click the slides into the lock and secure by turning the dial. Repeat for all the drawers click!
- Page 54 Assembly and Installation Manual Step 15 Use a screw driver to screw in the knobs \ pulls in to the drawer front. Repeat steps 13 - 15 for all drawers.
- Page 55 Assembly and Installation Manual Shoe Shelf Assembly Boxes Needed ALT-SHS (2- Pack) Hardware Packs Needed ALT-HRDP-SHS Wedgefix Shelf pin Push dowel Shoe rails (packed seperatly) Tools needed Philips screw driver...
- Page 56 Assembly and Installation Manual Shoe rail instructions Slide middle post through and side posts at the sides Screw in from the undeside...
- Page 57 Assembly and Installation Manual Step 1 After connecting the shoe rails, Insert wedgfixes as shown...
- Page 58 Assembly and Installation Manual...
- Page 59 Assembly and Installation Manual Step 2 Insert push dowel and shelf pin as shown and then place shoe shelf by clicking in the wedgefixes into the push dowels and rest the front onto the shelf pins.
Need help?
Do you have a question about the ALTO and is the answer not in the manual?
Questions and answers