
Related Manuals for Electrolux Professional SkyLine PremiumS 6GN1/1


Summary of Contents for Electrolux Professional SkyLine PremiumS 6GN1/1
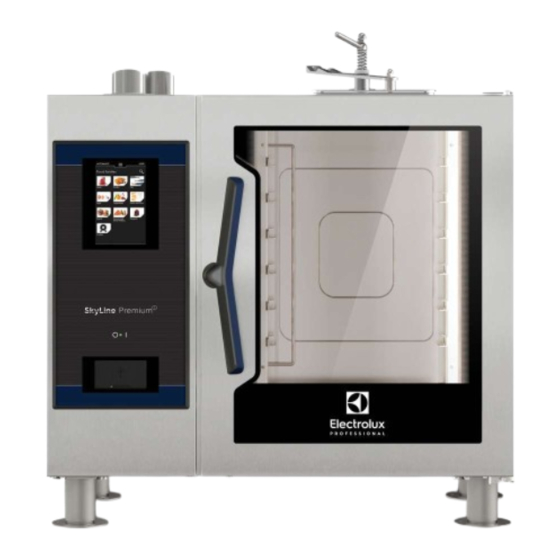
- Page 1 Electrical Oven Combi TOUCH User manual * 0595404F03_SW-5.8.1- 2024.09 *Original instructions...
- Page 2 Foreword Read the following instructions, including the warranty terms before installing and using the appliance. Visit our website www.electroluxprofessional.com and open the Support section to: Register your product Get hints & tips of your product, service and repair information The installation, use and maintenance manual (hereinafter Manual) provides the user with information necessary for correct and safe use of the appliance.
-
Page 3: Table Of Contents
Contents A WARNING AND SAFETY INFORMATION....................5 General information ........................5 Personal protection equipment ......................6 General safety ..........................6 Protection devices installed on the appliance ..................7 Safety signs to be placed on the appliance or near its area ..............8 Reasonably foreseeable improper use .................... - Page 4 F.17.5 SOUND .......................... 53 F.17.6 CAVITY LIGHT ......................... 53 F.17.7 DISPLAY......................... 54 F.17.8 TOUCH SCREEN CALIBRATION..................54 F.17.9 TOUCH SCREEN TEST ..................... 54 F.17.10FOOD SAFETY........................ 54 F.17.11AUTOSTART ........................54 F.17.12MANUAL ........................54 F.17.13AUTOMATIC ........................56 F.17.14PROGRAMS ........................56 F.17.15MULTITIMER........................57 F.17.16HOMEPAGE FAVORITE MODE...................
-
Page 5: Awarning And Safety Information
WARNING AND SAFETY INFORMATION General information To ensure safe use of the appliance and a proper understanding of the manual it is necessary to be familiar with the terms and typographical conventions used in the documentation. The following symbols are used in the manual to indicate and identify the various types of hazards: WARNING Danger for the health and safety of operators. -
Page 6: Personal Protection Equipment
Personal protection equipment Summary table of the Personal Protection Equipment (PPE) to be used during the various stages of the appliance's service life. Stage Protective Safety Gloves Glasses Safety garments footwear helmet ● ○ ○ — Transport — ● ○ —... -
Page 7: Protection Devices Installed On The Appliance
Disconnect the appliance from the power supply before carrying out any installation, assembly, cleaning or maintenance procedure. • Do not remove, tamper with or make illegible the CE marking, the safety, danger and instruction signs and labels on the appliance. •... -
Page 8: Safety Signs To Be Placed On The Appliance Or Near Its Area
Safety signs to be placed on the appliance or near its area Prohibition Meaning do not remove the safety devices do not use water to extinguish fires (placed on electrical parts) Keep the area around the appliance clear and free from combustible materials. -
Page 9: Appliance Cleaning
• Do not spray water or use water jets, steam cleaner or high pressure cleaner. Preventive Maintenance In order to ensure the safety and performance of your equipment, it is recommended that service is undertaken by Electrolux Professional SpA authorised engineers every 12... -
Page 10: Parts And Accessories
Electrolux Professional SpA Service Manuals. Please contact your local Electrolux Professional SpA Service Centre for further details. A.10 Parts and accessories Use only original accessories and/or spare parts. Failure to use original accessories and/or spare parts will invalidate the original manufacturer warranty and may render the appliance not compliant with the safety standard. -
Page 11: Cgeneral Information
– environment conditions provoking thermal (e. g. over- subject to local terms and conditions. heating/freezing) or chemical (e. g. corrosion/oxidation) Check on Electrolux Professional website the list of authorized stress; customer care. – foreign objects placed in- or connected to- the product;... -
Page 12: Responsibility
Guard an element of a appliance used in a • operations carried out by non-specialised personnel; specific way to provide protection by • unauthorized modifications or operations; means of a physical barrier. • missing, lack or inadequate maintenance; Safety device a device (other than a guard) that elimi- •... -
Page 13: Appliance Overview
Food loading on oven MODELS No. of grids 6 GN 1/1 6 GN 2/1 10 GN 1/1 10 GN 2/1 20 GN 1/1 20 GN 2/1 Maximum oven load Maximum pan/ tray load Appliance overview 1. Door handle (shape depending on the model) 10. -
Page 14: Door Stopper
1. Turn the door handle clockwise or counterclockwise all the way to fully open the oven door. The cooking cycle is stopped, if in progress. 2. To close the door press it against the oven enough to lock 20 GN Model 1. -
Page 15: Foperating
OPERATING SWITCH THE OVEN ON The main menu of the start page is composed of various modes corresponding to the different functions of the oven. Press the “I“ side of the button “O – I“ to switch the oven on. Press the “O“... -
Page 16: Oven Connectivity
Settings mode Oven connected to cloud via Ethernet. “Settings“ mode allows to customize the oven func- tions and options for a better use. For connection issues, refer to H.3 Oven connectivity issues (depending on your SW version) paragraph. < SCROLLING AREA Options> TOUCH SCREEN COMMANDS / INFO AND DISPLAY MESSAGES Help... -
Page 17: Drawers Area
– Upper drawer closing: Reduced power 160°C Help Agenda 01 20 Plan & save Blocking alarm 01:20 h:m Display messages Warnings A pop up window appears on the display to show the Touch button to close the drawer. warning in progress. LOWER DRAWER •... -
Page 18: Manual Mode
00:20 m:s BOILER BOILERLESS 160°C 00 30 MANUAL MANUAL Water Half Food speed injection power Safe 00:30 h:m Control Delayed Save start program 5:30 100% 300°C 120°C °C °C 160°C 160°C 00 30 00 30 Reduced power Touch this icon to limit the power peak of the installed power. 00:30 h:m 00:30 h:m Available for every cooking cycle. -
Page 19: Delay Start
IMPORTANT If it is necessary, set the required HUMIDITY; The numeric keypad allows to set further options of • Touch the row of the humidity value; the cycle without returning back to the first page of • Enter the new value on the numeric keypad appearing Manual mode. -
Page 20: Start Options
• If you want the oven to perform the preheating for the MANUAL delayed cycle, see F.17 SETTINGS chapter (Manual ⇨ General, ⇨ ) and enable the feature “Delayed start preheating“ ( In this case the oven asks to perform the preparation phase Preheating (preheating) for the cycle at the set time. -
Page 21: Temperature Options
3. Touch the probe icon and enter the required value; 4. Insert the probe into the food (see the probe use at the paragraph How to use a probe). Cycle done! Now holding 5. Close the door and press button. NOTE! 00:00:05 To delete ECO-DELTA function touch the icon... -
Page 22: Time Option
CONVECTION cycle – VENT VALVE • Touch VENT OPEN option MANUAL MANUAL Vent valve CLOSED for high humidity cooking (Default setting) Vent open 1 2 3 Models with boiler Vent open 4 5 6 Vent valve ADJUSTABLE for cooking with humid- °C ity adjustable from 1 to 99 %, allowing the 01 %... - Page 23 When the set value is reached, the oven stops automatically. Make sure the tip (the sensitive part) is positioned near the centre of the product. Probe types It is important to place the core probe correctly near the centre of the product, making sure the tip does not Adjustable PROBE to measure the product core protrude and, in particular, that it does not to touch the temperature...
-
Page 24: Multitimer Option
MANUAL PRESET NAME MANUAL MANUAL Preset 1 MultiTimer ---- --:--h:m ---- --:--h:m 1 2 3 4 5 6 7 8 9 0 620 - UPrb ---- --:--h:m USB Probe not detected Q W E R T Y U I O P ---- --:--h:m 10/07/2023... -
Page 25: Multiphase Drawer
5. Insert the food in the oven, the core probe in the product MANUAL (when needed) and close the door to start the cycle. The MultiTimer page list shows up on the display. The screen saver shows up to three presets: the remain- ing time (or the current food core temperature) and the name, when present. - Page 26 • Touch the “+“ icon in the Multiphase Drawer; Set the parameters of the new added cycles and touch button to start the cycle. MANUAL MANUAL MANUAL MANUAL Multiphase °C 00:10 °C 00:15 C ° C ° °C 00:25 C ° °C 00:10 00:30 00:30...
-
Page 27: Automatic Mode
SKIP option (available during a running programme F.7.1 SET AN AUTOMATIC CYCLE only): 1. Open the upper drawer and select Automatic mode 1. Touch the three dots on the right of the selected phase to MANUAL open the mini pop-up with Skip function. Manual Automatic Programs... - Page 28 • It is also possible to delete selected presets by means of the Other presets allow to change a few parameters: lower drawer: • Browning Level • Cooking Control (timer/probe). • Food status Cycle displaying Selective Delete It is possible to customize the cycle display through the 6:30 100°C 120°C...
-
Page 29: Update/Restore Automatic Cycles
3. Touch to proceed. The oven updates the files and Time consumption in hours : minutes : seconds displays a feedback. SETTINGS SETTINGS HACCP Automatic (recipe data stored into HACCP log) Automatic Enable Automatic cooking Enable Automatic cooking Update Automatic Update Automatic Reference standard used (if enabled) Enable step view... -
Page 30: Cycles+ / Special Cycles
During the restoring it could be that: 2. Touch to proceed. The oven updates the files and displays a feedback • Something goes wrong. Try to restore the Automatic mode again. SETTINGS SETTINGS Automatic Automatic Enable Automatic cooking Enable Automatic cooking Restore Automatic mode Enable step view Restore Automatic mode... - Page 31 • Set the delta value for the cavity temperature; AUTOMATIC • Then set the core probe temperature; Low temp. Cooking The display shows the set humidity value (A), for the cavity temperature the delta value set (B) and for the probe the current and the target values (C);...
- Page 32 • The cycle displaying can be customised as standard or AUTOMATIC AUTOMATIC steps view. Open the lower drawer and touch the required Cycles+ Proving icon: AUTOMATIC AUTOMATIC Low temper. Eco Delta Regeneration Regeneration Regeneration cooking cooking °C °C Load Static combi Proving Sous vide Half...
- Page 33 At the end of the cycle the display shows the consumptions (if AUTOMATIC PRESET 1 available) as a recap message. Cycles+ F.7.3.7 Advanced FSC Low temper. Eco Delta Regeneration ADVANCED FSC cooking cooking °C This cycle associates the reaching of pasteurization factor to Static combi Proving Sous vide...
- Page 34 AUTOMATIC AUTOMATIC PRESET 1 PRESET 1 Cycles+ Cycles+ Low temper. Eco Delta Regeneration Low temper. Eco Delta Regeneration cooking cooking cooking cooking Vent open °C °C Static combi Proving Sous vide Static combi Proving Sous vide 100°C 100°C 01:30 01:30 Advance FSC FSC standard FSC high risk...
-
Page 35: Programs Mode
To save and store the performed or new presets see Saving • If necessary modify the cooking parameters according to presets paragraph of this chapter. your requirement; • Open the lower drawer and touch the relevant icon to save At the end of the cycle the display shows the consumptions (if the programme;... - Page 36 • Touch the image icon to change the default image; • Touch the recycle bin icon to delete a program; Choose the required image and confirm it. Confirm to delete. PROGRAMS PROGRAMS PROGRAMS PICTURE All programs All programs All programs Default picture Delete program Program’s...
- Page 37 • select “Local“, “Cloud“, or “All“ to display the programs by • Select the programs to be deleted or open the drawer again their source or to display all programs; and select: PROGRAMS if you want to be selected all the programs; All programs PROGRAMS PROGRAMS...
-
Page 38: Homepage Favorites Mode (Skyhub/Solomio)
• Select MultiTimer presets to see all the presets saved and • Touch icon to close the EDIT window; present in all MultiTimer programs. Multitimer prg. . Multitimer prg.. PROGRAMS PROGRAMS MultiTimer MultiTimer Manage MT Presets Manage MT Pesets ---- Pepper --:-- 0:55... -
Page 39: Help Mode
F.10 HELP MODE – you are requested to give immediately a folder title and to choose a pictures form the proposed ones. This function provides QR codes in order to display the user It is possible to rename, associate another picture or manual on your device (smartphone, tablet or laptop). - Page 40 3. Touch the required time; • Select the required food family and the preset. The display shows the automatic program details. AGENDA AGENDA AGENDA AGENDA December 2018 Reminder 11th December 2018 - 08:00 Food families Meat Type Automatic Program 00:00 Cleaning Reminder Meat balls...
-
Page 41: Usb Mode
AGENDA AGENDA April 2019 December 2018 09:00 08:00 10:00 09:00 11:00 10:00 12:00 11:00 13:00 12:00 14:00 13:00 15:00 14:00 The display shows in the calendar the selected cleaning cycle 15:00 at the required time; 16:00 Reminder setting 17:00 • Select the date and the time; Cancellation of an event •... -
Page 42: Upload All
1. Select USB from the upper drawer. • Select one of the existing backups. Then select the required items associated with the selected backup. MANUAL USER Manual Automatic Programs Backup 20190607 Upload all Chill Backup 20190607 Programs Backup 20171222 °C Cleaning Settings Skyhub... -
Page 43: Plan&Save/Cooking Optimizer Mode
• All files associated are selected. Deselect the not needed Show selected files and touch to confirm it. Touch Programs and/or MultiTimer programs. When the Regarding the selected files, the oven asks to choose: wordings become green all the associated programs are –... - Page 44 2. Select an existing list or create a new one; • Touch icon to confirm it; PLAN & SAVE PLAN & SAVE PLAN & SAVE PLAN & SAVE New list Programs New list All lists Automatic Program 1 Automatic New list Programs Program 2 Programs...
-
Page 45: Skyduo/Match Mode (Depending On Your Model - Optional)
4. When the oven has optimized the sequence, press • Touch icon to delete the item; button to start the execution; PLAN & SAVE PLAN & SAVE New list New list Plan & Save Cooking done! Preset / Program 1 00:00 h:m The modification done are only Preset / Program 1... - Page 46 A. Select the food type (for example Meat) • Postpone the process of synchronization: touch the icon to postpone the connection with the oven. AUTOMATIC AUTOMATIC MANUAL MANUAL Meat Food type Roasted Meat loaf Meat Poultry Fish Meat balls SkyDuo Chill Chill Braising...
-
Page 47: Hood Management
Choose the required cycle and confirm the selection; • To skip the pop-up window touch Red meat SkyDuo SkyDuo has found the following paired cycles. Do you want to °C proceed with the skyDuo process? Red meat - chill 160°C Red meat - freeze 00:30 01:30 h:m... - Page 48 IMPORTANT • If you do not confirm it, the cleaning cycles are not available. If the cavity temperature is higher than 40 ℃ Press the button as shown in the figure to proceed with the [104 ℉] the oven will force the cool down prior cooling down.
- Page 49 IMPORTANT approved by Electrolux Professional, which already Electrolux Professional approved comply with fluid category 3, as per current rinse aid: C21 Extra Strong rinse aid regulations and legislation.
- Page 50 WARNING Detergent loading Both chemical substances and hot steam can escape from cavity with risk of burns and scalding. Use Gloves. Always refer to the safety cards and labels on the products used. WARNING Do not start any cooking cycle if the cleaning cycle has not been completed and/or after cleaning cycle completion if there are still...
-
Page 51: Forced Cleaning
• Forced rinse • The display shows the pop-up window “Forced cleaning“: it is necessary to perform one of the automatic cleaning If you have stopped a running cleaning cycle, the appliance cycles. may proceed to perform a forced rinse to wash out all the chemicals from the cavity. -
Page 52: Boiler Drain
• It may occur that, after carrying out the dedicated cycle, the SETTINGS SETTINGS display shows an error code again (dESS, dESC or EtUb). All settings All settings In this case, repeat the procedure. • If, after carrying out a second dedicated cycle, the display Boiler Drain Boiler Drain shows error code again, call Service. -
Page 53: Language
F.17.1 LANGUAGE SETTINGS Time Language Set format 24 H AM/PM This parameter allows to customize all menus in the selected Set time language. 0 1 4 : 5 • Touch the flag icon; 1 2 3 • The display shows all settings in the required language. 4 5 6 SETTINGS Language... -
Page 54: Display
1. Touch the screen as close as possible to the centre of the SETTINGS red cross; Cavity Light 2. Repeat until the cross turns green; Enable cavity light 3. Touch to exit; Brightness Light blinking at the end of cooking Light blinking when in alarm Preheat blinking Touch to test. - Page 55 SETTINGS SETTINGS Manual Manual Enable Manual Cooking cycle Enable Manual cooking General Timer / Temperature General Utilities Timer/Temperature dialogs Cooking info in drawer Utilities Delayed start Hold Hold NOTE! If a mode is disabled, it is not visible in the upper Hold drawer.
-
Page 56: F.17.13Automatic
SETTINGS SETTINGS Manual Automatic Enable Manual cooking Enable Automatic cooking General Enable step view Timer / Temperature dialogs Factory presets Utilities User presets Hold Food type Preferred cooking cycles Meat Coocking cycles setpoints Poultry Edit Convection setpoints Fish Edit Combi setpoints Eggs Edit Steam setpoints Vegetables... -
Page 57: F.17.15Multitimer
• Enable Presets modify. It allows “modify preset“ function; SETTINGS SETTINGS • Enable Presets overwrite. It allows “overwrite preset“ Programs Programs function; Enable Programs Enable Programs • Enable Presets delete. It allows “delete preset“ function; • Load programs with presets. When a MT programme is General General recalled, all the presets associated are automatically loaded. -
Page 58: F.17.18Green Spirit/Economizer
Cleaning – Advanced functions • This setting allows to set a password to access into specific environments, features and options to prevent setting • Forced cleaning after [xx]:[xx] H:M... changes. This setting allows to enable/disable ( ) the function SETTINGS of a forced cleaning after a settable cooking time. -
Page 59: F.17.23Service
• If the oven door is opened, the drying procedure starts with SETTINGS SERVICE SETTINGS SERVICE a 5-minutes countdown. Then, the oven switches off. Identity card Identity card Top inverter FW version 9PDD217722 02 0.0.0 Serial Number ACS version Automatic switch off SN2462000604 0.0.0 Appliance type... -
Page 60: Cleaning Introduction
IMPORTANT 2. Remove the filter from its housing; Problems resulting from poor or lack of care as 3. Wash the filter in the dishwasher with a gentle programme; hereinafter described will not be covered by the in other cases, wash the filter by hand with neutral dish warranty. -
Page 61: Inner, Outer And Cooking Chamber Glass
To replace it, proceed as follows: 2. With the door open, press the two top and bottom retaining clips as shown in the figure to reach the interspace 1. Remove the gasket from its seat; between the inner and external glass; 2. -
Page 62: Efficiency Control Of The Discharge System
After cooking cycle the oven door, its internal glass, the 2. Gap (“2“) between the door handle and the oven door gasket and the area around the door perimeter may become frame; easily dirty due to greasy vapours coming out from the oven. These operations must be done with the door glass cold, without using abrasive detergents or rags. -
Page 63: G.14 Food Probe
G.14 Food probe • Clean the stainless steel parts every day using lukewarm neutral soapy water; Residues released during cooking, despite regular cleaning of Rinse with plenty of water and dry thoroughly. the cooking chamber, can encrust the food probe, altering the •... -
Page 64: Htroubleshooting
Maintenance, inspections, checks and Frequency Responsability cleaning Electrical control panel • check the electrical components installed • Yearly inside the electrical control panel. Check the • Service wiring between the electrical panel and appli- ance parts Electrical connection cable • Yearly •... - Page 65 Anom- Type of Description Possible causes Actions anomaly Hd04 Stops Shower valve BV4 not Switch the oven OFF/ON. If the error persists, appliance working call Service. PdEF Stops Memorized default Physical memory failure Parameters memory corrupted; oven parameters corrupted • Try to switch the oven OFF/ON. •...
- Page 66 Anom- Type of Description Possible causes Actions anomaly N°116 Blocks ACS software version Wrong software upload ACS software version (inside ACU board) oven; fatal (inside ACU board) (example: after replacing incompatible with present UI SW version. Call ACSS error incompatible with ACU board, the SW is not service present UI SW...
- Page 67 Anom- Type of Description Possible causes Actions anomaly N°152 Stops Error during reading Error during reading of a file on the USB pen oven of a file on the USB drive. USrE pen drive • Try with another USB pen drive. N°153 Stops Error during writing of...
- Page 68 Anom- Type of Description Possible causes Actions anomaly N°210 Stops the Cavity safety switch Cavity over temperature reached. • The cavity is dirty; oven triggered (TSC) Call Service. • The parameter COT is set too high; • The safety thermostat bulb or the capillary are damaged;...
- Page 69 Anom- Type of Description Possible causes Actions anomaly N°223 Stops Boiler water loading • Water supply (pressure/ • Check if the water supply is open; cycle (if timeout BoLt quality of water). • Check if the water pressure is not too low; the cycle •...
- Page 70 Anom- Type of Description Possible causes Actions anomaly N°243 Warning Error, excessive time Mechanical or electrical The oven has detected a problem with cavity on closing operation problem with vent valve. vent operation. If cooking: check the cooking BEtc of the vent valve result, try to reset the message also switching during cleaning OFF/ON;...
- Page 71 Anom- Type of Description Possible causes Actions anomaly N°280/ Stops Humidifier not The oven has detected a problem with the • Water missing; humidifier working humidifier (ISG). It could be possible to cook in • ISG circuit obstruction. convection mode only. HFnI Verify the water supply valve is fully open and the water filler has no obstructions.
- Page 72 Anom- Type of Description Possible causes Actions anomaly N°302 Blocks Boiler gas burner The oven will not operate until restoring the • Air in gas supply; boiler. locked burner functionality. GbbU • Gas supply is closed; To recover the functionality: •...
- Page 73 Anom- Type of Description Possible causes Actions anomaly N°314 Stops Boiler SSR NTC over- The oven can continue to work in recovery • Inlet air filter dirty; boiler. temperature (NTC4) mode: cooking cycles will not use the boiler. BSOt • Cooling fan failure; Blocks •...
- Page 74 Anom- Type of Description Possible causes Actions anomaly N°327 Stops Water measured The oven can continue to work (check the • Water supply valve oven inconsistent with cooking results). EH2O closed or partly closed; valves state • Temporary lack of water •...
- Page 75 Anom- Type of Description Possible causes Actions anomaly N°408 Stops Upper inverter over All causes related to fric- Restart oven. appliance. torque tion phenomena: FU08 If the causes persist, error will appear again, Call Service. • Cavity fan towards suc- tion wall •...
- Page 76 Anom- Type of Description Possible causes Actions anomaly N°457 Stops Upper motor thermo- All causes related to fric- If in cooking phase: wait for the motor to cool appliance. stat safety tripping tion phenomena: down. Restart the oven after 30 min. If the Fd07 (Klixon).
-
Page 77: Oven Connectivity Issues (Depending On Your Sw Version)
Anom- Type of Description Possible causes Actions anomaly N°603 Warning Level 4 only: Hood’s The Demister and water Restart oven. water separator filter separator filter are not in Hod3 If the causes persist, error will appear again, missing appropriate position call service. - Page 78 • Handle the tray in a balanced way, trying not to arch your back during the loading/unloading. • If possible, flex your legs and don’t bend forward your back during the placement of the trays in the lower shelves and during the achievement of any lower tools or items.
- Page 79 5 Kg 5 Kg 10 Kg 10 Kg <15 Kg <10 Kg 15 Kg 15 Kg <5 Kg <3 Kg 10 Kg 10 Kg 5 Kg 5 Kg 3 Kg 3 Kg Blast Chiller 100Kg Oven 20G 3 Kg 5 Kg 5 Kg 10 Kg 10 Kg...
- Page 82 Electrolux Professional SPA Viale Treviso 15 33170 Pordenone www.electroluxprofessional.com...
Need help?
Do you have a question about the SkyLine PremiumS 6GN1/1 and is the answer not in the manual?
Questions and answers