Advertisement
Quick Links
User Manual
Designed and manufactured by Austin Hughes
UM-CV-751-MRP-Q424V1
dedicated KVM switch and rackmount screen technology
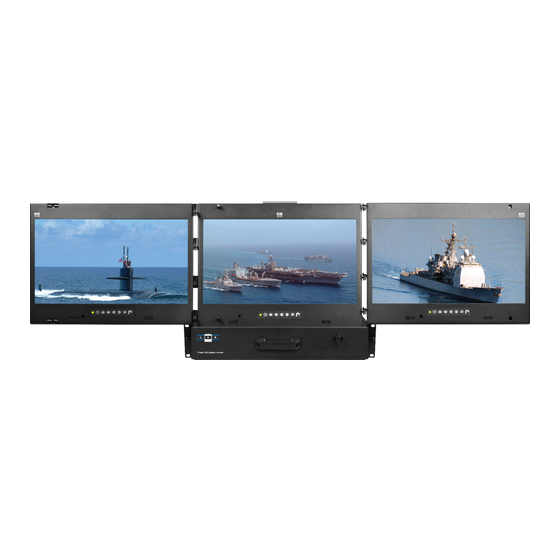
2U Multi-Display Drawer
MRP-K17-2L
MRP-F17-2L
MRP-X17-2L
MRP-19-2L
MRP-K17-3
MRP-F17-3
MRP-X17-3
MRP-19-3
MRP-K17-2R
MRP-F17-2R
MRP-X17-2R
MRP-19-2R
www.austin-hughes.com
751
Advertisement

Related Manuals for Austin Hughes CyberView MRP-K17-2L


Summary of Contents for Austin Hughes CyberView MRP-K17-2L
- Page 1 KVM switch and rackmount screen technology User Manual 2U Multi-Display Drawer MRP-K17-2L MRP-K17-3 MRP-K17-2R MRP-F17-2L MRP-F17-3 MRP-F17-2R MRP-X17-2L MRP-X17-3 MRP-X17-2R MRP-19-2L MRP-19-3 MRP-19-2R Designed and manufactured by Austin Hughes UM-CV-751-MRP-Q424V1 www.austin-hughes.com...
- Page 2 Legal Information First English printing, December 2024 Information in this document has been carefully checked for accuracy; however, no guarantee is given to the correctness of the contents. The information in this document is subject to change without notice. We are not liable for any injury or loss that results from the use of this equipment.
- Page 3 Contents < Part. 1 > Package Content Structure Diagram & Dimension Installation Connection < Part. 2 > Specifi cations / OSD Product Specifi cations P.10 On-screen Display Operation ( OSD ) P.16 < Part. 3 > Options 3G / HD / SD-SDI Broadcast-grade input P.19 Video / Audio P.20...
- Page 4 Before Installation ■ It is very important to mount the equipment in a suitable cabinet or on a stable surface. ■ Make sure the place has a good ventilation, is out of direct sunlight, away from sources of excessive dust, dirt, heat, water, moisture and vibration. Unpacking The equipment comes with the standard parts shown in package content.
- Page 5 < Part 1 > < 1.1 > Package Content MRP-F17 / MRP-K17 unit X 1 MRP-X17 / MRP-19 unit X 1 - Power adapter & Power cord X 1 - 6ft DVI cable X 2 or 3 - M6 screw, cage nut & cup washer X 8 - Power adapter &...
- Page 6 < 1.2 > MRP-K17 / MRP-F17 / MRP-X17 Dimension 1mm = 0.03937 inch Front View Triple display MRP-K17 MRP-F17 Dual display ( LH mounted ) MRP-X17 Dual display ( RH mounted ) Rear View MRP-K17 MRP-F17 DVI-D Power Power Central Central Left Left...
- Page 7 < 1.2 > MRP-19 Dimension 1mm = 0.03937 inch Front View Triple display MRP-19 Dual display ( LH mounted ) Dual display ( RH mounted ) Rear View DVI-D Power Central Left Right ** Actual connection port locations of the above models may vary. Side View Top View Product Dimension...
- Page 8 < 1.3 > Installation - How to install Installation Slides Step ■ The left and right rear mounting brackets are attached to the Multi-display drawer. Step ■ Measure the depth of the front and rear mounting rails. ■ Align each rear mounting bracket to a suitable length. ■...
- Page 9 < 1.3 > Installation - How to Use the Multi-Display Drawer Step ■ Unlock the key cylinder to 3 o’clock direction. Step ■ Hold the handle and slide out the drawer. Step Step ■ Flip up the LCD to a suitable angle. Step ■...
- Page 10 < 1.3 > Installation - How to Use the Multi-Display Drawer Step ■ Operate the multi-display drawer. Step ■ Close the Left Right display. ■ Flip down the LCD completely. Step Step ■ Must completely extend the drawer before returning it to the park position. ■...
- Page 11 < 1.3 > Installation - How to Use the Slides Figure 1. ■ A purple release button is located on the front of the slide. ( shown in Figure 1 ). ■ Pull and hold both side release buttons when Figure 2.
- Page 12 < 1.4 > MRP-K17 connection to DP Server Multi-display Console Drawer Power Central Left Right Attached 6 ft DP cable for each DP port DP server * DP cable x 2 for dual display ** Actual connection port locations of the above models may vary Caution : The LCD drawer is hot-pluggable, but components of connected devices, such as the servers and KVM switch, may not be hot-pluggable.
- Page 13 < 1.4 > MRP-F17 / MRP-X17 / MRP-19 connection to USB Server Mult-display Console Drawer DVI-D Power Central Left Right DVI cable x 2 or 3 USB server * DVI cable x 2 for dual display ** Actual connection port locations of the above models may vary Caution : The LCD drawer is hot-pluggable, but components of connected devices, such as the servers and KVM switch, may not be hot-pluggable.
- Page 14 < Part 2 > < 2.1 > Product Specifi cations - MRP-K17 MRP-K17 Panel Native Resolution 3840 x 2160@60Hz Panel Size ( diagonal ) 17.3-inch TFT color LCD Brightness ( cd/m² ) Contrast Ratio ( typ. ) 1000:1 Colors 16.7 M, 8-bit Viewing Angle ( L/R/U/D ) 89/89/89/89 Response Time ( ms )
- Page 15 < 2.1 > Product Specifi cations - MRP-K17 Physical Product ( W x D x H ) 441.6 x 550 x 88 Specifi cation inch 17.4 x 21.7 x 3.5 Packing ( W x D x H ) 580 x 683 x 197 inch 22.8 x 26.9 x 7.8 Triple display...
- Page 16 < 2.1 > Product Specifi cations - MRP-F17 MRP-F17 Panel Native Resolution 1920 x 1080 Panel Size ( diagonal ) 17.3" Standard Brightness ( cd/m² ) High Brightness ( cd/m² ) - Option 1000 Contrast Ratio ( typ. ) 1000:1 Colors 16.7 M, 8-bit Viewing Angle ( L/R/U/D )
- Page 17 < 2.1 > Product Specifi cations - MRP-F17 Physical Product 441.6 x 550 x 88 Specifi cation ( W x D x H ) inch 17.4 x 21.7 x 3.5 Packing 580 x 683 x 197 inch 22.8 x 26.9 x 7.8 ( W x D x H ) Triple display 24.1 kg / 53 lb...
- Page 18 < 2.1 > Product Specifi cations - MRP-X17 / MRP-19 MRP-X17 MRP-19 Panel Native Resolution 1920 x 1200 1280 x 1024 Panel Size ( diagonal ) 16.2" 19" Standard Brightness ( cd/m² ) High Brightness ( cd/m² ) - Option 1000 Contrast Ratio ( typ.
- Page 19 < 2.1 > Product Specifi cations - MRP-X17 / MRP-19 Physical Product MRP-X17 441.6 x 550 x 88 Specifi cation ( W x D x H ) inch 17.4 x 21.7 x 3.5 MRP-19 441.6 x 600 x 88 inch 17.4 x 23.6 x 7.8 Packing MRP-X17...
- Page 20 < 2.2 > On-screen Display Operation ( OSD ) Power light Green = On Orange = Power saving Membrane Switch Function Power on / off LCD Display the OSD menu Scrolls through menu options and adjusts the displayed control (To auto adjustment by pressing the button for 5 seconds) Exit the OSD screen Toggle analog, digital &...
- Page 21 < 2.2 > On-screen Display Operation ( OSD ) Picture Brightness : Adjust the screen brightness Contrast : Adjust the diff erence between the image background ( black level ) and the foreground ( white level ) Black level : Adjust background black level of the screen : Screen in power saving mode Position Picture size : Adjust the image size...
- Page 22 On-screen Display Operation ( OSD ) Reset Reset : Return the adjustment back to factory setting PIP ( Not Applicable to F17 ) PIP mode : Enter into PIP / PBP setting - PIP MODE / PBP 2WIN ( Main screen + 1 sub screen ) / PBP 3WIN ( Main screen + 2 sub screen ) / PBP 4WIN ( Main screen + 3 sub screen ) Select the signal input of each sub screen...
- Page 23 < Part 3 > < 3.1 > Options : 3G / HD / SD-SDI input Austin Hughes’ SDI input is an ideal solution for the broadcast-grade video and high resolution CCTV market. Designed for use with CyberView displays, a SDI input...
- Page 24 < 3.2 > Options : MRP-K17 : HDMI 2.0 ( HDCP 2.2 ) M RP -F 17 : HDMI 1.4 ( HDCP 1.4 ) DP 1.0 ( HDCP 1.3 ) M RP -X 1 7 : HDMI 1.4 ( HDCP 1.4 ) MRP-19 : HDMI 1.4 ( HDCP 1.4 )
- Page 25 < 3.3 > Options : Touchscreen & driver Capacitive Touch screen Specifi cation MRP-K17 MRP-F17 MRP-X17 Model TPC-10 Multi-touch Technology Projected Capacitive Touch Point Input Type Finger or Capacitive Stylus Resolution 4096 x 4096 Touch Point Accuracy ± 2 mm Response Speed <...
- Page 26 < 3.3 > Options : Touchscreen & driver TPC-10 Driver Connect the USB cable from the USB port on the LCD to a computer. The touch screen supports easy Plug-and-Play operations. There is no need to install additional drivers on the computer. TRB Driver Please follow the below steps to setup the touch screen:- Step 1.
- Page 27 < 3.4 > Options : DC Power Model 125V 250V Input rating Input voltage: 12-Volt 24-Volt 48-Volt 110-Volt 300-Volt Input range: 9 ~ 18V 18 ~ 36V 36 ~ 75V 66 ~ 160V 180 ~ 425V Input current - No load 50 mA 50 mA 50 mA...
- Page 28 The company reserves the right to modify product specifi cations without prior notice and assumes no responsibility for any error which may appear in this publication. All brand names, logo and registered trademarks are properties of their respective owners. Copyright 2024 Austin Hughes Electronics Ltd. All rights reserved. UM-CV-751-MRP-Q424V1 www.austin-hughes.com...
Need help?
Do you have a question about the CyberView MRP-K17-2L and is the answer not in the manual?
Questions and answers