Advertisement
Quick Links
TM
by:
Instruction Manual
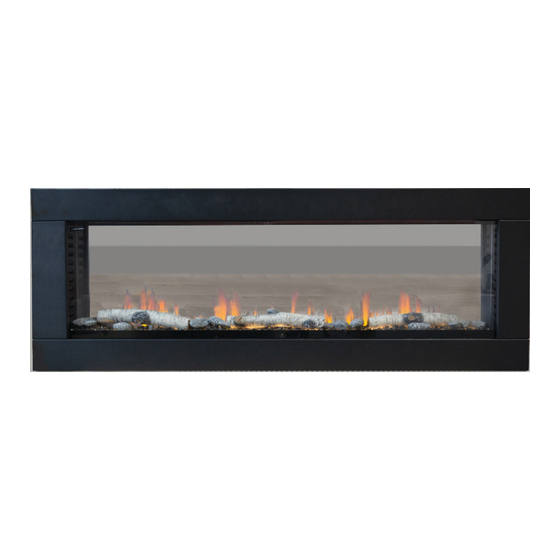
Optic 50
Important Safety Information
Always read this manual first before attempting to install or use this fireplace. For your safety, always comply
with all warnings and safety instructions.
Instructions contained in this manual to prevent personal injury or property damage.
Product
Information
ENGLISH
November 2024
Advertisement

Related Manuals for European Home SUSTAINABLE HEARTH Optic 50


Summary of Contents for European Home SUSTAINABLE HEARTH Optic 50
- Page 1 Instruction Manual Optic 50 Important Safety Information Always read this manual first before attempting to install or use this fireplace. For your safety, always comply with all warnings and safety instructions. Instructions contained in this manual to prevent personal injury or property damage. Product Information ENGLISH...
- Page 3 TABLE OF CONTENTS Important Safety Information....................4 Pre-Installation Planning......................5 Cut Sheet............................8 General Information........................9 Installation...........................11 Electrical Information......................14 Finishing............................18 Operating Instructions......................20 Technical............................22 Maintenance..........................23 Replacement Parts........................26 Troubleshooting........................27 Warranty............................29 IMPORTANT: Ensure that the operating instructions for the unit are left with the customer. Optic See-Through Rev #11/30/24 Sustainable Hearth...
- Page 4 IMPORTANT SAFETY INFORMATION When using electric fireplaces, basic precautions should be followed to reduce the risk of fire, electric shock, and injury to persons, including the following: • WARNING: If the fireplace is damaged, check immediately with your retailer before installation and operation. The heater must not be used if any part of it is damaged.
- Page 5 PRE-INSTALLATION PLANNING PRODUCT INSTALLATION RECORD Installer: Please complete this form. Customer: Please retain this information. Purchased From Date of Purchase Installed By Date of Installation Fireplace Serial Number General Instructions • Prior to plugging your fireplace into an electrical outlet, verify that the house circuit breakers for the outlet are on. •...
- Page 6 PRE-INSTALLATION PLANNING 8. The product should never be sealed into an opening with the use of silicones or adhesives as this can also alter the airflow and hinder any further servicing of the product. 9. For ventilation and normal function of the fireplace ensure a 1/2” [10mm] minimum gap exists between the back of the fireplace and the wall the fireplace is fixed to.
- Page 7 PRE-INSTALLATION PLANNING The appliance comes with medium density fiberboard (MDF board) installed on the sides. Remove fasteners on each side (Fig. 1), and then discard both MDF boards. Use 4 new fasteners (supplied) on each side to cover MDF board fastener holes (Fig. 2). Fitting the Fireplace •...
- Page 8 CUT SHEET OPTIC 11/25/24 INCH 43 5/8” 12” 50” 18 3/8” 47 9/16” 8 1/16” 17 5/8” [MILLIMETER] [1108] [305] [1270] [467] [1208] [205] [448] Net Weight Gross Weight POUNDS 98.1 115.4 [KILOGRAMS] [44.5] [52.3] Description See-Though Electric Appliance Type Electric Appliance Voltage 120V AC...
- Page 9 GENERAL INFORMATION Rating Plate Information Note: The rating plate must remain with the appliance at all times. It must not be removed. WARNING • Risk of fire! The power cord must not be pinched against a sharp edge. Secure cord to avoid tripping or snagging to reduce the risk of fire, electric shock, or personal injury.
- Page 10 GENERAL INFORMATION Determining the Front To determine the front side of the fireplace, the junction box should be located on the left side of the fireplace when the fireplace is viewed from the front side. Alternatively, you can determine the back side of the fireplace by looking for triangular covers on the media tray or by locating the junction box on the right side of the fireplace.
- Page 11 INSTALLATION Minimum Mantel Clearances WARNING • When using paint or lacquer to finish the mantel, the paint or lacquer must be heat resistant to prevent discoloration. Optic See-Through Rev #11/30/24 Sustainable Hearth...
- Page 12 INSTALLATION Framing Important: * This measurement accounts for thickness of wall plus any wallboard materials such as stone, tile, etc. This means the framing plus finishing materials must equal 8”. Example: 1/2” wallboard plus 1/4” tile on each side =(1/2”)2 + (1/4”)2 =1 1/2”...
- Page 13 INSTALLATION Installing the Fireplace Note: It is recommended to have the walls of the fireplace enclosure be finished (i.e. drywall) to avoid exposed insulation or vapor barrier coming in contact with the fireplace. This will ensure clearance to combustibles is maintained. Wall anchors are not required when screwing into the wall stud.
- Page 14 ELECTRICAL INFORMATION WARNING • Turn off the fireplace completely and let cool before servicing. Only a qualified service person should service and repair this electric fireplace. Wiring Diagram Optic See-Through Rev #11/30/24 Sustainable Hearth...
- Page 15 ELECTRICAL INFORMATION WARNING • Turn off the fireplace completely and let cool before servicing. Only a qualified service person should service and repair this electric fireplace. Hard Wiring Connection If it is necessary to hard wire this fireplace, a qualified electrician must remove the cord connection, and wire the fireplace directly to the household wiring.
- Page 16 ELECTRICAL INFORMATION 120V Hard Wire Connection Loosen the securing screw from the terminal block to remove the cord from the terminal block. KEEP 2 WIRE JUMPERS IN THE TERMINAL BLOCK. Add a strain relief and feed the supply wires through the 7/8” (22mm) hole from the terminal lock. Insert White (N) wire from power supply to the designated (N) slots in the terminal block.
- Page 17 ELECTRICAL INFORMATION WARNING INCH 43 5/8” 12” 50” 18 3/8” 47 9/16” 8 1/16” 17 5/8” [MILLIMETER] [1108] [305] [1270] [467] [1208] [205] [448] • This fireplace is for use with 120 volts. Net Weight Gross Weight • A grounded power source is mandatory for this fireplace. POUNDS 98.1 115.4...
- Page 18 FINISHING Media Installation Black Glass - 2 bags, 4 lbs each Logs - 2 boxes, 10 logs per box Twigs - 2 bags, 2 oz each Spread the Black Glass. Spread 1/2 of the Twigs. Add the Logs. Add the remaining Twigs. A.
- Page 19 FINISHING Front Glass Installation / Removal WARNING • Before the front trim or glass is removed or installed, turn off the appliance and wait until it is cool to the touch. • Trim can be heavy and fragile. Handle with care Have 2 people lift the glass up.
- Page 20 OPERATING INSTRUCTIONS WARNING • While the fireplace is operating, do not remove the trim. This will cause the remote control and touch panel to malfunction. Once the fireplace has been plugged into a grounded electrical outlet, it is ready to operate. Remote Control POWER BUTTON ORANGE...
- Page 21 OPERATING INSTRUCTIONS TEMPERATURE CONTROL Sets desired temperature. (OPTIONAL) Fahrenheit Settings Celsius Settings 64°F 18°C 65°F 19°C 66°F 20°C 67°F 21°C 68°F 22°C 69°F 23°C 70°F 24°C 71°F 25°C 72°F 26°C 73°F 27°C 74°F 28°C 75°F 29°C 77°F 30°C 79°F 81°F 86°F 87°F 88°F...
- Page 22 TECHNICAL Technical Parameters Information requirements for electric local space heaters. MODEL Optic 50 WEIGHT Pounds 98.1 [Kilograms] [44.5] VOLTAGE 120V 750/1500W REMOTE BATTERY CR 2025 Note: Weights are of the unit only, not including packaging. Optic See-Through Rev #11/30/24 Sustainable Hearth...
- Page 23 MAINTENANCE Remote Battery Installation WARNING • This remote control requires button batteries that are hazardous to young children. • WARNING - KEEP BATTERIES OUT OF REACH OF CHILDREN • Swallowing may lead to serious injury in as little as 2 hours or death, due to chemical •...
- Page 24 MAINTENANCE Note: Allow the fireplace to completely cool before cleaning it. Cleaning • Turn off before cleaning. • Using a soft, dry cloth, carefully clean the exterior surface of the product. • Do not allow water or other liquids to run into the interior of the product, as this is a hazard. •...
- Page 25 MAINTENANCE Servicing and Maintenance • The air inlet grilles on the TOP and/or BACK and SIDES of the fireplace should be unobstructed. Free air needs to circulate in these areas. • There are no user-serviceable components to this fireplace – do not attempt to service the fireplace. If there are issues that cannot be resolved with your fireplace, then please contact your retailer.
- Page 26 REPLACEMENT PARTS Items may not appear exactly as illustrated. Ref. Part Number Description SH-CP-FRA-OPT-50 Frame Assembly SH-CP-FGA-OPT-50 Face Glass Assembly SH-CP-CGA-OPT-50 Curtain Glass Assembly SH-ES-SM-OPT-50 Stepper Motor SH-ES-MB-OPT-50 Main Board SH-ES-RB-OPT-50 Receiving Board SH-ES-FLAME-LED-OPT-50 Flame LED SH-ES-FB-LED-OPT-50 Fuel Bed LED SH-ES-FHA-OPT-50 Fan Heater Assembly SH-ES-RC-OPT-50...
- Page 27 TROUBLESHOOTING WARNING Turn off the appliance completely and let cool before servicing. Only a qualified service person should service and repair this electric appliance. Symptom Problem Solution Appliance will not House circuit breaker has Reset house circuit breaker. come on when tripped.
- Page 28 TWO (2) YEARS from the date of original retail purchase. If a defect exists, European Home will, at its option, either (1) provide needed components using new or refurbished replacement parts or (2) exchange the product with one which is new or which has been manufactured from new or serviceable used parts and is at least functionally equivalent to the original product.
- Page 29 NOTES Optic See-Through Rev #11/30/24 Sustainable Hearth...
- Page 30 NOTES Optic See-Through Rev #11/30/24 Sustainable Hearth...
- Page 32 INSTRUCTIONS MUST BE KEPT AFTER INSTALLATION FOR FUTURE MAINTENANCE European Home 30 Log Bridge Road Building 300, Suite 303 Middleton, MA 01949 United States...
Need help?
Do you have a question about the SUSTAINABLE HEARTH Optic 50 and is the answer not in the manual?
Questions and answers