Advertisement
Quick Links
Advertisement

Related Manuals for thomann Thon 10U 50


Summary of Contents for thomann Thon 10U 50
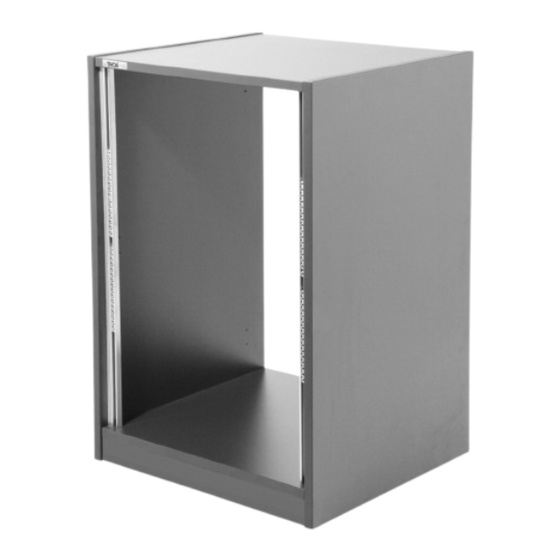
- Page 1 Thon Studio Rack 10U, 12U, 14U, 16U, 18U, 20U 50 Studio rack...
- Page 2 Thomann GmbH Hans-Thomann-Straße 1 96138 Burgebrach Germany Telephone: +49 (0) 9546 9223-0 Internet: www.thomann.de 02.08.2024, ID: 372110, etc. (V5)
- Page 3 Table of contents Table of contents General information........................................5 1.1 Symbols and signal words....................................5 Safety instructions.......................................... 6 Scope of delivery..........................................7 Installation............................................8 Technical specifications......................................16 Protecting the environment....................................22 Thon Studio Rack 10U, 12U, 14U, 16U, 18U, 20U 50 Studio rack...
- Page 4 Thon Studio Rack 10U, 12U, 14U, 16U, 18U, 20U 50 Studio rack...
- Page 5 Our products and documentation are subject to a process of continuous development. They are therefore subject to change. Please refer to the latest version of the documentation, which is ready for download under www.thomann.de. 1.1 Symbols and signal words In this section you will find an overview of the meaning of symbols and signal words that are used in this document.
- Page 6 Safety instructions Safety instructions Intended use This product is designed for the permanent installation of 19-inch devices. Use the product only as described in this user manual. Any other use or use under other operating conditions is considered to be improper and may result in personal injury or property damage.
- Page 7 Scope of delivery Scope of delivery Before you assemble your rack, make sure the contents of package is complete according to the following list. Thon Studio Rack 2 × side panel, melamine-coated 19-mm furniture board 1 × floor panel, melamine-coated 19-mm furniture board 1 ×...
- Page 8 Installation Installation Place all components on a suitable mounting surface for mounting. Use a soft pad in order to avoid damage to the surfaces. Overview The following figure shows an overview of the positioning of the individual components. ö & &...
- Page 9 Installation Preparing the components Floor panel Connector housing Base Connecting bolt Cover panel Insert the connector housings and connecting bolts into the designated blind holes in the floor panel (4 × connecting bolts, 6 × connector housings), the cover panel (6 × connector housings) and the bases (2 × connector housings each). Once inserted, the connecting bolts sit loosely in the drill holes and only spread apart when the connector housings on the associ‐...
- Page 10 Installation Assembling the base Floor panel Base Place each of the two bases on two connecting bolts of the floor panel. Make sure that the connector housings are posi‐ tioned so that the connecting bolts can be inserted. Turn the connector housings clockwise to lock the connection with the inserted bolts. Check that both bases have a firm seat, and turn over the pre-assembled unit.
- Page 11 Installation Mounting rack rails & & Rack strips Wood screws Screw the rack strips into the rack on the inside so they are parallel the front edge, using the 24 wood screws supplied. The assembly position of the front rack strips supplied and optional rack strips for rear assembly is dependent on the required installation depth.
- Page 12 Installation Assembly of optional doors Strike plate System screw Glass door Countersunk screws The lock of the lockable door is pre-assembled. Check for tightness and, if required, re-tighten the fixing nuts of the lock before assembling the door. For the assembly of the optional glass door, a minimum distance of 75 mm must be provided between the front outer edges and the rack strips (see figure).
- Page 13 Installation Strike plate System screw Furniture door Countersunk screws The lock of the lockable door is pre-assembled. Check for tightness and, if required, re-tighten the fixing nuts of the lock before assembling the door. For the assembly of the optional furniture door, a minimum distance of 75 mm must be provided between the back outer edges and the additional rack strips (see figure).
- Page 14 Installation Assembly of optional casters Casters Countersunk screws Turn the rack upside down for the assembly of the castors. Screw the four castors to the underside of the rack using four screws each. Thon Studio Rack 10U, 12U, 14U, 16U, 18U, 20U 50 Studio rack...
- Page 15 Installation Rack with assembled glass door Rack with assembled furniture door Thon Studio Rack 10U, 12U, 14U, 16U, 18U, 20U 50 Studio rack...
- Page 16 Technical specifications Technical specifications Thon Studio Rack 10U 50 Thon Studio Rack 10U 50 BK, graphite Item no. 372363 Thon Studio Rack 10U 50 WH, white Item no. 375266 Thon Studio Rack 10U 50 oak Item no. 512927 Thon Studio Rack 10U 50 maple Item no.
- Page 17 Technical specifications Thon Studio Rack 12U 50 Thon Studio Rack 12U 50 BK, graphite Item no. 372110 Thon Studio Rack 12U 50 WH, white Item no. 375268 Thon Studio Rack 12U 50 oak Item no. 512946 Thon Studio Rack 12U 50 maple Item no.
- Page 18 Technical specifications Thon Studio Rack 14U 50 Thon Studio Rack 14U 50 BK, graphite Item no. 372118 Thon Studio Rack 14U 50 WH, white Item no. 375285 Thon Studio Rack 14U 50 oak Item no. 512953 Thon Studio Rack 14U 50 maple Item no.
- Page 19 Technical specifications Thon Studio Rack 16U 50 Thon Studio Rack 16U 50 BK, graphite Item no. 372123 Thon Studio Rack 16U 50 WH, white Item no. 375289 Thon Studio Rack 16U 50 oak Item no. 512965 Thon Studio Rack 16U 50 maple Item no.
- Page 20 Technical specifications Thon Studio Rack 18U 50 Thon Studio Rack 18U 50 BK, graphite Item no. 372126 Thon Studio Rack 18U 50 WH, white Item no. 375291 Thon Studio Rack 18U 50 oak Item no. 512966 Thon Studio Rack 18U 50 maple Item no.
- Page 21 Technical specifications Thon Studio Rack 20U 50 Thon Studio Rack 20U 50 BK, graphite Item no. 372155 Thon Studio Rack 20U 50 WH, white Item no. 375293 Thon Studio Rack 20U 50 oak Item no. 512968 Thon Studio Rack 20U 50 maple Item no.
- Page 22 Protecting the environment Protecting the environment Disposal of the packing material Environmentally friendly materials have been chosen for the packaging. These materials can be sent for normal recycling. Ensure that plastic bags, packaging, etc. are disposed of in the proper manner. Do not dispose of these materials with your normal household waste, but make sure that they are collected for recycling.
- Page 24 Musikhaus Thomann · Hans-Thomann-Straße 1 · 96138 Burgebrach · Germany · www.thomann.de...
Need help?
Do you have a question about the Thon 10U 50 and is the answer not in the manual?
Questions and answers