
Related Manuals for thomann t.racks Thon Studio Rack 10U


Summary of Contents for thomann t.racks Thon Studio Rack 10U
- Page 1 Thon Studio Rack 10U, 12U, 14U, 16U, 18U, 20U 50 studio rack assembly instructions...
- Page 2 Musikhaus Thomann Thomann GmbH Hans-Thomann-Straße 1 96138 Burgebrach Germany Telephone: +49 (0) 9546 9223-0 E-mail: info@thomann.de Internet: www.thomann.de 16.10.2015, ID: 372110, 372118, 372123, 372126, 372155, 372363...
-
Page 3: Table Of Contents
Table of contents Table of contents Safety instructions.......................................... 4 Scope of delivery..........................................5 Installation............................................6 Technical specifications......................................12 Protecting the environment....................................14 Thon Studio Rack 10U, 12U, 14U, 16U, 18U, 20U 50... -
Page 4: Safety Instructions
Safety instructions Safety instructions DANGER! Danger for children Ensure that plastic bags, packaging, etc. are properly disposed of and are not in the reach of babies and young children. Choking hazard! Ensure that children do not detach any small parts (e.g. knobs or the like) from the product. They could swallow the pieces and choke! Never let children play unattended with the product. -
Page 5: Scope Of Delivery
Scope of delivery Scope of delivery Before you assemble your rack, make sure the contents of package is complete according to the following list. Thon Studio Rack 2 × side panel, coated 18 mm wooden board 1 × floor panel, coated 18 mm wooden board 1 ×... -
Page 6: Installation
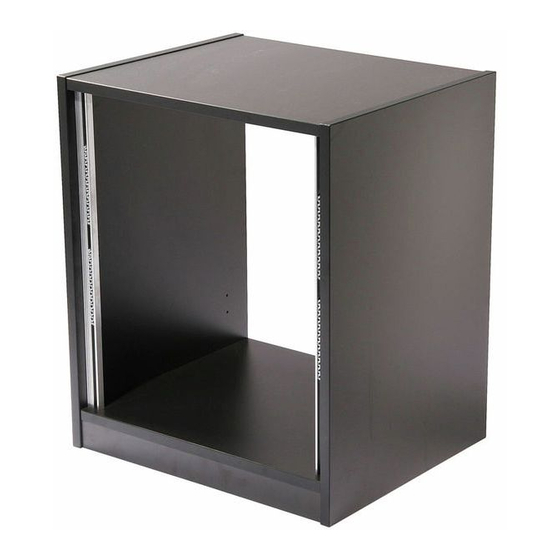
Installation Installation Overview The following figure provides an overview of the positioning of the individual components. Side panels. Floor panel. Base. Cover panel. Rack rails. studio rack... - Page 7 Installation Preparation of components Barrel nuts. Locating pins. Put the barrel nuts in the designated blind holes in the floor panel, the cover panel and the bases. Thon Studio Rack 10U, 12U, 14U, 16U, 18U, 20U 50...
- Page 8 Installation Press the locating pins in the designated blind holes in the floor panel and the side panels. Base mounting Place the floor panel onto a suitable mounting surface. Use a soft padding to avoid damage to the surface of the panel. Set both bases onto each two locating pins.
- Page 9 Installation Side and cover panel mounting First push a side panel on the locating pins of the floor panel. Ensure that the barrel nuts are positioned so that the locating pins can be latched. Tighten the barrel nuts with a screwdriver hand tight (clockwise rotation). Check the assembled side panel for firm seating and place the pre-assembled on the side panel.
- Page 10 Installation Tighten the barrel nuts with a screwdriver hand tight (clockwise rotation). Put the second side panel on the locating pins of the floor and cover panel. Ensure that the barrel nuts are positioned so that the locating pins can be latched. Tighten the barrel nuts with a screwdriver hand tight (clockwise rotation).
- Page 11 Installation Rack rail mounting Then screw both rack rails using the supplied wood screws inside the rack. The mounting position here is depending on the required installation depth. If desired, leave enough space on the front edge for the subsequent installation of a door (not included).
-
Page 12: Technical Specifications
Technical specifications Technical specifications Artnr. 372363 Thon Studio Rack 10U 50 Item no. 372363 Rack units Installation depth max. 495 mm Dimensions (W × H × D) 540 mm × 545 mm × 500 mm Weight approx. 16.3 kg Artnr. 372110 Thon Studio Rack 12U 50 Item no. - Page 13 Technical specifications Artnr. 372126 Thon Studio Rack 18U 50 Item no. 372126 Rack units Installation depth max. 495 mm Dimensions (W × H × D) 540 mm × 905 mm × 500 mm Weight approx. 22 kg Artnr. 372155 Thon Studio Rack 20U 50 Item no.
-
Page 14: Protecting The Environment
Protecting the environment Protecting the environment Disposal of the packaging material For the transport and protective packaging, environmentally friendly materials have been chosen that can be supplied to normal recycling. Ensure that plastic bags, packaging, etc. are properly disposed of. Do not just dispose of these materials with your normal household waste, but make sure that they are collected for recycling. - Page 16 Musikhaus Thomann · Hans-Thomann-Straße 1 · 96138 Burgebrach · Germany · www.thomann.de...
Need help?
Do you have a question about the t.racks Thon Studio Rack 10U and is the answer not in the manual?
Questions and answers