Table of Contents
Advertisement
Quick Links
Advertisement
Table of Contents

Subscribe to Our Youtube Channel
Related Manuals for Shini Budget SGD-EB


Summary of Contents for Shini Budget SGD-EB
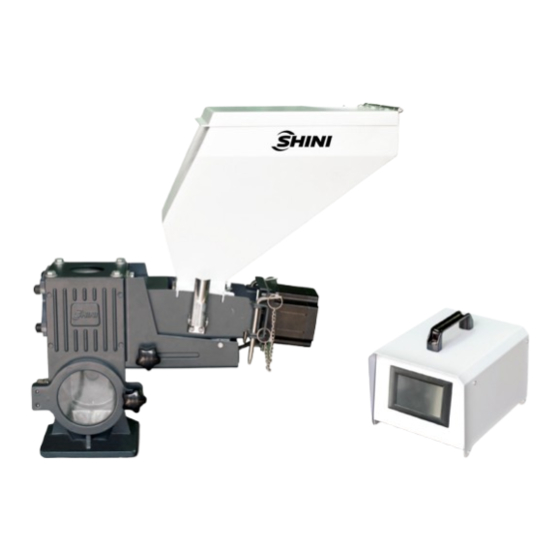
- Page 1 SGD-EB "Budget" Series Gravimetric Doser Date: Nov. 2022 Version: Ver.A (English)
-
Page 3: Table Of Contents
Contents General Description ..................5 1.1 Coding Principle ..................6 1.2 Features ....................6 1.3 Machine Specifications ................8 1.3.2 Base Installation Dimensions ............8 1.3.3 Specification List................9 1.4 Safety Regulations ................10 1.4.1 Safety Signs and Labels ............. 10 1.4.2 Signs and Labels ................ - Page 4 Maintenance and Repair ................28 6.1 Repair ....................28 6.2 Maintenance ..................28 6.3 Maintenance Schedule ................. 28 6.3.1 About the Machine..............28 6.3.2 Check after Installation ............... 28 6.3.3 Daily Checking ................28 6.3.4 Weekly Checking ................ 28 Table Index Table 1-1: Specification List of Dimensions ............
-
Page 5: General Description
1. General Description Please read this manual carefully before installation and using of the machine to avoid damage or personal injuries. SGD "Budget" Series Gravimetric Doser are suitable for auto-proportional mixing of virgin material, regrinds, masterbatch or additives. A stepping motor is coupled to a dosing screw of 12, 16, 20, and 30mm diameter to offer four models with different output ranging from 0.04 to 60kg/hr to clients. -
Page 6: Coding Principle
1.1 Coding Principle 1.2 Features Dosing screws are chrome plated for durability. Unit is comprised of standard modules for ease of cleaning, disassembly and interchangeability. Three-tube hopper magnet is equipped at the base to absorb metal scraps in the material to avoid the damage of screw. - Page 7 Chapter 6 contains service instructions intended for service engineers. Other chapters contain instructions for the daily operator. Any modifications of the machine must be approved by SHINI in order to avoid personal injury and damage to machine. We shall not be liable for any damage caused by unauthorized change of the machine.
-
Page 8: Machine Specifications
1.3 Machine Specifications Single Color Double Color Picture 1-1: Dimensions 1.3.1 Dimensions of Control Box Picture 1-2: Dimensions of Control Box 1.3.2 Base Installation Dimensions Picture 1-3: Dimensions of Base 8(28) -
Page 9: Specification List
1.3.3 Specification List Table 1-1: Specification List of Dimensions Double Color Single Color Unit Unit Model SGD-12-EB SGD-16-EB SGD-20-EB SGD-30-EB SGD-D-EB Ver. A Motor Power (kW) 0.06 0.06 0.06 0.06 0.06×2 (50/60Hz) Mixer Power (kW, 50 0.25 0.25 0.25 0.25 0.25 / 60Hz) Screw External Dia. -
Page 10: Safety Regulations
1.4 Safety Regulations Strictly abide by the following safety guide to prevent damage of the machine or personal injuries. Safety regulations should be abided by while operating the machine. 1.4.1 Safety Signs and Labels All the electrical components should be installed by qualified electricians. Turn off the main switch and control switch during maintenance or repair. -
Page 11: Exemption Clause
Shini (including employees and agents). Shini is exempted from liability for any costs, fees, claims and losses caused by reasons below: 1. Any careless or man-made installations, operation and maintenances upon machines without referring to the Manual prior to machine using. -
Page 12: Structure Characteristics And Working Principle
2. Structure Characteristics and Working Principle 2.1 Function Description SGD-EB "Budget" Series Gravimetric Doser are suitable for auto-proportional mixing of virgin material, regrinds, masterbatch or additives. The motor with gear ratio of 38:1 is coupled to a dosing screw of 12,16,20 or 30mm in diameter to give a total of four models with the output ranging from 0.04~60kg/hr. -
Page 13: Mixer System
According to the main hopper required by customers. Fig. 2-2 Main hopper 2.3.2 Mixer system According customer’s demands to select the mixing system; Notes: The Arabic numerals in the drawing refer to Parts List 2.3.3. Fig. 2-3: Mixer system 2.3.3 Mixer Assembly Parts List Name Material No. -
Page 14: Floor Stand
2.3.4 Floor stand It requires SHD-100~300kg according to customer’s demands, and SHD-160U~450U needs this optional floor stand. Fig. 2-4: Floor stand 14(28) -
Page 15: Installation And Debugging
Installation and Debugging Please read through this chapter and install according to the order as below before installation! This series of model can only be used in working environment with good ventilation. The doser power connection must be done professional electrician! 3.1 Power Connection Connect power 1 Φ... -
Page 16: Application And Operation
Application and Operation 4.1 Operation Description Turn on the power and enter the following screen: 4.1.1 Configuration parameter settings When users change parameter settings, it requires to input password: 55555 Click the parameter icon to enter the screen as below: Click machine parameter icon to enter the screen as below: 16(28) - Page 17 1) It means whether the set finished weight has decimal point display; 2) Mixing motor: start this item when installing the mixing motor; 3) Deviation alarm: set the output weight deviation percentage, when the output weight is greater than the set value, it will alarm; 4) Weight detection: when started (ON), it will recalculate three times after it runs 20 times, and adjusts the speed automatically;...
- Page 18 Click the loading parameter icon to enter the screen as below: 1) Low level: set the weight of hopper shortage alarm; 2) Feed supplement : Set auto feeding weight; 3) Feed supplement stop: set the weight of auto feeding 4) High level: set the weight of hopper over-weight alarm; 5) The maximum time: set the maximum time of feed supplement.
- Page 19 1) Adjust the "extruder" first, and adjust this production required maximum speed (DC 0 ~ 10V). 2) Press the extruder calibration, it will appear calibration page. First, stop the extruder, and add 2-3 to the value appearing in the "analog value of extruder tachometer".
- Page 20 1) Protocol:MUDBUS-RTU 2) Address:1(1-255) 3) Rate:19200bps (9600bps,19200bps, 38400bps, 57600bps) 4) Data length:8bit (The default can’t be changed) 5) Stop bit:1bit (The default can’t be changed) 6) Check bit:None (The default can’t be changed) Press the parameter key at the bottom right corner to return to screen as below: Press the return button at the bottom right corner to return to the screen as...
- Page 21 Click the cleaning icon to enter the screen as below: Press the cleaning time button, the cleaning time will be popped up in the window. Press the start cleaning button, the system will run according to the set time to remove the residues inside the screw.
-
Page 22: Calibration And Recipe Settings
Press the return button at the bottom right corner to return to the screen as below: 4.1.2 Calibration and Recipe Settings Click the sampling icon to enter the following screen: Scale calibration: If it enters this screen for the first or re-calibration, first clean the materials in the hopper, and input the weight to keep hopper cover opened or closed. - Page 23 Press the return key at the lower right corner to return to the screen as below: Click the recipe icon to enter the screen as below: Screen in extruder mode Screen in injection mode 1) Finished weight After pressing it, the keyboard will pop up that can set the finished product weight of each mould (extruder capacity).
-
Page 24: Production Operation
4) Masterbatch additional unit After pressing it, the keyboard can be popped up that can set the unit of gram or percentage when adding the masterbatch; 5) Screw rotating speed setting After pressing it, the keyboard will pop up that can set the screw rotation speed. - Page 25 Screen in extrusion mode After selecting the operation mode, relevant parameters can be set, and press the startup key. If has signal in the injection mode, the machine will discharge the materials according to set melting time (in the extrusion mode- machine will discharge if there’s 0-10V voltage input).
-
Page 26: Material Replacement
4.2 Material replacement 1. Loose the hopper snap hook to pull out the hopper with the screw, rotate the screw fixed plate, loose the screw, remove the screw and pour out the masterbatch. It also can use the compressed air to blow away masterbatch residuals. -
Page 27: Trouble Shooting
Trouble Shooting Failures Possible reasons Solutions 1. Power supply not 1. Connect power supply. connected No indicates on the control cabinet. 2. Fuse burnt out or control 2. Replace the fuse or check control board. board damaged Metering motor does not Metering motor wire loose or Fasten motor wire or replace metering work. -
Page 28: Maintenance Schedule
Maintenance and Repair 6.1 Repair All the repair work should be done by qualified technicians to prevent personal injuries and damage of the machine. 6.2 Maintenance Keep the surface of machine clean. 6.3 Maintenance Schedule 6.3.1 About the Machine Model Manufacturing date : Ф...
Need help?
Do you have a question about the Budget SGD-EB and is the answer not in the manual?
Questions and answers