ZAPTEC Pro Manual
- Installation manual (220 pages) ,
- User manual (96 pages) ,
- User manual (72 pages)
Advertisement
- 1 Introduction
-
2
Technical Specifications
- 2.1 Electrical
- 2.2 Connectivity
- 2.3 Integrated energy meter
- 2.4 MID model only: integrated energy meter
- 2.5 Zaptec Pro
- 2.6 Status Indicators on the Charging Station
- 2.7 Cable
- 2.8 How to Start Charging
- 2.9 How to Start Charging with Authentication
- 2.10 How to Stop Charging
- 2.11 Connecting a Charging Pass to your User
- 2.12 MID Model: Integrated MID Certified Energy Meter
- 2.13 How to Monitor the Charging Station (Zaptec Portal)
- 2.14 Adding Users to the Installation
- 2.15 Locking the Charging Cable for the Charging Station
- 2.16 Set Lighting Strength for the Status Indicator
- 2.17 Reading Error Codes
- 3 Troubleshooting
- 4 Check the Circuit Breaker in the Charging Station
- 5 Storage and Maintenance
- 6 Keeping You Secure
- 7 Safety Instructions
- 8 Documents / Resources
Introduction
A Norwegian charging system. The system is compatible with all power grids and with all types of rechargeable vehicles.*
Zaptec Pro enables you to charge your vehicle safely, simply and efficiently. The charging station distributes the available charging current between a number of charging stations.
Use your Zaptec Pro with a charging pass or through our Zaptec app to approve users in the installation. This will provide you with an overview of your charging history via our cloud-based service (Zaptec Portal).
When you purchase Zaptec Pro, you have purchased a charging station which regularly receives software updates from our cloud-based service to ensure that your charger is always updated.
* Provided that the vehicle supports the type of power grid concerned.
Technical Specifications
Electrical
| Parameter | Test condition | Min | Typ | Max | Unit |
| Standby power consumption | 3 | W | |||
| Maximum charging power | TN 3 phase @ 32 A | 22 | kW | ||
| TN 1 phase @ 32 A | 7.4 | ||||
| IT 3 phase @ 32 A | 12.7 | ||||
| IT 1 phase @ 32 A | 7.4 |
Connectivity
| Protocol | Supported standards |
| 4G | LTE Cat M1 |
| Wi-Fi | 802.11b/g/n (2.4 GHz) |
| Bluetooth | Bluetooth v5.1 (BR/EDR/BLE) |
| Powerline (PLC) | HomePlug Green PHY, 10 Mbit/s |
| Plug and charge | Hardware support for ISO15118 |
| RFID | ISO/IEC 14443 A (Type A, 13.56 MHz) ISO/IEC 15693 (Mifare classic, 13.56 MHz) |
Integrated energy meter
| Parameter | Test condition | Min | Typ | Max | Unit |
| Accuracy | Line voltage, current, and power factor | -2 | 2 | % | |
| Line voltage, current, power factor and temperature | -3 | 3 | % |
MID model only: integrated energy meter
| Parameter | Value |
| Certification | MID Class B |
| Harmonized Standard | EN 50470-1:2006, EN 50470-3:2006 |
| Notified Body | Justervesenet (0431) / NMi Certin (0122) |
| Rated Voltage | 3 x 230/400 V |
| Rated Current | 0.25-5 (32) A |
| Optical Test Output (must be activated in the app) | 10000 imp/kWh |
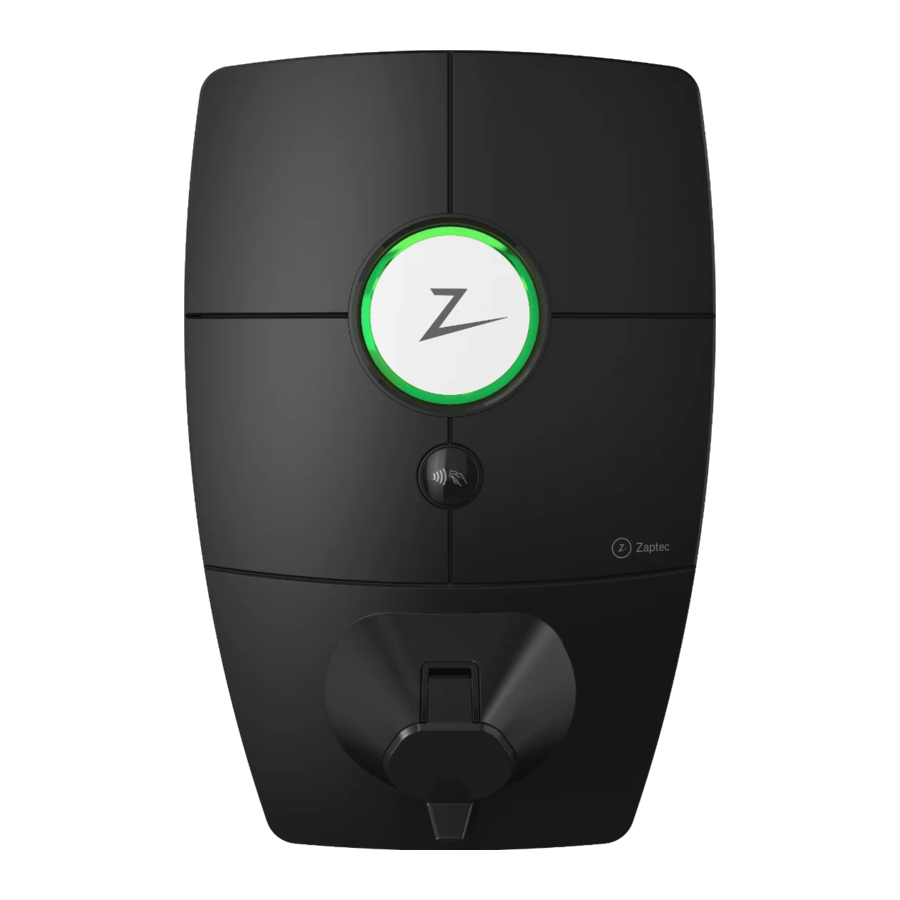
Zaptec Pro

Status Indicators on the Charging Station
The status of the charging station is shown by the status indicator (Z) using the following colours:
| Colour | Continuous | Flashing |
 | Ready to charge Charging complete | Authentication OK |
 | Connected to a vehicle and ready to charge | Charging |
 | Error (see the Troubleshooting section for further details) | Authentication failed (see the Troubleshooting section for further details) |
 | System starting up Awaiting authentication Awaiting Zaptec Portal Vehicle added to queue | |
 | Firmware updating |
Cable

Zaptec Pro needs a Type 2 charging point in order for you to be able to charge
How to Start Charging
- Check that the status indicator (Z) is illuminated green.
- Remove the protective cover to gain access to the electrical outlet.
- Attach the charging connector to the Zaptec Pro.
- Attach the charging connector to your vehicle.
- The status indicator will flash blue once charging has started.
 Charging current may vary depending on the capacity of the installation and the number of active charging stations.
How to Start Charging with Authentication
Charging with authentication requires you to have registered a user profile via Zaptec Portal and for your user profile to have had access granted to them (via Zaptec Portal) to the charging station/facility. The charging pass is linked to your user.
For details on how to set this up, see the section Connecting a Charging Pass to Your User.
The recommended authentication method is to use a charging pass.
Start charging with an authentication RFID tag/charging card:
- Follow steps 1–4 in How to Start Charging.
- The status indicator (Z) will now flash yellow to indicate that it is awaiting authentication.
- Hold the charging pass up to the RFID zone; see the illustration in the section Zaptec Pro.
- The status indicator will flash green once authentication is approved.
- The status indicator will flash blue once charging has started.
If the status indicator is flashing red, see the Troubleshooting section for further details.
Start charging with authentication for automatic payment solution/operator
- The user must be created/activated for the payment solution/operator concerned.
- Follow the instructions from the applicable payment solution/operator for authentication and to start charging.
How to Stop Charging
- To interrupt the charging process: Stop charging as recommended in your car's user manual.
- Disconnect the charging connector from the vehicle.
- Disconnect the charging connector from the charging station.
- Place the protective cover over the charging point to limit exposure to dust and rain.
Connecting a Charging Pass to your User
Zaptec Pro supports the most commonly used charging passes (Mifare Classic). If you have a visually readable code, this can be added via Zaptec Portal or by scanning the charging pass using the charging station as described below. Your user profile must have access to the installation you wish to use. This must be done by admin/installation owner in Zaptec Portal.
- Download the Zaptec app from App Store/Google Play.
- Register as a user and log in to the Zaptec app.
- Go to the menu, select user profile and add a new charging card. Then follow the instructions in the Zaptec app.
MID Model: Integrated MID Certified Energy Meter
Zaptec Pro has an integrated MID certified energy meter. Your charging station is individually calibrated to ensure accurate measurements every time. MID class B certification offers the same accuracy used in most home energy meters around the world. Display shows the total energy delivered over the lifespan of the charging station. To view your session energy, you can use Zaptec App, Zaptec Portal or if applicable your eMobility Service Provider. For more technical information about the MID energy meter, please visit https://zaptec.com/mid.
How to Monitor the Charging Station (Zaptec Portal)
You can log in via Zaptec Portal to see all your charging stations and all the charging stations that you are registered to use. If you are the owner of an installation, you can monitor all use, and you can use this information to share the electricity cost fairly. The installation or owner of the installation must add you as a user of the installation in order for you to be able to see the information.
Log in or register as a new user at https://portal.zaptec.com
Adding Users to the Installation
The installation owner can add users of the system by going to 'access'. Here, new users can be added, invited or removed from the system. This assumes that authentication (user control) has been activated on the installation.
Locking the Charging Cable for the Charging Station
The charging cable can be locked permanently to the charging station.
This feature is activated via the Zaptec app.
- Log in to the Zaptec app (can be App Store
![www.apple.com]()
/Google Play).
![play.google.com]()
- Go to settings and select the desired charging station.
- Enter the PIN code for the charging station concerned and activate Lock cable for this charging station.


Set Lighting Strength for the Status Indicator
- Log in to the Zaptec app.
- Click on the cog in the top right hand corner of the app home page.
- Select the charging station that you wish to amend the settings for.
- Enter the PIN code for the charging station
- The lighting strength can be adjusted by using the slider under 'Lighting strength for status indicator'.
Reading Error Codes
- Log in to the Zaptec app.
- Click on the cog in the top right hand corner of the app home page.
- Select the charging station that you want to view the error code for.
- Once the app has connected to the charging station, a red field will be displayed when the charger has active error codes. Click on this field to show the details of the active error codes.
Troubleshooting
Warnings/error messages are displayed in the Zaptec Portal /Zaptec App.
| Problem | Solution |
| Cannot log on to the Zaptec Portal | Reset password by clicking on 'Forgotten Password' |
| Cannot create installation via the Zaptec Portal | Contact Zaptec Support to gain access to create installations. |
| Charging station is not online, 4G installation |
|
| The charging station is not online, PLC installation |
|
| The charging station is not online, WiFi installation |
|
| Charging does not start | Check that the user profile has access to charge on the charging station |
| No power being supplied to charging station |
|
Colours & Meaning
| Colour | Meaning |
| NO LIGHT | Charging station has not been activated in the Zaptec Portal, no power from the power circuit, incorrect connection or product fault. Check the serial protection in the distribution cabinet. |
 | Not updated during charging. |
 |
|
 |
|
 | Flashing red light
Steady red light
|
If the charging station has been disconnected from the power network, it will take 2–3 minutes before the charging station starts up again.
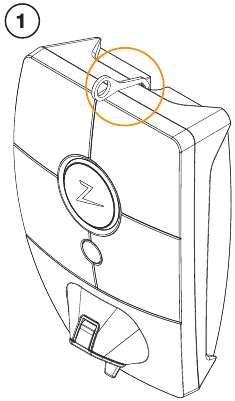
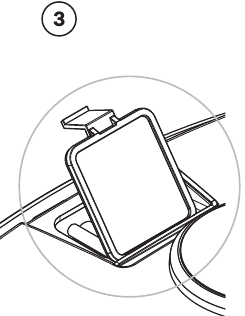
Check the Circuit Breaker in the Charging Station
- Remove the front cover using the SmartKey* special tool supplied with the charging station, and take the front cover off.
![]()
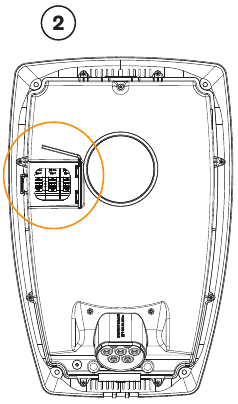
- Check that the circuit breakers in the circuit breaker window have not tripped (they should all face upwards).
![]()
- If any of the circuit breakers have tripped, remove the circuit breaker cover using the snap cover and flip the circuit breakers up again. Fit the circuit breaker cover as in step two and clip the cover into place.
![]()
* If the charging station is mounted on a Zaptec Column, you must use a SmartKey Column (supplied with the column) in order to access the charging station.
Storage and Maintenance
The product must be stored in a cool, dry place. The protective cover must always be fitted when the product is not in use.
The following periodic maintenance is recommended:
- Wipe down the charging station with a damp cloth.
- Make sure there are no foreign objects in the charging connector.
- Check that the charging station has no physical external damage.
Periodic checks should be carried out on all publicly accessible installations, in accordance with local legislation.
Keeping You Secure
Every Zaptec charger is designed to provide the highest possible level of security.
Your charger is configured with a security PIN to control access to certain functions. You should keep this PIN safe and not reveal it to anyone you do not trust.
To ensure your charger remains secure, Zaptec will continue to provide software updates for your charger for a minimum of five years from the date of purchase. You can check for updates and install them using the Zaptec app or Zaptec portal.
Please visit zaptec.com/support to notify us of any concerns regarding the security of your charger or request the removal of any personal data.
Safety Instructions

Before using or maintaining this product, it is important to read the following safety instructions. If you fail to follow and implement all the specified instructions and procedures, you will invalidate the warranty and Zaptec Charger AS will not be liable for any claims for compensation.
- Read these instructions carefully and examine the equipment to familiarise yourself with the product prior to use.
- This equipment may only be installed, repaired and maintained by qualified personnel.
- All applicable local, regional and national regulations must be followed when installing, repairing and maintaining this equipment.
- Do not use this product if it is damaged. See the section Support and Repairs for further information.
- Do not use an extension lead on the charging cable.
- Do not touch the plugs or insert foreign objects into them.
- Do not insert measuring pins, wires or anything else into the quick-release connector on the charging station. Contact your electrician for testing.
- Adapters are permissible – a conversion adapter from the EVSE plug must only be used if specified and approved by the vehicle manufacturer or EVSE producer.
Documents / Resources
References
Download manual
Here you can download full pdf version of manual, it may contain additional safety instructions, warranty information, FCC rules, etc.
Advertisement


Need help?
Do you have a question about the Pro and is the answer not in the manual?
Questions and answers