Advertisement
EZ1 system installation
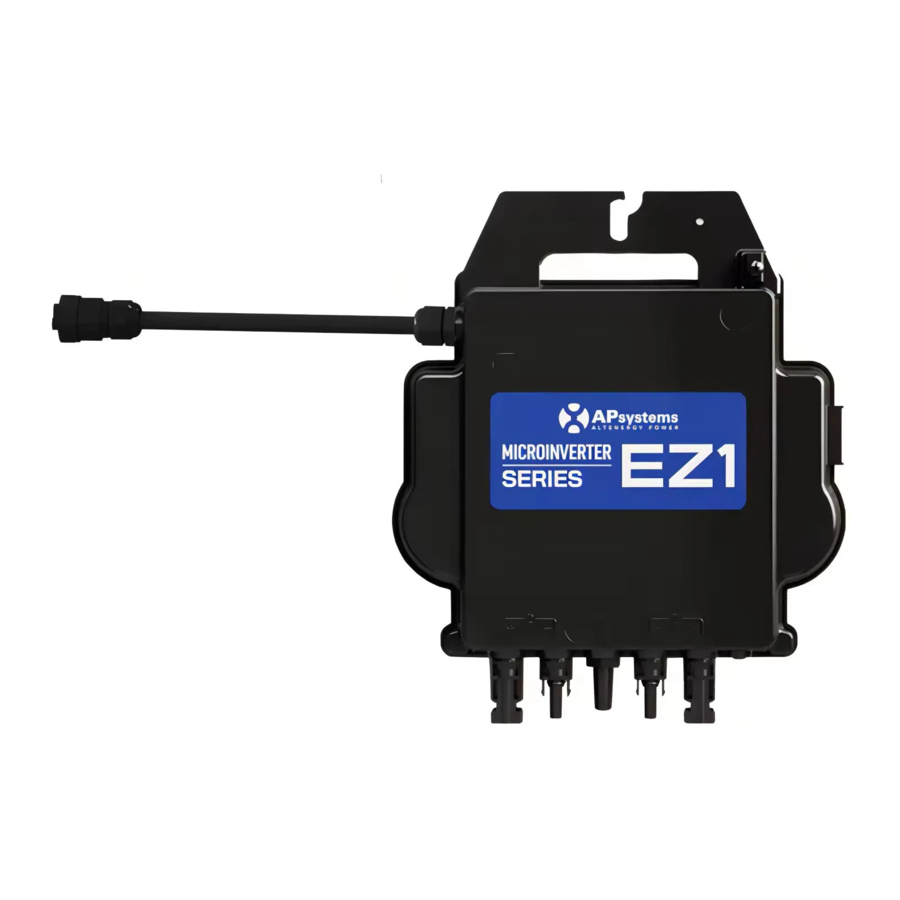
The EZ1 series APsystems Microinverter is used in balcony and DIY systems which comprised of the below key elements:

- PV modules
- Power Cord
- EZ1 series microinverter
- Router
- Cell phone
EZ1 series microinverters have 2 input channels with independent MPPT and high input current and output power to adapt to today's larger power module (EZ1-SPE microinverters have 1 input channel). Users could directly connect to the Wi-Fi version of EZ1 with their cell phones through Bluetooth and get the real-time data of the solar systems. Besides direct connection, Wi-Fi version of EZ1 could also connect to a router through Wi-Fi and send data to cloud servers for remote monitoring.
Through a power cord provided by APsystems, EZ1 could be plugged into a socket and start output energy, truly easy and convenient grid connection.
- Verify that grid voltage matches microinverter rating
Do NOT carry the microinverter by the AC cable. This may cause the AC cable to partially or fully disconnect from the unit, resulting in no or poor operation.
![]()
- Install the microinverters in proper position
The Microinverter EZ1 can be installed on the balcony wall or fixed to the railing using cable ties. Select an appropriate installation method based on your actual scenario to ensure that the EZ1 is securely installed.

NOTE: Install the microinverters in proper position to avoid direct exposure to rain, UV or other harmful weather events. - Connect APsystems microinverters to the PV modules

When plugging in the DC cables, the microinverter should immediately blink green ten times. This will happen as soon as the DC cables are plugged in and will show that the microinverter is functioning correctly. This entire check function will start and end within 10 seconds of plugging in the unit, so pay careful attention to these lights when connecting the DC cables.
NOTE: Each PV panel must be carefully connected to the same channel. Make sure to not split positive and negative DC cables into two different input channels: microinverter will become damaged and warranty will not apply.

- Connect the APsystems microinverter to power cord
Insert the microinverter AC connector into the power cord connector.

- Insert the power cord into the socket


Install APP

- Go to App Store

- Search "AP EasyPower"
- Download and install
NOTE: iOS: 10.0 and up

- Go to Google Play Store

- Search "AP EasyPower"
- Download and install
NOTE: Android: 7.0 and
Please scan this QR code to have access to our APPs.

Connect the EZ1
AP EasyPower offers two modes "Direct Connect Mode"and "Remote Mode" to monitor the device.

Direct Connect Mode: APP connects to Bluetooth of the device, so that users can realize local monitoring and control of the device.
Remote Mode: Login account, users can realize remote monitoring and control of the device.
NOTE: In the absence of Wi-Fi, users can monitor and control the device in direct connection mode.
NOTE: You are able to link up to 2 devices to your account, just repeat the linking device operations until linking all your devices.
Monitor & Control
On this page, user can visualize
- Live Data: The real-time data of the device in current round, including the power, energy, running time, working status and the cloud status.
- Working status
Normal: The device is working normally.
Alarm: The device has alarms and you need to check it. - Cloud status
Online: The device is connecting the cloud service through the internet.
Offline: The device is not connecting the cloud service through the internet, maybe the device is not connected the Wi-Fi or the router is down.
- Working status
- Benefits Overview: The lifetime energy produced by the device and the equivalent CO2 reduction.
By pressing "alarm icon" to check the alarm information if the device status is alarm.
By pressing "setting icon" to set the device. The setting page is shown below.


NOTE: For Connection and monitoring operation mode, please refer to the AP EasyPower User Manual.
Documents / Resources
References
Download manual
Here you can download full pdf version of manual, it may contain additional safety instructions, warranty information, FCC rules, etc.
Advertisement


Need help?
Do you have a question about the EZ1 Series and is the answer not in the manual?
Questions and answers