Advertisement
- 1 Device Overview
- 2 Preparing Your Home
-
3
Before Use
- 3.1 Connect to an Electrical Outlet
- 3.2 Positioning and Installing the Base Station Ramp Extension Plate
- 3.3 Remove the Protections
- 3.4 Turn on the Robot and Install the Side Brush and Mop Assembly
- 3.5 Connect the Robot to the Base Station
- 3.6 Install the Cleaning Solution Bottle
- 3.7 Add Water to the Clean Water Tank
- 4 Connecting with the Dreamehome App
- 5 How to Use
- 6 Routine Maintenance
- 7 Troubleshooting
- 8 Specifications
- 9 Safety Instructions
- 10 Documents / Resources
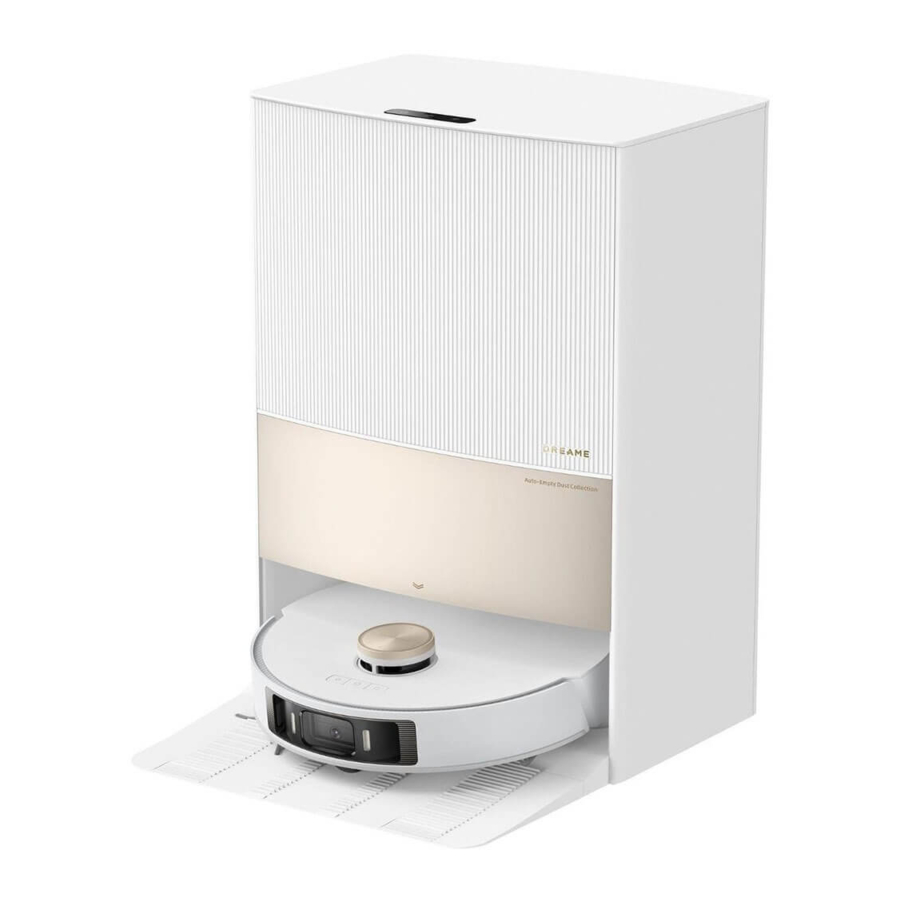
Device Overview
Robot

Instruction
- Spot Cleaning Button: Press to initiate spot cleaning.
- Power / Clean Button: Press and hold for three seconds to power on or off. Press to start cleaning after the robot is turned on.
- Dock Button: Press to command the robot back to the base station. Press and hold for three seconds to disable Child Lock.
Status Indicator
- Solid White: Cleaning or cleanup completed.
- Flashing Orange: Error.
- Solid Orange: Standby at low battery or paused at low battery.
Robot and Sensors

Dust Box

Mop Assembly

Base Station


Base Station Buttons
 Leave / Dock Button:
- Robot on the base station: Press to exit the base station.
- Robot out of the base station: Press to return to the base station.
 Start / Pause Button: Press to start or pause cleaning.
 Drying Button: Press the button to initiate or cease the drying process for the mop pads in the base station.
Status Indicator
- Solid White: The base station is connected to power
- Solid Orange: The base station has an error
Child Lock
- Press and hold the Leave / Dock Button and Drying Button for three seconds to activate or deactivate Child Lock. Once Child Lock is activated, all buttons on the robot and the base station will be locked.
Clean the Washboard
- After the robot has left the base station, press and hold the Leave / Dock button for three seconds to release the water from the base station to the washboard. Then press and hold the Leave / Dock button for three seconds to remove the used water from the washboard.
Preparing Your Home
- Tidy up objects such as power cords, cloths, slippers, and toys to optimize the robot's efficiency during the cleaning process.
- Before starting the cleaning session, open the door of the room and properly arrange furniture to maximize available space for the robot's movement.
- Before initiating the cleaning process, strategically position a physical barrier at the edge of stairs and sofas. This precaution guarantees the secure and smooth operation of the robot.
- To avoid hindering the robot's recognition of areas requiring cleaning, refrain from standing in front of the robot, on thresholds, in hallways, or narrow spaces. This ensures the robot can efficiently identify and clean all desired areas.
Before Use
Connect to an Electrical Outlet
- Insert the power cord into the base station and plug it into the socket. Place the base station in a location that is as open as possible with a good Wi-Fi signal.
 Note: When using the robot for the first time, accompany it during cleaning to promptly address any potential obstacles.
Positioning and Installing the Base Station Ramp Extension Plate
- Clear any objects within 1.5m in front and 5cm on either side of the base station.
Subsequently, install the base station ramp extension plate onto the base station.
Note: It is recommended to place the base station on tile floors or marble floors.
Remove the Protections
- Remove the two stickers from the front and back of the robot, and then lower the robot cover to remove the protective strip.
Turn on the Robot and Install the Side Brush and Mop Assembly
- Press and hold the On/Off Button on the robot for three seconds to turn it on. Install the side brush and mop assembly into place.
Connect the Robot to the Base Station
- Place the robot onto the base station with the mop assembly facing towards the washboard. You will hear a voice prompt indicating a successful connection between the robot and the base station.
Note: It is advisable to fully charge the robot before its initial use. If the robot cannot be turned on after the battery is depleted, manually connect the robot to the base station to initiate the charging process.
Install the Cleaning Solution Bottle
- Remove the cap of the cleaning solution bottle and tear off the two seals on the bottle. Open the upper cover of the base station and install the bottle along the slot into place. The cleaning solution will be added automatically while the robot is in operation.
Note: Only use the officially-approved cleaning solution; adding any other liquid may result in base station malfunction.
Add Water to the Clean Water Tank
- Remove the clean water tank from the base station, and fill it with clean water up to the max water line. Then reinstall it back into the base station.
Note: Avoid adding hot water to the water tank as it may cause deformation.
Connecting with the Dreamehome App
Download the Dreamehome App by scanning the QR code on the robot or searching for "Dreamehome" in the app store to download and install the app.
Note:
- Only 2.4 GHz Wi-Fi is supported.
- Due to upgrades in the app software, the actual operations may differ from the directions in this manual. Please follow the instructions based on the current app version.
Open the Dreamehome app, tap the "+" symbol in the upper right corner, and scan the same QR code on the robot again to add the device. Please follow the prompts to complete the Wi-Fi connection.
Note: If you wish to reset Wi-Fi, repeat this step
Wi-Fi Indicator
- Slow flashing: Awaiting connection.
- Rapid flashing: Connecting.
- Solid: Connected.
How to Use
Turn On/Off
Press and hold the button for three seconds to turn on the robot. Place the robot onto the base station, and it should automatically turn on and start charging. To turn off the robot, move it away from the base station and press and hold the button for three seconds.
Fast Mapping
After configuring the network for the first time, follow the instructions in the app to quickly create a map. The robot will initiate mapping without cleaning. Upon the robot's return to the base station, the mapping process will be completed, and the map will be saved automatically.
Pause/Sleep
While the robot is running, press any button to pause it. If the robot remains paused for more than ten minutes, it will automatically enter sleep mode, with all indicators turning off. Press any button on the robot or base station, or use the app to wake up the robot.
Note:
- The robot will automatically turn off if left in sleep mode for more than twelve hours.
- If the robot is paused and placed onto the base station, the current cleaning process will end.
Auto Resume Cleaning
If the battery is too low, the robot will automatically return to the base station for charging. After reaching the appropriate battery level, it will resume any unfinished cleaning tasks.
Note: To utilize this function, please enable it in the App.
Do Not Disturb (DND) Mode
When the robot is set to DND mode, it will be prevented from resuming cleaning, and the power indicator will turn off. DND mode is disabled by default at the factory. You can use the app to enable DND mode or modify the DND period, which is set to 22:00–8:00 by default.
Note: Scheduled cleaning tasks will proceed as usual during the DND period. The robot will resume cleanup where it left off after the DND period expires.
Spot Cleaning
While the robot is on standby, briefly press the button to activate the spot cleaning mode. In this mode, the robot cleans a square-shaped area of 1.5×1.5m around it and returns to its starting point once the spot cleaning is completed.
Robot Restarting
If the robot stops responding or cannot be turned off, press and hold the button for ten seconds to forcibly turn it off. Then, press and hold the button for three seconds to turn the robot back on.
Vacuum and Mop
Note: When using the mop assembly for the first time, the robot defaults to the "Vacuum and Mop" task.
Start Cleaning
Press the Start / Pause Button on the base station or the On/Off Button on the robot, or use the app to initiate cleaning from the base station. The robot will then plan the optimal cleaning route and execute the cleaning task based on the created map.
Note:
- To ensure the robot easily returns to the base station after cleaning, it is recommended to start the robot from the base station.
- The mop pads will be cleaned before the robot starts mopping; please wait patiently.
- Do not move the base station, the clean water tank, the used water tank, or the washboard during operation.
Auto Mop Washing
While cleaning, the robot will automatically return to the base station to wash the mop pads according to the frequency specified in the app. The base station will refill the robot's water tank automatically, and the robot will then resume its cleaning operation.
Automatic Dust Container Emptying and Mop Pad Cleaning
Upon completion of the cleaning process, the robot returns to the base station, triggering automatic emptying of the dust container. Subsequently, the base station initiates the washing and drying of the mop pads.
Note:
- If the auto-empty function is disabled in the app. The base station will not automatically empty the dust box.
- The base station will empty the dust box according to the frequency set in the app.
Cleaning the Used Water Tank
After the robot has finished its task, it is advisable to clean the used water tank to prevent any odors.
Vacuum then mop
Select "Vacuum then Mop" in the app and the robot will automatically detach the mop assembly from the base station to vacuum the floor. When vacuuming is complete, the robot returns to the base station. The base station will then automatically start emptying the dust bin.
Vacuum only
Select "Vacuum only" in the app and the robot will automatically remove the mop assembly from the base station and start vacuuming.
Mop only
Select "Mop only" in the app and the robot will automatically check if the mop assembly is installed on the Base Station. If not, the robot will install the mop assembly and start mopping after raising the main brush.
Routine Maintenance
Washboard
- Press the Leave/Dock Button to prompt the robot to exit the base station.
- Take off the washboard and rinse it thoroughly with clean water.
- Press and hold the Leave/Dock Button for three seconds to add water to the bottom of the base station. Then, employ the provided cleaning tool to thoroughly clean it.
- Press and hold the Leave/Dock Button for three seconds to expel the used water from the bottom of the base station. Afterward, dry it with a soft, dry cloth, and reattach the washboard.
Note: The recommended maintenance frequency is once a month
Dust Bag
- Unlock the dust tank cover and then take it off.
- Dispose of the dust bag.
Note: Pulling outward on the handle will seal the dust bag, preventing dust and debris from accidentally falling out. The recommended replacement of the dust bag is every 6-8 weeks
- Clear the filter of dust and debris using a dry cloth.
- Replace the dust bag with a new one. Reattach the dust tank cover and securely lock it in place.
Used Water Tank
- Take out the used water tank, open its cover, and empty the used water. Rinse the used water tank with clean water, and utilize the provided cleaning tool to clean the inner wall of the used water tank.
Note: The float ball in the used water tank is a movable part. Exercise caution while cleaning to avoid applying excessive force and causing damage. The recommended maintenance frequency is after each use.
Main Brush
- Press the brush guard clips inward to release the brush guard and pull out the brush out of the robot.
- Pull out the brush covers at both ends of the brush. Use the provided cleaning tool to remove any hair tangled in the brush. Reinstall the brush covers on both ends of the brush, and then place the brush back. Press on the brush guard to lock it in place.
Note: The recommended maintenance frequency is once every two weeks and the replacement period every three to six months.
Side Brush and Mop Pad Holder
- Pull off and clean the side brush and mop pad holder.
Note: The recommended maintenance frequency is once every two weeks.
Omnidirectional Wheel
- Employ a tool, such as a small screwdriver, to carefully separate the axle and tire of the omnidirectional wheel. Avoid applying excessive force.
- Rinse the omnidirectional wheel under running water and reattach it after ensuring complete drying.
Note: The recommended maintenance frequency is once every month.
Dust Box
- Lift the robot's cover and press the clip to detach the dust box. Open the dust box cover and empty its contents.
Filter
- Take out the filter and tap its basket gently.
- Rinse the dust box and filter with water and ensure they are completely dry before reinstalling.
Note:
- Avoid cleaning the filter with a brush, finger, or sharp objects to prevent damage.
- Rinse the dust box and filter with clean water only, refrain from using any detergent.
- Utilize the dust box and filter only when they are entirely dry.
Robot Sensors and Charging Contacts
- Clean the sensors and charging contacts of the robot using a soft, dry cloth.
Note: Using a wet cloth can damage sensitive components within the robot and the base station.
Charging Contacts
- Wipe the charging contacts and the signaling area of the base station with a soft, dry cloth.
Auto-empty Vents
- Clean the auto-empty vents on both the robot and the base station using a soft, dry cloth.
Mop Pad
- To replace the mop pad, remove it from the mop pad holder.
Cleaning Solution Adding Inlet
- If the cleaning solution adding inlet is dirty, wipe it with a soft, dry cloth.
Battery
- The robot features a high-performance lithium-ion battery pack. Ensure the battery is adequately charged for daily use to maintain optimal battery performance.
Troubleshooting
| Problem | Solution |
| The robot will not turn on. | If the battery is low, recharge the robot on the base and try again. Additionally, ensure that the appliance operates within a temperature range of 0°C (32 ℉) to 40°C (104 ℉) to prevent issues related to extreme temperatures affecting the battery performance. |
| The robot will not charge. | Ensure that the base station is connected to power. If there is poor contact between the charging contacts on the base station and the robot, clean the charging contacts to improve the connection. Additionally, inspect the connector of the robot for any foreign objects, and if found, remove them to ensure proper functionality. |
| The robot fails to connect to Wi-Fi. | If you experience Wi-Fi connection issues, first ensure the accuracy of the Wi-Fi network password. Confirm that the robot is connected to a 2.4 GHz Wi-Fi network, as it does not support a 5 GHz connection. Check for a strong Wi-Fi signal by placing the robot in an area with good coverage. If the robot is unresponsive to configuration, exit and re-enter the app, then follow the provided instructions once more. |
| The robot is unable to locate and return to the base station. | If the base station is disconnected from power or has been moved when the robot is not on it, please reconnect the base station to the power supply or place the robot onto the base station for charging. If there are numerous obstructions around the base station, consider relocating it to a more open area. Moving the robot may trigger re-positioning, and if this process fails, the robot will recreate a map. If the robot is too far from the base station, it might be unable to return automatically, requiring manual placement onto the base station. |
| The robot becomes trapped in front of the base station and is unable to return to it. | Ensure there are no obstructions within 5 cm on the left and right sides or within 1.5 m in front of the base station. Check for a closed door that might impede the robot's return route. If the floor in front of the base station is excessively wet, the robot may slip. In such cases, clean the excess water before attempting again. Consider relocating the base station to a different place and trying again. |
| The robot will not turn off. | The robot cannot be powered off while charging. It is advised to move the robot away from the base station and then press and hold the On/Off Button for three seconds to turn it off. If this step is ineffective, press and hold the button for ten seconds to completely turn off the robot. If the issue persists, please contact after-sales service for further assistance. |
| The charging speed is slow. | It takes approximately 4.5 hours to fully charge the robot when its battery is low. If you operate the robot at temperatures outside the specified range, the charging speed will automatically slow down to extend the battery life. If the charging contacts on both the robot and the base are dirty, please wipe them with a dry cloth. |
| The noise increases while the robot is operating. | Check if the dust box filter is clogged. If so, clean or replace it. There might be a hard object caught in the main brush or the dust box, so inspect and remove any such objects. The main brush or side brush may be tangled. Try switching the suction mode to Standard or Quiet. |
| The robot moves without following the set route. | Organize objects such as power cords and slippers before using the robot. Working on wet, slippery surfaces may cause the main wheel to slip, so it is recommended to dry any wet areas before using the robot. Keep the line laser sensors and the AI visual sensor on the robot clean and unobstructed by wiping them with a clean, soft, and dry cloth. |
| The robot misses the rooms to be cleaned. | Ensure that the doors of the rooms to be cleaned are open. Check for thresholds higher than 2 cm at the door, as the robot cannot climb over high thresholds or steps. If the area in front of the room to be cleaned is wet and slippery, it may cause the robot to slip and work abnormally. Try drying the floor before using the robot. |
| The robot will not resume cleaning after charging. | Ensure that the robot is not set to the DND mode, as this mode prevents it from resuming cleaning. |
| The station cannot automatically empty the dust box. | Inspect the dust bag in the dust tank. If the dust bag is not full, examine the auto empty vents on the robot, base station, or dust box for any obstructions. If obstructions are found, promptly clean the affected area. |
| The water level in the washboard is abnormal. | Take out the washboard and inspect the drain for any blockages, cleaning it if necessary. Ensure the used water tank is properly installed. Verify if the seal on the used water tank is secure and correctly positioned. If the issue persists, contact the after-sales service team. Confirm that only the officially-approved cleaning solution is used and avoid adding any other liquids. |
| The mop pad holder is raised abnormally. | Remove the mop pad holder and inspect it for any foreign objects. After ensuring it is clear, attempt to restart the robot. If the problem persists, please reach out to the after-sales service team for further assistance. |
| There is water under the clean water tank or around the seal. | When removing the clean water tank, it is normal for some water to remain in the pipe under the tank or around the seal. Please wipe it dry with a cloth. |
Specifications
Robot
| Model | RX41CE |
| Charging Time | Approximately 4.5 hours |
| Rated Voltage | 14.4V |
| Rated Power | 75V |
| Operation Frequency | 2400-2483.5MHz |
| Maximum Output Power | <20dBm |
Base Station
| Model | RCXE2 |
| Rated Input | 220-240V; 50-60Hz |
| Rated Output | 20V; 2A |
| Rated Power (during dust emptying) | 1000W |
| Rated Power (during cleaning) | 55W |
| Rated Power (during charging and drying) | 80W |
| Operation Frequency | 2400-2483.5MHz |
| Maximum Output Power | <20dBm |
Safety Instructions
Read all instructions before using. Failure to follow the warnings and instructions may result in electric shock, fire or serious injury.
Restrictions on use
- This product is not intended for use by children under eight years old, individuals with physical, sensory, or intellectual deficiencies, or those with limited experience or knowledge, unless supervised by a parent or guardian to ensure safe operation and avoid any risks. Cleaning and maintenance should not be performed by children without supervision.
- Use the appliance only with the provided power supply unit.
- Skilled persons are required for battery replacement in this appliance.
- Ensure the cleaning area is clear, and children should not play with the appliance. Keep children and pets at a safe distance from the operating robot.
- Do not install, charge, or use the appliance in bathrooms or around pools.
- This product is designed for floor cleaning in a home environment only. Avoid using it outdoors, on non-floor surfaces, or in commercial or industrial settings.
- Verify that the appliance operates correctly in the designated environment; otherwise, refrain from using it.
- If the power cord is damaged, it must be replaced with a special cord or assembly available from the manufacturer or its service agent.
- Do not flip the robot upside down,
- Operate the robot within an ambient temperature range of 0 ℃ to 40 ℃, and avoid using it on floors with liquids or sticky substances.
- To prevent damage or injuries from dragging, clear loose objects and remove cables from the cleaning path before using the appliance.
- Remove fragile or small items from the floor to prevent collisions and damage caused by the robot.
- Keep hair, fingers, and other body parts away from the suction opening of the robot.
- Keep both the robot and the cleaning solution out of the reach of children.
- Avoid operating the appliance in a room where an infant or child is sleeping.
- Do not place children, pets, or any items on top of the robot, whether it is stationary or moving.
- Use only the officially-approved detergent; do not add any liquid such as alcohol or disinfectant.
- Do not use the robot to clean burning objects or pick up flammable or combustible liquids, corrosive gases, or undiluted acids or solvents.
- Avoid vacuuming hard or sharp objects, and refrain from using the appliance to pick up items such as stones, large pieces of paper, or any objects that may cause clogging.
- Disconnect the plug from the socket-outlet before cleaning or maintaining the appliance.
- Do not wipe the robot or the base station with a wet cloth or rinse them with any liquid. After cleaning washable parts, ensure they are fully dry before reinstalling and using them.
- Please use this product in accordance with the instructions in the User Manual. Users are responsible for any damage that may arise from improper use of this product.
Batteries and Charging
- Do not use any third-party battery or base station. The robot is compatible only with the RCXE2 model base station.
- Avoid attempting to disassemble, repair, or modify the battery or base station independently.
- Keep the base station away from heat sources.
- Refrain from using a wet cloth or wet hands to wipe or clean the base station's charging contacts.
- Properly dispose of old batteries. Do not discard them improperly. Utilize an appropriate recycling facility for unneeded batteries.
- If the power cord becomes damaged or broken, cease usage immediately and contact after-sales service.
- Ensure the robot is turned off during transportation and ideally kept in its original packaging.
- If the robot will not be used for an extended period, fully charge it, turn it off, and store it in a cool, dry place. Recharge the robot at least once every three months to prevent over-discharging the battery.
+44 (0)203 514 4411
www.alza.co.uk/kontakt
Documents / Resources
References
Download manual
Here you can download full pdf version of manual, it may contain additional safety instructions, warranty information, FCC rules, etc.
Advertisement


Need help?
Do you have a question about the Ultra and is the answer not in the manual?
Questions and answers