
Related Manuals for NetComm NTC-30W


Summary of Contents for NetComm NTC-30W
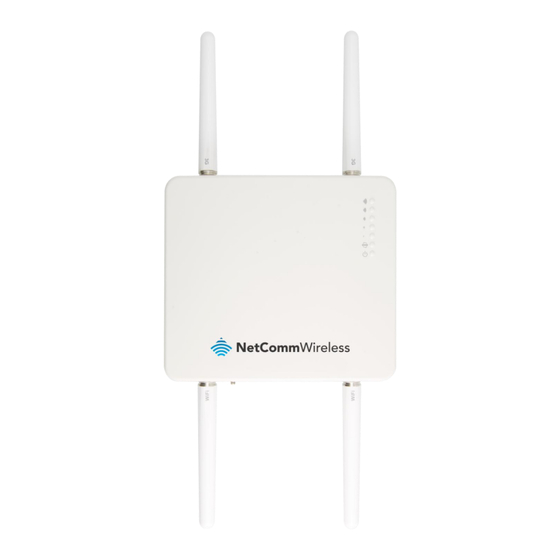
- Page 1 NTC-30WVV Outdoor HSPA+ WiFi Router with Voice USER GUIDE 4Gon www.4Gon.co.uk info@4gon.co.uk Tel: +44 (0)1245 808295 Fax: +44 (0)1245 808299...
- Page 2 Copyright© 2013 NetComm Wireless Limited. All rights reserved. The information contained herein is proprietary to NetComm Wireless Limited. No part of this document may be translated, transcribed, reproduced, in any form, or by any means without prior written consent of NetComm Wireless Limited.
-
Page 3: Table Of Contents
Table of Contents Overview ......................................4 Product Introduction ..................................6 Physical Dimensions and Indicators ............................. 7 NTC-30WV Default Settings ................................ 12 Implementation and Deployment Scenario ..........................14 Installation and Configuration of the NTC-30WV ........................15 Captive Power Terminal Block ..................................16 Logging on via the web-based user interface .............................. -
Page 4: Overview
RF exposure requirements. External Antenna Use only antennae which have been approved by NetComm Wireless Limited. Non-approved antennae may produce unwanted spurious or excessive RF transmitting power which may lead to the violation of FCC/IC limit and is prohibited. - Page 5 AVERAGE TRANSMIT POWER 802.11b 14.11 dBm 802.11g 13.32 dBm 802.11n – 20 MHz 13.38 dBm 802.11n – 40 MHz 13.21 dBm Table 3: Average Transmit Power Levels Prerequisites Before continuing with the installation of your NTC-30WV, please confirm that you comply with the minimum system requirements below.
-
Page 6: Product Introduction
Wireless Security Card Power DC cable 10m (open ended) If any of these items are missing or damaged, please contact NetComm Support immediately by visiting the NetComm Support website at: http://www.netcommwireless.com/contact-forms/support Product Features The NetComm Wireless outdoor router (NTC-30WV) is designed to deliver high speed internet to homes and businesses with otherwise little to no Internet access available. -
Page 7: Physical Dimensions And Indicators
Physical Dimensions and Indicators LED Indicators The NTC-30WV uses 7 LEDs to display the current system and connection status. Figure 1 - NTC-30WV LED Indicators NTC-30WV LED INDICATOR ICON COLOUR DEFINITION High Signal Green High 3G Signal strength available. Medium to High Signal Green Medium to High 3G Signal strength available. - Page 8 The 5 LEDs also indicate whether the device is MEP locked, SIM is not inserted and if the SIM is PIN or PUK locked by flashing in certain patterns. Below is a table outlining the various LED flash sequences and their meanings. LED PATTERN DESCRIPTION All signal LEDs flash ON and OFF...
-
Page 9: Physical Dimensions
Physical Dimensions The following page lists the physical dimensions of the NTC-30WV, as well as the physical dimensions of the antennas and the included mounting bracket which can be used to attach the NTC-30WV to a pole or to provide a wall / ceiling mount. Figure 2 –... - Page 10 Figure 4 - NTC-30WV Antenna NTC-30WV 3G AND WIFI ANTENNA Length 180 mm Diameter 20 mm 60 g Weight (w/o NTC-30WV attached) Table 7 - Antenna Dimensions www.netcommwireless.com NTC-30WV – Outdoor HSPA+ WiFi Router with Voice 4Gon www.4Gon.co.uk info@4gon.co.uk Tel: +44 (0)1245 808295 Fax: +44 (0)1245 808299...
- Page 11 Interfaces The following interfaces are available on the NTC-30WV: Figure 5 - Bottom Mounted Interfaces ITEM INTERFACE FUNCTION WiFi Antenna Connector (TNC) Connect one of the WiFi antennas here. DC Power Port Connect the optional DC Power supply to the NTC-30WV. Connect the NTC-30WV to an Ethernet enabled device or Switch and deliver power 10/100Base-TX Ethernet RJ-45 (w/Auto MDX) Port through Power over Ethernet (PoE) technology.
-
Page 12: Ntc-30Wv Default Settings
LAN (MANAGEMENT) Static IP Address: 192.168.1.1 Subnet Mask: 255.255.255.0 Default Gateway: 192.168.1.1 Table 10 - LAN Management Default Settings WIRELESS (WIFI) NetComm XXXX SSID: (where XXXX is 4 random numbers) Security: WPA2-PSK XXXXXXXXXX Security Key: (where XXXXXXXXXX are 10 random characters) Table 11 –... -
Page 13: Restoring Factory Default Settings
Restoring Factory Default Settings Restoring the NTC-30WV factory default settings will erase any configuration changes you have made. You may encounter situations where you need to restore the factory defaults on your router, such as: You have lost your username and password and are unable to login to the web configuration page. ... -
Page 14: Implementation And Deployment Scenario
Implementation and Deployment Scenario The NTC-30WV is a robust 3G (DC-HSPA+ ) router that connects to the 3G network and is mounted either on the wall or a pole and positioned in an optimal position on the outside of a property. The NTC-30WV features a powerful antenna system and radio modem together in the one unit in an outdoor location. -
Page 15: Installation And Configuration Of The Ntc-30Wv
Installation and Configuration of the NTC-30WV Hardware Installation Please refer to the NTC-30WV Installation Guide (available from the NetComm Wireless website) for instructions on assembling, mounting and placing the NTC-30WV. Powering the Router via DC Power Supply Below is a diagram summarising the assembly when connecting via DC power supply. Please refer to page 7 of the Quick Start Guide for more detail on how to connect the NTC-30WV via DC Power Supply. -
Page 16: Captive Power Terminal Block
Powering the Router via a Power over Ethernet (PoE) Cable (Optional) Please refer to the Installation Guide for step-by-step instructions on connecting the devices. Below is a diagram summarising the assembly when connecting via optional Power over Ethernet cable. Figure 9 – Example of how to connect the NTC-30WV when connecting via optional Power over Ethernet (PoE) cable Note: The DC Injector supplies 48V. -
Page 17: Connecting Wirelessly
Connecting wirelessly Ensure WiFi is enabled on your device (e.g. computer/laptop/smartphone). Scan for wireless networks in your area and connect to the network name that matches the Wireless network name configured on the NTC-30WV. The default wireless network name is printed on the security card included in the package. When prompted for your wireless security settings, enter the Wireless security key configured on the NTC-30WV. -
Page 18: Logging On Via The Web-Based User Interface
Configuring the NTC-30WV Logging on via the web-based user interface To log in to the management console and view the status and make changes to your NTC-30WV, please follow the steps below: Open your web browser (e.g. Internet Explorer/Firefox/Safari) and navigate to http://192.168.1.1 Enter the username and password configured during the first time setup and click the Submit button. -
Page 19: Status
Status The status page provides system related information and is displayed when you login to the NTC-30WV management console. By default, the status page will show System Information, Ethernet Port Status, WWAN Status, IPsec Status and the 3G service connection details. Figure 13 - The Status Page ITEM DEFINITION... - Page 20 Figure 14 - Status Page - LAN Details ITEM DEFINITION The current LAN IP Address and Subnet Mask. MAC Address The current MAC Address of the LAN port. Table 15 - Status Page - LAN Details Figure 15 - Status Page - PPPoE Details ITEM DEFINITION PPPoE Status...
-
Page 21: Advanced Status
ITEM DEFINITION Call Waiting Displays the status of the call waiting function. Displays the status of unconditional call forwarding. Unconditional call forwarding is a Unconditional Call Forwarding forward placed on all calls as soon as they reach the phone, regardless of the status of the handset. - Page 22 ITEM DEFINITION Phone Module The phone module name, hardware and firmware version Module Boot version The installed bootloader version of the phone module. Module PRID The Protocol ID of the phone module. System Uptime The time in minutes and seconds that the gateway has been up. Provider The current connection’s 3G provider.
-
Page 23: Internet Settings
Internet Settings This section describes how to set up the router to initiate a WWAN connection. There are 2 different ways to set up a WWAN connection via PPP: Initiating the PPP Connection directly from the router (most common). ... - Page 24 To connect using a Connection profile The router supports multiple APN profiles; these profiles allow you to configure the settings that the router will use to connect to the 3G network. By default, the “Automatically configure my mobile broadband” option is selected. This automatically detects the most appropriate APN from the inserted SIM by querying a database on the router.
- Page 25 PPPoE The PPPoE page is used to configure a transparent PPPoE connection. This can be used to provide a bridged connection. To enable PPPoE mode, firstly ensure the “Auto Connect” is disabled in all the profiles on the “Connection” configuration page by clicking on the “Internet Settings”...
- Page 26 Band / Provider The band settings page enables you to select which frequency band you will use for your connection and enables you to scan for available network operators in your area. Figure 22 - Band / Provider Selection You may want to do this if you’re using the router in a country with multiple frequency networks that may not all support HSPA. You can select the router to only connect on the network frequencies that suit your requirements.
- Page 27 SIM Security If the SIM card is locked you will need to unlock it with a PIN provided with your SIM card. You can find out if the SIM is locked by viewing the SIM Status on the Status page: Figure 24 - SIM Security - Status Page Warning If the SIM Status is “SIM PIN”...
-
Page 28: Lan
IP Setup The IP Setup page is used to configure the LAN Settings of the router and to enable or disable DNS Masquerade. Figure 27 - IP Setup Settings The default IP of the Ethernet port is 192.168.1.1 with subnet mask 255.255.255.0. To change this, enter the new IP Address and/or Subnet mask and click “Save”. - Page 29 DHCP The DHCP page is used to adjust the DHCP settings used by the router. The DHCP settings are then passed onto any device connecting via DHCP. You can manually set the DHCP Start and End range, the DHCP Lease time, the default Domain name suffix, Primary and Secondary DNS Server, the Primary and Secondary WINS Server, as well as the NTP, TFTP and Option 150/Option 160 (VoIP options) settings.
-
Page 30: Routing
Routing Static The Static Route page is used to add or delete static routes. Static routes can be used to facilitate communication between devices on different networks. Figure 30 - Static Route Settings Some routes are added by default by the router on initialisation such as the Ethernet subnet route for routing to a device on the Ethernet subnet. - Page 31 RIP (Routing Information Protocol) is used for advertising routes to other routers. Thus all the routes in the router’s routing table will be advertised to other nearby routers. For example, the route for the router’s Ethernet subnet could be advertised to a Router on the PPP interface side so that a Router on this network will know how to route to a device on the router’s Ethernet subnet.
- Page 32 VRRP Virtual Router Redundancy Protocol (VRRP) is a non-proprietary redundancy protocol designed to increase the availability of the default gateway servicing hosts on the same subnet. This increased reliability is achieved by advertising a “virtual router” (an abstract representation of master and backup routers acting as a group) as a default gateway to the host(s) instead of one physical router.
- Page 33 The NAT page is used to configure the Network Address Translation rules currently in use on the router. The router is in NAT mode by default. Figure 33 - NAT Settings This is only needed if you need to map inbound requests to a specific port on the WAN IP address to a device connected on the Ethernet interface, e.g.
- Page 34 The Demilitarised Zone (DMZ) enables a device to utilise a direct connection to the WAN. This means any incoming connections are forwarded directly to this device. The DMZ page is used to specify the IP Address of the device to this feature. Figure 34 - DMZ Settings Click the “Enable”...
-
Page 35: Vpn
A Virtual Private Network (VPN) is a tunnel providing a private link between two networks or devices over a public network. Data to be sent via a VPN tunnel needs to be encapsulated and as such is generally not visible to public networks. The advantages of a VPN connection include: ... - Page 36 IPSec IPSec operates on Layer 3 of the OSI model and as such can protect higher layer protocols. IPSec is used for both Site to Site VPN and Remote Access VPN. The NTC-30WV Outdoor WiFi Router supports IPsec end points and can be configured with Site to Site VPN tunnels with third party VPN routers.
- Page 37 Certificates Each type of Key mode requires different configuration options. For more information, please refer to the VPN Document available from the NetComm Website. www.netcommwireless.com NTC-30WV – Outdoor HSPA+ WiFi Router with Voice 4Gon www.4Gon.co.uk info@4gon.co.uk Tel: +44 (0)1245 808295 Fax: +44 (0)1245 808299...
- Page 38 OpenVPN OpenVPN is an open source virtual private network (VPN) program for creating point-to-point or server-to-multi-client encrypted tunnels between host computers. It can traverse network address translation (NAT) and firewalls and allows authentication by certificate, pre-shared key or username and password. OpenVPN works well through proxy servers and can run over TCP and UDP transports.
- Page 39 User Name / Password Each type of Key mode requires different configuration options. For more information, please refer to the VPN Document available from the NetComm Website. Table 22 - OpenVPN Configuration Items www.netcommwireless.com NTC-30WV – Outdoor HSPA+ WiFi Router with Voice...
- Page 40 PPTP-Client The Point-to-Point Tunneling Protocol (PPTP) is a method for implementing virtual private networks using a TCP and GRE tunnel to encapsulate PPP packets. PPTP operates on Layer 2 of the OSI model and is included on Windows computers. Figure 37 - VPN Connection Settings - PPTP ITEM DEFINITION Profile Type...
- Page 41 When you select GRE, a list of configured GRE VPNs is displayed. Click the “Add” button to configure a GRE VPN connection. Figure 38 - GRE VPN List Generic Routing Encapsulation (GRE) is a tunneling protocol developed by Cisco that works in conjunction with PPTP to create a virtual private network.
-
Page 42: Ussd
USSD The USSD page is used to send USSD (short SMS style) messages to the 3G service provider. Figure 40 - USSD Messaging USSD is a real-time messaging service usually utilised to perform mobile account related tasks such as the following: Checking available credit for a mobile service account. -
Page 43: Wireless Settings
Wireless Settings Basic The basic configuration page is used to define the basic wireless settings for the NTC-30WV such as the SSID and the type of wireless security in use. Figure 41 - Wireless Configuration - Basic Settings OPTION DEFINITION WiFi is turned on by default. - Page 44 Security Settings You may choose from the following wireless security options: Open Shared WPA-PSK WPA2 WPA2- PSK WPA-PSK-WPA2-PSK WPA1-WPA2 802.1x WPA1/WPA2 WPA (WiFi Protected Access) authentication is suitable for enterprise applications. It must be used in conjunction with an authentication server such as RADIUS to provide centralized access control and management.
- Page 45 802.1x In order to use 802.1X security, you need to have a RADIUS server on your network that will act as the authentication server. Please type in the details for your RADIUS server in the fields required. Figure 44 - Advanced View – WiFi Security Settings - 802.1x Note: After configuring wireless security, you also need to configure your wireless adapter to use the same security settings before you can connect wirelessly.
- Page 46 Configure the LAN IP Address of Access Point 1. In this example, it is set to the default address of 192.168.1.1: Figure 46 - WDS - Access Point 1 LAN IP Setup Enable the DHCP Server on Access Point 1: Figure 47 - WDS - Access Point 1 DHCP Server Settings www.netcommwireless.com NTC-30WV –...
- Page 47 Click Wireless Settings and then Basic. Enter the required details as listed in the table below: Figure 48 – WDS - Access Point 1 Repeater Mode Setup OPTION DEFINITION The Wireless Radio must be turned on in order to use WDS. Set this to ON. Radio On/Off Country Select the country where the router is operating.
- Page 48 Access Point 2 – No connection to mobile broadband Access Point 2 will act as a repeater for and provide internet access to its clients through Access Point 1 and therefore does not require a Mobile Broadband connection to be established. Figure 49 –...
- Page 49 Set the DHCP Server on Access Point 2 to Disable: Figure 51 - WDS - Access Point 2 DHCP Settings www.netcommwireless.com NTC-30WV – Outdoor HSPA+ WiFi Router with Voice 4Gon www.4Gon.co.uk info@4gon.co.uk Tel: +44 (0)1245 808295 Fax: +44 (0)1245 808299...
- Page 50 Under Wireless Setup, select the same frequency channel as you did for Access Point 1. Enter an SSID to identify Access Point 2 and set Network Authentication to Open. Copy the Network Authentication and WEP Encryption settings from Access Point 1. Set Access Point 2 to Repeater mode and enter the MAC address of Access Point 1 in the AP MAC Address1 field.
-
Page 51: Advanced
Advanced The Advanced page is used to modify the advanced wireless settings for the router. These settings should not be changed unless you are aware of what effect they will have. Figure 53 - Wireless Settings – Advanced OPTION DEFINITION A protective measure designed to prevent collisions among 802.11b/g modes. -
Page 52: Mac / Ip / Port Filter
MAC / IP / Port Filter The Wireless LAN MAC / IP / Port filter feature ensures the network accessibility for the wireless client devices can be controlled. When the MAC/IP/Port filter is enabled with a default policy of “Accepted”, the rules that are created indicate which packets to drop while all packets not listed are accepted. -
Page 53: Station List
Station List The Station List page shows the number of devices currently connected to your NTC-30WV via WiFi. The MAC address, Host Name and IP address of these devices are displayed. Figure 55 - Wireless Station List www.netcommwireless.com NTC-30WV – Outdoor HSPA+ WiFi Router with Voice 4Gon www.4Gon.co.uk info@4gon.co.uk Tel: +44 (0)1245 808295 Fax: +44 (0)1245 808299... -
Page 54: Services
Services Dynamic DNS The Dynamic DNS page is used to configure the Dynamic DNS feature of the router. There are a number of dynamic DNS hosts from which you can choose. Figure 56 - DDNS Settings Dynamic DNS provides a method for the router to update an external name server with the current WAN IP address. To configure dynamic DNS: Select the “Enable”... -
Page 55: System Monitor
System Monitor The System Monitor page is used to configure the behaviour of the Periodic Piing monitor function. Figure 58 - System Monitor Settings The Periodic Ping Reset Monitor configures the router to transmit controlled ping packets to 2 specified IP addresses. Should the router not receive responses to the pings, the router will reboot. -
Page 56: Snmp
SNMP The SNMP page is used to configure the SNMP features of the router. Figure 59 - SNMP Settings SNMP (Simple Network Management Protocol) is used to remotely monitor the router for conditions that may warrant administrative attention. It can be used to retrieve information from the router such as the signal strength, the system time, the interface status, etc. -
Page 57: Sms
The SMS pages are used to perform functions using the built-in SMS tools application. The SMS Tools application offers basic SMS functionality such as sending a message, receiving a message and redirecting an incoming message to another destination. You can also utilise this feature to read and change run-time variables on the router. Basic functionality supported: Ability to send a text message via a 3G network and store in permanent storage Ability to receive a text message via a 3G network and store in permanent storage... - Page 58 SMS Configuration for Redirection Incoming text messages can be redirected to another mobile device and/or a TCP/UDP message server. Redirect To Mobile You can forward incoming text messages to a different destination number. This destination number can be another mobile phone or 3G router phone number.
- Page 59 New Message The New Message page is used to send an SMS text message to multiple recipients. Figure 61 - New SMS Message A new SMS message can be sent to a maximum of 100 recipients at the same time. After sending the message, the result is displayed next to the destination number as “Success”...
- Page 60 Inbox / Outbox You can check all sent SMS messages in the SMS Outbox or you can read, delete, reply or forward an SMS message to another mobile device from the SMS Inbox. You are also able to add the SMS message sender to the “White List” which is used to secure the Remote Diagnostics feature.
- Page 61 Diagnostics The Diagnostics page is used to configure the SMS Diagnostics and Command execution configuration. This enables you to change the configuration or check on the status of the router via SMS commands. Figure 64 - SMS Diagnostics Settings The following pages detail the configuration items available. www.netcommwireless.com NTC-30WV –...
- Page 62 Enable Authentication Enable or disable checking the sender’s phone number against the allowed sender “White List” for incoming Diagnostics/Command Execution SMS messages. If authentication is enabled, the router will check if the sender’s number exists in the “White List”. If it exists, the router then checks the password in the incoming message against the password in the “White List”...
- Page 63 Max. Diag. SMS Tx Limit You can set the maximum number of acknowledgement and error messages sent when an SMS Diagnostics and/or Command is executed. You can set the maximum limit on a per hour/day/week or month basis. The default is to send a maximum of 100 messages per day. You can check the current sent message count by looking next to the “Max.
- Page 64 SMS Command format Generic Format for reading variables: get VARIABLE PASSWORD get VARIABLE Generic Format for writing to variables: set VARIABLE=VALUE PASSWORD set VARIABLE=VALUE Generic Format for executing a command: executeCOMMAND PASSWORD executeCOMMAND Replies Upon receipt of successfully formatted, authenticated (if required) command, the gateway will reply to the SMS in the following format: TYPE SMS CONTENTS...
- Page 65 List of valid commands (which can be used in conjunction with the execute command): “pdpcycle”, “pdpdown” and “pdpup” commands can have a profile number suffix ‘x’ added. Without the suffix specified, the command operates against the current active profile or last active profile. COMMAND NAME DESCRIPTION reboot...
- Page 66 SMS Diagnostics Examples The examples below demonstrate various combinations of supported commands. This is not a complete list. To obtain a complete list, please contact NetComm. DESCRIPTION AUTHENTICATION INPUT EXAMPLE set apn1=Telstra.internet Not required set apn2=”3netaccecss” Send SMS to change APN Password1234 set apn1=Telstra.internet...
-
Page 67: Auto Dial
Auto Dial Use this page to configure the NTC-30WV to dial a pre-defined number when you lift the handset of an attached device. To use this function, set Enable Auto Dialling to “Enable” and type the number you want to dial when the handset is lifted. Figure 65 - Auto Dial settings System The Log page is used to download or display the current System Log of the router. -
Page 68: Load / Save
Load / Save Note: the Load/Save menu is only available to users logged in to the router using the user name root . To perform Firmware upgrade, device configuration backup and reset the gateway to factory defaults, you need to login as the root user. Settings The settings page is used to backup or restore the router’s configuration or to reset it to factory default settings. - Page 69 Upload The Upload page enables you to upload firmware files or user created application packages to the NTC-30WV. Figure 68 - Upload Page Note: In order to perform an update, you must be logged into the router as the root user (see the Remote Administration section for more details).
- Page 70 Figure 71 - Recovery Console Banner To upload the main system software, click on “Application Installer” from the menu at the top of the page and then click on the browse button and navigate to where the main system image upgrade file is located on your computer. Once you have selected the recovery image file to use, click Upload to upload the file.
- Page 71 Alternatively, if you want to remove a package, click the blue “Uninstall” link. Note: For more information on creating software packages for the NTC-30WV, please refer to the SDK document available from the NetComm website. www.netcommwireless.com NTC-30WV – Outdoor HSPA+ WiFi Router with Voice...
-
Page 72: Administration
Administration The Administration page is used to enable or disable the firewall, remote administration, telnet access and ping responses. Figure 75 - Administration Configuration Items OPTION DEFINITION Firewall Enable or disable the in-built firewall on the router. Enable HTTP Enable or disable remote HTTP access to the router. You can also set the port you would like remote HTTP access to be available on. Enable Telnet Enable or disable telnet (command line) access to the router. -
Page 73: System Configuration
System Configuration The System configuration page is used to specify an external syslog server and the TCP Keepalive settings. The TCP Keepalive can be used to ensure the WWAN connection does not disconnect due to inactivity. Figure 76 - System Configuration Items OPTION DEFINITION IP / Hostname [:PORT]... - Page 74 TR-069 The TR-069 (Technical Report 069) protocol is a technical specification also known as CPE WAN Management Protocol (CWMP). It is a framework for remote management and auto-configuration of end-user devices such as customer-premises equipment (CPE) and Auto Configuration Servers (ACS). It is particularly efficient in applying configuration updates across networks to multiple CPEs. It uses a bi-directional SOAP/HTTP-based protocol based on the application layer protocol.
-
Page 75: Logoff
Logoff The logoff item will log you out of your web configuration session. Figure 78 - Logoff Reboot The reboot item will reboot the router. This can be useful if you have made configuration changes you want to implement or want to reboot the router. -
Page 76: Technical Data
Technical Data The following table lists the hardware specifications of the NTC-30WV. MODEL NETCOMM NTC-30WV Modem Module/Chipset Sierra Wireless MC8704 RAM: 64MB DRAM Memory Storage: 256MB Flash Operating System Embedded Linux 2.6 UMTS bands Quad-Band: 850/900/1900/2100Mhz GSM bands Quad-Band: 850/900/1800/1900Mhz Maximum Data Throughput / Downlink: 42 Mbps (HSDPA Cat. -
Page 77: Additional Product Information
Additional Product Information Using the NTC-30WV to make and receive telephone calls The NTC-30WV provides circuit switched voice services via a telephony line interface offering the ability to make and receive telephone calls via a regular analogue telephone using the 3G mobile network. Note: Please refer to your mobile service provider for activation of your voice service and information about the call charges that apply. - Page 78 Call feature codes Quick Reference Table The NTC-30WV supports a number of call feature codes for supplementary services. FEATURE ACTIVATION DEACTIVATION STATUS #31# *31# Caller ID (to block an individual call) (to unblock an individual call) Call Waiting *43# #43# *#43# Call Forwarding Unconditional *21*<Directory Number>#...
- Page 79 Call Forwarding No Answer Call forwarding No Answer will divert all incoming calls to a phone number that you desire only if the incoming call is not answered. To enable Call Forwarding No Answer, dial *61*<Directory Number># (Where directory number is the number you wish to forward calls to) Hang up after you hear 2 low pitch beeps.
- Page 80 Call Forwarding Busy Call forwarding busy will divert all incoming calls to a phone number that you desire only if your telephone is busy on another call. To enable Call Forwarding Busy, dial *67*<Directory Number># (Where directory number is the number you wish to forward calls to) Hang up after you hear 2 low pitch beeps.
-
Page 81: Appendix A: Tables
Appendix A: Tables Table 1 - Document Revision History ............................. 2 Table 2: Maximum Transmit Power Levels ............................ 4 Table 3: Average Transmit Power Levels ............................5 Table 4 - LED Indicators .................................. 7 Table 5 - Device Dimensions ................................9 Table 6 - Mounting Bracket Dimensions ............................ -
Page 82: Appendix B: Recovery Mode
Appendix B: Recovery mode The NTC-30WV features two independent operating systems, each with its own file systems. These two systems are referred to as 'Main' and 'Recovery'. It is always possible to use one in order to restore the other in the event that one system becomes damaged or corrupted (such as during a firmware upgrade failure). -
Page 83: Legal And Regulatory
NetComm’s (or its licensors’) intellectual property rights to you. You are permitted to use this Manual for the sole purpose of using the NetComm product to which it relates. Otherwise no part of this Manual may be reproduced, stored in a retrieval system or transmitted in any form, by any means, be it electronic, mechanical, recording or otherwise, without the prior written permission of NetComm. - Page 84 Consumer Protection Laws which cannot be excluded, NetComm’s liability for any breach of that guarantee, condition or warranty is limited to: (i) in the case of a supply of goods, NetComm doing any one or more of the following: replacing the goods or supplying equivalent goods;...
-
Page 85: Fcc Regulations
FCC Regulations: This device complies with part 15 of the FCC Rules. Operation is subject to the following two conditions: (1) This device may not cause harmful interference, and (2) this device must accept any interference received, including interference that may cause undesired operation. - Page 86 Contact Address: NetComm Wireless Limited 18-20 Orion Road, Lane Cove NSW 2066 Sydney, Australia ABN: 85 002 490 486 Website: www.netcommwireless.com Phone: +61(0)2 9424 2070 Fax: +61(0)2 9424 2010 Email: sales@netcommwireless.com techsupport@netcommwireless.com www.netcommwireless.com NTC-30WV – Outdoor HSPA+ WiFi Router with Voice...
Need help?
Do you have a question about the NTC-30W and is the answer not in the manual?
Questions and answers