Advertisement
Advertisement
Table of Contents

Related Manuals for Brightek WH-P18


Summary of Contents for Brightek WH-P18
- Page 1 POS Thermal Printer User Manual Model: WH-P18...
- Page 2 Notes: The printer should be installed in a stable place and avoid placing it in a place subject to vibration and shock. Do not use or store the printer in places with high temperature, high humidity or serious pollution. ...
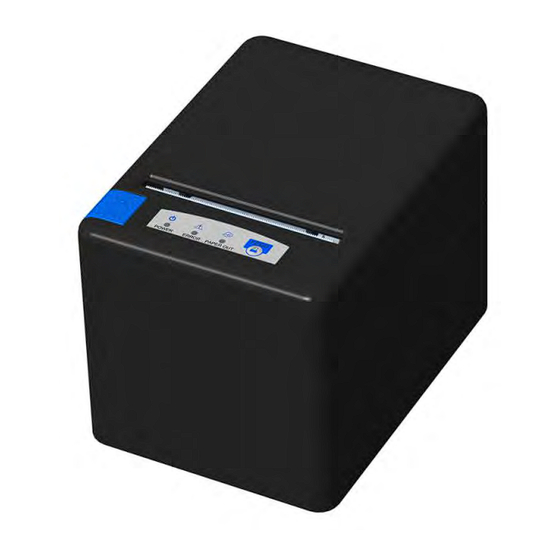
- Page 3 Part Name:...
-
Page 4: Paper Loading
Dimensions: Dimensions: 150mm X 110mm X 109.3mm Paper Loading: The installation method of thermal paper is as follows: 1. Press the paper case button to open the printer case cover 2. Insert the paper roll with the heat-sensitive chemically coated side facing the heating surface 3. -
Page 5: Specifications
Specifications: Items Parameter Printing method Direct thermal line printing Print width 72 mm Resolution 576 Dots/Line Printing speed 60 mm/sec (Max). Serial RS232, USB or Ethernet, Bluetooth Interface Cash Drawer port (RJ11) Printing Commend ESC/POS commands Paper roll Thermal paper roll 80mm (Diameter:Φ80mm), Blue base label paper Row number Font A:12 columns;... - Page 6 Operating Instructions 1. Self-Test Printout Power off the printer and install the paper roll, then close the paper case cover. Press and hold the Paper Feed [LF] button and then power on the printer. After the [ERROR] and [PAPEROUT] indicators light up at the same time, release the button to print the self-test page.
-
Page 7: Troubleshooting
4. Set the DHCP function of the Ethernet port Power off the printer and install the paper roll, then open the paper case cover. Press and hold the Paper Feed [LF] button and then power on the printer. When the [ERROR] indicator is OFF and [PAPEROUT] indicator lights up at the same time, and hear three beeps from the buzzer, release the button and close the paper case cover. -
Page 8: Warranty Period
Warranty 【Warranty Period】 From the date of delivery, the printer mechanism (printer head) of this product is guaranteed for three months, and the remaining parts are guaranteed for one year. 【Warranty Condition】 If the product is used under normal conditions during the warranty period, the product can be returned to the factory for free maintenance, but excluding transportation fee.
Need help?
Do you have a question about the WH-P18 and is the answer not in the manual?
Questions and answers