Table of Contents
Advertisement
Quick Links
Advertisement
Table of Contents

Related Manuals for Alliance Laundry Systems HTEBXFSP132DW01


Summary of Contents for Alliance Laundry Systems HTEBXFSP132DW01
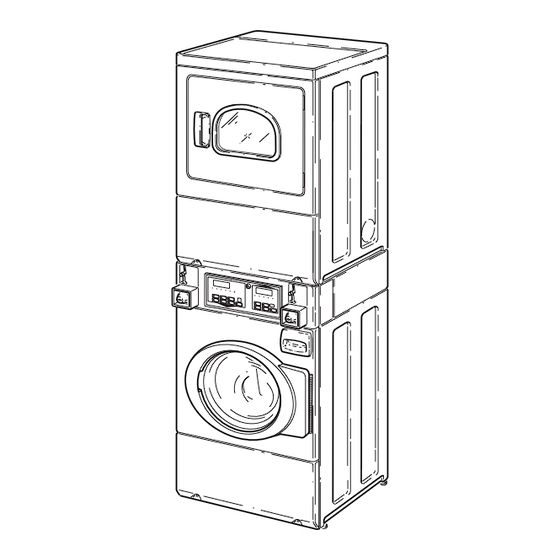
- Page 1 Stacked Washer and Dryer Electric and Gas Models SWD453C Original Instructions Keep These Instructions for Future Reference. (If this machine changes ownership, this manual must accompany machine.) Part No. 804504ENR5 August 2017 www.alliancelaundry.com...
- Page 3 The gas utility instructions plus the SAFETY and WARNING note directly above must be posted in a prominent location near the dryer for customer use. 804504ENR4 © Copyright, Alliance Laundry Systems LLC – DO NOT COPY or TRANSMIT...
- Page 4 W729R1 FOR YOUR SAFETY Do not store or use gasoline or other flammable vapors and liquids in the vicinity of this or any other appliance. W053 © Copyright, Alliance Laundry Systems LLC – DO NOT COPY or TRANSMIT 804504ENR4...
-
Page 5: Table Of Contents
All rights reserved. No part of the contents of this book may be reproduced or transmitted in any form or by any means without the expressed written consent of the publisher. 804504ENR4 © Copyright, Alliance Laundry Systems LLC – DO NOT COPY or TRANSMIT... - Page 6 Care of Your Dryer ................43 Reinstallation of Shipping Materials ..........44 Motor Overload Protector..............44 Troubleshooting .................. 45 Disposal of Unit ................... 47 Contact Information................48 Installer Checklist..............Back Cover © Copyright, Alliance Laundry Systems LLC – DO NOT COPY or TRANSMIT 804504ENR4...
-
Page 7: Safety Information
6. To reduce the risk of an electric shock or fire, DO NOT use an extension cord or an adapter to connect the washer to the electrical power source. 804504ENR4 © Copyright, Alliance Laundry Systems LLC – DO NOT COPY or TRANSMIT... -
Page 8: Dryer
If they are washer from electrical supply before attempting dried, wipe out the cylinder with a damp cloth to any service. remove particles of fiberglass. 804504ENR4 © Copyright, Alliance Laundry Systems LLC – DO NOT COPY or TRANSMIT... - Page 9 START mechanism. Remove the dryer from use and call the service person. 804504ENR4 © Copyright, Alliance Laundry Systems LLC – DO NOT COPY or TRANSMIT...
-
Page 10: Introduction
Introduction Model Identification HTEBXFSP132DW01 HTGBXFSP542DW01 STGBXFSP122DW01 HTEBXFSP542DW01 STEBXFSP132DW01 STGBXFSP542DW01 HTGBXFSP122DW01 STEBXFSP542DW01 804504ENR4 © Copyright, Alliance Laundry Systems LLC – DO NOT COPY or TRANSMIT... -
Page 11: Installation
(2,0 in.) (1,5 in.) GAS MODELS SWD917N *With leveling legs turned into base. NOTE: Exhaust openings are 10,2 cm (four inches) metal ducting. 3/8 in. NPT Gas Connection 804504ENR4 © Copyright, Alliance Laundry Systems LLC – DO NOT COPY or TRANSMIT... -
Page 12: Central Pay Models With Gravity Drain
NOTE: Exhaust openings are 10,2 cm (four inches) metal ducting. 3/8 in. NPT Gas Connection 3,81 cm (1,5 in.) Inside Diameter 4,72 cm (1,86 in.) Outside Diameter 804504ENR4 © Copyright, Alliance Laundry Systems LLC – DO NOT COPY or TRANSMIT... -
Page 13: Metered Models Without Gravity Drain
SWD921N (1,5 in.) GAS MODELS SWD921N *With leveling legs turned into base. NOTE: Exhaust openings are 10,2 cm (four inches) metal ducting. 3/8 in. NPT Gas Connection 804504ENR4 © Copyright, Alliance Laundry Systems LLC – DO NOT COPY or TRANSMIT... -
Page 14: Metered Models With Gravity Drain
NOTE: Exhaust openings are 10,2 cm (four inches) metal ducting. 3/8 in. NPT Gas Connection 3,81 cm (1,5 in.) Inside Diameter 4,72 cm (1,86 in.) Outside Diameter 804504ENR4 © Copyright, Alliance Laundry Systems LLC – DO NOT COPY or TRANSMIT... -
Page 15: Central Pay Models
Moisture or water used in factory testing may remain. 804504ENR4 © Copyright, Alliance Laundry Systems LLC – DO NOT COPY or TRANSMIT... -
Page 16: Installing The Unit
DO NOT install the unit on carpeting, soft tile, pedestal, a platform or other weakly supported structures. 804504ENR4 © Copyright, Alliance Laundry Systems LLC – DO NOT COPY or TRANSMIT... -
Page 17: Step 2: Position And Level The Unit
Place unit in position on a solid, sturdy and level floor. Installing the unit on any type of carpeting, soft tile, a platform or other weakly supported structures is not recommended. 804504ENR4 © Copyright, Alliance Laundry Systems LLC – DO NOT COPY or TRANSMIT... - Page 18 For easier access to leveling legs, prop up unit with a wooden block. Refer to Figure 5. Loosen the locknuts and adjust legs by screwing into or out of unit base. 804504ENR4 © Copyright, Alliance Laundry Systems LLC – DO NOT COPY or TRANSMIT...
-
Page 19: Step 3: Connect Fill Hoses
Water pressure must be a minimum of 138 to 827 kPa (20 to a maximum of 120 pounds per square inch) static pressure measured at the faucet. 804504ENR4 © Copyright, Alliance Laundry Systems LLC – DO NOT COPY or TRANSMIT... -
Page 20: Step 4: (Models Without Gravity Drain Only) Connect Drain Hose To Drain Receptacle
0,9 m (3 ft.) 31 (8,19) 1,5 m (5 ft.) 27,5 (7,27) 1,8 m (6 ft.) 23,9 (6,31) 2,1 m (7 ft.) 18,5 (4,89) 2,4 m (8 ft.) 10,6 (2,79) 804504ENR4 © Copyright, Alliance Laundry Systems LLC – DO NOT COPY or TRANSMIT... -
Page 21: Standpipe Installation
Beaded Tie-Down Strap from accessory bag Standpipe 4 cm or (1-1/2 in.) or 5,08 cm (2 in.) Figure 9 SWD74 SWD745N Drain Trough Drain Outlet Hose Figure 10 804504ENR4 © Copyright, Alliance Laundry Systems LLC – DO NOT COPY or TRANSMIT... -
Page 22: Step 6: (Gas Dryer Only) Connect Gas Supply Pipe
Longer than 6,1 m (20 ft.) – be reduced to ensure complete combustion. Refer to Use 1,27 cm (1/2 in.) pipe. Table 1. 3/8 in. NPT Gas Connection Figure 11 804504ENR4 © Copyright, Alliance Laundry Systems LLC – DO NOT COPY or TRANSMIT... -
Page 23: Step 7: Connect Dryer Exhaust System
If secondary systems are mandated, frequently clean the system to assure safe operation. W749 804504ENR4 © Copyright, Alliance Laundry Systems LLC – DO NOT COPY or TRANSMIT... - Page 24 Install backdraft dampers in multi-dryer installations. In mobile home installations, dryer exhaust duct must be secured to mobile home structure. Dryer exhaust duct MUST NOT terminate under mobile home. 804504ENR4 © Copyright, Alliance Laundry Systems LLC – DO NOT COPY or TRANSMIT...
-
Page 25: Exhaust Direction
NOTE: Deduct 1,8 m (6 feet) for each additional elbow. Table 3 NOTE: The maximum length of a 10,2 cm (4 in.) diameter flexible metal duct must not exceed 2,4 m (7,87 ft.). 804504ENR4 © Copyright, Alliance Laundry Systems LLC – DO NOT COPY or TRANSMIT... -
Page 26: Multi-Dryer Installation Exhaust Requirements
58786 Backdraft Damper Weather Hood or Sweep Elbow (Available through your local authorized parts (No cap or screen) source) Clean Out Cover (must be provided). Inspect monthly. Figure 13 804504ENR4 © Copyright, Alliance Laundry Systems LLC – DO NOT COPY or TRANSMIT... - Page 27 VERTICAL duct system. This will prevent a backdraft when dryer is not in use, and will keep the exhaust air in balance within the central exhaust system. 804504ENR4 © Copyright, Alliance Laundry Systems LLC – DO NOT COPY or TRANSMIT...
-
Page 28: Step 8: (Washer Only) Remove The Shock Sleeves And Shipping Brace
Figure 17 maximum of 15,24 cm (6 inches) in any direction. 3. Remove shock sleeves. FLW2271N FLW2271N Figure 18 804504ENR4 © Copyright, Alliance Laundry Systems LLC – DO NOT COPY or TRANSMIT... -
Page 29: Step 9: Wipe Out Inside Of Washer Drum And Dryer Drum
3-prong grounding plug. Refer to serial plate for specific electrical requirements. NOTE: The wiring diagram is located behind the control panel, inside the control cabinet. 804504ENR4 © Copyright, Alliance Laundry Systems LLC – DO NOT COPY or TRANSMIT... -
Page 30: Grounding Information
Check with a qualified electrician or service person if you are in doubt as to whether the washer is properly earthed. W032 804504ENR4 © Copyright, Alliance Laundry Systems LLC – DO NOT COPY or TRANSMIT... - Page 31 Standard IEC 60335-1, clauses 24.3 and 22.2. Gap is defined as the minimum contact separation of each pole in the switch between the “ON” and “OFF” positions. Figure 25 804504ENR4 © Copyright, Alliance Laundry Systems LLC – DO NOT COPY or TRANSMIT...
-
Page 32: Electric Dryers
Check with a qualified electrician or service person if you are in doubt as to whether the dryer is properly grounded. W038 804504ENR4 © Copyright, Alliance Laundry Systems LLC – DO NOT COPY or TRANSMIT... - Page 33 Standard IEC 60335-1, clauses 24.3 and 22.2. Gap is defined as the minimum contact separation of each pole in the switch between the “ON” and “OFF” positions. Figure 26 804504ENR4 © Copyright, Alliance Laundry Systems LLC – DO NOT COPY or TRANSMIT...
-
Page 34: Gas Dryers
NOTE: Have a qualified electrician check the polarity of the wall receptacle. If a voltage reading is measured other than that illustrated, the qualified electrician should correct the problem. 804504ENR4 © Copyright, Alliance Laundry Systems LLC – DO NOT COPY or TRANSMIT... - Page 35 Standard IEC 60335-1, clauses 24.3 and 22.2. Gap is defined as the minimum contact separation of each pole in the switch between the “ON” and “OFF” positions. Figure 28 804504ENR4 © Copyright, Alliance Laundry Systems LLC – DO NOT COPY or TRANSMIT...
-
Page 36: Connecting To Central Pay System
Close the loading door and start the dryer in a heat setting (refer to the Operation section). After the dryer has operated for three minutes, the exhaust air or exhaust pipe should be warm. 804504ENR4 © Copyright, Alliance Laundry Systems LLC – DO NOT COPY or TRANSMIT... - Page 37 DRY2235N Closed Position 0,31 cm (1/8 in.) Pipe Plug Shut-Off Valve Handle (For checking manifold pressure) Air Shutter Lockscrew Open Position Air Shutter Figure 30 804504ENR4 © Copyright, Alliance Laundry Systems LLC – DO NOT COPY or TRANSMIT...
-
Page 38: Operation
W236 SWD800N Figure 31 When washing bulky items such as blankets and comforters, use the DELICATES/COLD cycle. SWD802N Detergent Bleach Fabric Softener Figure 33 804504ENR4 © Copyright, Alliance Laundry Systems LLC – DO NOT COPY or TRANSMIT... -
Page 39: Step 4: Determine Proper Controls For Washer
DRY1927N Figure 37 Step 7: Start Washer After vend price has been satisfied, push the START keypad. SWD976N SWD976N Figure 35 SWD977N SWD977N Figure 38 804504ENR4 © Copyright, Alliance Laundry Systems LLC – DO NOT COPY or TRANSMIT... -
Page 40: Indicator Lights
WARNING To reduce the risk of bodily injury, do not remove laundry from washer until all lights are out, and all moving parts have stopped. W092 804504ENR4 © Copyright, Alliance Laundry Systems LLC – DO NOT COPY or TRANSMIT... -
Page 41: Operation Instructions For Mdc Dryers
To reduce the risk of fire and risk of lint collecting in exhaust duct, do not operate dryer without lint filter in place. W771 SWD759N SWD759N Figure 41 804504ENR4 © Copyright, Alliance Laundry Systems LLC – DO NOT COPY or TRANSMIT... -
Page 42: Step 4: Determine Proper Controls For Dryer
Remove knits when slightly damp because overdrying may cause shrinkage. Do not tumble dry knit woolens. 804504ENR4 © Copyright, Alliance Laundry Systems LLC – DO NOT COPY or TRANSMIT... -
Page 43: Step 7: Start Dryer
COOL DOWN is lit whenever the COOL DOWN portion of a heated cycle is active. It is also lit when no heat is programmed for a cycle in operation. 804504ENR4 © Copyright, Alliance Laundry Systems LLC – DO NOT COPY or TRANSMIT... -
Page 44: Maintenance
The outside of the door window can be cleaned with household window cleaner. Reconnect washer to electrical supply. Running an occasional rinse cycle with bleach will help avoid a musty smell in the wash drum. 804504ENR4 © Copyright, Alliance Laundry Systems LLC – DO NOT COPY or TRANSMIT... -
Page 45: Care Of Your Dryer
WARNING Label all wires prior to disconnection when servicing controls. Wiring errors can cause improper and dangerous operation. W049 D608I D608I Lint Filter Figure 48 804504ENR4 © Copyright, Alliance Laundry Systems LLC – DO NOT COPY or TRANSMIT... -
Page 46: Reinstallation Of Shipping Materials
Shock Sleeves Motor Mount Hooked End of Shipping Brace Bolts and Lockwashers Figure 49 Refer to Installation section, Step 8, for proper procedures whenever the washer is moved. 804504ENR4 © Copyright, Alliance Laundry Systems LLC – DO NOT COPY or TRANSMIT... -
Page 47: Troubleshooting
If using non-HE detergent, use only 1/2 of the detergent manufacturer’s recommended amount. • Laundry load may be overloaded. Make sure you are using proper load sizes. 804504ENR4 © Copyright, Alliance Laundry Systems LLC – DO NOT COPY or TRANSMIT... - Page 48 • Check room for odors before drying clothes. Any odor (fried foods, paint, varnish, Clothes have odor cleaners, burning wood, etc.) will transfer to clothing as the dryer draws air from the room. Ventilate room before drying clothes. 804504ENR4 © Copyright, Alliance Laundry Systems LLC – DO NOT COPY or TRANSMIT...
-
Page 49: Disposal Of Unit
MIX1N purchased. Figure 50 804504ENR4 © Copyright, Alliance Laundry Systems LLC – DO NOT COPY or TRANSMIT... -
Page 50: Contact Information
If replacement parts are required, contact the source from which you purchased your unit or contact us at +1 (920) 748-3950 for the name and address of the nearest authorized parts distributor. 804504ENR4 © Copyright, Alliance Laundry Systems LLC – DO NOT COPY or TRANSMIT... -
Page 52: Installer Checklist
• Recheck Steps 1-10. CHECK CHECK SWD745N SWD745N Gas Dryer Only • Check Heat Source. • Connect Gas Supply Pipe. • Check for Gas Leaks. DRY2235N CHECK DRY2235N D233I D233I CHECK © Copyright, Alliance Laundry Systems LLC – DO NOT COPY or TRANSMIT...
Need help?
Do you have a question about the HTEBXFSP132DW01 and is the answer not in the manual?
Questions and answers