Advertisement
Quick Links
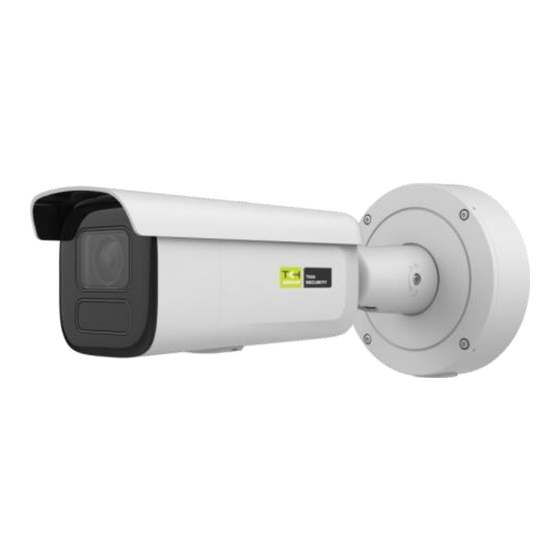
BL2024M
4MP IP Bullet camera, 5x motor zoom
Quick Start Guide
Unpack
Mounting Adapter
Camera Unit
Quick Start Guide
CAT-6 RJ45 conduit
& Pin pusher
Security Torx
Subject to modification. Actual product and accessories may differ in appearance.
Connector Definition
No.
Connector
Definition
1 Alarm I/O
Alarm I/O connection
2 Audio I/O
Line In and Line Out connection
For network and PoE connections. Please
3 RJ-45 Port
contact Siqura for a compatible PoE injecter.
4 Power(DC 12V)
Power Connection
Insert the SD card into the card slot to store
5 Micro SD Card Slot
videos and snapshots. Do not remove the SD
card when the camera is powered on.
To restore camera to factory defaults, power
6 Reset Button
up with Reset button pressed for at least 10s.
Table 1 Connector definition
© TKH Security B.V.
2024 | Version 1 (20240529) | BL2024M-QS-EN
Find additional manuals, the
datasheet, the EU Declaration of
Conformity, and the latest firmware
for this product at:
tkhsecurity.com
Installation Notices
Caution installation shall be performed by qualified
personnel only. Installation shall be in accordance with
local procedures. The camera contains batteries.
Battery replacement shall not be applied in view of the
risk of explosion. Dispose of used batteries according to
the instructions.
For "PoE" input connection, use only with UL listed
I.T.E. with "PoE" output. Description for the "PoE" is
intended to be connected to not exposed (outside plant)
networks or equivalent statement in installation
instructions.
Screws(4x) &
Plastic Screw
Anchors (4x)
Camera Cabling
Figure 2 Cabling
Connectors
5
6
3
1
2
Figure 1 Camera Connectors
Waterproof Notice
Bullet camera is suggested to be mounted either by
wall/pole mount or ceiling mount. Other mounting may
cause potential water leakage at camera, which is not
covered in warranty.
Figure 3 Wall/Pole Mount
Figure 4 Ceiling Mount
4
Advertisement

Subscribe to Our Youtube Channel
Related Manuals for TKH security BL2024M


Summary of Contents for TKH security BL2024M
- Page 1 To restore camera to factory defaults, power Figure 3 Wall/Pole Mount 6 Reset Button up with Reset button pressed for at least 10s. Figure 4 Ceiling Mount Table 1 Connector definition Figure 2 Cabling © TKH Security B.V. 2024 | Version 1 (20240529) | BL2024M-QS-EN...
- Page 2 Contact x6W@oM0a!9#F the manufacturer of the micro-SD card for information regarding the reliability and the life expectancy. © TKH Security B.V. 2024 | Version 1 (20240529) | BL2024M-QS-EN...
Need help?
Do you have a question about the BL2024M and is the answer not in the manual?
Questions and answers