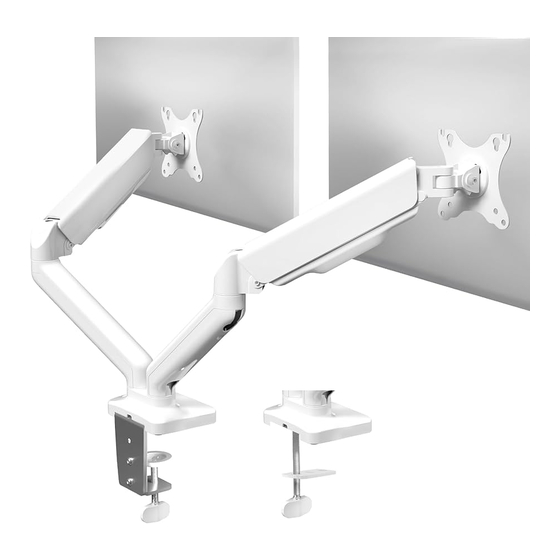
Vivo STAND-V002O Series Assembly Manual
Mechanical arm dual monitor desk mount
Hide thumbs
Also See for STAND-V002O Series:
- Assembly manual (16 pages) ,
- Instruction manual (8 pages) ,
- Instruction manual (8 pages)

Related Manuals for Vivo STAND-V002O Series


Summary of Contents for Vivo STAND-V002O Series
- Page 1 Mechanical Arm Dual Monitor Desk Mount STAND-V002O Series Assembly Manual Individual Product SKUs STAND-V002O STAND-V002OW...
- Page 2 If you do not understand these directions, or if you have any doubts about the safety of the installation, please contact our product support team at 309-278-5303 or help@vivo-us.com for further assistance. Check carefully to make sure there are no missing or defective parts. Failure to report missing parts within 30 days may result in denial of free replacement.
-
Page 3: Package Contents
Package Contents A (x2) B (x2) C (x1) D (x1) E (x1) Lower Arm Upper Arm Base Lower Clamp Upper Clamp F (x1) G (x2) H (x1) Grommet Plate VESA Plate Knob Included Hardware & Tools S-A (x2) S-B (x2) S-C (x2) M-A (x8) M-B (x8) -
Page 4: Assembly Steps
Assembly Steps STEP 1 Option 1: Clamp Installation Remove Plastic Cover (C1) from Base (C). Fully Loosen the Clamp Bolt (D1) on Lower Clamp (D). Install Upper Clamp (E) to Base (C) using Reinstall Plastic Cover (C1) to Base (C). M6x8mm Screws (S-A) and 5mm Allen Wrench (T-A). - Page 5 For Desktops 0.4” - 1.9” (10-50mm) Thick Attach Lower Clamp (D) to the upper two holes on Upper Clamp (E) using M6x10mm Screws (S-B) and 4mm Allen Wrench (T-B). Clamp the assembly to the desktop. For Desktops 1.8” - 3.1” (45-80mm) Thick Attach Lower Clamp (D) to the lower two holes on Upper Clamp (E) using M6x10mm Screws (S-B) and 4mm Allen Wrench (T-B).
- Page 6 Option 2: Grommet Installation Disassemble Lower Clamp (D) using the Phillips end on 5mm Allen Wrench (T-A) and separate the Clamp Bolt (D1). Plate Grommet Plate (F) onto the Clamp Bolt (D1) and Knob (H), then secure Base (C) to the desktop.
- Page 7 STEP 2 Place Lower Arms (A) onto Base (C), then place Upper Arms (B) onto Lower Arms (A). Tighten the set screws on the back of all arms using the flat end on 4mm Allen Wrench (T-B). STEP 3 Attach VESA Plates (G) to Upper Arms (B) using M8x30mm Screws (S-C) and 5mm Allen Wrench (T-A).
- Page 8 STEP 4 4.1 Determine which Screws (M-A or M-B) appropriately fits your monitors. Thread two Screws with M5 Washers (M-C) into the top VESA holes of the monitors leaving a 3mm gap. 4.2 Place monitors onto VESA Plates (G). Tighten the top two screws and install the remaining Screws (M-A or M-B) and M5 Washers (M-C) using the Phillips end of 5mm Allen Wrench (T-A).
- Page 9 STEP 5 Adjusting Monitor Height Position Mount Arm Turn 10-20x to Set Monitor Height Position the arm horizontally, as shown above, and firmly hold in Turn 5mm Allen Wrench (T-A) 10-20 times place. to obtain proper support for your monitor. Use the guide below to adjust the tension according to the amount of counterbalance Insert...
- Page 10 STEP 6 Remove plastic covers from Arms (A, B) using Phillips screwdriver end of 5mm Allen Wrench (T-A). Run cables from monitor through bottom of Arms, then reattach plastic covers.
- Page 11 Adjustments Turn the Adjustment Screw using 5mm Allen Wrench (T-A) to adjust the tilt joints. Adjust as desired.
- Page 12 Need Help? We’re Here For You Monday-Friday from 7am-7pm CST Saturday 8am-4pm CST Email Us Chat with Live Agent Give Us a Call help@vivo-us.com www.vivo-us.com 309-278-5303 ext. 1 FOR MORE GREAT VIVO PRODUCTS, CHECK OUT OUR WEBSITE AT: WWW.VIVO-US.COM VIVO-us @vivo_us @VIVOus VIVO...
Need help?
Do you have a question about the STAND-V002O Series and is the answer not in the manual?
Questions and answers