
Subscribe to Our Youtube Channel
Related Manuals for iWeld QUICKSILVER TIG 2800 DC


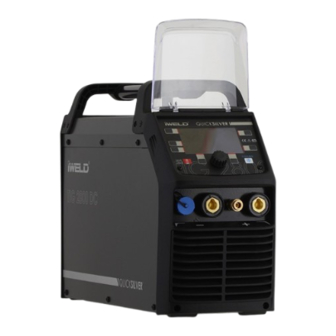
Summary of Contents for iWeld QUICKSILVER TIG 2800 DC
- Page 1 CUTTING EDGE WELDING USER’S MANUAL TIG/MMA dual function IGBT inverter technology AC/DC welding power source TIG 2800 DC...
- Page 2 Introduction First of all, thank you for choosing an IWELD welding or cutting machine! Our mission is to support your work with the most up-to-date and reliable tools both for DIY and industrial application. We develop and manufacture our tools and machines in this spirit.
-
Page 3: Fire Hazard
WARNING! Welding is a dangerous process! The operator and other persons in the working area must follow the safety instructions and are obliged to wear proper Personal Protection Items. Always follow the local safety regulations! Please read and understand this instruction manual carefully before the installation and operation! •... - Page 4 PRECAUTIONS TO ELECTROMAGNETIC COMPATIBILITY 1 General Welding may cause electromagnetic interference. The interference emission of arc welding equipment can be minimized by adopting proper installa- tion method and correct use method. The products described in this manual belong to the limit of class A equipment (applies to all occa- sions except the residential areas powered by public low-voltage power system).
- Page 5 The Main Parameters QUICKSILVER TIG 2800 DC 800TIG2800DC Art. Nr. IGBT Inverter type Water Cooling Unit HF/ LT Arc Ignition Number of programs Wireless Remote Control Remote Control from TIG Torch AC TIG AC PULSE TIG DC TIG ...
-
Page 6: Installation Instructions
2. Installation instructions 2-1. Layout for Front and Rear panel Aero socket: Is connected to torch switch control wire. Negative output: The welder’s negative polarity output. Shield gas connector: Is connected to the gas input pipe of torch. Positive output: The welder’s positive polarity output. Water box connector: Is connected to the water box. -
Page 7: Control Panel
3. Operation Instruction 3-1. Control Panel Welding mode button: Press it to select MMA/ HF TIG/ Lift TIG welding mode. Trigger mode selecting button: Press it to select 2T or 4T trigger mode. Welding function button: Press it to select the opening or closing of Pulse mode and Spot welding mode. - Page 8 Further Controls Explained Function A button (5) In HF TIG/ Lift TIG, press it to select Pre-gas time, Pre-current and Up-slope time; In Spot welding mode, press it to select Pre-gas time; In JOB program, press it to load the pa- rameter settings for the select number.
- Page 9 MMA display introduction Welding mode button: Press it to enter MMA welding mode. Hot Start button: Press it to select Hot start. Arc Force button: Press it to select Arc force. Parameter adjust knob: Rotate it to adjust welding current and value of Hot start and Arc force.
- Page 10 HF/LIFT TIG display introduction Welding mode button: Press it to enter HF TIG or Lift TIG welding mode. Trigger mode button: Press it to select 2T or 4T trigger mode. * Welding function button: Press it to select No Pulse/ Pulse/ Spot welding function. (Here is no Spot function in Lift TIG welding mode.) Function A button: Press it to select Pre-gas time, Start arc current, Up slope time.
- Page 11 TIG pulse display introduction Peak current It is 5% to 100% of the main welding current. Base current It is 5% to 100% of the main welding current, but less than Peak cur- rent. Pulse frequen- 0.5~999Hz. Pulse width 5~95%. TIG spot display introduction Current display 10~320A.
- Page 12 JOB Program introduction Welding mode display Here are selected welding states. Parameters display Here are all selected parameters values. JOB number A total 1~10 JOB numbers can store or call the se- lected parameters by JOB button. Load/ Delete display Press Function A/B button to call/delete parameters setting for the selected JOB number.
- Page 13 2T operation: This function without the adjustment of start current and crater current is suitable for the Re-tack welding, transient welding, thin plate welding and so on. Welding current Is Loosen the welding gun switch The setting base current Ib Arc is Arc is Press and hold the welding...
- Page 14 4T operation: The start current and crater current can be pre-set. This function can compensate the pos- sible crater that appears at the beginning and end of the welding. Thus, 4T is suitable for the welding of medium thickness plates. I (A) t2 t3 t (s)
- Page 16 4. Installation & Operation for MMA welding Set up and installation for MMA Welding Connection of Output Cables Two sockets are available on this welding machine. For MMA welding the electrode holder is shown be connected to the positive socket, while the earth lead (work piece) is con- nected to the negative socket, this is known as DCEP.
- Page 17 4.2. Operation for MMA Welding (1) According to the above method to install is correct, rotate the power switch, so that the power switch is “ON” position, then the screen light and the fan comes on, the device work properly. (2) Set to ‘MMA’...
- Page 18 5. Installation & Operation for TIG welding 5.1. Set up and installation for TIG Welding (1) Insert the earth cable plug into the positive socket on the front of the machine and tighten it. (2) Plug the welding torch into the negative socket on the front panel, and tighten it. (3) Connect the gas line of TIG Gun to outlet gas connector on the front of the machine.
- Page 19 5.2. Operation for TIG Welding (1) According to the above method to install is correct, turn the power switch to the “ON” position, the screen should illuminate, the fan comes on, the device work prop- erly. (2) Set the welding mode to ‘Lift TIG’ or ‘HF TIG’ and the output waveform: DC or AC. (3) Set trigger mode: 2T/4T.
-
Page 20: Duty Cycle Curve
Duty Cycle Curve TIG 2800 DC The letter “X” stands for duty cycle, which is defi ned as the proportion of the time that a machine can work continuously within a certain time (10 minutes). The rated duty cycle means the proportion of the time that a machine can work continuously within 10 minutes when it outputs the rated welding current. -
Page 21: Safety Requirements
Precautions Workspace 1. Welding equipment free of dust, corrosive gas, non-fl ammable materials, up to 90% humidity for use! 2. Avoid welding outdoors unless protected from direct sunlight, rain, snow, work area tempera- ture must be between -10 °C and +40°C. 3. - Page 22 CUTTING EDGE WELDING CERTIFICATE OF EUROPEAN STANDARD Manufacturer: IWELD Ltd. 2314 Halásztelek II. Rákóczi Ferenc street 90/B Tel: +36 24 532-625 info@iweld.hu www.iweld.hu TIG 2800 DC TIG/MMA dual function IGBT inverter Item: technology DC welding power source Applied Rules (1):...
Need help?
Do you have a question about the QUICKSILVER TIG 2800 DC and is the answer not in the manual?
Questions and answers