Table of Contents
Advertisement
Quick Links
Advertisement
Table of Contents

Summary of Contents for Digitus DS-55346
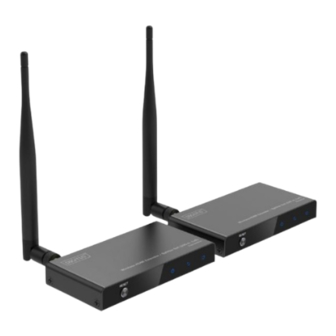
- Page 1 Wireless HDMI Extender / Splitter Set (100 m, 1x4) Manual DS-55346 - DS-55347...
-
Page 2: Table Of Contents
Table of contents Introduction ................3 Main Features ................ 3 Package Content ..............4 Technical Features ..............4 Panel Description ..............6 Connection Diagram ............... 8 Pairing Transmitter & Receiver ..........9 Troubleshooting ..............14 Safety Instructions ..............15 10. Frequency range and maximum transmission power .... 16... -
Page 3: Introduction
1. Introduction Experience ultimate flexibility and performance for the transfer of your Full HD AV signals with our wireless transfer system, which offers a range of up to 100 meters in a 1:1 connection with unobstructed view. Our system supports both Point-to-Point and Multicast (Point-to-Multipoint) transfers, which allows you the freedom of transferring your AV signal to multiple displays at the same time or connecting a single source with various target devices. -
Page 4: Package Content
Distribute your HDMI signal on up to 4 displays • Additional HDMI output (loop-out) on transmitter module for • connection to an external monitor IR transmission to control the source device from output • display Plug & Play - No software or driver required •... - Page 5 Signal Compressing 150-200 ms Latency Frequency Band Range 5GHz Vertical Frequency Range 50/60Hz Compression H.265 IR Frequency Range 20-60KHz Progressive Resolutions 480p, 576p, 720p, 1080p (50&60Hz) Operating Temperature 0℃ to 50℃ 5% to 90% RH Storage Humidity non-condensation Power Supply DC 5V/2A, 10W Power Consumption (Max) TX: 3W, RX: 1.5W...
-
Page 6: Panel Description
5. Panel Description INPUT: HDMI OUTPUT: HDMI... - Page 7 DC/5V: DC 5V Input Loop out: HDMI Loop Out pot to connect local monitor Reset: Long Press 10 Seconds to Reset, Short Click to reconnect the Sender and Receiver IR IN: IR Signal Input IR OUT: IR Signal Output Power LED No Connection: Constant light on Link Get Connection: Flashes Quickly...
-
Page 8: Connection Diagram
6. Connection Diagram Point-to-point Connection Point-to-Multipoint Connection... -
Page 9: Pairing Transmitter & Receiver
7. Pairing Transmitter & Receiver The set (DS-55346) already has the transmitter & receiver paired at the factory. If you want to pair the transmitter & receiver again or add additional receivers (DS-55347), please follow the steps below: Step 1:... - Page 10 Step 2: Start with the transmitter unit first. 1) Press and hold the "RESET" button. 2) Now connect the external power supply unit that was previously plugged into the socket. Wait (and continue to hold the "RESET" button) until the status LED (10) starts to flash rapidly. You can then press the "RESET"...
- Page 11 Step 3: While the transmitter and receiver are still in pairing mode (status LEDs flash quickly), you now need an HDMI connection cable (not included in the scope of delivery) to match the signal / pair transmitter & receiver. Now connect "HDMI IN" of the transmitter and "HDMI OUT" of the receiver with the HDMI cable.
- Page 12 Step 4: Once the transmitter and receiver have been successfully connected (step 3), the status LED stops flashing and lights up permanently, which means that the signal has been successfully matched / the transmitter and receiver(s) have been paired. Step 5: Now briefly disconnect the transmitter &...
- Page 13 Your display(s) will now show "Searching TX" for about 5 to 35 seconds (the time for the signal to build up varies depending on the local conditions). Step 7: Transmitter & receiver now connect to start wireless transmission -> the content of the signal source is shown on the display(s)
-
Page 14: Troubleshooting
8. Troubleshooting Problem Root Solution No picture after The transmitter Follow the matching correct and receiver may steps to match the connection need to be signal of the Sender (transmitter, paired again and Receiver receiver in the same room) No picture after The distance When passing may not reach... -
Page 15: Safety Instructions
specified in the at 5GHz that possible sources of description affect the signal interference that transmission of transmit on the the extender same 5GHz frequency band from the room 9. Safety Instructions Please read the following safety instructions carefully before carefully before commissioning: Observe all warnings and instructions for the device. -
Page 16: Frequency Range And Maximum Transmission Power
Disconnect the appliance from the power supply and power supply and the connected devices before cleaning. Clean the appliance with a dust-free cloth Only use the power adapter supplied for operation To disconnect the system completely from the power supply, you must unplug the mains plug from the socket. - Page 17 Hereby ASSMANN Electronic GmbH declares that the Declaration of Conformity is part of the shipping content. If the Declaration of Conformity is missing, you can request it by post under the below mentioned manufacturer address. info@assmann.com Assmann Electronic GmbH Auf dem Schüffel 3 58513 Lüdenscheid Germany...


Need help?
Do you have a question about the DS-55346 and is the answer not in the manual?
Questions and answers