
Related Manuals for AgileX PiPER


Summary of Contents for AgileX PiPER
- Page 1 PiPER Robo(c Arm Quick Start User Manual AgileX Robo(cs PiPER ROBOTIC ARM Quick start user manual V 1 . 0 2 0 2 4 . 0 9...
- Page 2 This chapter contains important safety informa(on that must be read and understood by any user or organiza(on before using the device for the first (me. If there are any ques(ons regarding the usage, please contact us at support@agilex.ai. It is essen(al to follow and implement all assembly instruc(ons and guidelines in other chapters of this manual.
- Page 3 Depending on the risk assessment, different func(onal safety levels may apply; therefore, when different safety and emergency stop performance levels are required, always choose the highest performance level. Always read and understand the manuals for all devices used in the installa(on. AgileX Robo(cs...
-
Page 4: Table Of Contents
2. Basic Usage ......................................4 2.1. Electrical Interface Introduc(on ..............................5 2.2. Robo(c Arm Teach/Demonstra(on Mode Instruc(ons ......................5 2.3. Base Installa(on Instruc(ons ..............................6 2.4. End Part Installa(on Instruc(ons .............................7 3. ArmRobotUA Host Computer Usage Instruc(ons ..........................7 4. Secondary Development ...................................9 AgileX Robo(cs... -
Page 5: Introduc
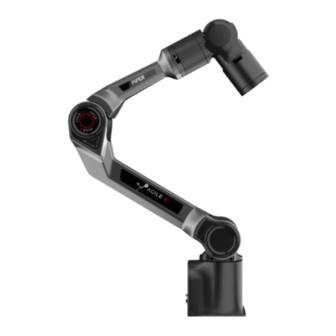
It features a lightweight design, allowing the robotic arm to achieve fast motion capabilities while maintaining a relatively high payload capacity. It can be widely used in embodied intelligence for real-world data collection. BuQon for teach/demonstra(on Electrical panel AgileX Robo(cs... -
Page 6: Electrical Interface Introduc
The robo(c arm's drag & teach mode status is indicated by the buQon light between J5 and J6. There are three types of robo(c arm status light displays: No light display: Robo(c arm’s drag & teach mode is stopped, or the drag recording has ended. AgileX Robo(cs... -
Page 7: Base Installa
M5 screws, which can be (ghtened using the provided hex tool. The hole spacing is 70mm. If you need to aQach the base to mobile equipment or a fixed surface, you can design the corresponding structure with 70mm hole spacing. AgileX Robo(cs... -
Page 8: End Part Installa
Using a PC with Windows 7 or higher, double-click to open the host computer soWware. Through this human-machine interac(on soWware, you can operate the robo(c arm and read feedback data from the external network of the robo(c arm. The user interface is shown as follows: AgileX Robo(cs... - Page 9 Names of the func(onal areas in the host computer soWware panel Index Name Robo(c Arm Communica(on BuQon Menu Op(ons Speed Percentage Setng Robo(c Arm Enable BuQon Robo(c Arm Emergency Stop BuQon Window Resize/Close BuQons Opera(on Func(on Area 3D Simula(on Model Trajectory Library Func(on AgileX Robo(cs...
-
Page 10: Secondary Development
Robo(c Arm Joint Status Robo(c Arm Status Bar 4. Secondary Development Currently, the robo(c arm supports secondary development through a Python SDK and ROS1 driver package. For detailed secondary development instruc(ons, please refer to the GitHub link. SDK:hQps://github.com/agilexrobo(cs/piper_sdk ROS1:hQps://github.com/agilexrobo(cs/piper_ros AgileX Robo(cs...
Need help?
Do you have a question about the PiPER and is the answer not in the manual?
Questions and answers