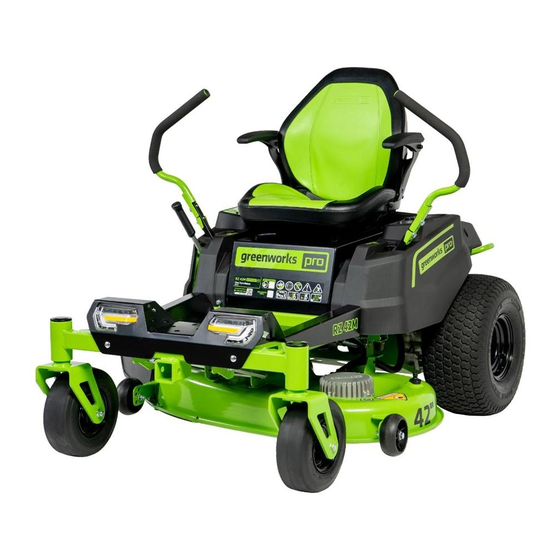
GreenWorks Pro CRZ426 Operator's Manual
Riding lawn mower
Hide thumbs
Also See for CRZ426:
- Operator's manual (121 pages) ,
- Assembly manual (28 pages) ,
- Manual (48 pages)
Table of Contents
Advertisement
Available languages
Available languages
Advertisement
Table of Contents

Related Manuals for GreenWorks Pro CRZ426


Summary of Contents for GreenWorks Pro CRZ426
- Page 1 CRZ426 CRZ428 RIDING LAWN MOWER OPERATOR MANUAL MANUEL D’OPÉRATEUR TONDEUSE À GAZON À CONDUCTEUR ASSIS CORTACÉSPED CON CONDUCTOR SENTADO MANUAL DEL OPERADOR www.greenworkstools.com www.greenworkscommercial.com...
-
Page 2: Items Not Covered By Warranty
As the original owner, be sure to register your product (vehicle, batteries & chargers) at following product pages on our Greenworks website(s): MODEL VOLTAGE DESCRIPTION PRODUCT PAGES QR CODE https://www. 42” CrossoverZ Zero Turn greenworkstools. CRZ426 60-volt Multi-Battery 6-in-Parallel com/pro-60v-42-inch- Kitted 60V crossover-Z-zero- turn-7409302 https://www. 42” CrossoverZ Zero Turn greenworkstools. - Page 3 HELPLINE: Warranty service is available by calling our toll-free helpline, at 1-888-909-6757 Greenworks Pro 1-855-470-4267 Greenworks Commercial. TRANSPORTATION CHARGES: Transportation charges for the movement of any power equipment unit or attachment are the responsibility of the purchaser. It is the purchaser’s responsibility to pay transportation chares for any part submitted for replacement under this warranty unless such return is requested in writing by Greenworks.
-
Page 4: Table Of Contents
English 10.1 Control panel..........13 Risk levels........5 10.2 Install the Roll over protection General machine safety structure (ROPS)........14 warnings........5 10.3 Steering control levers......14 Work area safety........5 10.4 Anti-scalp Wheels........14 Electrical safety.......... 5 10.5 Neutral bypass knob.........15 Personal safety...........5 11 Unpack the machine....15 Machine use and care........ - Page 5 English 23 Serial Number(s)......37...
-
Page 6: Risk Levels
English RISK LEVELS Unmodified plugs and matching outlets will reduce risk of electric shock. The following signal words and meanings are intended • Avoid body contact with earthed or grounded to explain the levels of risk associated with this product. surfaces, such as pipes, radiators, ranges and refrigerators. -
Page 7: Machine Use And Care
English can cause severe injury within a fraction of a to another. Shorting the battery terminals together second. may cause burns or fire. • Under abusive conditions, liquid may be ejected MACHINE USE AND CARE from the battery; avoid contact. If contact accidentally occurs, flush with water. -
Page 8: Safe Practices For Ride-On Mowers
English • Keep all cooling air inlets clear of debris. Blocked • Follow the manufacturer’s recommendation for air inlets and debris may result in overheating or risk wheel weights or counterweights. of fire. PREPARATION BEFORE • While operating the lawnmower, always wear OPERATING non-slip and protective footwear. -
Page 9: Slope Specific
English • Do not carry children, even with the blade(s) shut replacement parts. This will ensure that the safety off. Children could fall off and be seriously injured or of the ride-on lawn mower is maintained. interfere with safe machine operation. Children who •... -
Page 10: Operator
English • Follow daily and weekly checklists, making sure WARNING electrical connections are secured and bolts are • Carefully read all instructions on the mower and tightened. in the manual before attempting to assemble and • Replace damaged parts immediately. operate the mower. -
Page 11: Servicing
English • Look down and behind before and while moving • Always disengage deck blade switch and turn key to backwards. “OFF” position and remove key. • Slow down before turning. • Stay alert, and turn the mower off if a child or any other person enters the mowing area. -
Page 12: Symbols On The Product
English • Disconnect the battery pack from the appliance Symbol Name Explanation before making any adjustments, changing Recycle This product use lithi- accessories, or storing appliance. Such preventive Symbols um-ion (Li-ion) batteries. safety measures reduce the risk of starting the Local, state, or federal appliance accidentally. -
Page 13: Environmentally Safe Battery Disposal
English Symbol Name Explanation Symbol Name Explanation Read & Un- To reduce the risk of Do Not Step. Do not step. derstand injury, user must read Operator’s and understand opera- Manual tor’s manual before using this product. Lamp Alert CAUTION --- Do not stare at operating lamp. -
Page 14: Proposition 65
English PROPOSITION 65 WARNING This product contains a chemical known to the state of California to cause cancer, birth defects or other reproductive harm. Some dust created by power sanding, sawing, grinding, drilling, and other construction activities contains chemicals known to cause cancer, birth defects or other reproductive harm. -
Page 15: Install The Roll Over Protection Structure (Rops)
English Name Function Digital dis- This display shows important electri- play cal system information. Refer to the Electrical section for complete infor- mation. ON/OFF Pull the PTO switch up to activate Bolt and washer assembly for blade the mower’s cutting blades. Push the (PTO) knob down to stop the cutting blades. -
Page 16: Neutral Bypass Knob
English UNPACK THE MACHINE WARNING Make sure that you correctly assemble the machine before use. WARNING • If parts of the machine are damaged, do not use the machine. 10.5 NEUTRAL BYPASS KNOB • If you do not have all the parts, do not operate the machine. -
Page 17: Install The Accessories
English 3. Install the washers and nuts and tighten securely. 4. Attach the sleeve to the nut. seat adjustment lever 5. Make sure it is securely seated. INSTALL THE ACCESSORIES 1. Mulch cover 13.1 INSTALL THE MULCH COVER 1. Sit down on seat and lift the seat adjustment lever. Bolt 2. -
Page 18: Before Operating The Machine
English CAUTION WARNING Hold the deck height adjustment lever firmly when Align the ribs of the battery with the battery port. setting the deck height and only release when it Make sure that the battery latch clicks into the is secure in the desired slot. Quickly letting go of battery compartment smoothly. -
Page 19: Operate The Machine
English 14.2 OPERATE THE MACHINE NOTE The key will return back to (c) position 14.2.1 START THE MACHINE automatically. Wait for 4 seconds until the display WARNING shows normally. 4. Place steering control levers in forward (F) position Clear the area of bystanders before operating the and drive to desired mowing location. - Page 20 English MP3 player, or other USB devices. Consult the Inexperienced operators may have a tendency to owner’s manual for your device for specific charging oversteer and lose control. Slow-moving practice requirements. maneuvers are recommended to become familiar with these characteristics before attempting normal-speed Connect one end of a USB cable (not provided) to your operation.
-
Page 21: Slope Operation
English frequently. If you cannot mow at a regular interval, • Avoid starting and stopping on a slope. If tires lose mow at a high cutting height at first, then mow again traction, disengage the blades and proceed slowly two days later at a lower cutting height. straight down the slope. -
Page 22: Digital Display
English 6. Extremely dry conditions Left Driver Controller and motor 7. Tire pressure Power management unit (in the battery The attachments mounted to the mower will also cabin) affect the way it handles on a slope. Be aware that Right Blade Controller and motor each attachment’s characteristics vary. -
Page 23: Error Code
English ERROR CODE Dis- Description Error code on Cause Solution play The left steer- The potentiometer on the left The potentiometer fails. Contact a ing control lev- steering control lever fails. specified serv- er fails. ice center. The potentiometer connector The connector is loose. - Page 24 English Dis- Description Error code on Cause Solution play The left or right The 9pin connector between The connector is loose. Contact a drive motor the vehicle wire harness and specified serv- does not work. the left drive controller is loose. ice center.
- Page 25 English Dis- Description Error code on Cause Solution play The left or right The right gearbox is stuck. TR14 The right gearbox fails. Contact a drive motor specified serv- does not work. ice center. The left gearbox is stuck. TL14 The left gearbox fails.
- Page 26 English Dis- Description Error code on Cause Solution play The left or right The communication module of V 12 The left blade controller Contact a blade does not the left blade controller is dam- fails. specified serv- work. aged. ice center. The 30pin connector between The connector is loose.
- Page 27 English Dis- Description Error code on Cause Solution play The left or right The 6pin connector between ML15 The connector is loose. Contact a blade does not the left blade motor and the ve- specified serv- work. hicle wire harness is loose. ice center.
-
Page 28: Maintenance
English Dis- Description Error code on Cause Solution play The left or right The left blade motor fails. ML22 The motor fails. Contact a blade does not specified serv- The 6pin connector between The connector is loose. work. ice center. the left blade motor and the left blade controller is loose. -
Page 29: Mower Blade Maintenance
English 16.1.1 REPLACE THE BLADE pages contain suggested maintenance information and schedules which the operator should follow on a routine basis. For more detailed information, refer to the website for your unit. Remain alert for unusual noises, as they could be signaling a problem. Visually inspect the machine for any abnormal wear or damage. -
Page 30: Tires
English 16.2 TIRES 16.4 TORQUE VALUES It is important for level mowing that all tires have WARNING the correct amount of air pressure. The recommended Particular attention must be given to tightening the pressure are: drive wheel lug nuts and blade spindle bolts. Failure to NOTE correctly torque these items may result in the loss of a wheel or blade, which can cause serious damage or... -
Page 31: Battery Compartment Filter Maintenance
English • The working environment of the battery pack is • The jack stands should not allow the machine to -10°C - 45°C (14°F - 113°F). Battery pack can be move when the traction drive system is running and used a -21°C - 55°C (-5°F - 131°F) for discharge, the drive wheels are rotating. -
Page 32: Transportation
English TRANSPORTATION WARNING Use extra care when loading or unloading the machine into a trailer. Press the low speed drive button and carefully move the drive levers as needed to control the speed. Always back onto the trailer when loading. When loading or unloading the mower, do not exceed the maximum recommended operation angle of 15°. -
Page 33: Store The Machine
English • Turn off the mower completely. See section "STOPPING THE ELECTRIC ZERO TURN MOWER". 18.2 STORE THE MACHINE The following steps should be taken in order to prepare the machine for storage. • Clean the machine as described in the previous section. - Page 34 English Problem Cause Solution Sudden break- 1. The battery is out of power. 1. Make sure at least one Greenwoks designed down during battery pack is inserted in the battery com- 2. The seat switch is disconnected on rugged driving. partment.
- Page 35 English Problem Cause Solution The machine 1. The grass is too wet. 1. Please check the grass before working. If cuts the grass the grass is too wet, please wait until the 2. The grass amount you set is too much. abnormally.
-
Page 36: Technical Data
21.1 ITEMS NOT COVERED BY Warranty service is available by calling our toll- WARRANTY: free helpline, at 1-888-909-6757 Greenworks Pro, 1-855-470-4267 Greenworks Commercial. 1. Any that have been transferred to a new owner. This warranty only applies to the original purchaser from 21.3 TRANSPORTATION CHARGES:... - Page 37 Español NIVELES DE RIESGO • Mantenga alejados a los niños y los transeúntes mientras utilice esta máquina. Las distracciones Las siguientes indicaciones y los significados explican pueden hacer que pierda el control. los niveles de riesgo asociados a este producto. SEGURIDAD ELÉCTRICA SÍMBO- INDICACIÓN...
-
Page 38: Uso Y Cuidado De La Máquina
Español • Retire cualquier llave de ajuste antes de correctamente con filos cortantes tienen menos encender la máquina. Una llave que se quede probabilidades de atascarse y son más fáciles de fijada a una pieza giratoria de la máquina puede controlar. -
Page 39: Información General
Español únicamente piezas de repuesto idénticas. Esto • Cuando trabaje en pendientes, asegúrese garantizará el mantenimiento de la seguridad de la siempre de tener una posición estable, máquina. trabaje siempre en sentido transversal en las pendientes, nunca hacia arriba o abajo •... - Page 40 Español PREPARATIVOS ANTES DEL frecuencia si hay signos de desgaste o deterioro y sustituya según sea necesario. FUNCIONAMIENTO • No transporte niños, ni siquiera con las • Despeje la zona de trabajo de cualquier objeto cuchillas apagadas. Los niños podrían caerse y que podría salir despedido a causa la máquina o resultar gravemente heridos o interferir con el interferir en su funcionamiento.
- Page 41 Español SERVICIO AVISO Siempre deben seguirse precauciones básicas de • Mantenga la máquina en buen estado de seguridad al utilizar cortacéspedes para reducir el funcionamiento. Sustituya las piezas desgastadas o riesgo de incendio, descarga eléctrica y lesiones dañadas. personales. • Tenga precaución al realizar tareas de servicio en las cuchillas.
- Page 42 Español • Lleve siempre indumentaria adecuada. Se piedras, alambres, juguetes, etc., que podrían salir recomienda el uso de guantes protectores y calzado despedidos a causa de las cuchillas. de seguridad. • Asegúrese de que no haya transeúntes en la zona •...
-
Page 43: Seguridad Infantil
Español causa inmediatamente. Normalmente, un exceso de • Tenga mucho cuidado al acercarse a esquinas vibración es una señal de que el cortacésped no ciegas, pórticos, arbustos, árboles u otros objetos funciona correctamente. que puedan ocultar su visión de un niño que pueda correr hacia el recorrido del cortacésped. -
Page 44: Símbolos En El Producto
Español interruptor o la conexión de un aparato que tiene el estos símbolos le permitirá manejar la herramienta interruptor activado fomenta los accidentes. mejor y de manera más segura. • Desconecte la batería del aparato antes de realizar Símbolo Nombre Explicación ajustes, cambiar accesorios o almacenarlo. - Page 45 Español Símbolo Nombre Explicación Símbolo Nombre Explicación Revoluciones, carreras, PELIGRO --- Tenga especial precau- /min Por minuto velocidad de superficie, Riesgo en ción en las pendientes. órbitas, etc., por minuto pendientes No siegue en pendientes pronuncia- mayores de 15 grados. Velocidad Velocidad rotacional, sin No utilice en pendientes...
- Page 46 Español FINALIDAD AVISO Si la batería se agrieta o se rompe, con o sin fugas, Esta máquina se utiliza para el corte de césped no la recargue ni la utilice. Deséchela y sustitúyala doméstico. La cuchilla de corte debe estar paralela al por una batería nueva.
-
Page 47: Panel De Control
Español Luz delantera Nombre Función Alta/baja Permite a los operarios seleccionar CONOZCA SU MÁQUINA para veloc- una velocidad de conducción cómo- idad de da. Al pulsar a la posición “Veloci- 10.1 PANEL DE CONTROL conducción dad alta”, la velocidad de conducción máxima será... -
Page 48: Desembalaje De La Máquina
Español 10.5 MANDO DE DERIVACIÓN DE 1. Levante una palanca de dirección para alinear los orificios de la palanca de dirección con los orificios PUNTO MUERTO del poste de montaje correspondiente. Seleccione la altura de funcionamiento preferida de la palanca 1. -
Page 49: Instalación De Los Accesorios
Español INSTALACIÓN DE LOS AVISO ACCESORIOS • Si las piezas de la máquina presentan daños, no utilice la máquina. 1. Cubierta de mulching • Si no tiene todas las piezas, no utilice la máquina. • Si faltan piezas o hay piezas dañadas, contacte 13.1 INSTALACIÓN DE LA CUBIERTA con el centro de servicio. - Page 50 Español Palanca de ajuste del asiento Palanca de ajuste de altura de la plataforma 1. Siéntese en el asiento y levante la palanca de ajuste del asiento. 2. Mientras sujeta la palanca, deslice el asiento hacia la posición deseada. 3. Suelte la palanca y asegúrese de que el asiento esté...
- Page 51 Español empuje hacia la izquierda para desacoplar de Battery la ranura, mueva hacia la parte posterior del cortacésped, posteriormente, empuje hacia la derecha en la ranura para fijarla. Battery Seat 4. Para bajar la plataforma de corte, agarre la palanca latch de ajuste de altura de la plataforma, empuje hacia la izquierda para desacoplar de la ranura,...
-
Page 52: Funcionamiento De La Máquina
Español funcionamiento. Este sistema es una característica de Funcionamiento seguridad importante del cortacésped. Debe repararse Puesta en marcha inmediatamente en caso de fallo. La máquina incorpora un interruptor del asiento independiente que detendrá el sistema de transmisión y los motores de la plataforma cuando el operario se levante por cualquier motivo mientras el cortacésped está... - Page 53 Español NOTA NOTA No intente cambiar la dirección de funcionamiento El puerto USB solo recibe alimentación cuando la mientras el cortacésped esté en movimiento. máquina se pone en marcha. Deténgase siempre por completo antes de cambiar la dirección del cortacésped. AVISO Nunca utilice auriculares ni cualquier otro dispositivo AVISO...
-
Page 54: Funcionamiento En Pendientes
Español • Recuerde, el césped crece a distintas AVISO velocidades en las distintas épocas del año. Corte Las depresiones pronunciadas o los obstáculos el césped con más frecuencia a principios de elevados (como alcantarillas o bordillos) no deben la primavera para mantener la misma altura de abordarse directamente a alta velocidad en un corte. -
Page 55: Pantalla Digital
Español Los neumáticos podrían resbalar, aunque las 15 grados, tenga cuidado con cualquier condición ruedas estén paradas. que pueda hacer que los neumáticos de tracción del cortacésped pierdan tracción, lo que puede • Cuando descienda una pendiente, lleve siempre dar lugar a una posible pérdida de control de una marcha puesta. - Page 56 Español 14.4.1 PANTALLA DIGITAL Nombre Significado Capacidad restante de batería Reloj de arena Error del controlador/ error de la ba- tería/ error del motor/ error del vehí- culo Posición de error Código de error/ total horas de traba- 14.5 ERRORES El sistema Canbus emprenderá...
- Page 57 Español ERROR CODE Dis- Description Error code on Cause Solution play The left steer- The potentiometer on the left The potentiometer fails. Contact a ing control lev- steering control lever fails. specified serv- er fails. ice center. The potentiometer connector The connector is loose.
- Page 58 Español Dis- Description Error code on Cause Solution play The left or right The 9pin connector between The connector is loose. Contact a drive motor the vehicle wire harness and specified serv- does not work. the left drive controller is loose. ice center.
- Page 59 Español Dis- Description Error code on Cause Solution play The left or right The right gearbox is stuck. TR14 The right gearbox fails. Contact a drive motor specified serv- does not work. ice center. The left gearbox is stuck. TL14 The left gearbox fails.
- Page 60 Español Dis- Description Error code on Cause Solution play The left or right The communication module of V 12 The left blade controller Contact a blade does not the left blade controller is dam- fails. specified serv- work. aged. ice center. The 30pin connector between The connector is loose.
- Page 61 Español Dis- Description Error code on Cause Solution play The left or right The 6pin connector between ML15 The connector is loose. Contact a blade does not the left blade motor and the ve- specified serv- work. hicle wire harness is loose. ice center.
-
Page 62: Mantenimiento
Español Dis- Description Error code on Cause Solution play The left or right The left blade motor fails. ML22 The motor fails. Contact a blade does not specified serv- The 6pin connector between The connector is loose. work. ice center. the left blade motor and the left blade controller is loose. - Page 63 Español reparaciones prematuras. Las siguientes páginas AVISO contienen información y programas de mantenimiento • El filo de la cuchilla (parte curva) debe apuntar sugeridos que el operario debe seguir de forma hacia arriba al interior de la plataforma para rutinaria. Si desea información más detallada, consulte garantizar un corte adecuado.
- Page 64 Español 6. Enrosque la tuerca de la cuchilla en el eje y apriete NOTA con los dedos. Cambie el aceite de la caja de engranajes después de 7. Apriete la tuerca de la cuchilla hacia abajo en manejar la máquina durante 50 horas por primera vez; sentido horario con una llave dinamométrica (no posteriormente, cambie el aceite cada 200 horas.
Need help?
Do you have a question about the CRZ426 and is the answer not in the manual?
Questions and answers
blade base- part you connect blade to