
Related Manuals for GreenWorks Pro RZ42M60


Summary of Contents for GreenWorks Pro RZ42M60
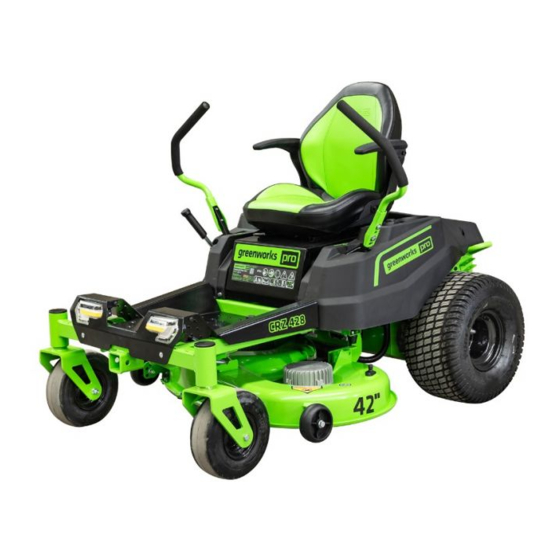
- Page 1 7406102/7406902/ 7407002 Zero-Turn Mower OPERATOR MANUAL RZ42M60/ RZ42M80/ www.greenworkstools.com www.greenworkscommercial.com RZ42M82 (7407002)
- Page 2 REGISTRATION: • A s t h e o r i g i n a l o w n e r , b e s u r e t o r e g i s t e r y o u r p r o d u c t ( ve h i c l e , b a t t e r i e s &...
-
Page 3: Table Of Contents
English 11.2 Operate the machine........11 Risk levels...........2 11.3 Slope operation..........12 Read all instructions......2 11.4 Digital display..........13 Operator............. 2 11.5 Faults............... 13 Machine............. 2 12 Fault code......... 14 Mowing area............3 13 Maintenance........20 Mowing..............3 Servicing............3 13.1 Mower blade maintenance.......20 Child safety............3 13.2 Tires.............. -
Page 4: Risk Levels
English RISK LEVELS WARNING • Carefully read all instructions on the mower and in the The following signal words and meanings are intended to manual before attempting to assemble and operate the explain the levels of risk associated with this product. mower. -
Page 5: Mowing Area
English • Replace damaged parts immediately. • Do not mow in reverse unless absolutely necessary. • Never operate mower without a proper trail shield, • When moving in reverse, SLOWLY pull right and left discharge cover, switch control, or other safety device in Drive Control Levers rearward and avoid sudden place and in working order. -
Page 6: Use A Ramp
English your view of a child who may run into the path of the always in operating condition. Be aware of possible mower. hazards when not using your battery-operated mower or when changing accessories. Following this rule will • Before and while backing, look behind and down for reduce the risk of electric shock, fire, or serious personal small children. -
Page 7: Environmentally Safe Battery Disposal
English ENVIRONMENTALLY SAFE Symbol Name Explanation BATTERY DISPOSAL Type or a characteristic of Direct Current current No Load Rotational speed, at no load Speed Precautions that involve Safety Alert your safety. WARNING Do not expose the product The toxic and corrosive materials below are in the batteries --- Wet Con- to rain or moist conditions. -
Page 8: Proposition 65
English PROPOSITION 65 OVERVIEW WARNING This product contains a chemical known to the state of California to cause cancer, birth defects or other reproductive harm. Some dust created by power sanding, sawing, grinding, drilling, and other construction activities contains chemicals known to cause cancer, birth defects or other reproductive harm. -
Page 9: Know Your Machine
English KNOW YOUR MACHINE Name Function High/Low Allows operators to select a comfortable CONTROL PANEL for driving driving speed. Pressing it to “High speed Speed"” position means that the maxi- 7.1.1 CONTROL PANEL mum drive speed will be 8 mph. Pressing it to “Low Speed”... -
Page 10: Unpack The Machine
English INSTALL THE SEAT WARNING Never drive mower with the neutral bypass knob working. Always install the neutral bypass knob to the original position before driving! Failure to re-install the knob could cause serious damage to your mower and void mower warranty! WARNING Seat plug... -
Page 11: Install The Mulch Cover
English 10.1 INSTALL THE MULCH COVER WARNING Be sure the seat is locked into place before operating the mower. A seat that is not secure can cause the operator to shift and lose control of the mower and result in possible death or serious personal inj ury. - Page 12 English • Check brake operation. • Check tire pressure. • Check for loose fasteners. • Check to make sure all guards are in place and working properly. • Clean debris from mower. • Test safety interlock system. • Adjust seat to desired position. •...
-
Page 13: Operate The Machine
English 11.2 OPERATE THE MACHINE 11.2.2 STOP THE MACHINE DANGER 11.2.1 START THE MACHINE Never make sudden stops or reverse direction, especially when maneuvering on a slope. The steering is designed for sensitive response. Rapid movement of the steering control levers in either direction could result in a reaction of the machine that can cause serious inj ury. -
Page 14: Slope Operation
English six inches, you may want to mow the lawn twice to WARNING achieve a better quality of cut. If you lose steering control while operating the machine, • During normal mowing, cut only about 1/3 of the grass place the steering control levers in the park brake position blade. -
Page 15: Digital Display
English 11.4 DIGITAL DISPLAY • Do not tow on slopes. The weight of the towed equipment may cause loss of traction and control. The function of the digital display, located on the control • If the mower’s tires lose traction when operating on panel, is to provide electrical system information to the slopes, disengage the deck drive, place the steering operator. -
Page 16: Fault Code
English FAULT CODE Dis- Description Fault code on Beep- Cause Solution play The left steer- The potentiometer on the left The potentiometer fais. Contact a ing control lev- steering control lever fails specified serv- er fails. ice center. The potentiometer connector on The connector is loose. - Page 17 English Dis- Description Fault code on Beep- Cause Solution play The left or The right gearbox is stuck. TR14 The right gearbox fails. Contact a right drive mo- specified serv- tor does not ice center. work. The left gearbox is stuck. TL14 The left gearbox fails.
- Page 18 English Dis- Description Fault code on Beep- Cause Solution play The left or No battery pack is inserted in V 12 There is no battery pack Contact a right cutter the PMU2 of the battery com- in the battery compart- specified serv- does not work.
- Page 19 English Dis- Description Fault code on Beep- Cause Solution play The left or The 6pin connector between the ML15 The connector is loose. Contact a right cutter left cutter motor and the vehicle specified serv- does not work. wire harness is loose. ice center.
- Page 20 English Dis- Description Fault code on Beep- Cause Solution play The beeper The opeartor leaves the seat. The machine beeps. Turn off the alarms. beeper machine before alarms you leave the in low machine. fre- The connector between the vehi- The connector is loose.
- Page 21 English Dis- Description Fault code on Beep- Cause Solution play The battery PMU is slightly overcurrent or PMU11 PMU is slightly over- Do not use the compartment PMU is slightly overtempera- current or PMU is machine too alarms. ture. slightly over tempera- much to avoid ture.
-
Page 22: Maintenance
English MAINTENANCE 13.1.1 REPLACE THE BLADE Regular maintenance is the best prevention for costly downtime or expensive, premature repair. The following pages contain suggested maintenance information and schedules which the operator should follow on a routine basis. For more detailed information, refer to the website for your unit. -
Page 23: Lubrication
English 13.3 LUBRICATION • Charge only lithium batteries provided by Greenworks Commercial. Please add oil before operation. • Do not touch uninsulated portion of charger (terminal pins) or of output connector. Oil type SAE85W-140 • Do not use with defective cords and wires. Replace Oil capacity 180 ml defective cords and wires immediately. -
Page 24: Transportation And Storage
English • The jack stands should not allow the machine to move 3. Position and secure ramp to the trailer according to when the traction drive system is running and the drive manufacturer’s instructions. wheels are rotating. Use only certified jack stands. Use NOTE only appropriate jack stands, with a minimum weight rating of 2000 pounds (907.2 kg) to block the unit up. -
Page 25: Prepare For Use After Stoage
English • Inspect the blade and replace it or sharpen it, if required (refer to the Maintenance section). • Do not store the machine next to corrosive materials, such as fertilizer or rock salt. • Keep the machine out of the reach of children. •... - Page 26 English Problem Cause Solution The blade fails 1. There is no battery inserted that controls the left 1. Make sure at least one Greenwoks designed bat- to run when you or right blade function. tery pack is inserted in the battery compartment pull up the PTO that controls the left or right blade.Make sure the 2.
- Page 27 English Problem Cause Solution The machine 1. The grass is too wet. 1. Please check the grass before working. If the cuts the grass grass is too wet, please wait until the grass gets 2. The grass amount you set is too much. abnormally.
-
Page 28: Technical Data
English TECHNICAL DATA Model No. RZ42M60 RZ42M80 RZ42M82 Voltage 60 V 80 V 82 V Gross vehicle weight (lbs) 234±3 234±3 234±3 Length 67” 67” 67” Height 46” 46” 46” Width (with discharge) 53” 53” 53” Deck width 42” 42”... -
Page 29: Greenworks Product Registration
English GREENWORKS PRODUCT REGISTRATION: NAME: ADDRESS: CITY: STATE: ZIP CODE: COUNTRY: HOME PHONE: MOBILE PHONE: PURCHASE DATE: PURCHASED FROM: P0803155-00 v1.3... -
Page 30: Serial Number(S)
English SERIAL NUMBER(S) Please list Serial Number(s) below along with Model Information: DESCRIPTION MODEL # PART # SERIAL # DATE PUR- CHASED P0803155-00 v1.3...
Need help?
Do you have a question about the RZ42M60 and is the answer not in the manual?
Questions and answers