Table of Contents
Advertisement
Available languages
Available languages
Quick Links
C21
C23
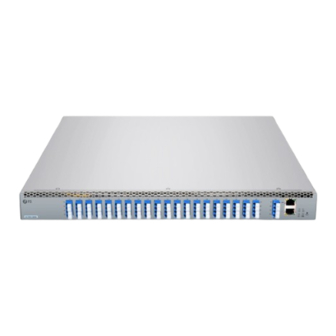
DCP910-D40M
C22
C24
DCP910-D40M
OPEN LINE SYSTEM
OPEN LINE SYSTEM
SYSTÈME DE LIAISON OUVERTE
オープンラインシステム
Quick Start Guide
Quick-Start Anleitung
Guide de Démarrage Rapide
クイックスタートガイド
C25
C27
C29
C31
C33
C35
C37
C39
C41
C26
C28
C30
C32
C34
C36
C38
C40
C42
V2.0
C43
C45
C47
C49
C51
C53
C55
C57
C59
C44
C46
C48
C50
C52
C54
C56
C58
C60
LINE
RX
DCN
TX
LOS FLT
LC
RX
Reset
TX
ACT PER
MON
Advertisement
Table of Contents

Related Manuals for FS DCP910-D40M


Summary of Contents for FS DCP910-D40M
- Page 1 LINE LOS FLT DCP910-D40M Reset ACT PER DCP910-D40M OPEN LINE SYSTEM OPEN LINE SYSTEM SYSTÈME DE LIAISON OUVERTE オープンラインシステム Quick Start Guide V2.0 Quick-Start Anleitung Guide de Démarrage Rapide クイックスタートガイド...
- Page 2 Introduction Thank you for choosing the Open Line System. This guide is designed to familiarize you with the structure of the open line system and describes how to deploy it in your network. DCP910-D40M DCP910-D40M Accessories Power Cord x2 Mounting Bracket x2...
-
Page 3: Hardware Overview
Hardware Overview Front Panel Ports C21-C60 Channel Port Line Port MGMT DCP910-D40M CONSOLE Port Port Type Description C21-C60 C21-C60 ITU grid DWDM tra c Channel Port Line Port LC/UPC Dense WDM port LC/UPC Optical performance monitoring MGMT RJ45 ETH Internet communication and management... -
Page 4: Installation Requirements
Installation Requirements Before you begin the installation, make sure that you have the following: M6 screws and M6 cage nuts for mounting the open line system. Site Environment Keep the equipment indoors and away from humidity. Make sure that there is no water on the storage oor and no leakage to the packing box of the equipment. - Page 5 C2 1 C2 3 C2 5 C2 7 C2 9 C3 1 C3 3 C3 5 C3 7 C3 9 C4 1 C4 3 C4 5 C4 7 C4 9 DC P91 0-D C5 1 C5 3 C5 5 C5 7 C2 2 C5 9 C2 4...
- Page 6 Installing Fiber Cables DCP910-D40M DCP910-D40M Connecting to the Console/MGMT Port 1. Connect one end of the console cable/Ethernet cable to the console/MGMT port. 2. Connect the other end of the console cable/Ethernet cable to a computer.
-
Page 7: Connecting The Power Cord
Step 1: Connect the open line system to a computer through the console port with the console cable. Step 2: Enter the built-in IP address (192.168.1.100) on the webpage. Step 3: Log in to the netmanager software DCP (User Name: superuser; User Password: Hsl2018$). User Name User Password Login WebManager Version: 1.00.001 Copyright©2022 FS Corporation.All rights resered. -
Page 8: Troubleshooting
Upgrade Help Link Conf Apply WebManager Version: 1.00.001 Copyright©2022 FS Corporation.All rights resered. NOTE: Connect the open line system to a computer through the MGMT port to change the IP address of the device. Troubleshooting Failed to Connect to the Switch Remotely 1. -
Page 9: Online Resources
Online Resources Download https://www.fs.com/products_support.html https://www.fs.com/service/fs_support.html Help Center Contact Us https://www.fs.com/contact_us.html Product Warranty Warranty: The product enjoys a 2-year limited warranty against defects in materials or workmanship. For more details about the warranty, please check at: https://www.fs.com/policies/warranty.html Return: If you want to return the item(s), information on how to return can be found at:... - Page 10 Vielen Dank, dass Sie sich für das Open Line System entschieden haben. Diese Anleitung soll Sie mit der Struktur des Open Line Systems vertraut machen und beschreibt, wie Sie es in Ihrem Netzwerk einsetzen können. DCP910-D40M DCP910-D40M Zubehör Netzkabel x2 Montagehalterung x2 Optisches Dämpfungsglied x50...
- Page 11 Hardware-Übersicht Ports an der Vorderseite C21-C60 Channel Port Line Port MGMT DCP910-D40M CONSOLE Port Port-Typ Beschreibung C21-C60 C21-C60 ITU Grid DWDM Tra c Channel Port Line Port LC/UPC Dichter WDM-Port LC/UPC Optische Leistungsüberwachung MGMT RJ45 ETH Internetkommunikation und -verwaltung CONSOLE RJ45 ETH Debugging &...
- Page 12 Installationsvoraussetzungen Bevor Sie mit der Installation beginnen, vergewissern Sie sich, dass Sie Folgendes haben: M6-Schrauben und M6-Kä gmuttern für die Montage des Open Line Systems. Betriebsumgebung Stellen Sie das Gerät in einem geschlossenen Raum auf und halten Sie es von Feuchtigkeit fern.
- Page 13 C2 1 C2 3 C2 5 C2 7 C2 9 C3 1 C3 3 C3 5 C3 7 C3 9 C4 1 C4 3 C4 5 C4 7 C4 9 DC P91 0-D C5 1 C5 3 C5 5 C5 7 C2 2 C5 9 C2 4...
- Page 14 Installation von Glasfaserkabeln DCP910-D40M DCP910-D40M Anschließen des Console/-MGMT-Ports 1. Schließen Sie ein Ende des Console-Kabels/Ethernet-Kabels an den Console-/MGMT-Port an. 2. Schließen Sie das andere Ende des Console-Kabels/Ethernet-Kabels an einen Computer an.
-
Page 15: Anschließen Des Netzkabels
Schritt 2: Geben Sie die integrierte IP-Adresse (192.168.1.100) auf der Webseite ein. Schritt 3: Melden Sie sich bei der netmanager Software DCP an (User Name: superuser; User Password: Hsl2018$). User Name User Password Login WebManager Version: 1.00.001 Copyright©2022 FS Corporation.All rights resered. -
Page 16: Fehlerbehebung
Upgrade Help Link Conf Apply WebManager Version: 1.00.001 Copyright©2022 FS Corporation.All rights resered. HINWEIS: Schließen Sie das Open Line System über den MGMT-Port an einen Computer an, um die IP-Adresse des Geräts zu ändern. Fehlerbehebung Remote-Verbindung zum Switch nicht möglich 1. - Page 17 Online-Ressourcen Download https://www.fs.com/de/products_support.html https://www.fs.com/de/service/fs_support.html Hilfecenter Kontakt https://www.fs.com/de/contact_us.html Produktgarantie Garantie: Für das Produkt gilt eine eingeschränkte Garantie von 2 Jahren auf Material- und Verarbeitungsfehler. Weitere Einzelheiten über die Garantie nden Sie hier: https://www.fs.com/de/policies/warranty.html Rückgabe: Wenn Sie den/die Artikel zurückgeben möchten, nden Sie Informa- tionen zum Rückgabeverfahren hier:...
- Page 18 Introduction Nous vous remercions d'avoir choisi le Système de Liaison Ouverte. Ce guide est conçu pour vous familiariser avec la con guration de l'appareil et décrit comment procéder à son déploiement. DCP910-D40M DCP910-D40M Accessoires Câble d'Alimentation x2 Support de Montage x2 Atténuateur Optique x50...
-
Page 19: Présentation Du Matériel
Présentation du Matériel Ports du Panneau Frontal C21-C60 Channel Port Line Port MGMT DCP910-D40M CONSOLE Ports Type de Port Description Port de Canal C21-C60 Tra c DWDM du réseau de l’UIT C21-C60 Port de Ligne LC/UPC Port WDM dense LC/UPC... -
Page 20: Conditions D'installation
Conditions d'Installation Avant l'installation, assurez-vous que vous disposez des éléments suivants : Vis M6 et écrous cage M6 pour le montage du système de ligne ouverte. Site d'installation Gardez l’équipement à l’intérieur et à l’abri de l’humidité. Assurez-vous qu’il n’y a pas d’eau sur le sol de stockage et qu’il n’y a pas de fuite dans la boîte d’emballage de l’équipement. - Page 21 C2 1 C2 3 C2 5 C2 7 C2 9 C3 1 C3 3 C3 5 C3 7 C3 9 C4 1 C4 3 C4 5 C4 7 C4 9 DC P91 0-D C5 1 C5 3 C5 5 C5 7 C2 2 C5 9 C2 4...
- Page 22 Installation des Câbles à Fibre Optique DCP910-D40M DCP910-D40M Connexion des Ports Console/MGMT 1. Connectez une extrémité du câble de console/câble Ethernet au port de console/MGMT. 2. Connectez l’autre extrémité du câble de console/câble Ethernet à un ordinateur.
-
Page 23: Connexion Du Câble D'alimentation
Étape 2 : Entrez l’adresse IP intégrée (192.168.1.100) sur la page Web. Étape 3 : Connectez-vous au DCP du logiciel netmanager (Nom d’utilisateur : superuser; Mot de passe de l’utilisateur : Hsl2018$). User Name User Password Login WebManager Version: 1.00.001 Copyright©2022 FS Corporation.All rights resered. -
Page 24: Dépannage
Upgrade Help Link Conf Apply WebManager Version: 1.00.001 Copyright©2022 FS Corporation.All rights resered. NOTE : Connectez le système de ligne ouverte à un ordinateur via le port MGMT pour modi er l’adresse IP de l’appareil. Dépannage Impossible de se Connecter au Switch à Distance 1. -
Page 25: Garantie Du Produit
Information en Ligne Téléchargez https://www.fs.com/fr/products_support.html Centre d'Assistance https://www.fs.com/fr/service/fs_support.html Contactez-Nous https://www.fs.com/fr/contact_us.html Garantie du Produit Garantie : Ce produit béné cie d'une garantie limitée de 2 ans contre les défauts matériels ou de fabrication. Pour plus de détails sur la garantie, veuillez consulter la page : https://www.fs.com/fr/policies/warranty.html... - Page 26 イントロダクション オープンラインシステムをご利用いただき誠にありがとうございます。このガイドは、オープ ンラインシステムの構造を理解し、それをネットワークに導入する方法について説明すること を目的としています。 DCP910-D40M DCP910-D40M アクセサリー 電源コード x� 取り付けブラケット x� 光減衰器 x�� M�ネジ x� 注: アクセサリーはイラストと異なる場合がございますので、現物をご了承ください。 注: この電源コードは他の機器には使用できません。また、他の電源コードはこの 機器に使用しないでください。...
- Page 27 ハードウェア概要 フロントパネルポート C��-C��チャネルポート ラインポート MGMT DCP910-D40M CONSOLE ポート ポートの種類 説明 C��-C�� C��-C�� ITUグリッドDWDMトラフィック チャネルポート LC/UPC ラインポート 高密度WDMポート LC/UPC 光学性能モニタリング RJ�� ETH MGMT インターネット通信と管理 CONSOLE RJ�� ETH デバッグとアップグレード フロントパネルLED DCP910-D40M 状態 説明 緑色 光信号は正常に伝送されています。 DCP910-D40M 赤色 光信号が異常に伝送されています。 赤色 重大なアラームが発生しています。 オフ アラームはありません。...
- Page 28 設置要件 設置を開始する前に、以下を確認してください: オープンラインシステム取り付け用のM�ネジとM�ケージナット。 サイト環境 機器は湿気の少ない屋内に保管してください。 保管床に水がなく、機器の梱包箱に漏水がないことを確認してください。 自動消火設備、暖房システム、その他漏洩が発生する可能性のある場所は避けてください。 設置方法 取り付けブラケットの設置 LINE LOS FLT Reset ACT PER �. �本のM�ネジで、オープン・ライン・システムの両側にマウント・ブラケットを固定します。...
- Page 29 C2 1 C2 3 C2 5 C2 7 C2 9 C3 1 C3 3 C3 5 C3 7 C3 9 C4 1 C4 3 C4 5 C4 7 C4 9 DC P91 0-D C5 1 C5 3 C5 5 C5 7 C2 2 C5 9 C2 4...
- Page 30 光ファイバケーブルの設置 DCP910-D40M DCP910-D40M コンソール/MGMTポートへの接続 �. コンソールケーブル/イーサネットケーブルの一端をコンソール/MGMTポートに接続します。 �. コンソールケーブル/イーサネットケーブルのもう一方をコンピュータに接続します。...
- Page 31 電源コードの接続 PWR1 PWR2 �. AC電源コードをバックパネルの電源ポートに差し込みます。 �. 電源コードのもう一方をAC電源に接続します。 警告: 電源を入れたまま電源コードを取り付けないでください。 オープンラインシステムの設定 ステップ�: コンソール・ケーブルを使って、オープン・ライン・システムをコンソール・ポー トからコンピューターに接続します。 ステップ�: ウェブページに内蔵IPアドレス(���.���.�.���)を入力します。 ステップ�: netmanagerソフトウェアDCPにログインします(User Name:superuser、User Password:Hsl����$)。 User Name User Password Login WebManager Version: 1.00.001 Copyright©2022 FS Corporation.All rights resered.
- Page 32 Monitor Con gure Optical Parameter System -10.00 Fiber Type G652_30km-80km Upgrade Help Link Conf Apply WebManager Version: 1.00.001 Copyright©2022 FS Corporation.All rights resered. 注: オープンラインシステムをMGMTポート経由でコンピュータに接続し、デバイス のIPアドレスを変更します トラブルシューティング スイッチへのリモート接続に失敗した �. pingでネットワークの接続性をテストします。 �. ネットワークに到達できる場合は、スイッチを再起動してみてください。 �. 対応するサービスが有効になっているかどうかを確認します。 ポートが機能せず、LEDインジケータが消灯している �. スイッチのポートがオープン状態であるかどうかを確認します。 �. スイッチがDDM情報を読み取ることができるかどうかを確認します。 �. ポートの速度設定が正しいかどうかを確認します。...
- Page 33 オンラインリソース ダウンロード https://www.fs.com/jp/products_support.html ヘルプセンター https://www.fs.com/jp/service/fs_support.html お問い合わせ https://www.fs.com/jp/contact_us.html 製品保証 保証: この製品には、 材料または製造上の欠陥に対する�年間の限定保証が付いています 。 保証の詳細については、 以下のサイ トをご参照ください: https://www.fs.com/jp/policies/warranty.html 返品: 返品を希望される場合は、 以下のサイ トで返品方法に関する情報をご確認ください: https://www.fs.com/jp/policies/day_return_policy.html...
-
Page 34: Compliance Information
2014/35/EU, 2011/65/EU und (EU)2015/863 konform ist. Eine Kopie der EU-Konformitätserklärung nden Sie unter www.fs.com/de/company/quality_control.html. FS.COM GmbH déclare par la présente que ce dispositif est conforme à la Directive 2014/30/EU, 2014/35/EU, 2011/65/EU et (EU)2015/863. Une copie de la Déclaration de Conformité de l'UE est disponible à l'adresse suivante https://www.fs.com/fr/company/quality_control.html. - Page 35 Caution shock hazard, disconnect all power sources. Attention risque d'électrocution, déconnectez toutes les sources d'alimentation. ISED CAN ICES-003(A)/NMB-003(A) English: This device contains licence-exempt transmitter(s)/receiver(s) that comply with Innovation, Science and Economic Development Canada’s licence-exempt RSS(s). Operation is subject to the following two conditions: (1) This device may not cause interference.
- Page 36 WEEE Waste Electrical and Electronic Equipment (WEEE) This appliance is labelled in accordance with European Directive 2012/19/EU concerning waste electrical and electronic equipment (WEEE). The Directive determines the framework for the return and recycling of used appliances as applicable throughout the European Union.
- Page 37 Q.C. PASSED Copyright © 2024 FS.COM All Rights Reserved.
Need help?
Do you have a question about the DCP910-D40M and is the answer not in the manual?
Questions and answers