
Subscribe to Our Youtube Channel
Related Manuals for FS XPON ONU


Summary of Contents for FS XPON ONU
- Page 1 ONU1710-1G XPON ONU XPON ONU XPON ONU XPON ONU Quick Start Guide V1.0 Quick-Start Anleitung Guide de Démarrage Rapide クイックスタートガイド...
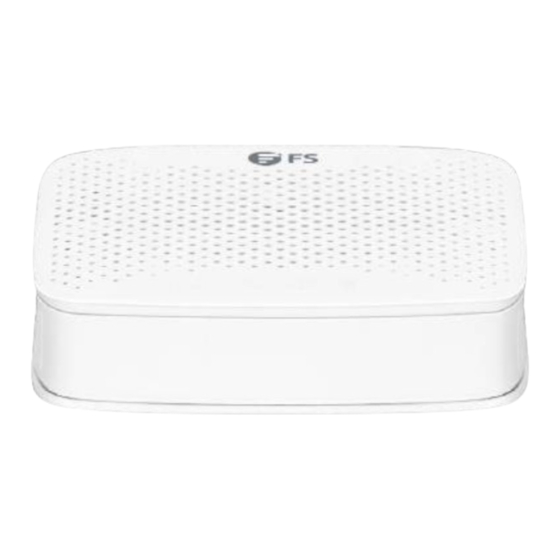
- Page 2 Introduction Thank you for choosing the XPON ONU. This guide is designed to familiarize you with the layout of the device and describes how to deploy it in your network. POWER ONU1710-1G Accessory Power Adapter x1 NOTE: The accessory may vary from illustration, please prevail in kind.
-
Page 3: Hardware Overview
Hardware Overview Ports DC/12V POWER Ports Description POWER A DC power port A 10M/100M/1000M signal transmission port An ONU port for connecting to OLT through the optical splitter LEDs POWER POWER... -
Page 4: Installation Requirement
LEDs State Description The system is powered on normally. POWER The system is not powered on. The ONU has been activated. The received optical power is lower than Blinking the threshold of the optical receiver. The optical power is received normally. The received optical power is lower than Blinking the threshold of the optical receiver. - Page 5 Mounting the ONU Desk Mounting Put the device on a desk. Connecting the LAN Ports D C /1 L A N P O N Connect the LAN port to a wireless router with a network cable.
- Page 6 Connecting the PON Port GPON D C/ 12 LA N PO N 1. Connect the PON port of the ONU to an optical splitter with an SC/UPC optical ber cable. 2. Then connect the splitter to the PON transceiver of the OLT with a ber cable.
- Page 7 Connect one end of the power adapter to the power port of the device and the other end to the power source. Con guring the ONU Step 1: Con gure the local IP as 192.168.123.2 and the subnet mask 255.255.255.0. Step 2: Access http://192.168.123.1 through your browser.
-
Page 8: Troubleshooting
Troubleshooting There Is a WiFi Signal on the PC but It Cannot Connect to the Internet 1. Check whether the WiFi name is the same as SSID of the wireless router. 2. Check the wi signal strength. Adjust the location of the wireless router. -
Page 9: Product Warranty
Product Warranty FS ensures our customers that for any damage or faulty items due to our workmanship, we will o er a free return within 30 days from the day you receive your goods. This excludes any custom-made items or tailored solutions. - Page 10 Einführung Vielen Dank, dass Sie sich für XPON ONU entschieden haben. Diese Anleitung soll Sie mit dem Aufbau des Geräts vertraut machen und beschreibt, wie Sie es in Ihrem Netzwerk einsetzen. POWER ONU1710-1G Zubehör Netzteil x1 HINWEIS: Das Zubehör kann von der Abbildung abweichen, bitte...
- Page 11 Hardware-Übersicht Ports DC/12V STROM Ports Beschreibung STROM Ein DC-Strom-Port Ein 10M/100M/1000M-Signalübertragungsport Ein ONU-Anschluss für die Verbindung zum OLT über den optischen Splitter LEDs POWER STROM...
- Page 12 LEDs Status Beschreibung Das System ist normal eingeschaltet. STROM Das System ist nicht eingeschaltet. Die ONU wurde aktiviert. Die empfangene optische Leistung liegt Blinkt unter dem Schwellenwert des optischen Empfängers. Die optische Leistung wird normal empfangen. Die empfangene optische Leistung liegt Blinkt unter dem Schwellenwert des optischen Empfängers.
- Page 13 Montage der ONU Tischmontage Stellen Sie das Gerät auf einen Schreibtisch. Anschließen der LAN-Ports D C /1 L A N P O N Verbinden Sie den LAN-Port über ein Netzwerkkabel mit einem WLAN-Router.
- Page 14 Anschließen des PON-Ports GPON D C/ 12 LA N PO N 1. Verbinden Sie den PON-Port der ONU über ein SC/UPC-Glasfaserkabel mit einem optischen Splitter. 2. Anschließend verbinden Sie den Splitter mit einem Glasfaserkabel mit dem PON-Transceiver des OLT. Anschließen der Stromversorgung D C / 1 L A N P O N...
-
Page 15: Fehlerbehebung
Verbinden Sie ein Ende des Netzteils mit dem Stromanschluss des Geräts und das andere Ende mit der Stromquelle. Kon gurieren der ONU Schritt 1: Kon gurieren Sie die lokale IP als 192.168.123.2 und die Subnetzmaske 255.255.255.0. Schritt 2: Greifen Sie über Ihren Browser auf http://192.168.123.1 zu. Schritt 3: Geben Sie den Standardbenutzernamen und das Standardkennwort user/123456 für die Benutzerober äche ein. - Page 16 3. Aktualisieren Sie die Netzwerkliste und stellen Sie erneut eine Verbindung zum WLAN her. 4. Wenden Sie sich an einen Fachmann für den PC oder die WLAN-Adapterkarte und stellen Sie die Verbindung gemäß den entsprechenden Richtlinien wieder her. 5. Starten Sie den PC neu. Es gibt kein WLAN-Signal auf dem PC 1.
- Page 17 Produktgarantie FS versichert unseren Kunden, dass wir bei Schäden oder fehlerhaften Artikeln, die auf unsere Verarbeitung zurückzuführen sind, innerhalb von 30 Tagen ab dem Tag, an dem Sie Ihre Waren erhalten, eine kostenlose Rücksendung anbieten. Dies gilt nicht für Sonderanfertigungen oder maßgeschneiderte Lösungen.
- Page 18 Introduction Merci d’avoir choisi le XPON ONU. Ce guide est conçu pour vous familiariser avec la disposition de l’appareil et décrit comment le déployer dans votre réseau. POWER ONU1710-1G Accessoire Adaptateur d'Alimentation x1 NOTE : L’accessoire peut di érer de l’illustration, s’il vous plaît...
-
Page 19: Présentation Du Matériel
Présentation du Matériel Ports DC/12V POWER Ports Description POWER Un port d’alimentation DC Un port de transmission de signal 10M/100M/1000M Un port ONU pour la connexion à l’OLT via le répartiteur optique POWER POWER... - Page 20 Statut Description Activé Le système est sous tension normalement. POWER Le système n’est pas sous tension. Éteint Activé L’ONU a été activée. La puissance optique reçue est inférieure Clignotant au seuil du récepteur optique. La puissance optique est reçue normalement. Éteint La puissance optique reçue est inférieure Clignotant...
- Page 21 Installation d'ONU Montage sur Bureau Placez l’appareil sur un bureau. Connexion des Ports LAN D C /1 L A N P O N Connectez le port LAN à un ordinateur ou à un routeur sans l à l’aide d’un câble réseau.
- Page 22 Connexion du Port PON GPON D C/ 12 LA N PO N 1. Connectez le port PON de l’ONU à un répartiteur optique à l’aide d’un câble à bre optique SC/UPC. 2. Connectez ensuite le répartiteur à l’émetteur-récepteur PON de l’OLT à...
- Page 23 Connectez une extrémité de l’adaptateur secteur au port d’alimentation de l’appareil et l’autre extrémité à la source d’alimentation. Con guration d'ONU Étape 1 : Con gurez l’adresse IP locale en tant que 192.168.123.2 et le masque de sous-réseau en tant que 255.255.255.0. Étape 2 : Accédez à...
-
Page 24: Dépannage
Dépannage Il y a un Signal WiFi sur le PC mais il ne peut pas se Connecter à Internet 1. Véri ez si le nom WiFi est le même que le SSID du routeur sans l. 2. Véri ez la force du signal wi . Ajustez l’emplacement du routeur sans l. -
Page 25: Garantie Du Produit
Garantie du Produit FS garantit à ses clients que tout article endommagé ou défectueux en raison de sa fabrication pourra être retourné gratuitement dans un délai de 30 jours à compter de la date de réception de la marchandise. Cette garantie ne s'applique pas aux articles fabriqués sur mesure ou aux solutions personnalisées. - Page 26 イントロダクション この度は、XPON ONUをお選びいただき、誠にありがとうござい ます。本ガイドは、デバイスのレイアウトを理解し、ネットワー クへの導入方法を説明するためのものです。 POWER ONU1710-1G アクセサリー 電源アダプタ x� 注: アクセサリーはイラストと異なる場合がありますので、ご了承く ださい。...
- Page 27 ハードウェア概要 ポート DC/12V POWER ポート 説明 POWER DC電源ポート 10M/100M/1000M信号伝送ポート 光スプリッタを介してOLTに接続するための ONUポート POWER POWER...
- Page 28 状態 説明 点灯 システムの電源は正常に入っている。 POWER 消灯 システムの電源が入っていない。 点灯 ONUがアクティブになった。 点減 受信光パワーが光受信器の閾値より低い。 消灯 光パワーは正常に受信される。 点減 受信光パワーが光受信器の閾値より低い。 イーサネットポートは接続されているが、 点灯 データ伝送が行われていない。 システムの電源が入っていないか、イーサ 消灯 ネットポートが端末に接続されていない。 点減 ポートを介したデータ伝送がある。 インストール要件 設置場所の換気がよく、電気機器の熱が十分に排出されるこ とを確認してください。 設置場所の温度が0~50℃に保たれていることを確認してくだ さい。 静電気放電防止手順に従ってください。 シャーシ内部の熱を冷風が吹き出す場所にシャーシを設置し てください。...
- Page 29 ONUの取り付け デスクマウント デバイスを机の上に置きます。 LANポートの接続 D C /1 LA N P O N LANポートとワイヤレスルーターをネットワークケーブルで接続し ます。...
- Page 30 PONポートの接続 GPON D C/ 12 LA N PO N �. ONUのPONポートと光スプリッタをSC/UPC光ファイバケーブル で接続します。 �. 次に、スプリッタをOLTのPONトランシーバにファイバケーブル で接続します。 電源の接続 D C / 1 L A N P O N...
- Page 31 電源アダプターの一端をデバイスの電源ポートに接続し、もう一 端を電源に接続します。 ONUの設定 ステップ�:ローカルIPを���.���.���.�、サブネットマスクを ���.���.���.�に設定します。 ステップ�:ブラウザからhttp://���.���.���.�にアクセスします。 ステップ�:ユーザーインターフェースには、デフォルトのユーザ ー名とパスワード「user/������」を入力します。 管理者インターフェイスには、「admin/super&���」 を入力します。次に「Login」をクリックします。 Input username and password UserName: user Password: ****** Login...
- Page 32 トラブルシューティング PCにWiFi信号があるがインターネットに接続できない 1. WiFi名がワイヤレスルーターのSSIDと同じかどうかを確認します。 2. 無線LANの電波強度を確認してください。無線LANルーターの設 置場所を調整します。 3. ネットワークリストを更新し、WiFiに再接続します。 4. PCまたはワイヤレスアダプタカードの専門家に相談し、関連す るガイドラインに従って再接続してください。 5. PCを再起動します。 PCにWiFiの電波が届かない 1. ワイヤレスアダプタカードが有効になっているか確認してくだ さい。 2. ワイヤレスアダプタカードのドライバが正常にインストールされ ているか確認してください。インストールされていない場合は、再 インストールしてください。 3. ワイヤレスルーターのWiFi機能が有効になっているか、PCが SSIDブロードキャストにアクセスできるかどうかを確認してくだ さい。 4. WiFiサービスが有効になっているかを確認してください。ホーム 画面の上にある「マイコンピュータ」を右クリックし(Windows 7 を例とする)、「管理」を選択します。次に、「サービスとアプリ ケーションプログラム」を選択し、ページが展開された後に 「サービス」を選択します。「WLAN AutoConfig」を探し、有効に なっていることを確認します。 5. PCをワイヤレスルーターに近づけて、ワイヤレス信号があるか どうかを確認してください。 6. 上記の解決策に失敗した場合は、別のワイヤレスアダプタカード を接続し直してください。それでもWiFi信号がない場合は、ワイヤ...
- Page 33 製品保証 FSでは、弊社の製造技術による破損や不良品については、製品を お受け取りになった日から30日以内であれば、無料で返品を承り ます。ただし、これにはカスタム製品やオーダーメイドは含まれ ません。 保証:この製品は、材料または製造上の欠陥に対して1年間の 限定保証を提供します。保証の詳細については、次のサイト でご確認ください: https://www.fs.com/jp/policies/warranty.html 返品:返品したい場合は、返品方法に関する情報が次のサ イトにご覧ください: https://www.fs.com/jp/policies/day_return_policy.html オンラインリソース その他の技術資料については、こちらをご覧く ださい: https://www.fs.com/jp/products_support.html FSアプリのダウンロード QRコードを読み取り、App StoreまたはGoogle Play StoreからFSアプリをダウンロードしてイ ンストールするか、 https://www.fs.com/jp/appdownload.htmlに アクセスしてください。...
-
Page 34: Compliance Information
Regulatory, Compliance, and Safety Information Informations relatives à la conformité et à la sécurité https://www.fs.com/products/154796.html FS.COM GmbH hereby declares that this device is in compliance with the Directive 2011/65/EU and (EU)2015/863. A copy of the EU Declaration of Conformity is available at www.fs.com/company/quality_control.html. - Page 35 Do not dispose of WEEE as unsorted municipal wasteand have to collect such WEEE separately. Q.C.PASSED Copyright © 2024 FS.COM All Rights Reserved.
Need help?
Do you have a question about the XPON ONU and is the answer not in the manual?
Questions and answers