Table of Contents
Advertisement
Available languages
Available languages
Quick Links
Advertisement
Table of Contents

Related Manuals for BLAUBERG Calm 100 S


Summary of Contents for BLAUBERG Calm 100 S
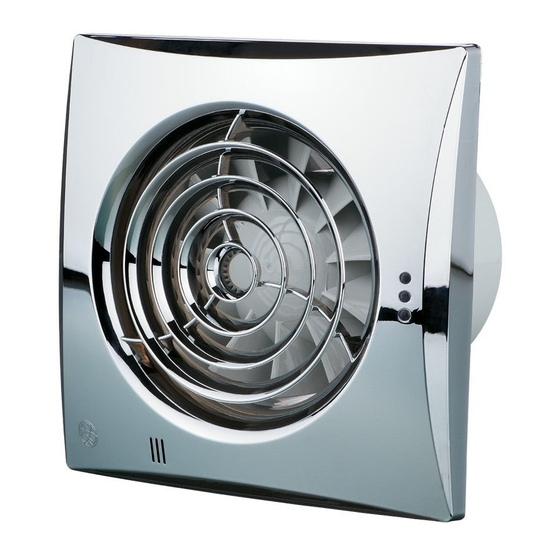
- Page 1 CALM User Manual Calm 100 S,T,H,IR Calm 125 S,T,H,IR...
- Page 2 USER MANUAL MANUEL DE L’UTILISATEUR BENUTZERHANDBUCH English Français Deutsch DIFFERENT LANGUAGES DIFFÉRENTES LANGUES VERSCHIEDENE SPRACHEN SCAN HERE: To see these instructions in different languages. SCANNEZ ICI: Pour voir ces instructions dans différentes langues. SCANNE HIER: Um diese Anweisungen in verschiedenen Sprachen zu sehen.
- Page 3 CONTENTS Operation Guidelines Box Contents Tools Required Register Your Warranty Additional Help and Resources Before You Start Mounting In Bathroom Zones Installation Instructions Electrical Wiring Adjusting The Humidity and Timer Settings Maintenance DELIVERY SET Technical Maintenance — 1 pc. Screws and dowels —...
-
Page 4: Box Contents
INSTRUCTIONS SCREW KIT PLASTIC ADJUSTMENT TOOL NOTE! All Blauberg packaging is certified as being either recyclable or compostable. Please dispose of all packaging using the correct recycling bin or bank. TOOLS REQUIRED Although installation is a DIY project, safety is of the utmost importance when undertaking any home improvement. -
Page 5: Additional Help & Resources
WIRING VIDEO Watch our latest wiring video to guide you through the correct electrical wiring process. GET BLAUBERG INFO Get Blauberg contact information. CHAT Connect with the Blauberg UK Office. (working hours apply) -
Page 6: Before You Start
BEFORE YOU START This user’s manual is a main operating document intended for qualified personnel only, properly trained and qualified to install, technical, maintenance, and operating staff. make electrical connections and maintain ventilation units. The manual contains information about purpose, technical details, Do not attempt to install the product, connect it to the mains, or perform maintenance yourself. - Page 7 Zone 2, ensuring further safety from electrical hazards. The Blauberg Calm fan, when installed in Zone 1, must comply with these regulations to prevent moisture ingress and ensure safe operation in the bathroom's wet conditions. It's essential for all installations to be carried out by qualified professionals to meet safety standards and regulations effectively.
-
Page 8: Installation Instructions
INSTALLATION INSTRUCTIONS... -
Page 9: Electrical Wiring
CALM 100 | CALM 100 S | CALM 100 ST | CALM 100 IR CALM 100, CALM 100 S, CALM 100 ST & CALM 100 IR require a permanent live and neutral mains voltage connection to function. For most installations, the electrical supply is provided from the lighting circuit. - Page 10 ADJUSTING THE TIMER & HUMIDITY SETTINGS 2min 30min To adjust the timer and humidity settings use the plastic adjustment tool provided. HUMIDITY SENSOR SETTING RUN ON TIMER SETTING Run-on setting is adjustable from Humidity setting is adjustable from 2 to 30 minutes 60 to 90 % RH.
-
Page 11: Maintenance
MAINTENANCE Disconnect the fan from mains power prior to any servicing and maintenance operations. Maintenance means regular cleaning of the fan surfaces of dirt and dust. To clean the fan, wipe its surfaces with a cloth using a mild soap solution, then wipe the surfaces dry. Avoid water dripping on the motor and circuit board. -
Page 12: Technical Maintenance
TECHNICAL MAINTENANCE The fan maintenance periodicity is at least once per • Clean the front panel under running water (Fig. 3/4). 6 months. • Wipe the fan surfaces dry. Maintenance steps: • Cover the fan with the front panel (Fig. 5). •... -
Page 13: Manufactures Warranty
MANUFACTURES WARRANTY The manufacturer’s warranty does not apply to the The product is in compliance with EU norms and following cases: standards on low voltage guidelines and electromagnetic compatibility. • User’s failure to submit the unit with the entire delivery We hereby declare that the product complies with package as stated in the user’s manual including the provisions of Electromagnetic Compatibility (EMC) -
Page 14: Directives D'utilisation
CALM Manuel de l’utilisateur Calm 100 S,T,H,IR Calm 125 S,T,H,IR CONTENU Directives d’utilisation Contenu de la boîte Outils nécessaires Enregistrer votre garantie Aide supplémentaire et ressources Avant de commencer Montage dans les zones de la salle de bain Instructions d’installation Câblage électrique... -
Page 15: Contenu De La Boîte
KIT DE VIS OUTILS DE RÉGLAGE EN PLASTIQUE REMARQUE ! Tous les emballages Blauberg sont certifiés comme étant soit recyclables soit compostables. Veuillez éliminer tous les emballages en utilisant la bonne poubelle de recyclage ou la bonne banque de recyclage. - Page 16 VIDÉO DE CÂBLAGE Regardez notre dernière vidéo de câblage pour vous guider à travers le processus correct de câblage électrique. OBTENIR DES INFORMATIONS SUR BLAUBERG Obtenez les coordonnées de Blauberg. CHAT Connectez-vous avec le bureau Blauberg FR. (heures de travail s’appliquent)
-
Page 17: Avant De Commencer
AVANT DE COMMENCER Règlementation Combinée de Sécurité et de Construction pour l’Installation de Ventilateurs Extracteurs les Salles de Bain Certification : Tous les travaux électriques dans les salles de bains doivent se conformer à la norme nationale et au document normatif national NF C15-100, exigeant que certains travaux soient notifiés et inspectés par le contrôle local des bâtiments ou effectués par un électricien agréé. - Page 18 Les installations en tension secteur sont autorisées si elles sont équipées d’une protection DDR de 30 mA, qui protège contre les chocs électriques. Lorsque les modèles Blauberg Calm 12V fonctionnent en Très Basse Tension de Sécurité (TBTS), le transformateur doit être situé en dehors de la Zone 2, garantissant ainsi une sécurité...
-
Page 19: Instructions D'installation
INSTRUCTIONS D’INSTALLATION... -
Page 20: Câblage Électrique
CALM 100 | CALM 100 S | CALM 100 ST | CALM 100 IR Les modèles CALM 100, CALM 100 S, CALM 100 ST et CALM 100 IR nécessitent une phase permanente et une connexion neutre pour fonctionner. Pour la plupart des installations, l’alimentation électrique est fournie par le circuit d’éclairage. - Page 21 RÉGLAGE DE L’HUMIDITÉ ET DES PARAMÈTRES DE LA MINUTERIE 2min 30min Pour ajuster les paramètres de la minuterie et de l’humidité, utilisez l’outil de réglage en plastique fourni. RÉGLAGE DU CAPTEUR D’HUMIDITÉ RÉGLAGE DE LA MINUTERIE Le réglage de la minuterie est ajustable de 2 à Le réglage de l’humidité...
-
Page 22: Entretien
ENTRETIEN Débranchez le ventilateur de l’alimentation principale avant toute opération d’entretien et de maintenance. L’entretien consiste à nettoyer régulièrement les surfaces du ventilateur de la saleté et de la poussière. Pour nettoyer le ventilateur, essuyez ses surfaces avec un chiffon et une solution de savon doux, puis essuyez les surfaces sèches. -
Page 23: Dépannage
Maintenance Technique La périodicité de la maintenance du ventilateur est • Séchez soigneusement les surfaces du ventilateur. d’au moins une fois tous les 6 mois. Procédure de • Remettez le panneau avant en place sur le maintenance: ventilateur (Fig. 5). •... - Page 24 Garantie Du Fabricant Le produit est conforme aux normes et standards de l’UE • Inadéquation entre le modèle de l’appareil et le nom en matière de directives sur les basses tensions et la de la marque avec les informations figurant sur compatibilité...
- Page 25 CALM Benutzerhandbuch Calm 100 S,T,H,IR Calm 125 S,T,H,IR INHALT Betriebsanleitung Inhalt der Verpackung Benötigte Werkzeuge Garantie registrieren Zusätzliche Hilfe und Ressourcen Bevor Sie beginnen Montage in Badezimmerbereichen Installationsanweisungen Elektrische Verkabelung DELIVERY SET Einstellen der Feuchtigkeit und Timer-Einstellungen — 1 pc.
-
Page 26: Inhalt Der Verpackung
ANLEITUNG ODER BENUTZERHANDBUCH SCHRAUBENKIT KUNSTSTOFF-EINSTELLWERKZEUG HINWEIS! Alle Blauberg-Verpackungen sind als recycelbar oder kompostierbar zertifiziert. Bitte entsorgen Sie alle Verpackungen in der richtigen Recyclingtonne oder beim entsprechenden Recyclinghof. BENÖTIGTE WERKZEUGE Obwohl die Installation ein DIY-Projekt ist, steht Sicherheit bei jeder Hausverbesserung an erster Stelle. - Page 27 Tablet, um: VERKABELUNGSVIDEO Sehen Sie sich unser neuestes Verkabelungsvideo an, das Sie durch den korrekten Verkabelungsprozess führt. BLAUBERG-INFOS ERHALTEN Erhalten Sie die Kontaktdaten und weitere Informationen über Blauberg. CHAT Verbinden Sie sich mit dem Blauberg DE Büro. (Arbeitszeiten beachten)
-
Page 28: Bevor Sie Beginnen
BEVOR SIE BEGINNEN Kombinierte Sicherheits- und Bauvorschriften für die Installation von Badlüftern Zertifizierung: Alle elektrischen Arbeiten in Badezimmern müssen den VDE 0100-Normen entsprechen, was erfordert, dass bestimmte Arbeiten dem lokalen Bauamt gemeldet und von diesem inspiziert oder von einem zugelassenen Elektriker durchgeführt werden. - Page 29 Der Blauberg Calm Abluftventilator hat eine IPX5 Schutzart Netzspannungsinstallationen sind erlaubt, wenn sie über einen 30 mA FI-Schutzschalter (RCD) verfügen, der gegen elektrischen Schlag schützt. Wenn die Blauberg Calm 12V-Modelle mit getrennt sicherer Kleinspannung (SELV) betrieben werden, muss der Transformator außerhalb der Zone 2 platziert werden, um zusätzliche Sicherheit vor elektrischen Gefahren zu...
- Page 30 INSTALLATIONSANWEISUNGEN...
-
Page 31: Elektrische Verkabelung
CALM 100 | CALM 100 S | CALM 100 ST | CALM 100 IR Die Modelle CALM 100, CALM 100 S, CALM 100 ST und CALM 100 IR erfordern eine permanente Phase und eine Neutralleiterverbindung zur Funktion. Für die meisten Installationen wird die Stromversorgung vom Beleuchtungskreis bereitgestellt. - Page 32 EINSTELLEN DER FEUCHTIGKEIT UND TIMER-EINSTELLUNGEN 2min 30min Um die Timer- und Feuchtigkeitseinstellungen anzupassen, verwenden Sie das mitgelieferte Kunststoff-Einstellwerkzeug. FEUCHTIGKEITSSENSOR-EINSTELLUNG TIMER-EINSTELLUNG Die Timer-Einstellung ist von 2 bis 30 Minuten Die Feuchtigkeitseinstellung ist von 60 bis einstellbar. 90 % relativer Luftfeuchtigkeit einstellbar. IM UHRZEIGERSINN DREHEN = Längere IM UHRZEIGERSINN DREHEN = Weniger Verzögerung...
-
Page 33: Wartung
WARTUNG Trennen Sie den Lüfter vor allen Wartungs- und Instandhaltungsarbeiten von der Stromversorgung. Die Wartung besteht aus der regelmäßigen Reinigung der Lüfteroberflächen von Schmutz und Staub. Zur Reinigung des Lüfters wischen Sie seine Oberflächen mit einem Tuch und einer milden Seifenlösung ab und trocknen Sie die Oberflächen danach. -
Page 34: Fehlerbehebung
TECHNISCHE WARTUNG Die Wartung des Ventilators sollte mindestens alle • Reinigen Sie das Frontpanel unter fließendem 6 Monate durchgeführt werden. Wasser (Abb. 3/4). Wartungsschritte: • Trocknen Sie die Oberflächen des Ventilators ab. • Trennen Sie den Ventilator von der • Decken Sie den Ventilator wieder mit dem Stromversorgung und stellen Sie sicher, dass der Frontpanel ab (Fig. - Page 35 HERSTELLERGARANTIE Das Produkt entspricht den EU-Normen und -Standards • Versäumnis des Benutzers, rechtzeitige technische für Niederspannungsrichtlinien und elektromagnetische Wartung des Geräts sicherzustellen. Verträglichkeit. • Äußere Schäden am Gehäuse des Geräts (außer Hiermit bestätigen wir, dass das Produkt den äußerliche Modifikationen, die für die Installation Anforderungen der Richtlinie über elektromagnetische erforderlich sind) und an den internen Komponenten, die Verträglichkeit (EMC) 2014/30/EU des Europäischen...
- Page 36 COMMISSIONING / MISE EN SERVICE / INBETRIEBNAHME SFP / PSV / SVL: AIR FLOW / FLUX D’AIR / LUFTSTROM: COMMISSIONED BY / COMMISSIONNÉ PAR / INBETRIEBGENOMMEN VON NAME: / NOM : / NAME: COMPANY: / ENTREPRISE : / UNTERNEHMEN: DATE: / DATE: / DATUM: SIGNED: / SIGNÉ: / UNTERSCHRIFT: NOTES / NOTES / NOTIZEN...
- Page 40 DATE OF MANUFACTURE DATE DE FABRICATION HERSTELLUNGSDATUM DESIGNED IN ASSEMBLED GERMANY IN THE UK UM-1-CALM-100-REV1-02-09-24...
Need help?
Do you have a question about the Calm 100 S and is the answer not in the manual?
Questions and answers