Table of Contents
Advertisement
Quick Links
Advertisement
Table of Contents

Related Manuals for Avery Weigh-Tronix WI-152


Summary of Contents for Avery Weigh-Tronix WI-152
- Page 1 Model WI-152 Battery-Operated Indicator Service Manual...
-
Page 2: Table Of Contents
Examples and Step by Step Instructions ........12 Setting ZERO and SPAN ................. 15 Setting LINEAR..................15 DISPLAY....................15 Reset Menu and Master Clear ................16 WI-152 Parts and Assembly ................17 PC Board Assemblies & Descriptions ..............18 Keypad and Schematic ..................20... - Page 3 WI-152 Specifications Display: 7-segment LCD, 8 digits, 1.0 inch high with 10 annunciators Display Rate: 1, 2 or 5 times per second Accuracy : Span: ±5.0 ppm/°C Zero: ±.066 uV/°C (-10 to 40°C) Span: ±10 ppm/°C Zero: ±0.13 uV/°C (-30 to 60°C) Linearity: ±0.005% of capacity, maximum...
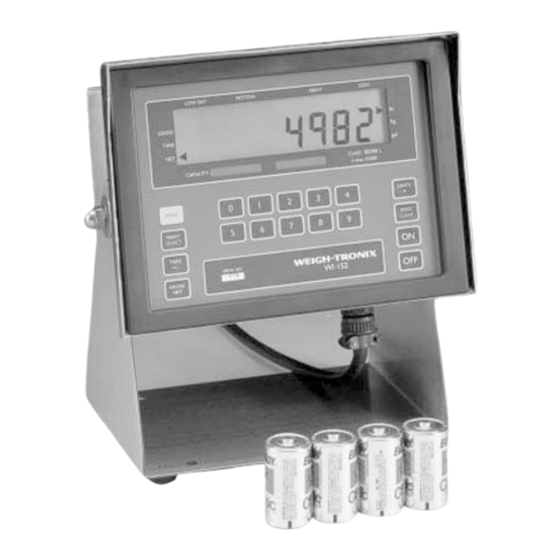
- Page 4 12-volt version FEATURES: • +10 to +16v power supply • RS-232 serial I/O • Real time clock • Dual cutoffs 6-volt version FEATURES: • 6 volt battery pack with replaceable D-cells • Long battery life—4 1/2 months (40 hours/week, 1 weigh bar, asleep 50% of the time) •...
-
Page 5: Introduction
Operations mode is fully explained in the User's Manual . Use this mode to perform tests on the WI-152. The test mode is covered in Test Mode the User's Manual . -
Page 6: Keyboard
Keyboard Figure 1 WI-152 Keyboard Turns the 12 volt model off. Puts the 6-volt model into an ultra- low power consumption mode called the sleep mode. Turns the 12-volt model on. Wakes the 6-volt model from sleep mode. Zeros the scale in gross/net weigh mode. This button also clears keyed in digits on the display before they are accepted. -
Page 7: Configuration Mode
This section of the manual explains how to set up and view parameters in the configuration mode. Follow the configuration menu and instructions in Figure 2 to set up the WI-152 indicator to suit your specific needs. Below are explanations for each section of the menu. The non-bold heading for each section is the pathway you follow on the configuration menu to get to the parameter or parameter options shown in bold text. - Page 8 Figure 2 Configuration Menu Part 1 PART 2 ↓ ↓ ↓ ↓ ↓...
-
Page 9: Configuration Menu
PART 1 ↑ ↑ ↑ ↑ ↑ Configuration Menu Part 2... - Page 10 Setup, Scale, Units, Capacity, Division- Density This option lets you set the density of the liquid you are weighing in grams per cubic centimeter. Your scale will then convert the weight of the liquid into gallons. (Specific gravity is identical to density as expressed in grams per cubic centimeter.) Setup, Scale, Units, Capacity, Division, Density, Zero- -Percent, Percent...
- Page 11 Total - This option lets you choose the number of cutoffs you want by keying in a number. You can have 0, 1, or 2 cutoffs on the WI-152. If you pick 0 cutoffs, CUTOFFS will not appear in the SECURITY section of this menu.
- Page 12 Enquire This option is not seen on the 6-volt version of the WI-152. On the 12-volt version this sub-menu allows you to choose a printer or other device which will send an enquire code to the indicator. You may select the ASCII code number you wish to act as the enquire code number.
-
Page 13: Layout
Setup, Scale, Options, Security, Serial, Print, Busy, Baud, No. Stops- Layout Use this print-layout option to customize the physical arrangement of your printed information. The next several pages deal with the layout of your printed output. The rest of the documentation on configuration follows this layout section. -
Page 14: Customizing The Layout Menu
Layout Menu customization. As in the other WI-152 menus, the SELECT key opens up the next level of the menu. There is one more level of information under the print commands in the layout menu. This information may be one of two types: •... - Page 15 ASCII Control Code Sequence Number Figure 6 ASCII Control Code under the Print Command, 1 ASCII In Figure 6, the MENU key advances you through the ASCII control-character displays. The SELECT key returns you to the 1 ASCII display. Table 1 ASCII Control Characters under the Print Command, 1 ASCII #31- Sets IMP printer to 40 column print mode...
-
Page 16: Examples And Step By Step Instructions
Example A: If you want to change the second print command in Figure 5 Examples and Step by from 2 HOUR to 2 TARE, you scroll to the TARE print command in the Step Instructions submenu under 2 HOUR and press SELECT to select it. The print command 2 HOUR is now changed to 2 TARE. - Page 17 For example, to delete 2 HOUR from Deleting a non-ASCII print the menu, display 2 HOUR , then command from the layout press CLEAR . . . The item is removed from the menu menu and all the following items move up one number value on the menu.
-
Page 18: Ascii Control Codes
Table 2 ASCII Control Codes NOTE: To repeat a control code a number of times, enter the control code #, a decimal, then the number of times you want it repeated. Spaces, letters, or carriage returns can easily be repeated this way. -
Page 19: Setting Zero And Span
Setup, Scale, Options, Security, Serial- Sleep This option lets you set the time to elapse before sleep mode begins. Set 0 to disable the sleep mode. Up to 99 hours, 99 minutes and 99 seconds are programmable. The sleep timer is reset each time a button is pressed or scale motion more than twice the stability window is seen. -
Page 20: Reset Menu And Master Clear
Reset Menu and Master Clear If the indicator's memory, calibration or other data becomes corrupted, a reset menu will become active. RESET will be displayed telling you there has been a problem. You may also choose to perform a master clear to reset the setup, adjust or data values to default values. -
Page 21: Wi-152 Parts And Assembly
WI-152 6V/12V INDICATOR BATTERY POWERED PARTS AND ASSEMBLY ITEM DESCRIPTION W-T P/N Analog A/D pwr saver Board 28175-0018 Digital A/D pwr saver Board 28178-0023 Pwr. Supply, RS-232,Cutoff, and 28186-0023 Clock PC Board. Analog A/D Board 28476-0014 Main Pc Bd Assy (w/ display) -
Page 22: Pc Board Assemblies & Descriptions
WI-152 6V/12V INDICATOR BATTERY POWERED PC BOARD ASSEMBLIES & DESCRIPTONS WI-152 INDICATOR MAIN PC BOARD P/N 28569-0020 Main PC Board Description The main board consists of a motorola microprocessor IC (U1), control circuitry (U2 & U8), random access memory or RAM (U3), Read only memory or EPROM (U4), display drivers (U9 &... - Page 23 WI-152 6V/12V INDICATOR BATTERY POWERED PC BOARD ASSEMBLIES (continued) POWER SAVER PC BOARD P/N 28178-0023 Battery Powered Power Saver Board Description This board provides the control timing circuitry for the analog to digital board. It POWER SUPPLY, RS-232, TIME/DATE, CUTOFF BOARD, P/N 28186-0023 Activates the analog circuitry as needed to reduce power consumption.
-
Page 24: Keypad And Schematic
WI-150 INDICATOR KEYPAD AND SCHEMATIC WI-152 KEYPAD OVERLAY P/N 28880-0022 AND SCHEMATIC BARRIER POWERED A/D PC BOARD P/N 28476-0014 AC/DC Analog to Digital Board Description This board consists of weight voltage amplifiers (U1 & U2), reference voltage amplifier (U6), Switching circuitry (U3), a dual slope ratiometric integrator (U4), a comparator (U5), analog to Digital control logic circuitry (U4), comparator (U5), analog to digital control logic circuitry (U7 &... - Page 25 Weigh-Tronix 1000 Armstrong Dr. Fairmont, MN 56031 USA Telephone: 507-238-4461 Facsimile: 507-238-4195 e-mail: industrial@weigh-tronix.com www.weigh-tronix.com Weigh-Tronix Canada, ULC 217 Brunswick Blvd. Pointe Claire, QC H9R 4R7 Canada Telephone: 514-695-0380 Facsimile: 514-695-6820 Weighing Products & Systems Weigh Bar ® is a registered trademark of Weigh-Tronix Inc. 04/13/00 152SERVC.P65 16927-0014e1 Printed in USA...
Need help?
Do you have a question about the WI-152 and is the answer not in the manual?
Questions and answers