Table of Contents
Advertisement
Advertisement
Table of Contents

Related Manuals for Avery Weigh-Tronix ZM301


Summary of Contents for Avery Weigh-Tronix ZM301
- Page 1 ZM301 Indicator User Instructions AWT35-500722 Issue AA...
- Page 2 Full acknowledgment of the source must be given. Avery Weigh-Tronix is a registered trade mark of the Avery Weigh-Tronix, LLC. This publication was correct at the time of going to print however, Avery Weigh-Tronix, LLC reserves the right to alter without notice the specification, design, price or conditions of supply of any product or service at any time.
-
Page 3: Table Of Contents
Declarations of conformity ....................10 Chapter 2 Introduction ..........................12 Front panel ........................13 Annunciators ......................14 Powering up the ZM301 ....................14 Numeric entry procedure ....................15 Example: To key in the number 507: ..............15 Entering a negative number ..................15 Chapter 3 Indicator applications ...................... - Page 4 Battery ........................49 Enable ......................... 49 Timeout ....................... 49 Accumulator application supervisor menu ............... 51 Accumulator ......................52 Print total ......................52 Total format ......................52 Clear total ......................53 Print ........................53 Reset ........................53 ZM301 Indicator User Instructions...
- Page 5 Notes on batching ..................... 65 2 Speed ....................... 65 Ingredient ......................66 Independent Setpoints ..................66 Fill/Discharge ...................... 66 Peak Hold application supervisor menu ................67 Peak hold ........................67 Reset ........................68 Remote Display application supervisor menu ..............69 ZM301 Indicator User Instructions...
- Page 6 ZM301 Indicator User Instructions...
-
Page 7: Chapter 1 General Information And Warnings
NOTE: This is a Note symbol. Notes give additional and important information, hints and tips that help you to use your product. 1.2 Installation NO USER SERVICEABLE PARTS. REFER TO QUALIFIED SERVICE PERSONNEL FOR SERVICE. ZM301 Indicator User Instructions... -
Page 8: Safe Handling Of Equipment With Batteries
IMPORTANT: This equipment must be routinely checked for proper operation and calibration. Application and usage will determine the frequency of calibration required for safe operation. Always isolate the indicator from the power supply before starting any routine maintenance to avoid the possibility of electric shock. ZM301 Indicator User Instructions... -
Page 9: Cleaning The Machine
Classe A prescrites dans le Règlement sur le brouillage radioélectrique edicté par le ministère des Communications du Canada. European Countries WARNING: This is a Class A product. In a domestic environment, this product may cause radio interference in which the user may be required to take adequate measures. ZM301 Indicator User Instructions... -
Page 10: Declarations Of Conformity
General information and warnings 1.8 Declarations of conformity ZM301 Indicator User Instructions... - Page 11 Declarations of conformity ZM301 Indicator User Instructions...
-
Page 12: Chapter 2 Introduction
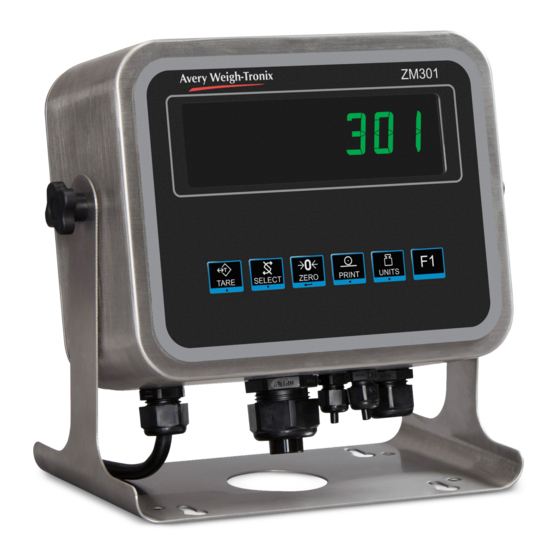
Introduction Introduction The ZM301, shown in Figure 2.1, is an easy to use indicator for weighing. The ZM301 comes in three housing types: stainless steel, aluminum desktop and stainless steel panel mount. It comes with one of two display types for indoor or outdoor use. The indicator has a USB port, two serial COM ports and an Ethernet port. -
Page 13: Front Panel
Press the F1 key to select application specific choices. Aborts a numeric entry and acts as an ESCAPE key in the menu navigation. Also used to display or enter an accumulator channel. Press and hold to view the password entry screen for menu access. ZM301 Indicator User Instructions... -
Page 14: Annunciators
Circle 4 & 5 Maximum 2.2 Powering up the ZM301 The indicator is always active as long as power is received. Power can be supplied by: AC power cord connected to a properly grounded outlet (100 VAC - 240 VAC,... -
Page 15: Numeric Entry Procedure
To enter a negative number, press the PRINT key until there is one flashing digit. With only one digit displayed, press SELECT repeatedly until the (-) negative sign appears. Enter the rest of the digits normally. ZM301 Indicator User Instructions... -
Page 16: Chapter 3 Indicator Applications
To perform gross weighing, power up the unit and follow these steps: Empty the scale and press ZERO to zero the display … 0 is displayed and the center-of-zero annunciator lights. Place item to be weighed on the scale … Weight is displayed. Repeat steps and 2. ZM301 Indicator User Instructions... -
Page 17: Net Weighing
If repeated weighments use the same tared item, you do not need to establish a new tare value as described in step and 3. To manually clear a tare weight, remove all weight from the scale and press TARE. ZM301 Indicator User Instructions... -
Page 18: Using Setpoints
Press SELECT … Current value is displayed with the last digit flashing. Key in a value and press ZERO to accept the value … out1 is displayed. Press UNITS to select the next output … out2 is displayed. ZM301 Indicator User Instructions... -
Page 19: Printing
The indicator can be configured to only allow one print for each weighing sequence. If PRINT is pressed when so configured, the message cAnt will appear. Refer to Default print formats on page 43. ZM301 Indicator User Instructions... -
Page 20: Accumulator Application
If enabled, press and hold PRINT for three seconds to print and/or clear the active accumulator values. These functions are enabled or disabled in a password protected menu. ZM301 Indicator User Instructions... -
Page 21: Counting Application
Use a tare method to tare a container, if necessary. SeeNet weighing on page Press F1 … ZEroing is briefly displayed. This means the indicator is zeroing itself. A numeric value (XX) is then displayed. This is the current sample size. Accept the current sample size by pressing ZERO ZM301 Indicator User Instructions... -
Page 22: Bulk Sampling
If the sample met the minimum sample requirements and the weight is stable, the display will show the correct number of parts on the scale and COUNT is lit. ZM301 Indicator User Instructions... -
Page 23: Piece Weight Entry
3.3.6 Piece weight entry Piece weight can be entered manually. Press and hold SAMPLE. The current piece weight is displayed. Use the Numeric entry procedure on page 15 and key in a new value. Press ZERO to accept. ZM301 Indicator User Instructions... -
Page 24: Checkweighing Application
The checkweighing annunciators are based off of net weight so if a tare is active only the net weight is considered for checkweighing. If there is no tare, gross weight is used as the basis for the annunciators. ZM301 Indicator User Instructions... -
Page 25: Weighing A Target Object
Hi is briefly displayed and then the current value for the upper accept weight. Press ZERO to accept this or key in a new upper accept weight and press ZERO … The display returns to normal weighing mode. ZM301 Indicator User Instructions... -
Page 26: Setpoint Operation In The Checkweighing Application
The annunciators’ and outputs’ status is determined by where the first stable weight occurs after an item is placed on the scale. The latched annunciator and output is reset OFF only when weight returns inside the gross zero band. ZM301 Indicator User Instructions... -
Page 27: Batching Application
Batching allows the indicator to control up to three motors, timers, augers, gates, etc. using the three outputs for the purpose of making batches based on weight. There are four types of batching operation: 2-speed single ingredient Ingredient filling (up to three ingredients) Independent setpoints filling Fill/discharge operation ZM301 Indicator User Instructions... -
Page 28: 2-Speed Filling
You can also do negative weight/discharge using this mode. Press and hold SELECT to access the setpoint editor. Set Out1, Out 2 and Out 3 values. To start or restart the setpoints, press F1. ZM301 Indicator User Instructions... -
Page 29: Fill/Discharge
To start or restart the large vessel fill process, press F1. To stop the large vessel filling process, press F1. Press TARE to start the bag filling process. To stop bag filling process, press TARE. ZM301 Indicator User Instructions... -
Page 30: Peak Hold Application
Place weight on the scale and then remove it … The display will show the peak weight recorded during the weighment. To reset the peak, press F1 … The minimum and maximums are reset to the current gross weight. ZM301 Indicator User Instructions... -
Page 31: Remote Display Application
3.7 Remote display application This section applies if you have the Remote Display application active. The indicator can be configured to work as a remote display with other compatible indicators or the GSE 350/355IS. ZM301 Indicator User Instructions... -
Page 32: Chapter 4 Menus
Password protected menus are available to configure the indicator and/or view information. 4.1 Accessing the menus Follow these steps to access the menus in the ZM301. With the indicator powered up and in normal operating mode, press and hold F1 …... -
Page 33: Exiting The Menus
Weighing Mode TARE = PRINT = Press and hold F1 key UNITS = ZERO = Enter 111 F1 = Escape or & press ZERO User About Audit page page page Figure 4.1 USER level (password 111) menus ZM301 Indicator User Instructions... -
Page 34: User Menu
Use this to set the time and clock style. Press SELECT … SEt is displayed. Press SELECT … h- x is displayed, with the x flashing. This is a numeric entry screen for the hour value. ZM301 Indicator User Instructions... -
Page 35: Date
Key in the month value and press ZERO to accept … d- x is displayed, with the x flashing. This is a numeric entry screen for the day value. Key in the day value and press ZERO to accept … SEt is displayed. ZM301 Indicator User Instructions... -
Page 36: Site Id
If the unit is sealed, no changes can be made to the configuration of the indicator. Press F1 to return to the SEAL display. To exit the menu, see Exiting the menus on page ZM301 Indicator User Instructions... -
Page 37: About Menu
PArtno is displayed Press SELECT … The bootloader PN is displayed. Press ZERO to return to the PArtno display. Press UNITS … VErSion is displayed. Press SELECT … The version number of the bootloader is displayed. ZM301 Indicator User Instructions... -
Page 38: Firm And App
Press UNITS … tYPE is displayed. This stands for the type of option card installed. The four option cards are: Analog, 802.11g wireless, USB-d, and Current Loop/RS485/RS422. Press SELECT … The currently installed option card name is displayed. ZM301 Indicator User Instructions... -
Page 39: Enet
4 XXX is displayed. This is fourth octet of the IP address. Press ZERO … iP is displayed. Press UNITS … Subnet is displayed. Repeat this sequence of key presses for the Subnet, Gateway and MAC addresses. When finished press TARE … EnEt is displayed. ZM301 Indicator User Instructions... -
Page 40: Dload
Press ZERO to show the 2nd half. Press F1 … dSEriAL is displayed. Press TARE until About is displayed. To exit the menu, see Exiting the menus on page ZM301 Indicator User Instructions... -
Page 41: Audit Menu
A number appears showing how many times the indicator has been configured. Press ZERO … conFig is displayed. Press UNITS … cALib is displayed. Press SELECT … A number appears showing how many times the indicator has been calibrated. Press ZERO … cALib is displayed. ZM301 Indicator User Instructions... -
Page 42: Print
Press UNITS to scroll through the choices and press ZERO when your choice is displayed … The audit log is printed through the chosen port and Print is displayed. This completes the Audit menu. To exit the menu, see Exiting the menus page ZM301 Indicator User Instructions... -
Page 43: Chapter 5 Communications
Default print formats Communications The ZM301 can communicate through these ports: Serial Ethernet Wireless 802.11g 5.1 Default print formats Below are examples of the default formats that are available: Gross 272.04 lb General Weighing (Format #1) Tare 95.88 lb 176.16 lb... -
Page 44: Chapter 6 Error Messages
Can’t fit on display Underload Can’t Entry not in valid range Password entry failed Remote display not receiving data from the master indicator Indicator did not reach a stable zero weight within time window set for automated weighing process. ZM301 Indicator User Instructions... -
Page 45: Chapter 7 Supervisor Menu
Batching application supervisor menu on page 62 Peak Hold application supervisor menu on page 67 Remote Display application supervisor menu on page 69 Use the Numeric entry procedure on page 15 when you need to enter values. ZM301 Indicator User Instructions... -
Page 46: General Weighing Application Supervisor Menu
The and symbols used in this section stand for direction moved in the menu. So Super Setpoint, shown above, illustrates that you move down from SuPEr to SEtPnt. This will help you keep track of where you are in the menu structure. ZM301 Indicator User Instructions... -
Page 47: Annunciators
The current value is displayed with a flashing right digit. Press ZERO to accept the displayed value or key in a new value and press ZERO to accept … out1 is displayed. Press UNITS … out2 is displayed. ZM301 Indicator User Instructions... -
Page 48: Inputs
Print is displayed after either action. Reset Setpoint Edit Print Reset Press UNITS … rESEt is displayed. Use this to reset the settings under Edit to factory defaults. Press SELECT … no is displayed. ZM301 Indicator User Instructions... -
Page 49: Battery
Values between 1 and 3600 minutes are valid. Press SELECT … A numeric entry screen appears. Key in a value, in minutes and press ZERO to accept … tMout is displayed. ZM301 Indicator User Instructions... - Page 50 Supervisor menu This completes the Supervisor menu for General Weighing. Repeatedly press TARE until the indicator returns to normal weighing mode. The current weight value is displayed. ZM301 Indicator User Instructions...
-
Page 51: Accumulator Application Supervisor Menu
The Setpnt and bAttErY submenus in Figure are the same as described in General Weighing application supervisor menu on page 46. Go there for information on those submenus. The unique submenus to this application are described below. ZM301 Indicator User Instructions... -
Page 52: Accumulator
Accum Print Total Total Format Press UNITS … tot FMt is displayed. This stands for the total print format. Press SELECT … The current print format number is displayed with a flashing right-most digit. (Default is format 8) ZM301 Indicator User Instructions... -
Page 53: Clear Total
Use this to reset the all the items under AccuM to the factory defaults. Press SELECT … no is displayed. Press ZERO to abort the reset or press UNITS … YES is displayed. ZM301 Indicator User Instructions... - Page 54 Refer to step on page for information on setting up the battery. This completes the Supervisor menu for the Accumulation application. Repeatedly press TARE until the indicator returns to normal weighing mode. The current weight value is displayed. ZM301 Indicator User Instructions...
-
Page 55: Counting Application Supervisor Menu
General Weighing application supervisor menu on page 46. Go there for information on those submenus. The unique submenus to this application are described below. The cnt Acc submenu is the same described in the Accum submenu in the Accumulator application. Refer to step on page 52. ZM301 Indicator User Instructions... -
Page 56: Count
Press UNITS to toggle between the choices and when your choice is displayed, press ZERO to accept … ModE is displayed. Print total Count Mode Print Total Press UNITS … Prt tot is displayed. This stands for print total. Press SELECT … no is displayed. ZM301 Indicator User Instructions... -
Page 57: Total Format
Press TARE … count is displayed. Press UNITS … bAttErY is displayed. The battery menu is identical in all the applications. Refer to step on page for information on setting up the battery. ZM301 Indicator User Instructions... - Page 58 Supervisor menu This completes the Supervisor menu for the Counting application. Repeatedly press TARE until the indicator returns to normal weighing mode. The current weight value is displayed. ZM301 Indicator User Instructions...
-
Page 59: Checkweighing Application Supervisor Menu
General Weighing application supervisor menu on page 46. Go there for information on those submenus. The one exception is that out1, out2 and out3 are not in the Setpnt menu. They do not apply in the Checkweigher application. The unique submenus to this application are described below. ZM301 Indicator User Instructions... -
Page 60: Check
Use this to set the number of divisions (0-100) below the target weight that is still within the accept window. Press SELECT … The current value is shown with a flashing right-most digit. ZM301 Indicator User Instructions... -
Page 61: Over Divisions
Refer to step on page for information on setting up the battery. This completes the Supervisor menu for the Checkweighing application. Repeatedly press TARE until the indicator returns to normal weighing mode. The current weight value is displayed. ZM301 Indicator User Instructions... -
Page 62: Batching Application Supervisor Menu
7.5.1 Batch Super Setpoint Batch With the Batching application active, access the Supervisor menu using password 1793. Refer to Accessing the menus on page 32 for instructions. From SuPEr, press SELECT … SEtPnt is displayed. ZM301 Indicator User Instructions... -
Page 63: Type
Batching application on page 27 Press SELECT … The current setting is displayed. Press UNITS to toggle between the choices and when your choice is displayed, press ZERO to accept … ModE is displayed. ZM301 Indicator User Instructions... -
Page 64: Display
If preact was set to oFF, then preact will be disabled or new values can be manually entered in the setpoint menu. Press SELECT … The current setting is displayed. ZM301 Indicator User Instructions... -
Page 65: Negative Fill
If NEG FILL is set to YES, then DISP should be set to NET so that an autotare occurs prior to start and the cutoffs will be based on negative entered values for Out 1 and Out 2. ZM301 Indicator User Instructions... -
Page 66: Ingredient
MODE setting does not apply to Fill/Discharge DISP setting does not apply to Fill/Discharge If PREACT is set to AUTO it only applies during the Out 2 discharge cycle. NEG FILL setting does not apply to Fill/Discharge ZM301 Indicator User Instructions... -
Page 67: Peak Hold Application Supervisor Menu
Press UNITS twice … P-hoLd is displayed. Use this to reset the min/max peak. If the F1 key is disabled, which is the normal key to reset min/max, the supervisor needs an alternate method to reset these values. ZM301 Indicator User Instructions... -
Page 68: Reset
Press SELECT … no is displayed. Press UNITS to toggle between the no and YES choices. Press ZERO to accept … The min/max are reset and rESEt is displayed. Press TARE repeatedly to return to normal weighing operation. ZM301 Indicator User Instructions... -
Page 69: Remote Display Application Supervisor Menu
Repeatedly press TARE until the indicator returns to normal weighing mode. The current weight value is displayed. When set as a remote display, the indicator will only function as a remote display for the connected master indicator. ZM301 Indicator User Instructions... - Page 70 Supervisor menu ZM301 Indicator User Instructions...
- Page 72 Avery Weigh-Tronix USA 1000 Armstrong Dr. Fairmont MN 56031 USA Tel:507-238-4461 Fax:507-238-4195 Email: usinfo@awtxglobal.com www.wtxweb.com Avery Weigh-Tronix UK Foundry Lane, Smethwick, West Midlands, England B66 2LP Tel:+44 (0) 8453 66 77 88 Fax: +44 (0)121 224 8183 Email: info@awtxglobal.com www.averyweigh-tronix.com...
Need help?
Do you have a question about the ZM301 and is the answer not in the manual?
Questions and answers
Without weight spam celebration Karne se kya problem hoga
need to see how the printer wires connect inside the unit