Table of Contents
Advertisement
Quick Links
Advertisement
Table of Contents

Related Manuals for HELI G Series


Summary of Contents for HELI G Series
- Page 1 Baoji Heli Forklift Co.,Ltd.
- Page 2 Statement The products listed in this manual are 2-3.5 tons four-wheel-drive off-road truck forklift s of our company,which can only be used in the factories,scenic spots,amusement places and other specific areas specified in the safety supervision regulations of special equipment...
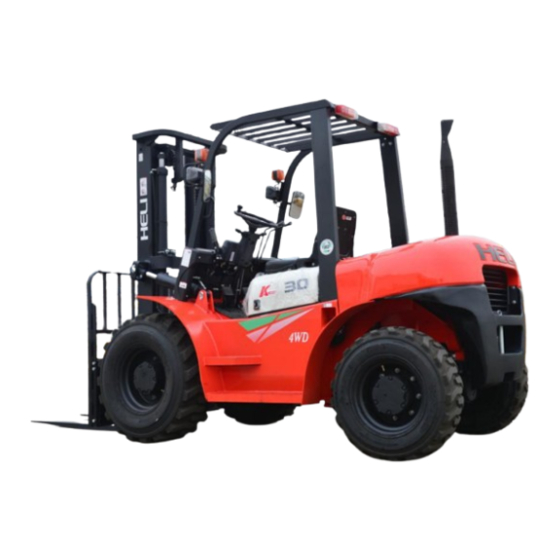
- Page 3 The G series of CPCD20Y、 CPCD25Y、 CPCD30Y、 CPCD35Y four-wheel-drive off-road trucks forklift are lifting and transportation machine with front wheel drive rear wheel steering,It suitable freight yard,station,port,wharf,construction site,farm,beach,mountain slope general factory which is loading and unloading stacking and short distance transportation of goods.This series of forklift has novel appearance good linear...
-
Page 4: Table Of Contents
Contents 一、Characteristics of Forklift Truck............. 4 二、Outline Drawing and Performance Parameter Table...... 5 1、Outline Drawing and Performance Parameter Table....5 2、Main Specifications..............5 1、Power System................7 2、Drive Shaft Part................11 3、Steering Axle................13 4、Front drive axle structure............20 5、 Drive shaft part..............26 6、Steering system................ 27 7、... -
Page 5: 一、Characteristics Of Forklift Truck
一、Characteristics of Forklift Truck he G series of 2-3.5 ton four-wheel-drive off-road forklift trucks are drove by engine-hydraulic torque converter- Transmission with power shift-Drive Axle-Steering Axle.There characteristics Green environment protection,Manipulation of simple,Safe and comfortable,Better performance and Easy maintenance etc. 1、Widely used by mine,farmland,orchard and other field situations Min.Underclearance is 300mm(Frame Center) and Mast Tilt Angle are front 10... -
Page 6: 二、Outline Drawing And Performance Parameter Table
二、Outline Drawing and Performance Parameter Table 1、Outline Drawing and Performance Parameter Table 2、Main Specifications CPCD20Y/25Y/30Y/35Y 主要性能参数表 CPCD20Y CPCD25Y CPCD30Y CPCD35Y Rated Load 2000 2500 3000 3500 Max.Lift Height 3000 3000 3000 3000 Lift Speed Laden Load Center MAX Speed fall Free Lift Height... - Page 7 CPCD20Y CPCD25Y CPCD30Y CPCD35Y Foward first gear Foward Speed second gear Reverse first gear Min.Turning Radius 3365 3365 3365 3415 Min.Underclearance Overall Length 3934 3934 4084 4134 Overall Width 1550 1550 1550 1550 Overall Height 2250 2250 2250 2250 Wheelbase 1900 1900 1900...
-
Page 8: 1、Power System
CPCD20Y CPCD25Y CPCD30Y CPCD35Y 0.62MPa 10-16.5-10PR TL Rear 0.52MPa 三、Structure and Performance Of Main Components 1、Power System 1-1 Engine KUBOTA Engine ISUZU Xin chai V2403-CR Yuma4TNE98 4JG2-NBKEG GK-4JG2 4D32G31 -TE5B Rated Output 36.8 42.6 (kW) Rated 2300 2450 2450 2500 2400 Speed(rpm) Rated... -
Page 9: Fuel System
The power of the hydraulic forklift trucks’ engine is transferred to the Steering Axle Drive Axle flywheel through torque converter ,hydraulic gearbox and transfer case to meet the needs of driving,and the oil pump is drove by the engine to meet the needs of steering system and working devices Fuel System The fuel system is composed a tank. - Page 10 located on the top surface of the tank to check fuel oil level Fuel Sensor The Fuel Sensor converts the amount of fuel in the tank into a voltage,pictured above,The sliding resistor is connected with the float by using alloy steel wire,When the float moves up and down the resistance changes and data can be read from the dashboard.
- Page 11 Every 600 hours operation ,the filter element should be removed Every 600 hours operation the fuel tank should be changed. c)After reassembly of filter. start the engine to feed gasoline into filter bowl and check for leaks. d )Pay attention to check the working condition of relief valve Fuel Filter The Cleaning of Fuel Tank 1-2.2-2...
-
Page 12: 2、Drive Shaft Part
2、Drive Shaft Part 2-1 Overview Power transmission system of 2-3.5tons four-wheel drive off-road forklift trucks mainly consists of FSDT35Ⅰtransmission box and FSDT35Ⅱtransmission box,there are 2 gears for front and 1 gear for behind,and It can realize the four-wheel drive function according to the actual demand.The torque converter installed in the gearbox is a unipolar two phase three working wheel,so that the transmission with hydraulic transmission out put of the automatic adaptability.It can change the output torque and speed as the load changes,and can absorb and... - Page 13 Hydraulic transmission oil Lubricating oil for Transmission box and 85W/90 Heavy load gear oil Main Reducer 2-3Precautions for installation and use 2-3.1 Main oil outlet pressure of gearbox is 1.1~1.4 MPa,Inlet pressure of torque converter is 0.4~0.6 MPa,Back to the oil pressure. 2-3.2 Working fluid oil temperature is 70-90degree centigrade,Maximum operating oil temperature is not more than 120 degree centigrade,and the time of duration does not exceed 5 minutes.
-
Page 14: 3、Steering Axle
1 Damaged gasket.Replace it. Leaking 2 Rubber parts are worn out or damaged.Replace it. 3 Parts damaged.Replace it. 1 Low standard position.Check oil position and Replenish oil to Low clutch standard position. pressure and 2 The sealing ring on the input shaft and piston is excessive damaged.Replace it. - Page 15 The front wheel toe-in 0—2mm Steering Form Hydraulic steering Rear axle swing Angle 11º Internal wheel angle 61.59、External wheel The biggest Angle angle 45 Steering cylinder diameter Ø75/Ø50 /Piston rod diameter(mm) Number of steering Cylinders Steering cylinder stroke(mm) Rated load(kg) 4500 Weight(kg)...
- Page 16 port to the vertical position,Facing the wheel side reducer end cover.The oil port of wheel side reducer is on the top,Filling gear oil(GL-5) from the side of the oil spill shall prevail. 3-2.1.2 Fill adequate amount of 2# grease at each nozzle 3-2.2 After loading the axle and running 15900km,it is necessary to recheck the tightening torque of each fastener 3-2.3Bridge Maintenance...
- Page 17 Tighten bolts for planetary support.(Number 59) 180-220 Tighten bolts for planetary frame connection(Number 62) 80-90 3-2.4.2Main maintenance standard Project Maintenance Standard Note Rear starting Follow the tangent of the hub 30-55N power bolt Steering knuckle < 100N Follow the tangent of the stud starting power 3-2.5Assembly and adjustment 3-2.5.1Assembly and disassembly...
- Page 18 tightening torque. 3-2.5.1.3Method of removal of Steering Knuckle assembly (1) First remove the hexagon bolts with a wrench(Number 38) (2) Remove the baffles(Number 38) (3) Remove the link pin(Number 20) (4) Remove the Connecting rod(Number 24) (5) Remove the hexagon bolts with a wrench from the flange(Number 26 and Number (6) Remove the left steering knuckle(Number 25),right steering knuckle(Number 73) and Lower limb pin(Number 42).
- Page 19 Main rear reduction box assembly as opposed to the above procedure,Pay attention to the tightening torque.(Number 7) 3-2.5.2Axle adjustment 3-2.5.2.1Clearance adjustment between rear axle and steering knuckle (1)Load the axle shaft assembly into the Axle first. (2)Set the right or left steering knuckle(Number 30 and Number 72) into the half shaft assembly and axle(Number 11) Press the inner ring(Number 41-1) of the bearing into the lower pin(Number 42).
- Page 20 Figure 1 Figure 2 3-2.5.2.2Preload adjustment of rear axle hub bearing (1) Load the rear hub assembly into the knuckle (2) Turn the hub 2-3 times to position the bearing accurately (3) Load the gear ring assembly into the knuckle (4) Load the out half shaft inner baffle ring (5) Apply thread fastening adhesive to the stud,then tighten it with 100N.m.
-
Page 21: 4、Front Drive Axle Structure
5.Bearing lack of lubrication of Add grease drive axle Replenish rated 6.Low tire pressure pressure 7.Tyre wear replace it 8.Hub bearing wear replace it 9.The steering cylinder leaks replace it 10.Low steering oil pressure Adjust the oil pressure 11.The stud is loose Tight it 12.The nut is loosen Tight it... - Page 22 Maximum(N.m) ≤1200 Transmission ratio 18.6,Wheel side reduction Transmission ratio Ratio 6,Main Transmission ratio3.1 Front axle drive shaft Middle drive shaft Input parameter 4XØ115X(89X43X4XM10X1.25) Link bolt 8-M18X1.5-6g Spokes (mm) 1193 Brake specification Φ313X76 Maximum braking torque 2X 7046N.m Installation Φ125X35X600 dimensions The frame Installation 4XΦ21X(3X18°)XR260X668 dimensions...
- Page 23 4-2.2 After loading the axle After loading the axle and running 15900km,it is necessary to recheck the tightening torque of each fastener 4-2.3Bridge Maintenance 4-2.3.1Remove dirt and dust from rear axle housing frequently. 4-2.3.2Check the filling port and the drain port plug frequently.If leaking ,tighten it in time or replace the sealing plate.
- Page 24 4-2.5 Assembly and adjustment 4-2.5.1 Assembly and disassembly 4-2.5.1.1Assembly and disassembly of plantary wheel (1)First,let off the side gear oil (2)Remove the screws with hexagon socket wrench(Number 34) (3) Turn the planet wheel frame and pull it out forcefully while tapping gently to loosen it,so that it can be easily removed ,Pay attention to avoid being smashed.
- Page 25 (2) Pull left Brake assembly (Number 11)and right Brake assembly (Number 8)out forcefully. Left brake assembly (Number 11)and right brake assembly as opposed to the above procedure,Pay attention to the tightening torque and clearance. 4-2.5.1.4Method of removal of Front main reduction gearbox (1)Remove the screws with bolt (Number 1) (3) Bolt up the main reduction gearbox (4) Pull Front main reduction gearbox assembly (Number5)out forcefully,Pay...
- Page 26 abnormal 2.Large clearance between active gear Replace sound and passive gear 3.The active gear has low pretensionAdjust the preload 4.The gear and gasket are worn Replace or Adjust 5.The hydraulic oil less Add enough hydraulic oil 1.The oil seals are worn ,loose or Replace damaged Tighten as required torque and apply...
-
Page 27: 5、 Drive Shaft Part
6.There is lubrication oil on the Clean or Replace surface of brake friction plate 7.Brake drum inlet water Draining the water while driving 8.Brake connection bolts are loose or Replace damaged 4-2.7 Wearing parts list serial Code Name Number Note number SIMRIT Combination... -
Page 28: 6、Steering System
Rear drive shaft assembly:Y21Z3-80301 6、Steering system Type Rear wheel steering powered Model 2-3.5 ton SteeringAss'y Model BZZ1-E200AC Bore φ75 Steering Dia.of Piston Rod φ50 Cylinder Stroke 110.5 Radius of Steering Handwheel mm General Description The steering system principally consists of a steering handwheel and Steering Cylinder 6-1.1 Hydraulic system assembly... - Page 29 The powered steering unit can transmit the pressure oil from the flow-divider by pipes to the steering cylinder in terms of the rotating angle of the handwheel. When the engine stop running, the charging pump will not work. in this case a man-powered steering should be adopted.
- Page 30 l. Spacing sleeve 4. Interlock shaft 7. Rotor 2. Valve body 5. Spring piece 8. Stator 3. Valve core 6. Joint sleeve 9. Valve sleeve 6-2 Steering Cylinder The steering cylinder is double-acting through type ,with the movement of the piston rod to achieve left and right steering.
- Page 31 1 Piston 6 Shaft sleeve 11 Shield 2 Cylinder head 7 “ O”Sealing ring 12 Bushing 3 Cylinder block 8 Shaft sleeve 13 Block slice 4 “ O”Sealing ring 9 YX Sealing ring 5 Support ring 10 gasket Inspection on Reassembly of Steering System (1)Check the forces necessary to turn the steering handwheel to right and left until it can't be turned any more to see if they are identical each other and check the operation of the steering handwheel for smoothness during above operation.
-
Page 32: 7、 Brake System
(2)Check the arrangement of hydraulic pipeline and turning direction of the truck for correctness. (3)Put up the rear wheels and slowly turn the handwheel over again to exhaust the air in the hydraulic pipelines and the cylinder. Steering System Troubleshooting 7、... - Page 33 The braking system is a front two-wheel braking system, which is composed of a brake master cylinder, brake and brake pedal mechanism. Master Cylinder The cylinder contains valve seat. check valve. return spring, primary cup, piston and secondary cup, which are all kept in place with a stop washer and a stop wire.
- Page 34 7.3Wheel brake The Wheel brake is consisting brake shoes,spring,operating cylinder and adjuster,and backing plates.Two wheel brakes are provided on each of the front axle.The brake shoe,one end of it being connected to the anchor pin and the adjuster,is stressed on the backing plate by the spring and spring pull rod.The primary shoe is provided with the parking pull rod while the secondary shoe with the adjusting lever of the clearance self-adjuster Wheel Brake for 2 to 3.5 Ton Truck...
- Page 35 force than that offered by operation of the operating cyclinder.The secondary shoe upper end is forced strongly against the anchor pin,providing large braking force.On the other hand,the braking operating in the truck's reverse travel is performed in resver order,but the braking force is the same as that in the case of the truck's forward travel 7.4Clearance Self-adjuster Clearance self-adjusting range:within 0.4 to 0.45mm,however,actuates only...
- Page 36 7.6 Brake Pedal Adjustment...
- Page 37 1、Loose the putter and bolts 2、Adjust the stopping bolt so that the pedal height is 11mm 3、Adjust the bolt so that the left Brake Pedal has an empty stroke 2-10mm 4、Press down the right Brake Pedal 60mm,and adjust the length of the screw until the front end of the push rod and the pump piston began to contact,then tighten the nut.
- Page 38 (1)Remove the lock pin,adjust lever,adjuster and spring of secondary shoe (2)Remove shoe return springs (3)Remove hold-down spring of primary shoe (4)Remove the primary and secondary shoes,an the same time,remove adjuster and adjuster spring...
- Page 39 (5)Remove the braking oil pipe from the operating cylinder,remove operating cylinder mounting bolts and detach the operating cylinder from the backing plate (6)Remove the E-retainer for securing the parking brake cable to the backing plate.Remove the backing plate mounting bolts and detach the backing plate from the drive axle body (7)Remove the operating cylinder boot and push parts out of the cylinder...
- Page 40 7.7.2Inspection of wheel brake Inspect all parts make sure if there's any worn or damaged part.if necessary,repair or replace with new one 1.Check the operating cylinder body's inner surface and the piston periphery surface for rusting.Then,measure the clearance between the piston and cylinder body.
- Page 41 Install length Standard:122mm Install load Standard:225N (7) Measure the free length and load of the return spring Free length:124.5mm Install length:130mm Install load:245N Forklift ton:2-3.5ton (8) Measure the free length and load of the regular spring Free length:121mm Install length:137mm Install load:71.5N...
- Page 42 (8)Measure the free length and load of the ratchet spring Install load:14.7N (10)Check the adjusting mechanism to see if it is broken.if necessary,replace 7.7.3Wheel Brake Remounting 1.Apply brake fluid to the piston and piston cup and reinstall spring,cup,piston and dust cover in this order. 2.Install the operating cylinder on the backing plate Pay attention :Make sure all parts are installed in right place,Torque moment for bolts:17.6-26.N...
- Page 43 5.Install the brake cable assembly on the backing plate with an E-retainer 6.Install shoes on the backing plate with hold-down spring 7.Put the spring on the parking push rod and then install the rod on the shoe 8.Install the shoe guide plate on the anchor pin,and install the shoe return spring...
- Page 44 9.Install the clearance self-adjuster,adjuster spring,push rod and its return spring Pay attention to the following points: a.Adjuster thread direction and its mounting direction. b.Adjuster spring direction (Do not allow the adjuster gear teeth to contact with the spring) c.Return spring direction of the push rod(Spring hook at archor pin side should be located in at the opposite side to push rod) d.Push rod and its return spring should be located in the groove on the anchor pin.
- Page 45 10.Install the braking oil pipe on the operating cylinder. 11.Measure the inner diameter of drum and the outer diameter of shoe.Adjust the adjuster to obtain the difference needed between the drum inner diameter and the friction piece outer diameter,Specified difference:0.5-0.8mm 7.8 Operation Test to Clearance Self-adjuster 1.Make the brake shoe diameter approach the sapecified mounting size,and pull the adjusting lever with your finger along the arrow marks to turn the adjuster...
- Page 46 7.9 Wheel Break troubleshooting problem Problem Cause Remedy 1、fluid leaks from brake system Repair 2、Maladjustment of break shoe clearance Adjust the adjuster 3、Brake overheating Check for dragging 4、poor contact between brake drum and of Poor Readjust friction piece breaking 5 、 Foreign matter adhered on friction Repair or replace piece 6、Foreign matter mixed in break fluid...
-
Page 47: 8、Hydraulic System
braking 2、Maladjustment of break shoe clearance Adjust the adjuster 3、Malfunction operating cylinder Repair or replace 4、Shoe return spring deteriorated Replace 5、Deflected drum Repair or replace 6、The air pressure is not up to standard Adjust 1、Break fluid leaks form system Repair or replace Soft or 2、Maladjustment of break shoe clearance Adjust the adjuster spongy... - Page 48 Stem diameter 50mm Displacement 1495mm Tilting cylinder Model Double-acting Cylinder diameter 80mm Stem diameter 35mm Displacement 251mm General description The hydraulic system consists of main pump,control valve,lift cylinder,tilt cylinder and oil pipe-lines, the engine's power take-off (P,T,O) directly drives the oil pump.
- Page 49 by three studs and nuts, and the inclined slide valve is equipped with an inclined self-locking valve. 8.3.1 Slave installation of slide valve (taking inclined slide valve position as an example) (1) neutral position, when the high-pressure oil discharged from the oil pump returns to the oil tank through the neutral position.
- Page 50 (2) Push in the slide valve, and close the middle passage at this time. The oil from the oil inlet opens the one-way valve and flows to the port B of the oil cylinder. The oil from the oil cylinder interface A flows to the oil tank through the low-pressure passage.
- Page 51 low-pressure channel. With the help of the return spring, the slide valve can return to the neutral position. 8.3.2 Main safety overflow valve and shunt safety valve The main safety overflow valve consists of main valve A and pilot valve B. When the multi-way valve is reversed, chamber C communicates with the high-pressure oil of working mechanism (such as lifting cylinder and tilting cylinder), and the pressure oil acts on pilot valve B through fixed orifices D...
- Page 52 8.3.3 Action of tilting self-locking valve The tilting slide valve is equipped with self-locking rice, which is mainly used to prevent vibration caused by negative pressure inside the tilting cylinder and avoid serious consequences caused by misoperation. Generally, in the traditional structure, the tilting slide valve can be operated to tilt forward after engine flameout.
- Page 53 Interface of valve body. Ports "A" and "B" are respectively connected to the front and rear chambers of the tilt cylinder piston. When the slide valve is pulled out, the high-pressure oil (P) enters the port "A", and the oil in the rear chamber returns to the oil tank (T) from "B".
- Page 54 tilting cylinder, and the other part is divided into the steering gear at a constant flow rate to control the steering cylinder. When the lifting and tilting slide valves are in neutral position, the high-pressure oil directly returns to the oil tank from the channel. When the lifting slide valve is pulled, the high-pressure oil passes through the throttle valve, and then pushes the piston rod upward from below the lifting cylinder piston.
- Page 55 8.5 Lifting cylinder Two single-acting lifting cylinders are fixed on the rear side of the channel steel of the outer portal frame. The bottom of the cylinders is fixed on the bearing of the lifting cylinder of the outer portal frame with pins and bolts, while the top of the cylinders (i.e.
- Page 56 ring and supporting ring. The piston moves along the inner surface of the cylinder body under the action of high-pressure oil entering the cylinder bottom. The inner hole of the cylinder head is equipped with press-fit shaft sleeves and When the lifting slide valve of the multi-way valve is pulled backward, high-pressure oil enters through the bottom of the lifting cylinder, pushing the piston and piston rod, and lifting the fork and the inner door frame by means of the lifting chain;...
- Page 57 There is a cut-off valve at the bottom of the lifting cylinder to prevent the cargo from dropping sharply when the high-pressure hose suddenly breaks. Oil from the lifting cylinder passes through the slide valve of the cut-off valve, and the oil hole around the slide valve causes a pressure difference between the two rubber hoses.
- Page 58 large pressure difference is formed, which makes the slide valve move to block the oil hole around it, and only a small amount of oil flows through the small hole at the end of the slide valve, so that the fork slowly descends. 、...
- Page 59 When the pressure difference exceeds the spring force of the spring 2, the valve core 7 moves to the right, so that the oil flow rate drops due to the reduction of the D and C holes. 8.7 tilt cylinder The tilt cylinder is a double-acting cylinder, which is installed on both sides of the portal frame, and its piston rod end is connected with the portal frame.
- Page 60 When the inclined slide valve pushes forward, high-pressure oil enters from the bottom of the oil cylinder. So as to push the piston forward and tilt the gantry forward by 6 degrees. When the slide valve When pulling backward, high-pressure oil enters from the front end of the cylinder block, pushing the piston backward until the mast tilts backward by 12.
- Page 61 8.8.2 Inspection and repair Except rubber, the removed parts shall be cleaned with oil first, and inspected, repaired or replaced according to the following steps. (1) pump body inspection The high-efficiency gear pump is designed such that the tooth top of the gear rotates slightly along the inner surface of the pump body, and there will be scratches around the tooth top and the inner surface of the pump body.
- Page 62 appear at about 1/2 of the inlet side. If one of the following situations occurs, the bearing should be replaced. 、 A) there are contact marks on the whole sliding inner surface, which have obvious rough feeling when scraped with nails; B) Cracks appear around the end face, and they feel severe roughness when scraped with nails;...
- Page 63 (3) Gear inspection As long as clean hydraulic oil is used, generally speaking, the gear shaft and gear end face will not be damaged. For example, when the bearing gear end face feels quite rough when scraped by nails, or the gear end face has cracks, or the tooth surface has serious uneven wear, the gear should be replaced at this time;...
- Page 64 check whether the oil seal is cracked, worn or deformed, and check whether the rubber elasticity is enough, and replace it if there is any problem. B) sealing rings 8 and 9: When reinstalling the pump body, the spring body sealing ring 8 and the bearing sealing ring 9 should be replaced with new sealing rings.
- Page 65 is difficult, take them out and try to install them again. Never lightly hit or press them hard. (5)Turn the pump body upside down and put the driving and driven gears 5 and 6 into the pump body, so that the meshing teeth are in the same meshing position as before disassembly;...
- Page 66 (12) install spring washer 13 and bolt 12, and tighten the bolt with torque of 47+0.25 N.m(4.7+0.26 kgm). Check whether the gear pump is completely refitted, put the driving shaft in a vise, and then rotate the pump, which should rotate quite lightly. If it is difficult to rotate, check the pump again.
- Page 67 the maximum pressure is reached. In this process, the relief valve is used to increase the load to adjust the pressure. Let each oil circuit work for 5 minutes, and replace the filter element of oil return filter or clean it. When increasing the pressure, pay attention to the oil temperature, pump surface temperature and working sound.
- Page 68 8.8.5 Common faults of hydraulic system and their elimination methods solutions Problems Possible reasons The oil level in the oil pump tank The oil pump The oil is added to the is low ; does not specified oil level Clean and The oil suction line or oil filter is supply oil change the oil if it is dirty.
- Page 69 pressure of Improper pressure adjustment of Re-adjustment high-pressure overflow valve oil, (1)retighten the joint on the oil suction pipe side; (2)refuel the oil tank (3)Check the oil seal of the Air mixed into the pump pump; (4) The pump can not be started until there is no bubble in the fuel tank the joint on the oil suction side...
-
Page 70: 9、 Load System
(2) Wear of sliding surface (increase of internal leakage) (1) The oil pump gear is (1)replace damaged parts or damaged or the internal leakage replace new pumps is serious. The working (2) Replace the oil seal (2) The oil seal of lifting cylinder device is (3)Maintenance is damaged. - Page 71 Roller Roller1 φ119 Limit Roller φ91.5 Side Roller φ58 Lifting chain(IOS) Lh1634 Fork space adjusting Manual General Description The loading system is of the two-stage, rolling telescopic mast type and consists of J-shaped inner mast. C-shaped outer mast with 150mm free lift.
- Page 72 Inner and Outer Masts The inner and outer masts are welded parts. The bottom of outer mast is connected with the drive axle through supporting. At the outside middle of outer mast. there are tilt cylinder connected with the frame. The mast assembly can be tilt forward 10 degree and backward12 degree by operating the tilt cylinder.
-
Page 73: 10、 Electric System Description
10、 Electric System Description General 10.1 The electric system for this forklift truck is of the single-pole type, in which the frame of the truck provides the return path for the electricity. The electric system seems like the nerve system of the truck and it mainly consists of the following systems:Starting System Charging System and Lamp System.Voltage:12V Brief Explanation for Operation 10.2... - Page 74 circuit and firing circuit are ready for work. Turn the key switch clockwise to the second "on" position (starting ② position), then start the engine. 2)For diesel engine. the automatic pre-heater begins to work and the pre-heating indicator lights. The pre-heating indicator automatically lighting after 3.5 seconds and the pre-heater automaticallly stops working after 13.5 seconds.
- Page 75 Water Temperature Meter It indicates the temperature of the coolant for the engine Hour Meter It indicates how many hours the engine has worked Lamp Switch 10.3...
- Page 76 1.护顶架线束 2.组合仪表盘 3.组合开关总成 4.电器接线图 5.车体线束 6.集成电器盒 7.蓄电池 8.控制盒 9.后组合灯线束 10.警示灯 11.起动继电器 1 Frame wire harness 2 Instrument 3 Modular switch assembly 4 Electrical wiring diagram 5 Forklift truck wire harness 6 Electrical box 7 Battery 8 Control box 9 Combined lamp harness 10 Warning lights 11 Starting R...
-
Page 77: 三、Safety Rules For Operation And Daily Maintenance Of Forklift Truck
三、Safety Rules for Operation and Daily Maintenance of Forklift Truck It is important that driver and manager for forklift trucks remember the principle of the "first safety" and ensure the safety operation as the description in 《 OPERATION AND SERVICE MANUAL》 . 1. - Page 78 (2) Wear all the safety guards. such as shoes. helmet. clothing and gloves while operating the truck. (3) Check all the control and warning devices before starting the truck. If any damages or defects are found, operate it after repairing. (4) Overload or overload operation is strictly prohibited.
- Page 79 ● Check if the radiator is clogged; ● Check if the thermostat can open normally; (2)Use HELI exclusive coolant in order to keep the engine and cooling system in good condition. Change it once a year. If the coolant is bad in less than one year, change it when necessary.
- Page 80 (a) Replenish the coolant with HELI exclusive one only when the engine is cool when necessary avoiding engine damage. (b) If there is no HELI exclusive coolant in an emergency, never add any additives. Add water only and contact with local HELI sales network for proper mixture as possible.
- Page 81 Name Brand、Code and the use of temperature Diesel Diesel Brand -10# -20# -35# the use of temperature(℃) ≥4 ≥-5 ≥ ≥-14~-29 -5~-14 Diesel and Viscosity grade 5W30 10W30 15W40 20W50 engine oil the use of temperature(℃) -30~+30 -25~+ -20~+40 -15~+50 Hydraulic HLT-9 General environment:Mobil...
- Page 82 (6)Check the steering and transmission system for reliability. 8、Regular Inspection (1)Check the reliability of hydraulic system (2)Check steering and braking system reliability (3)Check the specific gravity and liquid level of the battery (4)Check the connection reliability of frame,drive axle,ect (5)The forklift works for 500 hours to change gear oil (6)The forklift works for 1000 hours to change hydraulic oil 9、Irregular Inspection (1)Check welding reliability everywhere...
- Page 83 Tilting Calcium cylinder grease tie rod Frame Calcium support grease Lifting Calcium roller grease...
-
Page 84: 四.Euro V Higher Emission Limits Stage
四.EURO V higher emission limits stage 1.Instrument(for certain truck models ) 18 Forklift run-well 27 Warning of high exhausting temperature 28 Parked regeneration request 29 Inhibit regeneration 23~26 DPF jammed volume is the volume that cannot be processed by regeneration. 30 Air cleaner(optional) Parked regeneration request... - Page 85 When the figure is displayed,it means that the truck needs to be parked for regeneration Warning of high exhausting temperature When the truck is under regenerating,the instrument will give a warning of high exhausting temperature when the exhausting temperature reaches to a value. Inhibit regeneration(for certain truck model) When the inhibit regeneration switch is pressed,the figure will display to suggest that the truck is under inhibit regeneration mode...
- Page 86 regeneration mode will not be effective.After a period of time,it is easy to cause blockage of post-treatment system.The maintenance cycle will be shortened. Safety belt reminder After the vehicle is started after 20s,if it is detected that the safety belt is not fastened,and the instrument will give a buzzer alarm.
-
Page 87: Dpf Maintenance(Regeneration Type,For Certain Truck Models)
2. DPF maintenance(regeneration type,for certain truck models) - Page 89 In order to improve the quality of the products,and to absorb the valuable opinions of the users,please send your opinions to us about the improvement of the product.The parameters of the forklift trucks are subject to change without prior notice.
- Page 90 Baoji Heli Forklift Co.,Ltd. Address:No,127,Baofu Road,Jintai District,Baoji City,Shaanxi Province,P.R.China...
Need help?
Do you have a question about the G Series and is the answer not in the manual?
Questions and answers