HELI G3 Series Operation & Service Manual
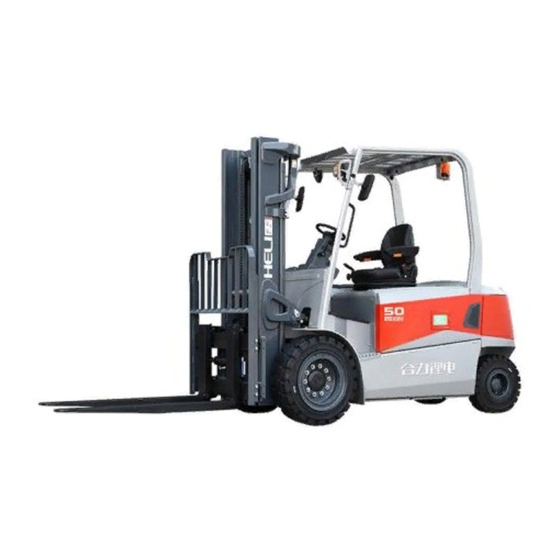
Dual-drive lithium battery powered forklift trucks 3-3.5t
Hide thumbs
Also See for G3 Series:
- Operation & service manual (199 pages) ,
- Operation & maintenance manual (179 pages) ,
- Operation & service manual (111 pages)

Related Manuals for HELI G3 Series


Summary of Contents for HELI G3 Series
- Page 1 OPERATION & SERVICE MANUAL G3 Series Dual-drive Lithium Battery Powered Forklift Trucks 3-3.5t...
- Page 2 G3 series dual-drive lithium battery powered forklift truck. They are particularly suitable for railway stations, ports, freight yard, warehouse and food, light textile industry, as well as general industrial goods loading and unloading, transporting, stacking, etc.
- Page 3 precautions in this manual strictly. This manual is the description of standard and optional trucks. Non-standard trucks shall prevail in kind. If you have any technical questions, please consult the manufacturer. This manual content might not correspond with the actual condition because of the improving of our products.
-
Page 4: Table Of Contents
CONTENTS Ⅰ. Safety regulations for driving and operation of forklift truck ........1 1. Fundamental principle ..................1 2. The delivery of the truck ..................1 3. The storage of the truck ..................1 4. Preparations before use ..................1 5. -
Page 5: Ⅰ. Safety Regulations For Driving And Operation Of Forklift Truck
Ⅰ. Safety regulations for driving and operation of forklift truck 1. Fundamental principle Drivers and superiors of the truck should always keep “SAFTY FIRST” in mind. Operate according to the OPERATION & SERVICE MANUAL and OPERATOR’S MANUAL. 2. The delivery of the truck Pay attention to the following items when delivering the forklift truck by car: (1) Pull up the hand brake;... -
Page 6: Operation Of Forklift Truck
(6) Complete the preparation work before starting; (7) Loose the parking brake; (8) Carry out the operation of mast lifting and lowering, forward and backward tilting, steering and braking. 5. Operation of forklift truck (1) Only trained and authorized operator shall be permitted to operate the truck; (2) Wear safety guards such as shoes, helmet, clothing and gloves while operating the truck;... -
Page 7: Daily Maintenance Of Forklift Truck
(13) Tilt the mast backward as possible if the lifting height is high. Load or unload with mast slightly forward or backward tilt; (14) Slow down and be more careful when travelling on dock or bridge plate; (15) When checking the battery or fuel tank level the driver should not be on the truck and make the truck shut down and stop steadily;... - Page 8 : check whether all parts of instruments, lighting, connectors, switches and electrical lines work normally. (2) Oil and grease for the truck Oil adding volume Brand, code and applying temperature (L) HELI special Antifreeze hydraulic oil Sticky grade Hydraulic hydraulic oil 40# YYY-LPL-HS32...
- Page 9 (3) The figure of Lubrication System...
-
Page 10: The Frame Number Position
7. The frame number position The unique series number (the same number as the product number) is marked on the frame of the forklift truck when leaving the factory, and it is permanently marked on the frame with steel marks, which can trace the production, sales, maintenance and other information of the truck. - Page 11 (2)The rated capacity chart of forklift trucks (2-stage mast) (3-stage mast) (2-stage mast) (3-stage mast) 3.5t 3.5t...
-
Page 12: Ⅱ. Primary Parameters Of Forklift Truck
Ⅱ. Primary Parameters of Forklift Truck... - Page 13 Primary Parameters Model number CPD30 CPD35 Configuration GD2DLI GD2DLI Rated load weight 3000 3500 Load centre distance Power source Lithium Battery Operation type Sit-on truck Tyre type Super elastic solid tire Size of front tyre 23x10-12 23x10-12 200/50 200/50 Size of rear tyre Wheel base 1750 1750...
- Page 14 Main detachable parts dimensions and weights Truck configuration number CPD30 CPD35 Unit Item GD2D GD2D Maximum external 1120x400x645 1120x400x645 dimension Drive axle Weight Maximum external 1176× 620× 988 1176× 620× 988 dimension Counterweight Weight 1300 Maximum external 1665× 1166× 1620 1665×...
-
Page 15: Ⅲ. The Structure, Principle, Adjustment And Maintenance Of Forklift Truck
Ⅲ . The Structure, Principle, Adjustment and Maintenance of Forklift Truck 1. Transmission system 1.1 General description The driving system of this series of electric forklift adopts the integral dual-drive bridge produced by Germany ZF company. The drive axle is mainly composed of two sets of wheel side reducers, two sets of AC asynchronous drive motors, and a set of driving brake and parking system in the middle. - Page 16 Fig.1-2 Transport of drive axle 1.Sling position 2.Wheel hub bolt 1.3.2 Storage of drive axle After the drive axle stored for 6 months, the starting motor works at approximately 1000rpm maintained for 2 minutes, so that the gear oil inside the drive axle is fully agitated and reactivated to ensure that each part is lubricated.
- Page 17 Fig.1-3 Position of each oil hole 1. Oil level check hole of gear box 2. Oil filling port of gear box 3. Oil drain hole of brake system 4. Oil level check hole of Brake system 5. Oil filling port of Brake system 6. Oil drain hole of Gear box...
- Page 18 1.3.4 The driving brake connection of the drive axle Fig.1-4 Position of brake oil port 1. External hydraulic connection(M10x1) 2. Breathing cap 1.3.5 Parking brake connection of the drive axle Fig.1-5 Parking brake oil port position 1. External hydraulic connection(7/16-20 UNF) 2. Breathing cap...
- Page 19 1.3.6 Electrical connection of the drive axle Fig.1-6 Electrical connection position 1.Temperature sensor interface 2.UVW binding post 3.Speed encoder interface Incorrect connections may cause personal injury or damage to parts. Be sure to follow the electrical wiring diagram for proper connection. Maximum tightening torque of nuts on UVW binding posts is 8Nm.
- Page 20 (3) Use appropriate equipment (such as funnel, pipe, etc.) to add unused new gear oil; (The gear oil must meet the requirements.) (4) Check the oil level, until it reach required; (The correct oil level is reached when the oil reaches the bottom edge of the filling hole. 0.5L on each side.) (5) Use a new copper sealing ring and tighten the oil plug with 22Nm torque.
-
Page 21: Braking System
in the mast support round hole, grease the inner wall, then place the mast support shaft into the steel back bearing, along with the mast placed in the left of the drive axle of the side on the "claw" integrally, using four groups M16x80 (10.9S) bolts fasten the mast support shaft on the drive axle "claw", bolts must add thread locking glue. - Page 22 brake pump, oil cup and wet brake composition, wet brake integrated in the drive axle. Parking brake adopts negative brake, brake mechanism is integrated in the drive axle. 2.2 Brake pedal The driving brake system mainly consists of brake pedal, main pump, sub-pump and brake.The principle of service brake is shown in figure 2-1, and the structure of brake pedal is shown in figure 2-2, which is installed on the support assembly through pin shaft.The pedal and the mounting frame are kept in position by a tension spring.
- Page 23 Fig.2-2 Service brake device 2.3 Brake pedal adjustment (1) Shorten the push rod on the brake main pump; (2) Adjust the stop bolt. As shown in the figure below, adjust the pedal height, which is about 60-75-mm; After stepping the pedal, the gap between the pedal and the front bottom plate should be greater than 20 mm;...
- Page 24 Fig.2-2 Brake pedal adjustment 2.4 Brake master pump The master pump consists of a seat, a one-way valve, a return spring, and a leather bowl, piston and auxiliary leather bowl. The ends are secured with stop washers and stop wire, the exterior is protected by a rubber dust cap, and the master pump piston is actuated by a push rod with the help of an operating brake pedal.
- Page 25 by the return spring of the brake shoe, so that the brake fluid returns to the main pump (piston front chamber) through the one-way valve, and the piston returns to the original position.The brake fluid in the master pump flow back to the fuel tank through the oil return port, adjust the one-way valve pressure into a certain proportion with residual pressure in the brake pipe and brake sub-pump ,makes the brake fluid in the sub-pump flow back to the fuel tank through the oil return port, adjust the...
- Page 26 "hand brake button", and its function is to remove the negative brake. When the button is energized, the LED ring row will display red or green. When the button floats, the light shows green to indicate that the truck is allowed to drive, while when the button is pressed, the light shows red to indicate that the truck is prohibited to drive.
- Page 27 Fig.2-4 Hand brake button layout 2.7 Adjustment of brake switch a) Release the lock nut of the brake switch after the height of the brake pedal is adjusted; b) Unplug the plug to separate the wires; c) Turn the switch to make the gap A=1mm; d) Confirm that the brake light should be on when the brake pedal is pressed.
-
Page 28: Steering System
3. Steering system 3.1 General description The function of forklift steering system is to change the direction of forklift or keep the forklift traveling straight. The performance of steering system is directly related to driving safety, operating efficiency and operator's labour intensity. According to the power source used for steering, the steering system can be divided into mechanical steering system (manual steering system) and power steering system. - Page 29 3.3 Steering system composition (1) Steering control mechanism Fig.3-1 Steering control mechanism G3 series of 3~3.5t forklift steering mechanism is mainly composed of the steering wheel, pipe column, connecting shaft, steering and mounting bracket, etc (as...
- Page 30 (2) Steering gear G3 series 3~3.5t adopts the cycloidal rotary valve type full hydraulic steering gear, which is a closed dynamic load steering gear. (see hydraulic system for details). (3) Steering transmission mechanism...
- Page 31 Steering axle tires, wheel hub models and tire pressure are shown in Tab.3-1: Tab.3-1 Tonnage of forklift 3t、3.5t Tire 200/50-10 Wheel Hub 6.50F-10 Tire pressure Fig.3-2 Steering axle 1) Steering axle body 2) connecting rod 3) steering cylinder 4) knuckle 5) Axle sleeve 6) Tapered Roller Bearings 7) Steering stub 8) Angle potentiometer 9) Tapered Roller Bearings 10) Tapered Roller Bearings 11) Locknut 12) Gasket 13) Lockpin 14) Wheel hub cover...
- Page 32 Fig.3-3 Steering cylinder 1) piston rod 2) U-ring 3) Scraper seal 4) Cylinder cover 5) Cylinder barrel 6) Combination seal ring 7) O-ring 8) O-ring 9) Separation blade (2) Wheel hub Wheel hub is mounted on the steering knuckle with two tapered roller bearings. The wheel is pried to the wheel hub by the wheel rim.
- Page 33 (2) Fix the outer ring of the bearing onto the wheel hub and install the wheel hub onto the steering knuckle shaft; (3) Install the plain washer and tighten the groove nut with a torque of 206-23N.m (21-24kgm), loosen the groove nut, and then tighten the groove nut with a torque of 9.8N.m(1kgm);...
- Page 34 ensure the tightening torque of the wheel hub nut: 161-188N.m for 1-3.5t forklift. 3.5.2 Maintenance of steering system (1) The steering master pin shall be inspected every 40 hours, and lubricating oil shall be added every 300 hours for the bent neck lube nozzle of the master pin; The left and right steering knuckle arms of steering cylinder piston rod and connecting rod shall be inspected every 40 hours and lubricating grease shall be added every 300 hours.
-
Page 35: Electric System
3.6.2 Steering system troubleshooting Tab.3-2 Steering system troubleshooting Problem Analyses of trouble Remedies Pump damaged or breaking down. Replace Fail to turn Splite-flow valve damaged or blocked Clean or replace hand-wheel Hose or joint damaged or pipeline Clean or replace blocked. - Page 36 Figure 4-1 Principle diagram of electric system...
- Page 37 4.2 Detailed description of electrical system 4.2.1 CAN bus network technology 3-3.5t dual-drive four-wheel counterbalanced forklift truck uses CAN bus network technology, and each module connected to CAN network (including traction control module/lift control module/steering control module instrument display module) act as an "access point"...
- Page 38 Fig.4-2 ZAPI Intelligent instrument panel 1) There are 6 keys on the instrument panel. Users can enter the control system through the corresponding keys to monitor the truck operation data and modify related parameters: (1) Parameter Setting Reduces Key (2) Parameter Setting Increases Key Speed Down Mode (3) Menu scroll down key (4) Menu scroll up key (5) Cancel Modified Data...
- Page 39 (11) Indicates fault: trouble light lights up when truck is out-of-order (12) Power status: when the power is less than 20%, the icon will light up 4.2.2.2 LCD display interface Fig.4-3 LCD display interface of ZAPI intelligent instrument (1) Power display: display the current lithium battery power, each cell represents 10% of the lithium battery power, When the battery power is reduced to only 2 grids, the lower limit of lithium battery power on the display screen prompts the icon "...
- Page 40 means the right turn signal is on. (9) the Angle of the wheel is actually displayed. 4.2.2.3 Function and application SMART DISPLAY is an intelligent instrument panel connected to the truck system through CAN bus. The smart instrument panel provides diagnosis and setup for the entire truck system.
- Page 41 " on the lower limit of lithium battery power on the display screen and the lithium battery power grid begin to flash, indicating that the operator's lithium battery power is insufficient and needs to be charged. When the lithium battery power drops to only 1 grid. The fault light also lights up at the same time, and displays the corresponding "under voltage"...
- Page 42 ② Operating ambient temperature range: -10º C~+50º C. 4.2.3 Electronic control 4.2.3.1 General description This series of counterbalanced forklift adopts ZAPI electrical control system imported from Italy, with advanced high frequency MOS tube technology, excellent speed regulation performance, good security, flexibility and first-class protection.The truck (lifting system solenoid valve solution) is equipped with four ZAPI motor controllers and a valve controller imported from Italy to control the traction, steering and lifting systems of the forklift truck respectively.
- Page 43 function, CAN BUS interface and digital control of microprocessor (based on motor speed feedback). ●The allowable working ambient temperature range is -40º C~+40º C, and the maximum allowable working temperature is 85º C. ●Protection functions of motor controller: a) Battery polarity protection b) Incorrect connection protection c) Over heat protection;...
- Page 44 Rated current 140A 381A 23 A Rated speed 2500 rpm 2280rpm 1300rpm 4.2.5 Lithium battery 4.2.5.1 Lithium Battery specification Table 4-3 Lithium Battery specification Model 16V/202AH 16V/202Ah 404AH Capacity 606Ah/5 (Standard configuration) Voltage Number of module 4.2.5.2 Lithium battery usage The usage and routine maintenance of the lithium battery will influent lithium battery life and performance.
- Page 45 (2) Lithium battery must be recharged within 24 hours after use, charging should be sufficient, but it is strictly prohibited to overcharge; (3) When the truck needs to be stored for a long time, it should be kept at 50% ~ 80% of the battery, and do not charge up full.
-
Page 46: Troubleshooting
months. If any damage or safety hazard is found during the inspection, the agent of ZAPI shall be notified immediately and the agent shall determine the safety of the truck. Note: After the chopper is installed, the truck wheels should be lifted (off the ground) for test, so that there will be no danger even if there is a connection error. - Page 47 Cause Fault in the hardware section of the logic board which deals with voltage feedbacks of motor phases. LOGIC FAILURE #2 Troubleshooting The failure lies in the controller hardware. Replace the controller. Cause This fault is displayed when the controller detects an undervoltage condition at the key input .
- Page 48 controller, it is necessary to replace the logic board. Cause: This test is carried out when the pump motor is turning (PWM applied). The pump motor output is higher than expected, considering the PWM applied. PUMP VMN HIGH Troubleshooting: - Motor internal connections - If motor windings/cables have leakages towards truck frame - If no problem are found on the motors, the problem is inside the controller, it is necessary to replace the logic board.
- Page 49 Cause 2 This alarm may also occur when the start-up diagnosis has succeeded and so the LC has been closed. In this condition, the phase voltages are expected to be lower than half the battery voltage. If one of them is higher than that value, this alarm occurs. Troubleshooting - If the problem occurs at start-up (the LC does not close), check: - motor internal connections (ohmic continuity);...
- Page 50 Cause In standby, the sensor detects a current value different from zero. STBY I HIGH Troubleshooting The current sensor or the current feedback circuit is damaged. Replace the controller. Cause When the key is switched on, the inverter tries to charge the power capacitors through the series of a PTC and a power resistance, checking if the capacitors are charged within a certain timeout.
-
Page 51: Battery Low
Troubleshooting: - Check the temperature read by the thermal sensor inside the motor through the MOTOR TEMPERATURE reading in the TESTER function. - Check the sensor ohmic value and the sensor wiring. - If the sensor is OK, improve the cooling of the motor. - If the warning is present when the motor is cool, replace the controller. - Page 52 Troubleshooting: - Check the wirings. - Check the mechanical calibration and the functionality of the accelerator potentiometer. - Acquire the maximum and minimum potentiometer value through the PROGRAM VACC function. - If the problem is not solved, replace the logic board. Cause: Incorrect starting sequence.
- Page 53 - Ask for help to a Zapi technician. Cause: Controller in calibration state. 115 LIFT ACQUISITION Troubleshooting: The alarm ends when the acquisition is done. Cause: Controller in calibration state. 116 TILT ACQUISITION Troubleshooting: The alarm ends when the acquisition is done. Cause: Controller in calibration state.
-
Page 54: High Pressure
Cause: 1).The CPOT input read by the microcontroller is not within the MMAX AUX IN÷ MAX AUX OUT range (see parameter in main pump adjustment menu); 2). The acquired values are wrong, make sure the values if are same as the parameters setting. 3.)maybe 122 AUX OUT RANGE the wiring is disconnected. - Page 55 Troubleshooting:Check the lithium battery,ask for help to the lithium battery manufacturer Cause: Lithium battery alarm ;Battery stop temperature ,battery temperature is high ,when this alarm appears , the truck should stop to work , inhibit traction and lifting and tilt ,only steering BMS6 function can work as normal Troubleshooting:Check the lithium battery,ask for help to the lithium...
- Page 56 ask for help to the lithium battery manufacturer Cause: Lithium battery alarm ; the traction inverter lost the 2F0 message,and the inverter can't receive this message again within 800ms , when this alarm will appears, truck should stop work , inhibit traction and lifting and tilt , only steering function can work 2F0 TIMEOUT as normal...
- Page 57 Cause:Networking alarm ; when key switch is closed, the traction inverter try to receive the 1AA message from the remote device, if the inverter can't receive this message,this alarm will appears, the truck should inhibit lifting and traction function , but tilt , side shift , 148 REM DEV INIT ERR attachment , steering function can work as norma Troubleshooting:Check the networking device if works properly,or...
-
Page 58: Short Circuit
Cause: RPM HIGH This alarm occurs in Gen. Set versions when the speed exceeds the threshold speed. Cause The two digital inputs dedicated to the bumper functionality are high at the same time. Troubleshooting BUMPER STOP - Turn off one or both inputs dedicated to the bumper functionality;... - Page 59 Cause At start-up, the controller checks the presence of IMS board. If the IMS board is not well connected, this alarm appears. IMS ERROR Troubleshooting - Replace the controller. Cause: This alarm occurs only when the controller is configured as PMSM and the feedback sensor selected is sin/cos.
- Page 60 Troubleshooting - Check that the sensor used is compatible with the software release. - Check the sensor mechanical installation and if it works properly. - Also the electromagnetic noise on the sensor can be a cause for the alarm. - If no problem is found on the motor or on the speed sensor, the problem is inside the controller, it is necessary to replace the logic board.
- Page 61 through the STEER ACQUIRING function Troubleshooting: - Acquire the maximum and minimum values coming from the steering potentiometer through the STEER ACQUIRING function. If the alarm is still present, check the mechanical calibration and the functionality of the potentiometer. - If the problem is not solved, replace the logic board Cause The motor current has overcome the limit fixed by hardware.
- Page 62 - If the problem is not solved, it could be necessary to replace the controller Cause: The EVP2 driver is not able to drive the EVP2 coil. The device itself or its driving circuit is damaged EVP2 DRIVER OPEN Troubleshooting: This fault is not related to external components.
- Page 63 Troubleshooting: - Check that LIFT and LOWER requests are not active at the same time. - Check the LIFT and LOWER input states through the TESTER function. - Check the wirings. - Check if there are failures in the microswitches. - If the problem is not solved, replace the logic board.
- Page 64 controller. Cause: The voltage on A30 is outside of the parameters range. Troubleshooting: PUMP VACC If the EVP TYPE parameter is set to ANALOG, please acquire again RANGE the values of MIN LOWER and MAX LOWER. If the controller is in configuration COMBI and lifting is proportional, please acquire again also the values of MIN LIFT and MAX LIFT.
-
Page 65: 36/37/38) Troubleshooting
The voltage on terminal PEB is at the high value even if the smart driver is turned OFF. Troubleshooting: Verify that the parameter POSITIVE EB is set in accordance with the actual coil positive supply . Since the software makes a proper diagnosis depending on the parameter, a wrong setting could generate a false fault. - Page 66 Troubleshooting - Check that the battery has the same nominal voltage of the inverter. - Check the battery voltage, if it is out of range replace the battery. - In case the problem is not solved, replace the logic board. Cause: There is an error in the choice of the torque profile parameters.
- Page 67 Cause Before switching the LC on, the software checks the power-bridge voltage without driving it. The software expects the voltage to be in a “steady state” value. If it is too high, this alarm occurs. Troubleshooting INIT VMN HIGH - Check the motor power cables; - Check the impedance between U, V and W terminals and -Batt terminal of the controller.
- Page 68 Cause The algorithm implemented to check the main RAM registers finds wrong contents: the register is “dirty”. This alarm inhibits the WRONG RAM machine operations. MEM. Troubleshooting Try to switch the key off and then on again, if the alarm is still present replace the logic board.
- Page 69 Cause - The EVP driver is shorted . - The microcontroller detects a mismatch between the valve set-point and the feedback of the EVP output. EVP DRIV. SHORT. Troubleshooting - Check if there is a short circuit or a low-impedance conduction path between the negative of the coil and -BATT.
- Page 70 - In case the problem is not solved, replace the logic board. Cause: Handbrake input is active. Troubleshooting: - Check that handbrake is not active by mistake. HANDBRAKE - Check the SR/HB input state through the TESTER function. - Check the wirings. - Check if there are failures in the microswitches.
- Page 71 PROGRAMM VACC function (see paragraph 9.1). The acquired values MIN VACC and MAX VACC are inconsistent. Troubleshooting: Acquire the maximum and minimum potentiometer values through the PROGRAM VACC function. If the alarm is still present, check the mechanical calibration and the functionality of the accelerator potentiometer.
-
Page 72: Analog Input
Troubleshooting: The device or its driving circuit is damaged. Replace the controller. Cause The DC-link voltage drops to zero when a high-side MOSFET is turned on. POWERMOS Troubleshooting SHORTED - Check that motor phases are correctly connected. - Check that there is no dispersion to ground for every motor phases. - Page 73 Troubleshooting: This type of fault is not related to external components. Replace the logic board. Cause: The software is not compatible with the hardware. Each controller produced is “signed” at the end of line test with a specific code mark saved in EEPROM according to the customized Part Number. According with this “sign”, only the customized firmware can be CONTROLLER uploaded.
- Page 74 Troubleshooting: Connect the Console to the supervisor uC and check which alarm is present. Cause The error between the Iq (q-axis current) setpoint and the estimated Iq is out of range. 245 IQ MISMATCHED Troubleshooting Ask for assistance to a Zapi technician in order to do the correct adjustment of the motor parameters.
- Page 75 Troubleshooting - Check that the SET BATTERY parameter inside the ADJUSTMENT list matches with the battery nominal voltage. - Through the TESTER function, check that the KEY VOLTAGE reading shows the same value as the key voltage measured with a voltmeter on pin A1.
- Page 76 Cause: This fault is displayed when the controller detects an undervoltage condition at the key input . Undervoltage threshold is 11V for 36/48V controllers and 30 V for 80V controllers. - Fault can be caused by a key input signal characterized by pulses below the undervoltage threshold, possibly due to external loads like DC/DC converters starting-up, relays or contactors during switching LOGIC FAILURE...
- Page 77 - Low/normal voltage Undervoltage condition Troubleshooting If the alarm happens during the brake release, check the line contactor contact and the battery power-cable connection. Cause: A HW or SW defect of the non-volatile embedded memory storing the controller parameters. This alarm does not inhibit the machine operations, but it makes the truck to work with the default values.
- Page 78 The supervisor microcontroller records different input values with respect to the master microcontroller. Troubleshooting: - Compare the values read by master and slave through the TESTER function. - Ask for the assistance to a Zapi technician. - If the problem is not solved, replace the logic board. Cause: This is a safety related test.
- Page 79 According with this “sign”, only the customized firmware can be uploaded. Troubleshooting - Upload the correct firmware. - Ask for assistance to a Zapi technician in order to verify that the firmware is correct. Cause: This is a safety related test. Supervisor μC has detected that the Master μC is driving DC motor in a wrong way (not correspondent to the status of operator commands).
- Page 80 4.2.7.3 ACE0 independent steering pump master alarm(node 13.0) Tab.4-7 Independent steering pump ACEO master controller alarm instructions CODE ALARM ANALYSIS OF ALARMS Cause: This is a safety related test. It is a self-diagnosis test that involves the logic between master and supervisor microcontrollers WATCHDOG Troubleshooting: This alarm could be caused by a CAN bus malfunctioning, which...
- Page 81 Troubleshooting: A) If the problem occurs at start up (the LC does not close at all), check: - Motor internal connections - Motor power cables connections - If the motor connection are OK, the problem is inside the controller B) If the problem occurs after closing the LC (the LC closed and then opens back again), check: - Motor internal connections...
- Page 82 Troubleshooting - If the problem occurs at start up (the LC does not close at all), check: o motor internal connections (ohmic continuity); o motor power-cables connections; o if the motor connections are OK, the problem is inside the controller; replace it. - If the alarm occurs while the motor is running, check: o motor connections;...
- Page 83 Cause The LC coil is driven by the controller, but it seems that the power contacts do not close. In order to detect this condition the controller injects a DC current into the motor and checks the voltage on power CONTACTOR capacitor.
- Page 84 temperature excess from 85 °C up to 105 °C. At 105°C the current is limited to 0 A. Troubleshooting: It is necessary to improve the controller cooling. To realize an adequate cooling in case of finned heat sink important factors are the air flux and the cooling-air temperature.
- Page 85 Cause The LC coil driver is not able to drive the load. The device itself or its driver circuit is damaged. CONTACTOR DRIVER Troubleshooting This type of fault is not related to external components; replace the logic board. Cause: At key-on and immediately after that, the travel demands have been turned off.
- Page 86 Troubleshooting - Check the electrical and the mechanical functionality of the encoder and the wires crimping. - Check the mechanical installation of the encoder, if the encoder slips inside its housing it will raise this alarm. - Also the electromagnetic noise on the sensor can be the cause for the alarm.
- Page 87 Troubleshooting: Perform the teaching procedure: in OPTIONS, select ABS SENS. ACQUIRE. See paragraph 7.3.1 for more details. SIXSTEP ERROR This alarm is not implemented in this truck WAIT MOTOR Cause:The controller is waiting for the motor to stop rotating. This STILL warning can only appear in ACE2 for brushless motors.
- Page 88 Cause The HW dedicated to detect faults on power bridge does not work SHORT CIRCUIT properly Troubleshooting - Replace the controller. Cause The controller continuously checks that the Three-phase bridge works properly and that a short-circuit between motor phases is not present.
- Page 89 Cause: Controller is acquiring data from the absolute feedback sensor. ACQUIRING A.S. Troubleshooting: The alarm ends when the acquisition is done. Cause: ACQUIRE ABORT The acquiring procedure relative to the absolute feedback sensor aborted. Cause: ACQUIRE END Absolute feedback sensor acquired. Cause This alarm occurs if the absolute position sensor is used also for speed estimation.
- Page 90 threshold (if analog). Troubleshooting: - Check the temperature read by the thermal sensor inside the motor through the MOTOR TEMPERATURE reading in the TESTER function. - Check the sensor ohmic value and the sensor wiring. - If the sensor is OK, improve the cooling of the motor. - If the warning is present when the motor is cool, replace the controller.
- Page 91 Cause - The EVP2 driver is shorted. - The microcontroller detects a mismatch between the valve set-point and the feedback of the EVP2 output Troubleshooting - Check if there is a short circuit or a low-impedance conduction path between the negative of the coil and -B. 183 EVP2 DRIV.
- Page 92 appear (See Paragraph 10.1). Cause: Both the pump requests (LIFT and LOWER) are active at the same time. Troubleshooting: - Check that LIFT and LOWER requests are not active at the same LIFT+LOWER time. - Check the LIFT and LOWER input states through the TESTER function.
- Page 93 controller it is necessary to replace the logic board. Cause: In standby condition (pump motor not driven), the feedback coming from the current sensor in the pump chopper gives a value out of a permitted range, because the pump current is not zero. PUMP I NO ZERO Troubleshooting: This type of fault is not related to external components;...
- Page 94 The parameter “Positive EB” has to be set in accordance with hardware configuration : Troubleshooting: - Verify that the parameters “Positive EB” is set in accordance with the actual coil positive supply . The software, in fact,depending by specific parameter value, makes a proper diagnosis; a wrong configuration of the parameter could generate a false fault.
- Page 95 Cause: At start-up there is a mismatch in the parameter checksum between M/S PAR CHK the master and the supervisor microcontrollers. MISM Troubleshooting: Restore and save again the parameters list. Cause: Master uC is transferring parameters to the supervisor. 199 PARAM TRANSFER Troubleshooting: Wait until the end of the procedure.
- Page 96 logic board. Cause: The CPOT BRAKE input read by the microcontroller is at its maximum value without the hand-brake request. BRAKE RUN OUT Troubleshooting: Check the mechanical calibration and the functionality of the brake potentiometer. If the alarm is still present, replace the logic board. Cause: The controller receives from EPS information about the safety contacts being open.
- Page 97 alarm disappears, the previously stored parameters will be replaced by the default parameters. Cause: The controller has restored the default settings. If a CLEAR EEPROM has been made before the last key re-cycle, this warning informs you that EEPROM was correctly cleared. PARAM RESTORE Troubleshooting: - A travel demand or a pump request cancels the alarm.
- Page 98 could generate a false fault. - In case no failures/problems have been found, the problem is in the controller, which has to be replaced. Cause: No load is connected between the NEVP output (A19) and the electrovalve positive terminal. EVP COIL OPEN Troubleshooting: - Check the EVP condition.
- Page 99 Cause: The output of the motor thermal sensor is out of range. Troubleshooting: SENS MOT TEMP - Check if the resistance of the sensor is what expected measuring its resistance. - Check the wiring. - If the problem is not solved, replace the logic board. Cause: The voltage of traction A17 pin is wrong, A17 pin voltage is +24V, from DC-DC output, if the voltage is wrong,this alarm will appears...
- Page 100 Troubleshooting - Check the connections between the controller outputs and the loads. - Collect information about characteristics of the coil connected to the driver and ask for assistance to a Zapi technician in order to verify that the maximum current that can be supplied by the hardware is not exceeded.
- Page 101 - If the problem is not solved, replace the logic board. Cause: At start-up, the hardware circuit dedicated to enable and disable the EB driver is found to be faulty. The hexadecimal value “XX” facilitates Zapi technicians debugging the problem. HW FAULT EB.
-
Page 102: Analog Input
PWM CTRAP, ) and the feedback of the actual threshold value. Troubleshooting The failure lies in the controller hardware. Replace the logic board. Cause: The maximum current gain parameters are at the default values, which means the maximum current adjustment procedure has not been carried out yet. - Page 103 board. Cause: This alarm occurs when there is an overload of one or more EV driver. As soon as the overload condition has been removed, the alarm disappears by releasing and then enabling a travel demand. COIL SHOR. Troubleshooting: EVAUX - Check the EVs conditions.
- Page 104 Troubleshooting: The alarm ends when the acquisition is done. Cause: This is a safety related test. It is a self-diagnosis test that checks the communication between master and supervisor microcontrollers. NO CAN MSG. Troubleshooting: This alarm could be caused by a CAN bus malfunctioning, which blinds master- supervisor communication Cause: This is a warning to point out that it is time for the programmed...
- Page 105 Troubleshooting: - Check if there is a short or a low impedance path between the negative coil terminal and -BATT. - Check if the voltage applied is in accordance with the parameters set . - If the problem is not solved, replace the controller. 4.2.7.4 ACE0 independent steering pump slave alarm (node 13.1)...
- Page 106 at the same time. The alarm can occur only if parameter BUMPER STOP = ON and only if ACE2 is in CAN OPEN configuration Troubleshooting - Turn off one or both inputs dedicated to the bumper functionality. - If the alarm occurs even if the inputs are in the rest position, check if the microswitches are stuck.
- Page 107 Troubleshooting: Execute a CLEAR EEPROM procedure (refer to the Console manual). Switch the key off and on to check the result. If the alarm occurs permanently, it is necessary to replace the controller. If the alarm disappears, the previously stored parameters will be replaced by the default parameters.
- Page 108 Troubleshooting: - Checks the matching of the parameters between Master and Supervisor. - Ask for assistance to a Zapi technician. - If the problem is not solved, replace the logic board. Cause CANbus communication does not work properly. The hexadecimal value “XX”...
- Page 109 Troubleshooting: - Checks the correspondence of the parameters between Master and Supervisor - Ask the assistance of a Zapi technician. - If the problem is not solved it is necessary to replace the logic board. Cause: This is a safety related test. The Master μC has detected a Supervisor μC wrong set point for DC Pump motor.
- Page 110 detected. All functions are blocked. Troubleshooting depends on which is the reason of the alarm: A) A real undervoltage situation happened. The alarm should disappear by simply switching off and on again the key. The cause of the undervoltage event has to be found on the application. For example: a truck function requesting a very large battery current may decrease too much the battery voltage.
- Page 111 Cause: This is an alarm related to the hardware configuration. OUT PORT PULL-UP Troubleshooting: The problem is on the logic board, which must be replaced. Cause: There is a problem in the analog-to-digital module of the microcontroller. All functions are stopped. ANALOG INPUT Troubleshooting: this a failure internal to the microcontroller, replace the board.
- Page 112 MASTER technician. This alarm is not implemented in this truck.Ask for help to a Zapi PCF TIMEOUT technician. Cause: Parameters are saved both in the master Eeprom and in the slave Eeprom. The two non-volatile memories must contains the same parameter values and they are compared periodically.
- Page 113 Troubleshooting depends on which is the reason of the alarm: A) A real undervoltage situation happened. The alarm should disappear by simply switching off and on again the key. The cause of the undervoltage event has to be found on the application. For example: a truck function requesting a very large battery current may decrease too much the battery voltage.
- Page 114 in the controller, which has to be replaced. Cause: This alarm occurs when there is a short circuit of the EVP7 or EVP8 coil. After the overload condition has been removed, the alarm exits automatically by releasing and then enabling a travel demand.
- Page 115 B) In case no failures/problems have been found externally, the problem is in the controller, which has to be replaced Cause: This alarm occurs when there is a short circuit of the EV2 coil,After the overload condition has been removed, the alarm exits automatically by releasing and then enabling a travel demand Troubleshooting: ALARM COIL SH.
- Page 116 Cause: VCM is not able to drive the high side driver of output PEVP1. PEV DRV. OPEN Troubleshooting: This type of fault is not related to external components; replace the logic board. Cause: The high side driver of output PEVP1 is shorted. Troubleshooting: Check if there is a short or a low impedance pull-up between PEV DRV.
- Page 117 Troubleshooting: Switch OFF and ON. If the alarm is still present replace the board. Cause: Wrong customer ID code found in the protected area of memory CONTROLLER where this parameter are stored MISM. Troubleshooting: Replaced the controller. Cause: The driver of one of the first eight outputs is shorted. Troubleshooting: Check if there is a short or a low impedance pull-down DRV.
- Page 118 alarm is still present than the problem is inside the controller logic board, replace it. Cause: This fault appears when the no load is connected between one of the outputs NEV1….NEV3 and the positive. Troubleshooting: It is suggested to check the harness, in order to verify if some COIL OPEN B coil is connected to the right connector pin and if it is not interrupted.
- Page 119 occurs permanently, it is necessary to replace the controller. If the alarm disappears, the previously stored parameters will be replaced by the default parameters. LEFT STBY I HIGH This is not implemented in this truck. Cause: This alarm occurs when there is a short circuit of the AUXILIARY coil connected to CNB#1 output.
-
Page 120: Hydraulic System
Troubleshooting: The problem is inside the logic, no external component are involved, replace the logic board Cause:It defines the truck behaviour when a maintenance is required SERVICE REQUIRED Troubleshooting:Set parameter "CHECK UP DONE" to ON, then switch off and on. 5. - Page 121 Fig.5-2 Hydraulic piping diagram (electromagnetic full proportional load sensing multiplexer valve) 5.1.1 Oil pump The oil pump converts the mechanical energy of the motor into the hydraulic energy. The lifting pump is a single The oil pump used by forklift is external gear pump. pump (figure 5-3), and the steering braking system is a dual pump (Fig.5-4).
- Page 122 Fig.5-5 Outline drawing of multiple valve The multiway valve is a four-piece, five-part valve, controlled by a thumb switch, that distributes high pressure oil to the lifting cylinder or tilting cylinder and allows the return oil to flow back to the tank. The tilting control valve is equipped with a balance valve, which is mainly used to prevent the tilting cylinder in the case of no pressure source, due to the improper operation of the valve stem caused by the serious consequences of load movement.
- Page 123 1.The valve body 2.Prefill solenoid valve 3.Safety overflow valve 4.High-voltage alarm switch 5.Brake relief valve 6.Oil return port 7.Low voltage control switch 8.Mounting plate 9.Accumulator 10.Oil inlet 11.Brake oil port Fig.5-6 Brake system control valve Note: The brake control valve is integrated with a high pressure accumulator. Non-professional maintainers are not allowed to remove the relevant joints and pipelines for maintenance and operation.
- Page 124 descending position, the piston rod is lowered under the action of goods, mast, fork arm carrier and the mass of the piston itself, and the hydraulic oil is pressed back to the oil tank. A cut-off valve is installed at the bottom of the cylinder (see Fig.5-7). If the mast is raised, the high-pressure pipe rupture can be a safety protection.
- Page 125 Fig. 5-8 pipeline explosion-proof valve structure 1.Valve body 2. Guide shaft 3. Spring 4 Separation blade 5.1.5 Speed limit valve The speed limit valve is installed in the lifting oil line to limit the descending speed of the fork under heavy load, as shown in Fig.5-9. It mainly consists of a cylindrical valve body with control valve element, valve element spring and free-floating detection throttle disc.
- Page 126 Fig. 5-11 Free flow condition 5.1.6 Tilting cylinder The tilting cylinder is a double-acting piston hydraulic cylinder mounted on both sides of the mast, and its piston rod end is connected with the mast. The bottom of the tilting cylinder is connected with the connecting end of the frame and the mast. Tilting forward and backward of the mast are accomplished by the action of the tilting cylinder.
- Page 127 Fig.5-12 Tilt cylinder (1) Earring (2) Dust ring (3) Retaining ring (4)Yx seal ring (5) O-ring (6) Guide sleeve (7) Bearing (8) O-ring (9) Piston rod (10) Cylinder block (11)Yx seal ring (12) Supporting ring (13) Piston (14)Yx seal ring 5.1.7 Hydraulic oil tank The hydraulic tank is equipped with return oil filter and respirator to ensure the cleanness of the oil in the hydraulic system, as shown in Fig.5-13.
- Page 128 of the steering and brake valve block is combined with the three ways on the brake valve block to return to the steering oil pot, which is integrated with return oil filter. Fig.5-14 Steering brake line The steering oil pot (as shown in Fig.5-15) acts as a common oil tank for steering and braking, with integrated oil scale, respirator and return oil filter.
- Page 129 5.2 Maintenance, fault analysis and troubleshooting methods 5.2.1 Maintenance Before and after the shift, check whether there is leakage or serious oil leakage in the pipe joint, lifting cylinder, tilting cylinder, oil pump, full hydraulic steering gear and steering cylinder of the hydraulic transmission system; Check whether there is enough working oil in the working tank;...
-
Page 130: Lifting System
mixed with air, and the suction pipe is fluid. leaking, the hydraulic oil is not enough. 3) The sealing ring in the pump cover groove is damaged. Replace. 4) Wear of end face of bearing sleeve. 5) Oil pump gear wear. Replace. - Page 131 6.1.1 Inner and outer mast The inner and outer portal frames are welded parts, the weight is mainly supported on the bridge shell, and the whole outer mast is mounted on the frame by supporting axle. The middle part of the outer mast is connected with the frame through the tilting cylinder.
- Page 132 middle and bottom rollers adopt compound rollers; The main roller shaft is welded to the fork carrier, and the side roller of the plate is bolted to the fork carrier. The longitudinal load is borne by the main roller, which is exposed from the top of the mast when the fork is lifted to the top, and the transverse load is borne by the compound roller.
- Page 133 carrier. The compound rollers not only bear the load in the front and rear directions but also bear the lateral load. The main rollers in the upper end of the fork carrier only bear the load in the front and rear directions, while the side rollers bear the lateral load in the left and right directions.
- Page 134 Note: the clearance adjustment method of the side roller of the compound roller is as shown in the figure. Special gaskets are added between the side roller and the roller shaft. 6.1.4 Repair (1)Adjusting of the lifting cylinder Readjust the stroke of the lift cylinder when the lift cylinder, the inner mast or the outer mast is replaced.
- Page 135 Fig.6-4 (2)Adjustment of fork carrier height (a) Park the truck on a level ground and ensure the mast is vertical. (b) Make the bottom of the fork touch the ground, adjust the adjusting nut of the upper end joint of the chain so that there is an A distance between the main roller and the mast channel, as shown in the Fig.6-5.
- Page 136 (e) The forklift can be reversed when the fork carrier disengaged from the outer mast. (f) Replacing main rollers: ●Take apart all of snap ring and take out main rollers. Take care to keep the shims. ●Confirm the new roller is the same type as the old one, Fit the new main roller to replace the old one, and fastened with snap ring in the meantime.
- Page 137 inner mast. (g) When the main rollers on the upper outer mast will come out from the inner mast top end, then the main roller can be removed. (h) Replacing main rollers ● Take apart the upper main rollers without losing shims. ●...
- Page 138 Fig. 6-7 Inner and outer mast 6.2.2 Fork carrier The fork carrier rolls through the compound roller, the main and side rollers inside the inner mast. The main roller at the upper end of the column plate is mounted on the main roller shaft and stuck with the elastic retaining ring. The main roller shaft is welded to the fork carrier, and the side roller of the column plate is bolted to the fork carrier.
- Page 139 1. Limit screw 2. Washer 3. Load-backrest 4. Washer 5. Bolt 6. Fork carrier 7. Main roller 8. Retainer ring 9. Compound roller 10. Adjusting gasket 11. Side roller 12. Washer 13. Bolt 14. Fork assembly Fig. 6-8 Fork carrier 6.2.3 Adjustment method of roller 8 compound rollers, respectively installed on the upper end of the outer mast (2), the lower end of the inner mast (2), and both sides of the column plate of the fork...
- Page 140 Fig.6-9 Roller layout Note :(a) Adjust the clearance of side rollers to be 0~0.5mm; (b) Butter the main roller surface and the contact surface of the mast. (Note: the maintenance of the upper compound roller of the inner and outer mast belongs to the high maintenance, and safety shall be paid attention to.
- Page 141 shown in the figure. Special gaskets are added between the side roller and the roller shaft. 6.2.4 Repair (1)Adjusting of the lifting cylinder When the lifting cylinder, inner mast or outer mast are disassembled and replaced, the stroke of the rear lifting cylinder shall be adjusted again (Note: there is no need to carry out the front lifting cylinder).
- Page 142 Fig. 6-10 (e) When the front cylinder needs to be replaced, the fork carrier needs to be removed. The disassembling and assembling method is the same as c. Remove the fork carrier as a whole, and then remove and replace the oil cylinder before lifting, as shown in the figure below.
- Page 143 (a) Hold a pallet on the fork and park on the level ground. (b) Drop forks and pallets to the ground. (c) Remove the upper end joint of the chain and remove the chain from chain wheel (Fig. 6-12). (d) Lift the inner mast. (e) Take out the fork after confirming that the fork has been independent of the inner mast.
- Page 144 mast and be careful not to lose the adjusting pad on the piston rod head. (e) Remove the connection bolt between the lifting cylinder and the bottom of the outer mast. Remove the lifting cylinder and the oil pipe between the two cylinders. Do not loosen the tubing joint.
- Page 145 installed at the bottom. The inner mast keeps the relative position in the process of movement of the inner mast and the outer mast through compound roller rolling. Maintenance of the compound roller on the inner, middle and outer masts is high maintenance, should pay attention to safety.
- Page 146 1. Limit screw 2. Washer 3. Load-backrest 4. Washer 5. Bolt 6. Fork carrier 7. Main roller 8. Retainer ring 9. Compound roller 10. Adjusting gasket 11. Side roller 12. Washer 13. Bolt 14. Fork assembly Fig. 6-14 Fork carrier 6.3.3 Adjustment method for roller 12 compound rollers, respectively installed on the upper end of the outer mast (2), the upper end of the middle mast (2), the lower end of the middle mast (2), the lower...
- Page 147 fork carrier move freely. Fig. 6-15 Roller layout Note :(a) Adjust the clearance of side rollers to be 0 ~ 0.5mm; (b) Butter the main roller surface and the contact surface of the mast. (Note: the maintenance of the upper compound roller of the inner, middle and outer mast belongs to the high maintenance, safety shall be paid attention to.
- Page 148 shown in the figure. Special gaskets are added between the side roller and the roller shaft. 6.3.4 Repair (1)Adjusting of the lifting cylinder When the lifting cylinder, inner mast or outer mast are removed and replaced, the stroke of the rear lifting cylinder shall be adjusted again (Note: there is no need to carry out the front lifting cylinder).
- Page 149 Fig. 6-17 Adjust rear lifting cylinder synchronously (e) When the front cylinder needs to be replaced, it is necessary to remove the fork carrier. The disassembly method is the same as c. Remove the fork carrier as a whole and then remove and replace the lifting cylinder before replacing. (2) Adjust the height of the fork carrier (a) Park the truck on the horizontal ground and make the mast vertical.
- Page 150 (a) hold a pallet on the fork and park on the level ground. (b) drop forks and pallets to the ground. (c) Remove the upper end joint of the chain and remove the chain from chain wheel (Fig. 6-7). (d) Lift the inner mast. (e) Take out the fork carrier after confirming that the fork carrier has been detached from the inner mast.
-
Page 151: Operating System
(e) Lower the inner mast until the rollers of the lower and middle mast are exposed. (f) Replace the main roller: ● Remove upper main roller with drawing tool, do not lose adjusting pad. ● Install the new roller with the adjustment pad removed in step (a). (g) Remove fixing bolts between the lift cylinder and middle mast. - Page 152 Figure 7-1 Centralized control system 7.2 Operation and Attention (1)Travelling There are three "travelling direction switches", namely forward, backward and median. After the forklift is ready, press the front end of the " travelling direction switch" (arrow forward) , the foot presses down the accelerator pedal, the truck can move forward;...
- Page 153 greater the speed. When the tilting fingertip switch is pushed forward, the fork tilts forward; When pulled back, the fork tilts back. The greater the angle of the fingertip switch, the greater the speed. The " accessory three-piece/four-piece finger-tip switch" is pushed forward or pulled back, and its action is defined according to the operation of the specific instrument.
- Page 154 (5)Steering light switch "Steering signal light switch" is three in total. Press the left arrow end, and the left steering light flashes; Press the right arrow end and the right steering light flashes; Middle , steering signal off. (6)Light switches There are three "light switches"...
-
Page 155: Ⅵ. Lithium Battery Changing
Ⅵ. Lithium Battery changing 1. General description Lithium Battery is the energy source of the truck. When the working intensity is high and the operation duration is long, the lithium battery needs to be replaced. The lithium battery can be changed from the right side of the truck body by forklift, pallet stacker and other tools. - Page 156 L2 + For example, when equipped with the 80V700Ah battery, it is estimated to use the HELI H3 series 2.5ton battery truck to pick up. Technical parameters of H3 series 2.5ton battery truck: Q=2500kg, fork length L4=1070mm, front suspension L2=465mm, c=500mm.
-
Page 157: Steps To Change The Lithium Battery
2500(500 + 465) ��2 = = 1977kg 1030 + (1070 − 830) 465 + Through calculation, Q2 is 1977kg, which is larger than the lithium battery weight of 1830kg, meeting the service requirements. 3. Steps to change the lithium battery Change the lithium battery according to the following steps: (1)Open the side door to the maximum Angle. - Page 158 (4)Adjust the fork spacing of the truck to a proper level. Put the truck directly facing the side of the lithium battery. Lower the fork horizontally and insert it into the bottom of the auxiliary counterweight under the lithium battery. Pay attention to the fork carrier or any part of the truck body when the truck enters, otherwise it may cause damage to the side door.
-
Page 159: Steps To Install The Lithium Battery
(6) When the truck is equipped with a cab, please pay attention to open the right door of cab before opening the side door, as shown in Figure (b) below; Then open the side door of the battery cabin, as shown in Figure (c). Figure(a)... - Page 160 lithium battery warehouse, adjust the height of the fork properly and enter the warehouse. Pay attention while the truck moving forward, the fork carrier or any part of the truck body should not hit the side door, otherwise the side door may be damaged.
- Page 161 (5)Connect the lithium battery. (6)Close the side door.
- Page 162 OPERATION & SERVICE MANUAL www.helichina.com Add/No.668, FangXing Road, Hefei, China Post Code/230000 Customer Service Hotline/4001-600761 Service Tel/+86-551-63648005,63689000 S337-3:2022 E-mail/heli@helichina.com All rights reserved...
Need help?
Do you have a question about the G3 Series and is the answer not in the manual?
Questions and answers