
Subscribe to Our Youtube Channel
Related Manuals for Eureka NER J20 Ultra


Summary of Contents for Eureka NER J20 Ultra
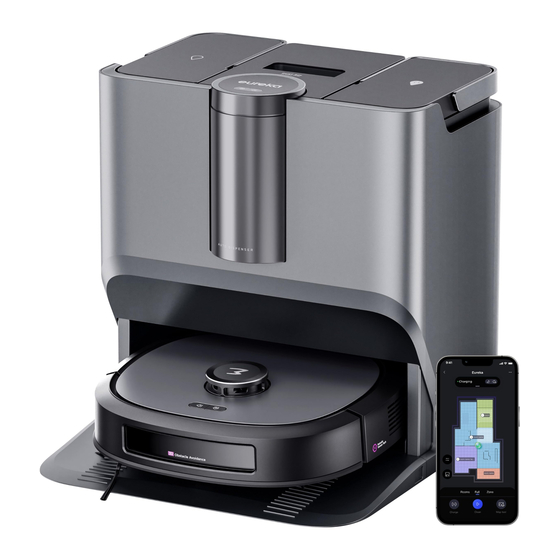
- Page 1 INSTRUCTION MANUAL Eureka NER J20 Ultra ROBOT VACUUM CLEANER Please read the manual before use.
-
Page 3: Table Of Contents
CONTENTS Safety instructions Technical data Product Introduction Product Usage Smart Operations Maintenance The Eureka limited warranty Troubleshooting Common Issues... -
Page 4: Safety Instructions
SAFETY INSTRUCTIONS IMPORTANT SAFETY INSTRUCTIONS When using an electrical appliance, basic precautions should always be followed, including the follow- ing: READ ALL INSTRUCTIONS BEFORE USING (THIS APPLIANCE). Failure to follow the warnings and instructions may result in electric shock, fire and/or serious injury. WARNING To reduce the risk of fire, electric shock, or injury: Turn o all controls before unplugging. - Page 5 SAFETY INSTRUCTIONS Recharge only with the charger specified by the manufacturer. A charger that is suitable for one type of battery pack may create a risk of fire when used with another battery pack. Use appliances only with specifically designated battery packs. Use of any other battery packs may create a risk of injury and fire.
- Page 6 fit, contact a qualified electrician to install the proper outlet. Do not change the plug in any way. To reduce the risk of fire and electric shock due to internal component damage, use only eureka cleaning product intended for use with this appliance.
- Page 7 SAFETY INSTRUCTIONS WARNING FOR BATTERY The product must be powered o before removing the battery. Please note that do not disassemble the battery by yourself. If you need to replace it, please contact the after-sales service center. Please dispose of used battery according to local laws and regulations. Do not dismantle, open or shred the battery.
- Page 8 SAFETY INSTRUCTIONS FCC COMPLIANCE STATEMENT [symbol IEC 60417-5957 for indoor use only ( 2004-12 )] CAUTION: Please read the instruction sheet carefully before use [symbol ISO 7000-0790 read user's manual ( 2004-01 )] This device complies with Part 15 of the FCC Rules. Operation is subject to the following two conditions: - This device may not cause harmful interference.
-
Page 9: Technical Data
TECHNICAL DATA Product Model NER J20 Ultra Battery Capacity 6000mAh (Li-battery) Base Station Dimensions 423 x 444 x 452.5mm Charging Type Auto Charging Main Unit Dimensions 352 x 352 x 105mm Cleaning Mode Whole House, Area, Scheduled Base Station Dustbin Capacity... -
Page 10: Product Introduction
Product Introduction Component Introduction Robot Main View (with Cover Closed) Bottom View of the Robot Radar Cover Mop Assembly Main Unit Rolling Brush Roller Cover Top Cover Side Strip Start Button Caster Wheel Recharge Button Carpet Sensor Side Brush Front Bump Sensor Robot Main View (with Cover Open) Cleaning Tool Power Button... - Page 11 Product Introduction Component Introduction Station Main View Bottom View of the Robot Cleaning Clean Water Tank Solution Cover Dustbin Cover Waste Water Tank Start Button Return Button Charging Terminal Return Cleaning Tray Alignment Mirror Base Ramp Rear View of the Robot Power Cord Interface...
- Page 12 Product Introduction Accessory List Mop x 1 Cleaning Tray se Ramp x 1 (Installed) Power Cord x 1 Cleaning Solution Double-sided Mop x 1...
-
Page 13: Product Usage
Product Usage Initial Use Remove the Robot's collision protection strip and the laser Install the Base station Base ramp protection film Press it down into the corresponding position on the base station shell. When you hear a 'click' sound, Install the side brush with the convex side facing down. it indicates that the installation is completed. - Page 14 Product Usage Initial Use Base Station Placement Clean Water Replenishment Please place the base station against the wall on a hard surface, To add water, take out the left water tank, open the cover ensuring there is more than 0.05m of space on both sides and more fill the tank with tap water, and then place it inside the base than 1.3m of open space in front, Connect the power supply and ensure station.
- Page 15 Product Usage Home Environment Preparation Cleaning the Area to be Swept Before use, please arrange furniture such as tables and Organize miscellaneous items on the floor such as wires, chairs, as well as items like floor fans neatly. Store low items like weighing scales properly to create the largest unit.
-
Page 16: Smart Operations
Product Usage Smart Operations Home Environment Preparation Power On and Charge Preventing Robot Falls To charge the robot, connect the power to the base station and press and hold the robot's power button. Wait for the power If the robot is performing tasks in indicator to stay on steadily, then place the robot with the areas such as the landing of a charging port facing inward into the base station. - Page 17 Download the App Scan the QR code on the device or add it manually by Search for 'eureka robot' in the app store or scan the QR selecting the model code below to download and install the eureka Smart App QR code Follow the App instructions to add the device.
- Page 18 Smart Operations Robot Usage Common Functions of the Robot Start Cleaning Child Lock (Button Lock) Function Long press the robot's return-to-charge button ' ', or enable the Short press the robot's start button ' ' to initiate cleaning. child lock function in the app. Once the child lock is activated, the buttons on the base station and robot will be disabled, and Pause only control through the app will be possible to prevent pets or...
- Page 19 Smart Operations Robot Usage Explanation of Robot Buttons Operation Indicator Lights Meaning Buttons Short Press Long Press White Breathing Robot Charging Robot Cleaning/ Start/Pause/ Start Button Spot Cleaning Solid White Robot Returning Resume Work to Charge Return to Charging Return to Red Blinking Robot Malfunction Station/Pause and...
- Page 20 Smart Operations How to Use the Base Station Common Functions of the Robot Clean Mop When the robot is at the base station, long press the ' ' to clean the mop. Initiating the mop cleaning will automatically clean the robot's mop, Start Cleaning and empty the water in the robot's dirty water tank.
- Page 21 Smart Operations How to Use the Base Station APP Usage Friendly Reminder Instructions for Base Station Buttons The software and products are continually upgraded, and other Indicator Lights Meaning to the latest version of the app for accurate information. Cleaning Cleaning White Breathing Tray/Dusting Robot Charging/...
- Page 22 Smart Operations App Feature List App Feature List Creating No-go zone Cleaning Records Virtual Wall Personalized Cleaning Map Settings Room Editing Other Settings Accessory Lifetime Map Management Manual Control Cleaning Mop Find Robot Base Station Drying Mop Operations Dust Collection Carpet Recognition Child Lock Robot Settings...
-
Page 23: Maintenance
Maintenance Robot - Dirty Water Box & Dirty Water Tank & Dirty Water Filter Valve Disassembly Cleaning and Maintenance Press and hold the dirty water tank release button(purple) Open the top cover of dirty water tank, wipe it with a soft at the tail of the robot to manually remove the dirty water cloth according to the degree of dirt, or rinse it with box and dirty water tank by hand. - Page 24 Maintenance Robot - Dustbin & Dustbin Filter Disassembly Cleaning and Maintenance Open the cover on the robot, squeeze the dustbin latches, Rinse the dustbin filter with clean water, make sure to and lift the dustbin upwards. air-dry it before placing it back in the dustbin. Open the dustbin lid along the arrow direction, and Depending on usage, it can be replaced with a new one.
- Page 25 Maintenance Robot - Mop Bracket & Mop Disassembly Cleaning and Maintenance Press the purple buttons on both sides of the robot's Follow the Installation instructions to remove the mop. bottom mop bracket, flip it up, and then remove the bracket. Squeeze the mop bracket and then remove the mop.
- Page 26 Maintenance Robot - Side Brush Robot - Roller Brush Disassembly Disassembly Flip the robot, gently pinch the side brush, and lift it upward. Simultaneously press the buttons on the roller brush cover with both hands and remove the cover. Lift and take out the roller brush from the tight purple end. Cleaning and Maintenance Cleaning and Maintenance Use the provided cleaning tool to remove entangled hair.
- Page 27 Maintenance Base Station-Clean the filter & bottom shell cleaning trough Disassembly Cleaning and Maintenance Hold both sides of the cleaning filter with your hands and lift it Please use a cleaning cloth or disposable wet wipes to upward to remove the cleaning filter. clean the cleaning filter and the base station's bottom shell cleaning slot.
- Page 28 Maintenance Base Station-Base Station Ramp Disassembly Cleaning and Maintenance Gently lift the ramp by holding the catches on both sides of the Use a cleaning cloth or disposable wipes to clean the base station with both hands. base station slope. Rinse with water based on the level of dirt.
- Page 29 Maintenance Base Station-Dust bag Disassembly Cleaning and Maintenance Remove the panel of the base station dustbin. Discard the filled dust bag. Lift the dust bag upward and pull it out. Wipe the dust collection port and the interior of the dust bin with a disposable wet wipe.
- Page 30 Maintenance Base Station - Cleanser Disassembly Cleaning and Maintenance Remove the decorative cover of the base station buttons. Discard the used cleanser container. Lift the cleaning solution upward and pull it out. Remove the cap from the new cleaning solution bottle, pour the cleaning solution into the cleaning solution compartment, and press it down to the bottom.
- Page 31 Maintenance Base Station-Dust Collection Duct Filter Disassembly Disassembly Cleaning and Maintenance Remove the cover of the base station dustbin. Please use a cleaning cloth or disposable wet wipes to clean the surface dust of the Dust Collection Air Duct Filter. Along the handles of the dust collection duct filter, push Depending on the degree of dirt, it can be rinsed with forward to remove the dust collection duct filter.
- Page 32 Maintenance Base Station-Purifying Odor HAPA Disassembly Disassembly Cleaning and Maintenance Remove the cover of the base station dust bin. Rinse the odor Filter with clean water and make sure to air-dry it before putting it back for use. It may take a day. Lift the Purifying Odor HAPA filter upward and take Depending on usage, it can be directly replaced with it out.
-
Page 33: The Eureka Limited Warranty
Eureka will, at its option, repair or replace a defective vacuum/Battery Module or vacuum part that is covered by this warranty. Repairs may be performed using new or refurbished parts that meet or exceed Eureka specifications for new parts. lf Eureka elects to replace it, the replacement may be a reconditioned unit. - Page 34 You will be responsible for any initial shipping and insurance charges if the defective product(s) must be shipped for warranty service or warranty evaluation; however, Eureka or a Eureka Authorized Warranty Station will pay the return shipping charges if repairs are covered by the warranty.
-
Page 35: Troubleshooting Common Issues
Troubleshooting Common Issues Abnormal Descriptions Possible Reasons Troubleshooting Steps - Clean contacts The robot does not charge The robot is not in contact with the - Place the robot in front of the charging dock charging contacts and press the “return to Charge” button The robot does not return to charge The base station is placed in an Refer to the user manual for details on "Base... - Page 36 Troubleshooting Common Issues Problem Descriptions Possible Reasons Troubleshooting Steps - The navigation module protective - Clear obstacles promptly cover is stuck - After clearing obstacles or foreign objects, - There are obstacles in front of the lightly tap the collision board robot - Clean any dust accumulation on the lens surface The robot moves backward...
- Page 37 Troubleshooting Common Issues Abnormal Descriptions Possible Reasons Troubleshooting Steps App responses slowly - Network busy - Restart the router to reduce the number of - Poor wireless signal on the phone connected users - Check the phone's settings - Increase network bandwidth Base station reports robot is Robot and base station connection Long press the base station start button and return...
-
Page 38: Troubleshooting Common Issues
Troubleshooting Common Issues Common Issues Abnormal Descriptions Possible Reasons Troubleshooting Steps App cannot scan robot's QR code Blurry or damaged QR code on Enter the Midea Smart Life App—Add Device the device Method 1: Choose to add by model, find the corresponding device Method 2: Choose nearby devices, search for nearby devices to add...
Need help?
Do you have a question about the NER J20 Ultra and is the answer not in the manual?
Questions and answers