
Related Manuals for ActronAir NEXUS WTC-01


Summary of Contents for ActronAir NEXUS WTC-01
- Page 1 NEXUS TOUCH CONTROLLER Installation and Commissioning Guide Model: WTC-01 IMPORTANT NOTE: Please read this manual carefully before installation and operation. Please keep this manual for future reference.
-
Page 2: Table Of Contents
Installation Guide and Owner’s Manual Wired Touch Controller Table of Contents 01. SAFETY PRECAUTIONS .........................3 01.01. Safety Instructions ........................ 3 01.02. Codes, Regulations and Standards ..................3 01.03. Waste Electrical and Electronic Equipment Disposal Guidelines .......... 3 02. INSTALLATION OF ACCESSORIES ....................5 03. -
Page 3: Safety Precautions
• Only licensed technicians are allowed to perform the procedures described in this guide. • The ActronAir Group Control kit is NOT FOR OUTDOOR USE. Install the kit away from excessive dust, heat and moisture. - Page 4 • The specified power supply adaptor and the correct installation method are described in detail in the following text. Please read this manual carefully. If you have any questions, please contact ActronAir’s technical support team. • Power Supply Adaptor sold separately from ActronAir (Model: WPS-01) Installation Guide and Owner’s Manual - Wired Touch Controller...
-
Page 5: Installation Of Accessories
Wired Touch Controller 02. INSTALLATION OF ACCESSORIES The following accessories are included in the product package. Please check to ensure all accessories are complete. If any are missing, contact ActronAir as soon as possible. Do not use unauthorised accessories. Accessories Image... -
Page 6: Zone System Installation Guide
Installation Guide and Owner’s Manual Wired Touch Controller 03. ZONE SYSTEM INSTALLATION GUIDE No temperature control and on/off control in constant zone. Recommended installation method Installation Guide and Owner’s Manual - Wired Touch Controller Doc. No. 9590-3039-02 Ver. 1 241003... -
Page 7: Possible Application / Installation Scenarios
Installation Guide and Owner’s Manual Wired Touch Controller 03.01. Possible Application / Installation Scenarios Installation Guide and Owner’s Manual - Wired Touch Controller Doc. No. 9590-3039-02 Ver. 1 241003... - Page 8 Installation Guide and Owner’s Manual Wired Touch Controller We strongly recommend to record the size of each damper. It will helps the system work more effectually and improve the comfort performance. Record the size of dampers on the list below, and enter the size if you are using different size of damper. Control Box Damper Number Zone Name...
-
Page 9: Product Dimensions
Installation Guide and Owner’s Manual Wired Touch Controller 04. PRODUCT DIMENSIONS Length 203.0 mm Width 17.5 mm Height 110.6 mm Screen size 7” inch colour touch screen Installation Guide and Owner’s Manual - Wired Touch Controller Doc. No. 9590-3039-02 Ver. 1 241003... -
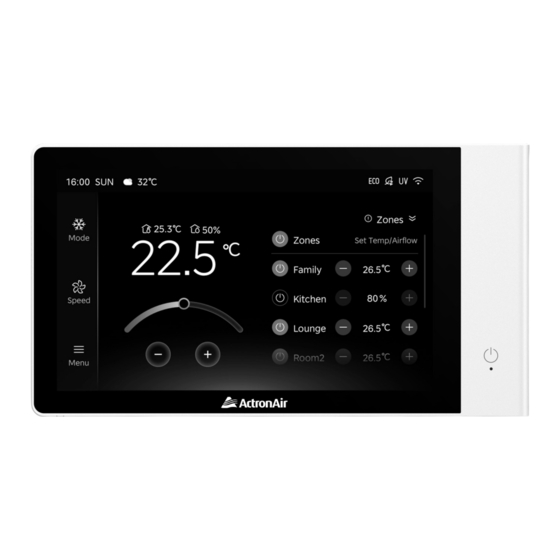
Page 10: Product Overview
Installation Guide and Owner’s Manual Wired Touch Controller 05. PRODUCT OVERVIEW Power and Communication Terminal (hold for 4 seconds) Removal slot Installation Guide and Owner’s Manual - Wired Touch Controller Doc. No. 9590-3039-02 Ver. 1 241003... -
Page 11: Determine Mounting Location
Installation Guide and Owner’s Manual Wired Touch Controller 06. DETERMINE MOUNTING LOCATION The product includes a light sensor and a proximity sensor. These sensors help control the screen display brightness and automatically wake up the screen according to the environment. 2. -
Page 12: Installation Introduction
Installation Guide and Owner’s Manual Wired Touch Controller 07. INSTALLATION INTRODUCTION 1. Insert the screwdriver into the unclench hole. Rotate 2. Remove the mounting bracket from the controller. the screwdriver to remove the back cover. 3. Place the back cover at the installation position and 4. -
Page 13: System Settings (Single Controller)
Installation Guide and Owner’s Manual Wired Touch Controller NOTE 1. Before powering on and starting the Touch controller settings, ensure that all installation work for the zone system is complete. This includes installing the zone control box, dampers, power adapter, and the air conditioner unit. 2. - Page 14 Installation Guide and Owner’s Manual Wired Touch Controller 3. Ensure all touch screen and zone boxes appear bellow. (Fig 1.3). Fig 1.3 NOTE 1. Ensure all devices are detected and none are missing. 2. If a [Communication error] occurs, it indicates a connection problem between the Touch controller and the control box, or between the control box and the indoor unit.
-
Page 15: Bypass Method
Installation Guide and Owner’s Manual Wired Touch Controller 08.01. Bypass Method Installation Guide and Owner’s Manual - Wired Touch Controller Doc. No. 9590-3039-02 Ver. 1 241003... - Page 16 Installation Guide and Owner’s Manual Wired Touch Controller Installation Guide and Owner’s Manual - Wired Touch Controller Doc. No. 9590-3039-02 Ver. 1 241003...
-
Page 17: Constant Zone Method
Installation Guide and Owner’s Manual Wired Touch Controller 08.02. Constant Zone method Installation Guide and Owner’s Manual - Wired Touch Controller Doc. No. 9590-3039-02 Ver. 1 241003... - Page 18 If you are unsure which option is correct, press the [Calibrate] button to check if all Rotate direction dampers are opening. If they are opening, you have selected the correct option. For ActronAir supplied dampers, the rotation direction should be set to anti-clockwise for opening. Rotate speed For ActronAir supplied dampers, the rotation speed should be set to 15 seconds.
- Page 19 Installation Guide and Owner’s Manual Wired Touch Controller 9. Press [Calibrate] to calibrate all dampers. All dampers will start calibrating after pressing the [Next] button. (Fig 1.6) Fig 1.6 10. Press [Advance settings] to change more operating parameters of damper. Delay closing The time between asking the zone to close, and the zone following this instruction.
- Page 20 Installation Guide and Owner’s Manual Wired Touch Controller NOTE 1. Ensure no sub-controllers are set to the same dial code. Each room can only be bound to one sub-controller. 2. If an incorrect sub-controller appears, select it and press the [Delete] button to remove it. 3.
- Page 21 Installation Guide and Owner’s Manual Wired Touch Controller 15. After completing all setup steps, the Touch controller will enter the main page. Set up the wireless network information and enter the password (refer to Fig 1.10). Fig 1.10 NOTE • This device only supports 2.4Ghz WiFi. •...
-
Page 22: System Settings (Dual Controller)
Installation Guide and Owner’s Manual Wired Touch Controller 08. SYSTEM SETTINGS (DUAL CONTROLLER) 1. Choose the [Start synchronize from other controller] option on the slave Touch controller after the master touch controller installation process is complete (refer to Fig 2.1). Fig 2.1 2. -
Page 23: System Settings (Re-Enter)
Installation Guide and Owner’s Manual Wired Touch Controller 09. SYSTEM SETTINGS (RE-ENTER) 1. Click on the [SETTINGS] 5 times to get into system install setting mode. (Fig 3.1) Easy Connect Fig 3.1 2. Enter the install settings menu to adjust commissioning settings. Fig 3.2 Devices information Displays information for all connected components. -
Page 24: Maintenance
Installation Guide and Owner’s Manual Wired Touch Controller 10. MAINTENANCE WARNING 1. Carry out safe Lock Out Tag Out procedures before commencing works on the zoning system 2. In the event of faults please contact a licensed technician NOTE 1. Replace the Master Touch Controller. Enter the [Start install procedure] after the touch controller is turn on. -
Page 25: Software Version (Ota)
Installation Guide and Owner’s Manual Wired Touch Controller 11. SOFTWARE VERSION (OTA) 1. Find [Update] on the menu. (Fig 4.1) Fig 4.1 2. You can read the current [Firmware Version] and [software Version], and see if there is new version to update. 3. -
Page 26: Error Codes
Installation Guide and Owner’s Manual Wired Touch Controller 12. ERROR CODES Error Code Causes Indoor EE failure Indoor DC fan stall failure Indoor T1 temperature sensor failure Indoor T2 temperature sensor failure Leakage of refrigerant Indoor water level alarm failure Outdoor T3 temperature sensor failure Communication failure between indoor board and display board / upper computer and lower computer PC08... - Page 27 THIS PAGE WAS INTENTIONALLY LEFT BLANK...
- Page 28 ©Copyright 2024 Actron Engineering Pty Limited ABN 34 002767240. ®Registered Trade Marks of Actron Engineering Pty Limited. ActronAir is constantly seeking ways to improve the design of its products. Therefore, specifications are subject to change without notice. Installation Guide and Owner’s Manual - Wired Touch Controller...
Need help?
Do you have a question about the NEXUS WTC-01 and is the answer not in the manual?
Questions and answers