ActronAir LM7 Service Manual
Air conditioner wall controller
Hide thumbs
Also See for LM7:
- Operating instructions manual (32 pages) ,
- Installation manual (4 pages)
Table of Contents
Advertisement
AIR CONDITIONER
WALL CONTROLLER
Service Manual
Controller
Model Numbers
LM7
LM7-D
LM24W
Please Read This Manual
Congratulations on your purchase of an
ActronAir air conditioning system. This unit
has been designed and manufactured with
the highest quality standard in mind.
Please read this manual carefully and keep it
for future reference.
Copyright © 2014
All rights reserve. No part or contents of this book maybe reproduced or transmitted in any
form or by any means without the written permission of Actron Engineering Pty. Ltd.
®
Advertisement
Table of Contents

Related Manuals for ActronAir LM7


Summary of Contents for ActronAir LM7
- Page 1 LM7-D LM24W Please Read This Manual Congratulations on your purchase of an ActronAir air conditioning system. This unit has been designed and manufactured with the highest quality standard in mind. Please read this manual carefully and keep it for future reference.
-
Page 2: Table Of Contents
Diagnosis Codes ..............Page 42 Sensor and Controller Wiring ..........Page 44 Remote ON / OFF Operation..........Page 46 Turning the System ON / OFF by Remote ......Page 47 LM7 / LM7-D / LM24 / LM24W Service Manual Version 4.0 140402... -
Page 3: Lm Series Wall Controller Application Matrix
This is designed to work with Home / Building Automation System. STD - Standard Supplied. OPT - Optional, contact ActronAir Customer Care for your specifi c application requirement. ActronAir is constantly seeking ways to improve the design of it’s products, therefore specifi cations are subject to change without notice. Please check prior to purchase. -
Page 4: Advance Features
(where possible) and display a fault code on the wall controller. (See Trouble shooting, page 29) Temperature settings can be adjusted by half a degree increments Compressor “Run” Indicator Light LM7 / LM7-D / LM24 / LM24W Service Manual Version 4.0 140402... -
Page 5: Control Installation Diagram
OPTIONAL 4-ZONE 24VAC INTEGRATED ZONE BARRELS (ZB-10-250 / ZB-12-300 / ZB-14-350 / ZB-16-400) OPTIONAL ACTRONAIR ZONE BARREL CABLES CAT5E Cable with Basic Non-Moulded RJ45 Plug ZONE 1 ZONE 2 ZONE 3 ZONE 4 OPTIONAL 4 - ZONE 24VAC ZONE CARD... - Page 6 1. DIAGRAM SHOWN ABOVE IS A GENERAL PRESENTATION ONLY. REFER TO INDIVIDUAL UNIT WIRING DIAGRAM FOR COMPLETE WIRING CONNECTION DETAILS AND SPECIFICATIONS. 2. NOT APPLICABLE TO ESP ULTIMA, ESP PLATINUM ULTIMA & ESP PLATINUM PLUS MODELS. LM7 / LM7-D / LM24 / LM24W Service Manual Version 4.0 140402...
- Page 7 Fan Coil side. OPTIONAL 8-ZONE 24VAC INTEGRATED ZONE BARRELS (ZB-10-250 / ZB-12-300 / ZB-14-350 / ZB-16-400) OPTIONAL ACTRONAIR ZONE BARREL CABLES INDOOR BOARD CAT5E Cable with Basic Non-Moulded RJ45 Plug ON / OFF ZONING Brown...
- Page 8 1. DIAGRAM SHOWN ABOVE IS A GENERAL PRESENTATION ONLY. REFER TO INDIVIDUAL UNIT WIRING DIAGRAM FOR COMPLETE WIRING CONNECTION DETAILS AND SPECIFICATIONS. 2. APPLICABLE TO ESP ULTIMA MODEL SERIES ONLY. LM7 / LM7-D / LM24 / LM24W Service Manual Version 4.0 140402...
- Page 9 MODE TEMP ON/OFF ON/OFF ON/OFF 1-Zone Up To 8-Zone Options OPTIONAL ACTRONAIR ZONE BARREL CABLES CAT5E Cable with Fully Moulded RJ45 Plug INDOOR BOARD A N E OPTIONAL INDOOR UNIT 8-ZONE 24VAC ZONE MODULE (8Z-VAV) (8Z-24V) 8Z-VAV ZONE MODULE COMPATIBILITY...
- Page 10 1. DIAGRAM SHOWN ABOVE IS A GENERAL PRESENTATION ONLY. REFER TO INDIVIDUAL UNIT WIRING ® DIAGRAM FOR COMPLETE WIRING CONNECTION DETAILS AND SPECIFICATIONS. 2. NOT APPLICABLE TO ESP PLUS & ESP ULTIMA MODEL SERIES. LM7 / LM7-D / LM24 / LM24W Service Manual Version 4.0 140402...
-
Page 11: Indoor Board And Optional Zone Board
EDGES AND OBSERVE CORRECT PROCEDURES IN HANDLING STATIC SENSITIVE ELECTRONIC DEVICES TO PREVENT DAMAGE TO THE UNIT. ActronAir is constantly seeking ways to improve the design of it’s products, therefore specifi cations are subject to change without notice. Please check prior to purchase. ®... -
Page 12: Wall Controller Installation
AND CANNOT BE LOOPED FROM THE OTHER WALL CONTROL’S SENSOR TERMINAL NEUT EARTH DATA INDOOR BOARD (AMIB) SCRN WC-1 WC-2 DO NOT OPTIONAL CONNECT SENSOR 1 SCREEN AT WALL CONTROL OPTIONAL SENSOR 2 LM7 / LM7-D / LM24 / LM24W Service Manual Version 4.0 140402... -
Page 13: Wall Controller Functions
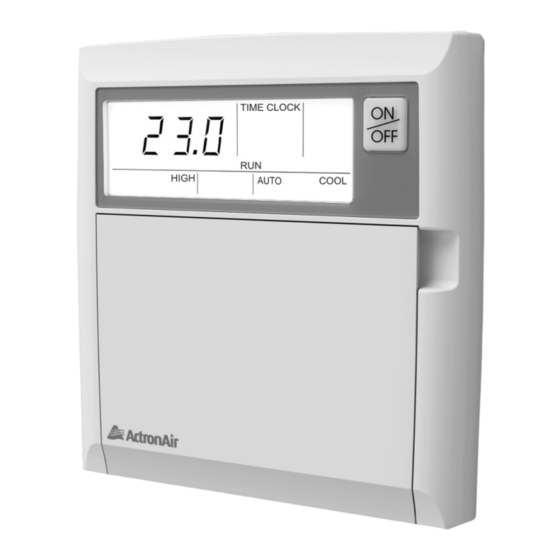
Temperature-Down Setting Button Select / Clock-Down Setting and Room Lowers room temperature setting. Temp Display Button Exit Button (Not used on LM24W) Repeat / Backlight Button (LM7 only) Quick exit from time clock • Repeats the previous day settings to programming menu. - Page 14 SET TEMP SELECT REPEAT / EXIT LM24W Display 26 27 TIMER INSIDE FILTER HIGH AUTO HEAT COOL CONT AUTO HEAT / COOL 40 41 TIMER SELECT TEMP DISPLAY LM7 / LM7-D / LM24 / LM24W Service Manual Version 4.0 140402...
- Page 15 Shows during backlight adjustments and timer times and event times when Turning On/Off backlight. Timer and Room/Setpoint 1 & 2 Indicator (LM7 function only) Temperature Indicator (LM24W only) Illuminates together with Event to show Displays the setpoint & current room the programming event.
-
Page 16: Lcd Backlight
1 second indicating the backlight level is set. Turn On/Off LCD Backlight 1A Turn On LCD Backlight. Press and hold REPEAT (LM7) or DISPLAY (LM24W) Button for 4 seconds. LOCK symbol will appear, then release button and backlight will remain On. 2A Turn Off LCD Backlight. -
Page 17: On / Off Light
NOTE: The Wall Controller must be turned on before operating this procedure. Turn On the On/Off Button Light 1A Press and hold REPEAT (LM7) or DISPLAY (LM24W) Button, press and release ON/OFF Button and then release REPEAT (LM7) or DISPLAY (LM24W) Button. -
Page 18: Off Timer Operation
The up/down arrow keys must be pressed whilst “Timer” is fl ashing. The timer can be set from 0.5 hours to 24 hours. Timer Cancellation Press ON/OFF Button again. Changing the Hours Set Follow the steps 2 and 3. LM7 / LM7-D / LM24 / LM24W Service Manual Version 4.0 140402... -
Page 19: On Timer Operation
Auto mode. • Circulation mode cannot be turned ON by timer. ActronAir is constantly seeking ways to improve the design of it’s products, therefore specifi cations are subject to change without notice. Please check prior to purchase. ® Copyright © 2014 Actron Engineering Pty. Ltd. -
Page 20: Checking Temperature Via Sensors
This will display the onboard sensor temperture for 3 seconds then it will return to the set point temperature. (“INSIDE,” “ C,” and “ ” indicators will also fl ash for 3 seconds) LM7 / LM7-D / LM24 / LM24W Service Manual Version 4.0 140402... - Page 21 HOW TO CHECK THE TEMPERATURE OF EACH SENSOR Model LM7 One Onboard Sensor INSIDE & one Remote Sensor COOL with Optional Zone Card ONLY AUTO AUTO HEAT / COOL HEAT / COOL PROGRAM TIMER SET TEMP SET TEMP SELECT REPEAT /...
-
Page 22: Difference Between Set Temp And Room Temp
NOTE: This will stay on the screen for 30 minutes unless it is cancelled. Press FAN Button once to cancel temperature difference display. This will now show the set temperature. LM7 / LM7-D / LM24 / LM24W Service Manual Version 4.0 140402... -
Page 23: Setting Upper And Lower Limits
You cannot adjust the upper limit below your current set-temperatue. • You cannot adjust the lower limit above your current set-temperature. ActronAir is constantly seeking ways to improve the design of it’s products, therefore specifi cations are subject to change without notice. Please check prior to purchase. ®... -
Page 24: Cancelling Compressor Time Delay
(3 mins). When the “RUN” indicator is not lit up, this means the unit is not calling for heating or cooling. LM7 / LM7-D / LM24 / LM24W Service Manual Version 4.0 140402... -
Page 25: Enabling / Disabling Zones
ENABLING / DISABLING ZONES Zones Assigned Model LM7 Sensor Enable Make sure the zone board/module is installled before proceeding with this set up. If zone board/module is not installed, the COOL zone set up menu will not function. AUTO AUTO... -
Page 26: Assigning Sensors To Zones
2) 3-1 upon exit = 3 zones enable. 3) 4-1 upon exit = 4 zones enable Press FAN Button once to exit set up menu and return to set temperature. LM7 / LM7-D / LM24 / LM24W Service Manual Version 4.0 140402... -
Page 27: Adjusting Differentials
DIFFERENTIALS LM7 & LM24W Factory Settings Set Temp = 22 C : This is the temperature you set on the controller, this will allow the unit to cool or heat the room to the desired temperature. Cool Off Stage 1 = 22.5 C : This is a differential in the control telling the controller to turn off the unit when it gets to this temperature on cooling mode. - Page 28 1. You cannot set differentials closer than 0.5K of each other. 2. Wall Controller must be in OFF position. 3. * LM7 Controller shown for illustration purposes only. Buttons, displays and operations are the same for both controllers. Hold FAN...
- Page 29 ADJUST THE DIFFERENTIALS SINGLE STAGE UNIT ONLY Model LM7 * HEAT HEAT AUTO AUTO HEAT / COOL HEAT / COOL STEP 5 DISPLAY SHOWN PROGRAM TIMER SET TEMP SET TEMP SELECT EXIT REPEAT / REPEAT / ... Continued Press ON/OFF key once to scroll to the Heat Off setting.
- Page 30 1. You cannot set differentials closer than 0.5K of each other. 2. Wall Controller must be in OFF position. 3. * LM7 Controller shown for illustration purposes only. Buttons, displays and operations are the same for both controllers. Hold FAN...
- Page 31 ADJUST THE DIFFERENTIALS TWO STAGE UNIT ONLY Model LM7 * HEAT COOL STEP 6 DISPLAY SHOWN AUTO AUTO HEAT / COOL HEAT / COOL PROGRAM TIMER SET TEMP SET TEMP SELECT EXIT REPEAT / REPEAT / HEAT STEP 7 DISPLAY SHOWN ...
- Page 32 Repeat step 2 to adjust. Press ON/OFF key once to scroll to the next menu. Press the FAN Button. This will now take you back to the set temperature LM7 / LM7-D / LM24 / LM24W Service Manual Version 4.0 140402...
-
Page 33: Boost Heat Differentials
This is done by using heater elements in the duct work. * LM7 Controller shown for illustration purposes only. Buttons, displays and operations are the same for both controllers. Press ON/OFF key once to scroll to the Heat Off boost heat setting. -
Page 34: Filter Clean Indicator
The factory setting is set at 200 hours. NOTE: Make sure the controller is in OFF position. * LM7 Controller shown for illustration purposes only. Buttons, displays and operations are the same for both controllers. Adjusting the Run Hours on the Filter Timer... -
Page 35: (Model Lm7 - Application Only) 7-Day Timeclock Operation
EXIT REPEAT / REPEAT / • The 7-Day timeclock feature on the LM7 controller allows you to set the air conditioner to turn ON and OFF at different times for each day of the week. • Each day can have two programmmed events. -
Page 36: Setting The Time And Day
Press the “PROGRAM” button. Adjust the “Day” by using buttons. SELECT Battery Backup During a power failure, the clock retains the time and day via the backup battery inside the system. LM7 / LM7-D / LM24 / LM24W Service Manual Version 4.0 140402... -
Page 37: Activating And De-Activating The 7-Day Timeclock
ACTIVATING AND DE-ACTIVATING THE 7 DAY TIMECLOCK Model LM7 TIME CLOCK AUTO AUTO HEAT / COOL HEAT / COOL PROGRAM TIMER SET TEMP SET TEMP SELECT EXIT REPEAT / REPEAT / Activating Press the PROGRAM button twice. Press ON/OFF until “ON” is fl ashing. -
Page 38: Programming The Events
Event On times can be set to 11:45 PM of the current day. Event Off times can be set to 9:00 AM the following morning. Notice • If you program event 1 past midnight, event 2 will be automatically cancelled. LM7 / LM7-D / LM24 / LM24W Service Manual Version 4.0 140402... -
Page 39: Cancelling An Individual Event
CANCELLING AN INDIVIDUAL EVENT Model LM7 TIME CLOCK EVENT AUTO AUTO HEAT / COOL HEAT / COOL PROGRAM TIMER SET TEMP SET TEMP SELECT EXIT REPEAT / REPEAT / Press the PROGRAM button repeatedly until the “ON” time for the event you wish to cancel is displayed. -
Page 40: Repeating A Days Event And Times
Display shows “SET”, “EVENT”, “1”, “TIMECLOCK” and “ON”. Press the REPEAT button. You have now copied the previous days events into the current day displayed. Repeat steps 2 and 3 for the remaining days. LM7 / LM7-D / LM24 / LM24W Service Manual Version 4.0 140402... -
Page 41: Adaptive Demand Defrost (De-Ice Cycle)
ADAPTIVE DEMAND DEFROST (DE-ICE CYCLE) Model: LM7 Model: LM24W Set Temp. Set Temp. COOL COOL CONT AUTO AUTO AUTO AUTO HEAT / COOL HEAT / COOL HEAT / COOL HEAT / COOL TIMER PROGRAM TIMER SELECT SET TEMP SET TEMP... -
Page 42: Diagnosis Codes
HEAT light will fl ash PROGRAM TIMER PROGRAM TIMER (3 times every 10 seconds) (3 times every 10 seconds) SET TEMP SET TEMP SELECT SELECT LM7 / LM7-D / LM24 / LM24W Service Manual EXIT REPEAT / EXIT REPEAT / Version 4.0 140402... - Page 43 EXIT REPEAT / EXIT REPEAT / ActronAir is constantly seeking ways to improve the design of it’s products, therefore specifi cations are subject to change without notice. Please check prior to purchase. ® Copyright © 2014 Actron Engineering Pty. Ltd.
-
Page 44: Sensor And Controller Wiring
Ex. B: 1 x Wall Controler using the on-board sensor and 1 x remote sensor connected. OUTDOOR UNIT NEUT EARTH DATA INDOOR BOARD (AMIB) SCRN WC-1 DO NOT OPTIONAL CONNECT SENSOR 1 SCREEN AT WALL CONTROL LM7 / LM7-D / LM24 / LM24W Service Manual Version 4.0 140402... - Page 45 AT WALL CONTROL OPTIONAL SENSOR 2 ActronAir is constantly seeking ways to improve the design of it’s products, therefore specifi cations are subject to change without notice. Please check prior to purchase. ® Copyright © 2014 Actron Engineering Pty. Ltd.
-
Page 46: Remote On / Off Operation
1. Close remote switch/relay for a min. of 2 seconds. 2. Open remote switch/relay. 3. System will turn off in approximately 10 seconds. NOTE: The system will always start with the last settings used. LM7 / LM7-D / LM24 / LM24W Service Manual Version 4.0 140402... -
Page 47: Turning The System On / Off By Remote
INTENTIONALLY LEFT BLANK ActronAir is constantly seeking ways to improve the design of it’s products, therefore specifi cations are subject to change without notice. Please check prior to purchase. ® Copyright © 2014 Actron Engineering Pty. Ltd. - Page 48 1800 119 229 www.actronair.com.au Actron Engineering Pty Ltd Printed in Australia Part No. 0500-0XX ABN 34 002 767 240 Version: 4.0 HEAD OFFICE SYDNEY AUSTRALIA 140402...
Need help?
Do you have a question about the LM7 and is the answer not in the manual?
Questions and answers
Lower row of zone buttons have stopped activating
The lower row of zone buttons on the ActronAir LM7 may have stopped activating because the zone board/module is not installed or turned on. According to the manual, if the zone board/module is not installed, the zone setup menu will not function. Ensure that the zone board/module is properly installed and powered on before attempting to activate the zones.
This answer is automatically generated
How do I switch off the timer on my actron wall mount unit LM7-D. My aircon keeps turning on automatically.