Table of Contents
Advertisement
Quick Links
Advertisement
Table of Contents

Summary of Contents for Rocker Galaxy 330
- Page 1 INSTRUCTION MANUAL Colony Counter Model No. Tech support Galaxy 330...
-
Page 3: Table Of Contents
Table Of Contents 1. Important Notice 2. Unpacking 3. Main Part Diagram (1) Galaxy 330, Colony Counter (2) Control Panel 4. Installation and Operation (1) Installation (2) Operation 2.1 Buttons, Indicator and Regulators 2.2 Main Unit Operation - Operating Mode 2.3 Main Unit Operation - Viewing Mode... -
Page 4: Important Notice
1. Important Notice This instrument is designed for laboratory usage only. Please read this manual carefully before installing and operating. The instrument shall not be modi ed in any way. Any modi cation will void the warranty and may result in potential hazard. We are not responsible for any injury or damage caused by any non-intended purposes and modifying the instrument without authori- zation. -
Page 5: Unpacking
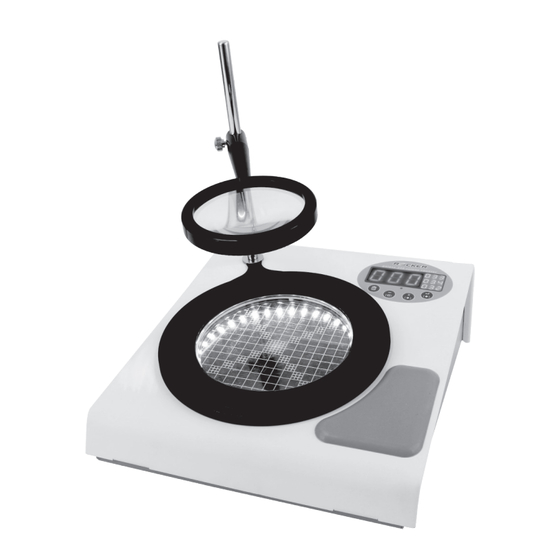
Galalxy 330 Model Standard Package Includes: Galaxy 330, Colony Counter Magni er Magni er Holder Galaxy 330 Screwdriver Power Adaptor... -
Page 6: Main Part Diagram
3. Main Part Diagram (1). Galaxy 330, Colony Counter (3) (4) (10) (11)(12) (13)(14) Position Designation Position Designation DC Socket Petri Dish Holder (60 mm) Adjustable Petri Dish Holder Power Switch (90~150 mm) Control Panel Background Plate Magni er Holder... -
Page 7: Control Panel
(2). Control Panel Position Designation Position Designation Counted Value Display (LED-A) Average / Previous Storage Value Display (LED-B) Back / Exit Storage Value Display (LED-C) Delete Storage Value Display (LED-D) USB Connecting Indicator (Green: connected / Red: o ) Save / Next... -
Page 8: Installation And Operation
4. Installation and Operation (1). Installation (ii) (iii) (iv) I. Screw the magni er holder (ii) into magni er position (i). II. Pass the magni er (iv) through the holder (ii) and lock the adjustable screw (iii) at proper height. Plug the power adaptor into main unit and ensure the supplied voltage is within the acceptable range of the power adaptor. -
Page 9: Operation
(2). Operation 2.1 Buttons, Indicator and Regulators • Buttons Position Function Designation Save the counting value to main unit. SAVE Calculate the average of the saved counts. AVERAGE Operating Average data displays on LED-A (1). Mode Subtract 1 from the counting value on LED-A (1). BACK Alarm with a beep. - Page 10 • Indicator Position Color Designation Illuminated - successful connection and data transmission. Green Flashing - data is currently being transmitted. Illuminated - connection error and data transmission failure. No light - computer connection is not detected. • Regulators Adjust the below items with screwdriver. Turning it clockwise will increase setting, turning it counterclockwise will decrease the setting.
-
Page 11: Main Unit Operation - Operating Mode
2.2 Main Unit Operation - Operating Mode The labeled number in this section, please refer to P.3 3. (1) Galaxy 330, Colony Counter. ◆ Place the 90 mm~150 mm Petri dish on petri dish position (7) and adjust dish to the center by sliding the adjustable Petri dish holder (9) properly. - Page 12 2.2.D Press “SAVE” to 2.2.A Petri Dish Placement Save Current Count 2.2.F Press “EXIT” to 2.2.G Average the Saved Counts Enter Viewing Mode...
-
Page 13: Main Unit Operation - Viewing Mode
2.3 Main Unit Operation - Viewing Mode Press and hold “EXIT” to enter Viewing Mode when “000” shows on LED-A. While holding “EXIT” button, LED-A will show total number of saved data. ◆ After releasing “EXIT” , the saved counts will be displayed on LED-B / C / D. The currently selected count will be in a ashing state, and its corresponding entry number will be shown on LED-A. -
Page 14: Maintenance
5. Maintenance The instrument is not autoclavable. Please clean the Petri dish position, the magni er and the surface of main unit with 75% ethanol after every use to sterilize and ensure good illumination. Please keep instrument in well packed box to prevent dust from accumulating and a ecting light transmission if it is not in use for a period. -
Page 15: Ordering Information
7. Ordering Information 175330-01(02) Galaxy 330, Colony Counter with AC100-240V adaptor, US plug (EU plug) 175331-01(02) Galaxy 330, Colony Counter with software, AC100-240V adaptor, US plug (EU plug) 175330-12 Software Package for Galaxy 330 (Include a 16G USB and connecting cable) 175330-09... - Page 16 Rocker Scienti c Co., Ltd. Tel: +886-2-26033311 Fax: +886-2-26036622 E-mail:export@rocker.com.tw https://www.rocker.com.tw...


Need help?
Do you have a question about the Galaxy 330 and is the answer not in the manual?
Questions and answers