Table of Contents
Advertisement
Available languages
Available languages
Advertisement
Table of Contents

Related Manuals for Paramount Fitness MS-1500WOIRPH


Summary of Contents for Paramount Fitness MS-1500WOIRPH
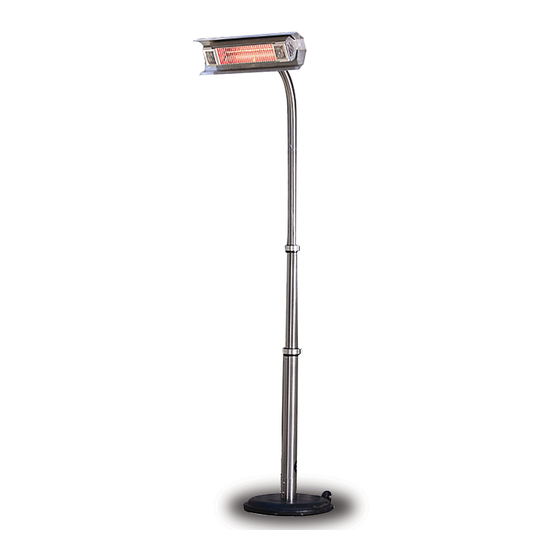
- Page 1 Pole Mounted Infrared Electric Patio Heater Model # MS-1500WOIRPH ETL # LIP-15-TGG-SP, LIP-15-TGG-SP-SB-SP-BK INSTRUCTION MANUAL IMPORTANT Please read this manual carefully for guidance on the safe assembly and use of this product. Save these instructions for future reference.
- Page 2 Safety Guidelines Failure to follow warnings and operational instructions contained in this manual can result in severe property damage and / or personal injury. DANGER WARNING Indicates a potentially hazardous situation Indicates a potentially hazardous situation which, if not avoided, WILL result in serious which, if not avoided, COULD result in injury or death.
-
Page 3: Specification
NOTICE Thank you for purchasing the J. R. Homes, Pole Mounted Infrared Electric Patio Heater. Please read these instructions carefully. They have been written to help you make the most of your Pole Mounted Infrared Electric Patio Heater. FEATURES Environmentally friendly: Silent, clean, and odourless infrared heating with no harmful emissions or toxic residuals. - Page 4 IMPORTANT OPERATING INSTRUCTIONS 1. Read all the instructions before using this heater. 2. The head of this heater will get very hot during use. To avoid burning, do not let bare skin touch the hot surfaces. If provided, use handles when moving this heater. Keep flammable materials such as furniture, pillows, bedding, papers, cloths and curtains at least 3 feet (0.9M) from the heater.
- Page 5 COMPONENTS Please open the packing carefully and confirm you have all the following components. Should any components be missing or damaged, please report promptly to your supplier. 1. Heater head assembly. 2. Safety bar 3. Top bracket 4. Curved top tube 5.
-
Page 6: Assembly Tools
IDENTIFY THE LOCATION OF COMPONENTS ON THE FINISHED ASSEMBLY ASSEMBLY TOOLS The following hand tools, not supplied, are required for assembly. A large cross head screwdriver. A medium cross head screwdriver An M12 wrench or adjustable wrench. ASSEMBLY PROCEDURE Check inside the box to ensure all parts are included before starting assembly. Prior to assembly, please read these instructions carefully. - Page 7 Step 2: Align the safety bar, item 2, to the heater head assembly, item 1. Insert and tighten the screws. Replace these Replace these two screws two screws Step 3: Note the orientation of the top bracket, item 3, to the curved top tube, item 4. Insert and tighten four large screws, items 11.
- Page 8 Step 6: Note the orientation of the top bracket to the heater head. Insert and tighten four large screws, items 11. Step 7: Release the adjustable tubes clamps and slide the upper straight tube, item 5 through the adjustable tubes, item 6, narrow end first.
- Page 9 Step 10: Insert the base bracket threaded bolt, item 8 into the base assembly, item 9. Invert the base assembly and fit the large flat washer, the spring washer and the M12 nut, items 12 onto the bolt, in that sequence and tighten the nut. Step 11: Place the base assembly item 9 on the floor and align the lower straight tube, item 7 with the screw holes in the base bracket, item 8.
- Page 10 Step 14: With the heater in the required operating location check that the heater head assembly is level. This is necessary to avoid uneven heating of the infrared lamp, which will shorten its life span. If not level, release the screws holding the top bracket to the heater head assembly and to the upper curved tube, adjust the heater head assembly to a level position, then re-tighten the screws.
-
Page 11: Troubleshooting
TROUBLESHOOTING In the unlikely event that the heater fails to operate, check the following:- Problem Probable Cause Solution Heating tube No power. Check the power plug connection with the power outlet. Tilt switch knob set to “OFF”. Set tilt switch knob to “ON” will not light Non-self-resetting thermal fuse blown. -
Page 12: Warranty
IMPORTANT For questions, concerns or problems with our product please email our customer service department: customercare@jrhome.com or call 1-800-561-5550. DATED PROOF OF PURCHASE REQUIRED FOR WARRANTY SERVICE. WARRANTY This product is inspected, tested and carefully packaged to minimize the chance of damage during shipment. - Page 13 Radiateur de terrasse électrique à rayonnement infrarouge sur pied N° de modèle MS-1500WOIRPH N° ETL LIP-15-TGG-SP, LIP-15-TGG-SP-SB-SP-BK MODE D’EMPLOI NOTE IMPORTANTE Prière de lire attentivement le présent mode d’emploi afin de savoir comment monter et utiliser cet appareil. Conserver ce mode d’emploi à titre de référence.
- Page 14 Consignes de sécurité Le fait de ne pas tenir compte des mises en garde et des directives de fonctionnement contenues dans le présent mode d’emploi pourrait provoquer des dommages matériels graves ou des préjudices corporels. DANGER AVERTISSEMENT Signifie que la situation pose un risque et Signifie que la situation pose un risque et que si le risque n’est pas évité, de graves que si le risque n’est pas évité, de graves...
-
Page 15: Caractéristiques
AVIS Nous vous remercions d’avoir fait l’acquisition du radiateur de terrasse électrique à rayonnement infrarouge sur pied de J. R. Homes. Veuillez lire attentivement les instructions. Elles ont été rédigées dans le but de vous aider à utiliser votre radiateur de terrasse électrique à... - Page 16 DIRECTIVES DE FONCTIONNEMENT IMPORTANTES 1. Lisez en entier les consignes avant d’utiliser l’appareil. 2. La partie chauffante de cet appareil (la tête) peut devenir très chaude lorsqu’elle fonctionne. Afin de prévenir les brûlures accidentelles, évitez le contact entre la peau de nue et les surfaces chaudes de l’appareil. Pour déplacer l’appareil, utilisez les poignées, le cas échéant.
- Page 17 PIÈCES Veuillez ouvrir l’emballage avec soin et vérifiez si toutes les pièces énumérées sont incluses. Si des pièces manquent ou sont défectueuses, veuillez en aviser immédiatement le fournisseur. 1. Tête du radiateur 2. Barre protectrice 3. Bride de fixation supérieure 4.
- Page 18 REPÉRAGE DE L’EMPLACEMENT DES PIÈCES SUR L’APPAREIL MONTÉ OUTILS DE MONTAGE Les outils à main suivants, non compris, sont nécessaires pour réaliser le montage. Un tournevis cruciforme de grande taille Un tournevis cruciforme de taille moyenne Une clé M12 ou une clé à molette DIRECTIVES DE MONTAGE Avant de commencer le montage du produit, vérifiez si la boîte contient toutes les pièces nécessaires.
- Page 19 Étape 2 : Ajustez correctement la barre protectrice, pièce n° 2, par rapport à la tête du radiateur, pièce 1. Vissez les vis. Revissez les vis Revissez les vis these two screws Étape 3 : Ajustez correctement la bride de fixation supérieure, pièce n° 3, par rapport au tube courbé supérieur, pièce n°...
- Page 20 Étape 6 : Ajustez correctement la bride de fixation supérieure par rapport à la tête du radiateur. Vissez quatre grandes vis, pièce n° 11. Étape 7 : Relâchez les clamps de fixation des tubes réglables et faites glisser le tube droit supérieur, pièce n° 5, à l’intérieur des tubes réglables, pièce n°...
- Page 21 Étape 10 : Insérez le boulon fileté de la bride de fixation de la base, pièce n° 8, dans la base, pièce n° 9. Retournez la base à plat sur le sol. Enfilez la rondelle, la rondelle élastique et l’écrou M12 sur le boulon, dans cet ordre, et serrez l’écrou.
- Page 22 Étape 14 : Une fois le radiateur installé à l’endroit voulu, vérifiez si la tête du radiateur est horizontale. On évite ainsi un chauffage inégal de la lampe infrarouge qui réduirait sa durée de vie. Si la tête n’est pas droite, dévissez les vis fixant la bride de fixation supérieure à...
-
Page 23: Dépannage
DÉPANNAGE S’il advenait que le radiateur ne fonctionne pas, vérifiez ce qui suit : Problème Cause possible Solution Élément Aucune alimentation électrique Vérifiez si la fiche est branchée dans la prise de courant Le bouton de l’interrupteur Réglez l’interrupteur d’interrupteur d’inclinaison à la chauffant ne d’inclinaison est réglé... -
Page 24: Note Importante
NOTE IMPORTANTE Si vous avez des questions au sujet de nos produits ou éprouvez des difficultés, faites parvenir un courriel à notre service à la clientèle : customercare@jrhome.com ou composez le 1 800 561-5550. UNE PREUVE D’ACHAT DATÉE EST REQUISE POUR FAIRE VALOIR LA GARANTIE. GARANTIE Cet appareil a été...
Need help?
Do you have a question about the MS-1500WOIRPH and is the answer not in the manual?
Questions and answers