Advertisement
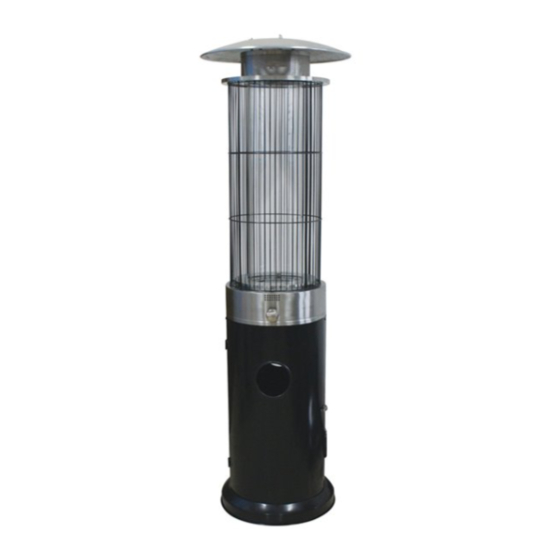
Outdoor Patio Heater
ATTACH YOUR RECEIPT HERE
Serial Number ___________
This product can expose you to chemicals
including carbon monoxide which is known to the
State of California to cause birth defects or other
reproductive harm. For more information go to
www.P65W arnings.ca.gov.
Purchase Date ______
- 1 -
M
o
d
l e
#
KLD7003S/KLD7003SS
Item # PH-F122
WARNING
Advertisement
Table of Contents

Related Manuals for Paramount Fitness KLD7003S


Summary of Contents for Paramount Fitness KLD7003S
- Page 1 KLD7003S/KLD7003SS Item # PH-F122 Outdoor Patio Heater WARNING This product can expose you to chemicals including carbon monoxide which is known to the State of California to cause birth defects or other reproductive harm. For more information go to www.P65W arnings.ca.gov.
-
Page 2: Table Of Contents
TABLE OF CONTENTS ASSEMBLY Package Contents ....................................Page 3 Part list ........................................Page 4 Safety Information .................................... Page 5-7 Assembly ......................................Page 8-10 Operating Instructions ................................Page 11-13 Care and Maintenance ..................................Page 14 Troubleshooting ....................................Page 15 Warranty ....................................... Page 16... -
Page 3: Package Contents
PACKAGE CONTENTS HARDWARE ASSEMBLY - 3 -... -
Page 4: Part List
PART LIST - 4 -... -
Page 5: Safety Information
SAFETY INFORMATION SAFETY INFORMATION Please read and understand this entire manual before attempting to assemble, operate or install this appliance. If you have any questions regarding the product, please contact customer service at customercare@jrhome.com or call 1-800-561-5550 . This manual contains important information about the assembly, operation and maintenance of this patio heater. - Page 6 SAFETY INFORMATION - 6 -...
-
Page 7: Safety Information
SAFETY INFORMATION ASSEMBLY PREPARATION Before beginning assembly of this appliance, make sure all parts are present. Compare all parts with package contents list and hardware as listed on pages 3 and 4 of this manual. If any part is missing or damaged, do not attempt to assemble this product. - Page 8 ASSEMBLY 1. Attach wheels to tank assembly.Line up holes in wheel with corresponding holes in base and insert 2pcs M8x16 screw (A) through holes. Finger tighten bolts. Be sure that wheels are parallel to base and fully tighten the bolts. M8X16 Hardware Used 2.
-
Page 9: Assembly
ASSEMBLY 4. Place the glass tube onto the tank assembly. 5. Place the emitter screen assembly onto the protection guards. Make sure the thread goes through holes on the bottom of the emitter screen assembly. 6. Use 8pcs M6 nuts (B) to tighten protection guards. Hardware Used: B M6 16PCS - 9 -... - Page 10 Step 7: The unit assembled. ASSEMBLY Hose / Regul a tor Regul a tor / Cylinder Connection Connection A minimum supply pressure of .5 psi is required for the purpose of input adjustment of propane gas. Storage of an appliance indoors is permissible only if the cylinder is disconnected and removed from the appliance. A cylinder must be stored outdoors in a well-ventilated area out of the reach of children.
-
Page 11: Operating Instructions
OPERATING INSTRUCTIONS Leak Test 1. Make 2-3 oz. of leak test solution (one part liquid dishwashing detergent and three parts water). 2. Apply several drops of solution where hose attaches to regulator. 3. Apply several drops of solution where regulator connects to cylinder. 4. - Page 12 OPERATING INSTRUCTIONS Lighting : 1.Turn the control knob to “OFF” position. 2.Slowly open the gas cylinder valve. 3.Press and turn the control knob to “HIGH” position (counterclockwise). Flame ignites after click sound. 4.If burner does not light immediately press and turn control knob to “OFF” Position and try again from start.
- Page 13 OPERATING INSTRUCTIONS NOTE : After use, some discoloration of the emitter screen is normal. Operation Checklist For a safe and pleasurable heating experience, perform this check before each use: Before Operating 1. I am familiar with entire owner’s manual and understand all precautions noted. 2.
-
Page 14: Care And Maintenance
CARE AND MAINTENANCE To enjoy years of outstanding performance from your heater, make sure you perform the following maintenance activities on a regular basis: Keep exterior surfaces clean. 1. Use soapy water for cleaning. Never use flammable or corrosive cleaning agents. 2. -
Page 15: Troubleshooting
TROUBLESHOOTING If you have any questions regarding this product, please call our customer service hotline at 1-800-561-5550, 7.30 – 3.30 PST, Monday – Friday, email customercare@jrhome.com PROBLEM POSSIBLE CAUSE CORRECTIVE ACTION Gas valve may be off Turn gas valve ON Fuel tank may be empty Refill LPG tank Orifice blocked... -
Page 16: Warranty
IMPORTANT For questions, concerns or problems with our product please Si vous éprouvez des dicultés, ou si vous avez des questions ou des email our customer service department: préoccupations, prière de faire parvenir un courriel à notre Service à la clientèle customercare@jrhome.com customercare@jrhome.com DATED PROOF OF PURCHASE REQUIRED FOR WARRANTY SERVICE...
Need help?
Do you have a question about the KLD7003S and is the answer not in the manual?
Questions and answers