Baker Hughes Druck DPI610E Series Instruction Manual
Portable pressure calibrator
Hide thumbs
Also See for Druck DPI610E Series:
- Instruction manual (356 pages) ,
- Quick start manual (268 pages) ,
- Instruction manual (290 pages)

Related Manuals for Baker Hughes Druck DPI610E Series


Summary of Contents for Baker Hughes Druck DPI610E Series
- Page 1 DPI610E DPI610E-IS Portable Pressure Calibrator Instruction Manual DPI610E-PC DPI610E-SPC DPI610E-HC DPI610E-SHC Druck.com...
-
Page 2: Table Of Contents
1.15.8 Volume Adjuster (Pneumatic Version) 1.15.9 Volume Adjuster Wheel (Hydraulic Version) 1.15.10 Pressure/ Vacuum Selector (Pneumatic Version) 1.15.11 Auxiliary Ports 1.15.12 External Sensor Port 1.15.13 Barometric Port (Pneumatic Version only) Copyright 2022 Baker Hughes Company. English–DPI 610E Instruction Manual | i... - Page 3 Relief Valve Test Tasks Selection Adding Tasks to the Dashboard Removing Tasks from the Dashboard General Settings DATE, TIME and LANGUAGE BACKLIGHT COMMUNICATIONS AUTO POWER DOWN TOUCHSCREEN LOCK ENABLE HOLD ADVANCED Copyright 2022 Baker Hughes Company. ii | DPI 610E Instruction Manual–English...
- Page 4 8.1.1 Overview 8.1.2 Media Compatibility 8.1.3 Setup 8.1.4 The Zero Function 8.1.5 Available External Pressure Sensors 8.1.6 Configuration of an External Pressure Sensor RTD Probe and Interface 8.2.1 Overview Copyright 2022 Baker Hughes Company. English–DPI 610E Instruction Manual | iii...
- Page 5 11.2.2 How to create an Internal Procedure 11.2.3 How to start a Test Procedure 11.2.4 How to delete a Test Procedure 11.2.5 Starting a Test Procedure 11.3 The Documenting Main Screen 11.4 Documenting Settings Copyright 2022 Baker Hughes Company. iv | DPI 610E Instruction Manual–English...
- Page 6 13.4.1 Change Last Calibration Date 13.4.2 Change Calibration Interval 13.4.3 Change Calibration Due Date 13.5 BACKUP CALIBRATION 13.6 RESTORE CALIBRATION 13.7 RESTORE FACTORY CALIBRATION 13.8 EXTERNAL PRESSURE SENSOR CALIBRATION MENU Copyright 2022 Baker Hughes Company. English–DPI 610E Instruction Manual | v...
- Page 7 16.4 Delete Favorite Files 16.5 Transferring Favorite Files 16.6 Accessing Favorite Files via the File System General Specification 17.1 Leak Rates 17.2 Open Source Software Licenses Manufacturer 18.1 Contact details Copyright 2022 Baker Hughes Company. vi | DPI 610E Instruction Manual–English...
- Page 8 Appendix A. COMPLIANCE STATEMENTS FCC (USA) CANADA Copyright 2022 Baker Hughes Company. English–DPI 610E Instruction Manual | vii...
-
Page 9: Overview
70 bar - 1000 bar DPI610E-SHC Yellow (1000 psi - 15000 psi) Hydraulic- Intrinsically Safe (7 MPa - 100 MPa) Photographs of these Calibrator types are on the next page. Copyright 2022 Baker Hughes Company. English–DPI610E Instruction Manual | 1... - Page 10 Type: Hydraulic - Intrinsically Safe Pressure Range: 70 - 1000 bar, Pressure Range: 70 - 1000 bar, 1000 - 15000 psi, 7 - 1000 MPa 1000 - 15000 psi, 7 - 1000 MPa Copyright 2022 Baker Hughes Company. 2 | DPI610E Instruction Manual–English...
-
Page 11: Equipment In The Box
11. Certificates Document Pack (IS product only) 12. Factory Calibration Certificate. 1.3 Specifications for DPI610E Refer to www.druck.com/dpi610e for the Data sheet that gives the technical specifications for the DPI610E. Copyright 2022 Baker Hughes Company. English–DPI610E Instruction Manual | 3... -
Page 12: Accessories
Follow all operating and safety instructions in the Quick Start and Safety Manual. Use suitably qualified Technicians and good engineering practice for all procedures in this documentation. Copyright 2022 Baker Hughes Company. 4 | DPI610E Instruction Manual–English... -
Page 13: General Safety Precautions
External circuits should have appropriate insulation to the mains. WARNING This instrument uses a Lithium-Ion (Li-Ion) battery pack. To prevent an explosion or fire, do not short circuit and do not disassemble. Keep the battery safe from damage. Copyright 2022 Baker Hughes Company. English–DPI610E Instruction Manual | 5... -
Page 14: Pressure Warnings
CAT I equipment cannot be CAT I directly connected to the mains power. E.g a process loop powered device. This is for single phase electrical CAT II installation. E.g appliances and portable tools. Copyright 2022 Baker Hughes Company. 6 | DPI610E Instruction Manual–English... -
Page 15: Maintenance
Internal components, such as the Lithium battery pack, may be under pressure or create other hazards if abused. For more details, please see www.bakerhughesds.com/druck/global-service-support Copyright 2022 Baker Hughes Company. English–DPI610E Instruction Manual | 7... -
Page 16: Spares
Storage and shipping temperature -20 to 70°C -20 to 70°C Altitude -300 to 2000m -300 to 2000m 0 to 95% relative humidity (RH) 0 to 95% relative humidity (RH) Operating humidity non-condensing non-condensing Pollution degree Copyright 2022 Baker Hughes Company. 8 | DPI610E Instruction Manual–English... -
Page 17: Preparing The Instrument
The instrument can be charged while switched on and also when powered off. Battery charge time is approximately two hours from empty to fully charged. Socket Figure 1-1: Battery Charging Socket Copyright 2022 Baker Hughes Company. English–DPI610E Instruction Manual | 9... -
Page 18: Battery Status Indicator
The instrument has an Auto Power Down feature that can be enabled/deactivated as required. See General Settings Section 4 on page 36: (on the instrument it can be found under the General Settings screen on the Dashboard). Copyright 2022 Baker Hughes Company. 10 | DPI610E Instruction Manual–English... -
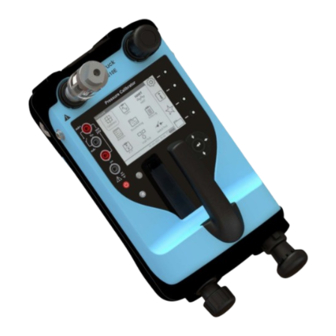
Page 19: Parts
Screen Selection softkeys Clip Fastener for Carrying Strap Power ON/OFF button Barometer Port Help Button Battery Level Indicator (One bar equals 25% charge) Home Button External Sensor Port Navigation Pad Copyright 2022 Baker Hughes Company. English–DPI610E Instruction Manual | 11... - Page 20 Electrical 4mm Sockets Clip Fastener for Carrying Strap Screen Selection softkeys Pressure Release Valve Power ON/OFF button Battery Level Indicator (One bar equals 25% charge) Help button External Sensor Port Home button Copyright 2022 Baker Hughes Company. 12 | DPI610E Instruction Manual–English...
-
Page 21: Test Port
1.15.12 External Sensor Port On the right side of the instrument is the RS485 communications port to enable connection of external remote sensors such as the PM700E pressure sensor and the RTD-Interface. Copyright 2022 Baker Hughes Company. English–DPI610E Instruction Manual | 13... -
Page 22: Barometric Port (Pneumatic Version Only)
Canada ISED Radio Approval ID (Bluetooth) US FCC Radio Approval ID (Bluetooth) China RoHS WEEE (Recycling) Marking. Do not dispose of as normal refuse - take to an authorized disposal facility. Copyright 2022 Baker Hughes Company. 14 | DPI610E Instruction Manual–English... -
Page 23: User Interface
Navigation Pad. 1.17.1.5 Navigation Pad The Navigation Pad consists of Up, Down, Left, Right and Enter buttons which allow quick and easy navigation when using the user interface. Copyright 2022 Baker Hughes Company. English–DPI610E Instruction Manual | 15... -
Page 24: First Use
This can make the system execute unintended actions. This can happen, for example, when pushing cables into the sockets in the face of the instrument or by letting cables touch the screen. Copyright 2022 Baker Hughes Company. 16 | DPI610E Instruction Manual–English... -
Page 25: Dashboard Navigation
When all parameters have been selected push the Tick softkey to accept the Date/Time changes or tap the Back button to exit without saving the changes. Copyright 2022 Baker Hughes Company. English–DPI610E Instruction Manual | 17... - Page 26 1.19.3.3 Open Source Licenses There are two files that relate to the software for upgrading the firmware for this instrument: 1568-notices-report-08_08_2022_17_04.txt covers DK0491 DPI610E Bootloader 1563-notices-report-08_08_2022_16_01.txt covers DK0492 DPI610E Main Application. Copyright 2022 Baker Hughes Company. 18 | DPI610E Instruction Manual–English...
-
Page 27: Pump Operations
To vent the system to atmospheric pressure, slowly turn the pressure release valve fully counter-clockwise until the sensor returns to zero (gauge sensor) or 1 bar (absolute sensor). Copyright 2022 Baker Hughes Company. English–DPI610E Instruction Manual | 19... -
Page 28: Attach Instrument Dirt (And Water) Trap To Test Port
Make sure that the device under test has a male G ⅜ Quickfit adapter thread or use a suitable adapter rated to 35 bar. If in doubt, please contact www.bakerhughesds.com/druck/global-service- support Copyright 2022 Baker Hughes Company. 20 | DPI610E Instruction Manual–English... - Page 29 Attach the Blanking Plug to seal and protect the socket if the instrument will not be in immediate use, see “Use of Blanking Plug” on page 19. Step 2 Copyright 2022 Baker Hughes Company. English–DPI610E Instruction Manual | 21...
-
Page 30: Preparing The Instrument For Pressure/Vacuum Operation
Note: Make sure that the device under test has a male G ⅜ Quickfit adapter thread or use a suitable adapter rated to Step 4 35 bar. If in doubt, please contact www.bakerhughesds.com/druck/global-service-support Copyright 2022 Baker Hughes Company. 22 | DPI610E Instruction Manual–English... -
Page 31: Generating Pressure/Vacuum
Use the pump to achieve the desired pressure/vacuum. Step 3 Turn the volume adjuster to make fine adjustments to the pressure/vacuum. Step 4 Copyright 2022 Baker Hughes Company. English–DPI610E Instruction Manual | 23... - Page 32 If the pressure is too high or if the display shows > > > > (the pressure is above the internal sensor full-scale limit), slowly turn the fine adjustment knob counter-clockwise to move the pressure down to the necessary value. Copyright 2022 Baker Hughes Company. 24 | DPI610E Instruction Manual–English...
- Page 33 If -950 mbar is achieved but then the pressure slowly increases (i.e. system appears to be leaking) then check that the release valve is tightly shut and that the IDT (Instrument Dirt Trap) top/bottom seals are not leaking. Copyright 2022 Baker Hughes Company. English–DPI610E Instruction Manual | 25...
-
Page 34: Hydraulic System
The reservoir can be unscrewed from the instrument and filled. To avoid contamination, use only one type of pressure media in the instrument. If you wish to change the pressure medium after first use, please contact the Service Department. Copyright 2022 Baker Hughes Company. 26 | DPI610E Instruction Manual–English... -
Page 35: Priming The Instrument
Go to step 16 for more information. Step 2 Turn the volume adjuster wheel clockwise until it stops: this can be up to 30 turns. Note: This is the zero point. Copyright 2022 Baker Hughes Company. English–DPI610E Instruction Manual | 27... - Page 36 Push the Tick softkey and push the Back button to show the previous screen. Step 8 Slowly operate the priming pump until the pressure reaches 5-10 bar. Copyright 2022 Baker Hughes Company. 28 | DPI610E Instruction Manual–English...
- Page 37 If pressure is observed, turn the pressure release knob fully counter-clockwise until the pressure display reads zero (gauge sensor) or atmospheric pressure (absolute sensor). Step 13 Remove the blanking plug from the test port. Copyright 2022 Baker Hughes Company. English–DPI610E Instruction Manual | 29...
- Page 38 Note: As required, use adapters provided with the instrument or an AMC adapter(s) and the corresponding seal(s). Step 17 Use the priming pump to prime the system to a maximum of 10-20 bar. Copyright 2022 Baker Hughes Company. 30 | DPI610E Instruction Manual–English...
-
Page 39: Generating Pressure
Remove the DUT or (blanking plug if attached) and then attach the supplied hose (or compatible hose) to the test port with the open end of the hose in an empty container. Copyright 2022 Baker Hughes Company. English–DPI610E Instruction Manual | 31... - Page 40 16. Remove the reservoir and empty the hydraulic fluid (if necessary clean the reservoir again) and then fill the Reservoir with fresh fluid to the recommended level (75% full). 17. Attach the Reservoir filled with new fluid to the DPI610E Reservoir port. Copyright 2022 Baker Hughes Company. 32 | DPI610E Instruction Manual–English...
-
Page 41: Basic Tasks
This task is typically for calibrating Current Output Pressure transmitters. 3.1.2 P-P (Pressure to Pressure) This configures CH1 to internal (INT) pressure measurement and CH2 to external (EXT) pressure measurement. Copyright 2022 Baker Hughes Company. English–DPI610E Instruction Manual | 33... -
Page 42: P-V (Pressure To Voltage)
Relief Valve Test utility. If external pressure is detected on CH1, it will retain this function otherwise, it defaults to internal pressure. CH2 configuration remains unchanged. For more details on the Relief Valve Test, refer to Section 7.4 on page 130. Copyright 2022 Baker Hughes Company. 34 | DPI610E Instruction Manual–English... -
Page 43: Tasks Selection
UP/DOWN/LEFT/RIGHT buttons to select the desired task and press the (HOMEx) softkey to remove the selected option. Once removed, the mini HOME icon next to the option text will disappear. Copyright 2022 Baker Hughes Company. English–DPI610E Instruction Manual | 35... -
Page 44: General Settings
Press the softkey corresponding to the General Settings icon. Option 2 4.1 DATE, TIME and LANGUAGE To change the Date, Time and Language settings, see “Set Date, Time and Language” on page 17 and page 18. Copyright 2022 Baker Hughes Company. 36 | DPI610E Instruction Manual–English... -
Page 45: Backlight
If ALWAYS OFF is selected, the backlight will remain off at all times when the instrument is Copyright 2022 Baker Hughes Company. English–DPI610E Instruction Manual 37... -
Page 46: Communications
A device with a Bluetooth capability can receive data at a distance of up to 5m from the DPI610E. Bluetooth devices can read the DPI610E channel configuration and its measurements. Copyright 2022 Baker Hughes Company. 38 | DPI610E Instruction Manual–English... -
Page 47: Auto Power Down
If 30 Minutes Inactivity is selected, the instrument will automatically switch off after 30 minutes of inactivity. Note: Auto Power Down will not come into effect until all tests running have been completed. Copyright 2022 Baker Hughes Company. English–DPI610E Instruction Manual 39... -
Page 48: Touchscreen Lock
Step 2 Ensure that TOUCHSCREEN LOCK is checked (has a tick mark.) Note: TOUCHSCREEN LOCK can be disabled by tapping anywhere on the touch-screen 3 times within 5 seconds. Step 3 Copyright 2022 Baker Hughes Company. 40 | DPI610E Instruction Manual–English... -
Page 49: Enable Hold
To disable the Hold icon if necessary, tap on the ENABLE HOLD checkbox to remove the tick mark. Step 1 Select OK. Step 2 Confirm that the ENABLE HOLD checkbox does not have a Tick mark. Step 3 Copyright 2022 Baker Hughes Company. English–DPI610E Instruction Manual 41... - Page 50 Enter the PIN. The default PIN is 4321 and it can be changed by the user at any time. See Section 5.2 on page 46. Step 1 Select to confirm. Step 2 Copyright 2022 Baker Hughes Company. 42 | DPI610E Instruction Manual–English...
-
Page 51: Advanced
ADVANCED The Advanced Menu screen is now unlocked and its options available (see Chapter 5, “Advanced Menu,” on page 44). Step 3 Copyright 2022 Baker Hughes Company. English–DPI610E Instruction Manual 43... -
Page 52: Advanced Menu
CALIBRATION is selected. (See Chapter 13, “Instrument Calibration,” on page 255). Note: To access the Advanced menu, select ADVANCED from the General Settings menu (see Chapter 4.7, “ADVANCED,” on page 42). Copyright 2022 Baker Hughes Company. 44 | DPI610E Instruction Manual–English... -
Page 53: Calibration Menu
Advanced Menu screen as shown below: Select CALIBRATION from the Advanced Menu. Step 1 Refer to Chapter 13, “Instrument Calibration,” on page 255 that describes the options available when this CALIBRATION menu becomes active. Copyright 2022 Baker Hughes Company. English–DPI610E Instruction Manual | 45... -
Page 54: Change Pin
To change the PIN to a new number, use the onscreen keypad to enter the new number. Select , enter the new PIN again and select to confirm the selection. Step 2 Copyright 2022 Baker Hughes Company. 46 | DPI610E Instruction Manual–English... -
Page 55: Software Upgrade
Dashboard. To select, tap on the icon or press the softkey on the right of icon. Step 2 The General Settings screen appears. Select the COMMUNICATIONS option. Step 3 PORT Copyright 2022 Baker Hughes Company. English–DPI610E Instruction Manual | 47... - Page 56 Copy the DK0492.raw file from the PC file system location and paste it into the root directory of the DPI610E mass storage drive. Step 6 If a previously existing DK0492.raw file is present, a popup window will indicate this. Select Overwrite to replace the old file. Copyright 2022 Baker Hughes Company. 48 | DPI610E Instruction Manual–English...
-
Page 57: How To Upgrade The Firmware
Section 5.3.1 on page 47 for how to show this screen. Step 1 Press the OK button to start the upgrade process. Be aware that this will reboot the DPI610E. Step 2 Copyright 2022 Baker Hughes Company. English–DPI610E Instruction Manual | 49... - Page 58 Select the OK button to close this screen message. Step 4 Contact the Technical Support Dept using the links given in Chapter 1 of this manual if you are unable to upgrade the software. Copyright 2022 Baker Hughes Company. 50 | DPI610E Instruction Manual–English...
-
Page 59: Factory Reset
Advanced Menu screen. Step 1 Select the OK button to confirm the selection of Factory Reset. Step 2 Select the OK button to confirm deletion of all user files. Step 3 Copyright 2022 Baker Hughes Company. English–DPI610E Instruction Manual | 51... - Page 60 Select the OK button to confirm the restart of instrument. Step 4 If Cancel is selected in Step 4, reset will be completed on next boot. Select the OK button to confirm selection. Option Copyright 2022 Baker Hughes Company. 52 | DPI610E Instruction Manual–English...
-
Page 61: Format File System
“Formatting will be completed on next reboot”. Tap OK to close this message window. Step 3 After the instrument is restarted, copy any backup files back into their respective folders. Copyright 2022 Baker Hughes Company. English–DPI610E Instruction Manual | 53... -
Page 62: Service / Engineering
Chapter 5. Advanced Menu 5.6 SERVICE / ENGINEERING This Advanced SERVICE/ENGINEERING function is not for operator use and requires a PIN for use only by specialist users. Copyright 2022 Baker Hughes Company. 54 | DPI610E Instruction Manual–English... -
Page 63: Calibrator Tasks
Softkey – up to four softkeys are available throughout the menu screens giving touchscreen and button options for operating different aspects of the user interface. Copyright 2022 Baker Hughes Company. English–DPI610E Instruction Manual | 55... -
Page 64: Calibrator Tasks Screen Shortcuts
Step 1 INFORMATION When in maximized/minimized layout, the 50:50 layout can be restored by tapping on any area of the channel windows with the exception of the Units area. Copyright 2022 Baker Hughes Company. 56 | DPI610E Instruction Manual–English... - Page 65 Press the Enter button to maximize the Channel window. Step 2 INFORMATION When in a maximized/minimized layout, the 50:50 layout can be restored by pressing the ENTER button. Copyright 2022 Baker Hughes Company. English–DPI610E Instruction Manual | 57...
- Page 66 The desired unit appears on the configured channel window. Step 3 Note: An alternative method to select units of measurement is given in Step 3 of Section 2.1.6 on page 22. Copyright 2022 Baker Hughes Company. 58 | DPI610E Instruction Manual–English...
- Page 67 When 10 V or 24 V Loop Power is enabled, it is displayed at the top of the CH2 channel window (see Figure 6-2). Figure 6-2: 24 V Loop Power Enabled Copyright 2022 Baker Hughes Company. English–DPI610E Instruction Manual | 59...
- Page 68 (e.g. 24V ON). Using Navigation Buttons Press the DOWN button to select the channel 2 window area. Step 1 Copyright 2022 Baker Hughes Company. 60 | DPI610E Instruction Manual–English...
- Page 69 Press the Enter Key to cancel the 24V ON function. Step 3 Check that the 10 V/24 V function is not in the display after the function has been disabled. Step 4 Copyright 2022 Baker Hughes Company. English–DPI610E Instruction Manual | 61...
-
Page 70: Error Indications
INFORMATION If the display shows any of the above error indications: Check the sensor/measurement full scale pressure range (shown on screen) against the range of the system being measured. Copyright 2022 Baker Hughes Company. 62 | DPI610E Instruction Manual–English... -
Page 71: Functions
Functions 6.2 Functions 6.2.1 Functions available by channel Figure 6-3: Channel 1 Functions Figure 6-4: Channel 2 Functions Copyright 2022 Baker Hughes Company. English–DPI610E Instruction Manual | 63... - Page 72 Difference Barometer Observed INFORMATION ‘Electrical’ includes Current, Voltage and Millivolt functions. Note: ‘o’ denotes a supported combination of functions. Note: ‘x’ denotes that a combination of functions is not supported. Copyright 2022 Baker Hughes Company. 64 | DPI610E Instruction Manual–English...
-
Page 73: None
200 bar / 3000 psi / 20 MPa G or A 350 bar / 5000 psi / 35 MPa 700 bar / 10000 psi / 70 MPa 1000 bar / 15000 psi / 100 MPa Copyright 2022 Baker Hughes Company. English–DPI610E Instruction Manual | 65... - Page 74 Select FUNCTION in the Channel Setup screen. Step 2 Select Pressure in the Channel Function screen. Select INT (for Internal). Select Normal or Pseudo. Select to confirm the selections. Step 3 Copyright 2022 Baker Hughes Company. 66 | DPI610E Instruction Manual–English...
- Page 75 Note: It is recommended that all gauge sensors are zeroed at the beginning of each day before use. Copyright 2022 Baker Hughes Company. English–DPI610E Instruction Manual | 67...
- Page 76 (except the Units area) (See Chapter 6.1.1.1, “Maximize and Minimize Channel Window,” on page 56). Step 3 Select to set the pressure sensor to zero. Step 4 Copyright 2022 Baker Hughes Company. 68 | DPI610E Instruction Manual–English...
- Page 77 Copyright 2022 Baker Hughes Company. English–DPI610E Instruction Manual | 69...
- Page 78 Select to confirm. Step 2 Make sure that Sealed Gauge is correctly configured on the desired channel. Step 3 Copyright 2022 Baker Hughes Company. 70 | DPI610E Instruction Manual–English...
- Page 79 Make sure that the pressure port is open to atmosphere. When the pressure reading is stable, select the icon. Step 2 Make sure that Sealed Gauge is correctly configured on the desired channel. Step 3 Copyright 2022 Baker Hughes Company. English–DPI610E Instruction Manual | 71...
-
Page 80: Sum
To configure a pressure measurement reading using the Sum function: Tap the icon to select Channel 1 or push the related softkey. Step 1 Select FUNCTION from the Channel Setup menu. Step 2 Copyright 2022 Baker Hughes Company. 72 | DPI610E Instruction Manual–English... - Page 81 The CH Setup screen will appear again. Step 3 Check that the desired configuration appears in the CH Setup menu. to go back to the Calibrator Select Main screen. Step 4 Copyright 2022 Baker Hughes Company. English–DPI610E Instruction Manual | 73...
-
Page 82: Difference
Step 1 Select FUNCTION from the Channel Setup menu. Step 2 Select Difference from the FUNCTION menu. Select INT-EXT or EXT- INT as desired. Select to confirm. Step 3 Copyright 2022 Baker Hughes Company. 74 | DPI610E Instruction Manual–English... - Page 83 (INT-EXT) or (EXT-INT) depending on the priority chosen. The FS values of both the internal sensor and the external sensor will also be displayed. The sensor type field will also be updated where required. Copyright 2022 Baker Hughes Company. English–DPI610E Instruction Manual | 75...
-
Page 84: Barometer
Select FUNCTION from the Channel Setup menu to show the CHL Function screen. Step 2 Select Barometer in the channel FUNCTION menu. Select the Tick button to confirm the selection. Step 3 Copyright 2022 Baker Hughes Company. 76 | DPI610E Instruction Manual–English... - Page 85 CH Setup menu. Select the Back icon to go to the Calibrator Main Screen. Step 4 Check that the Barometer function is correctly configured in the desired channel window. Step 5 Copyright 2022 Baker Hughes Company. English–DPI610E Instruction Manual | 77...
-
Page 86: Observed
Step 1 Select FUNCTION from the Channel Setup menu. Step 2 Select Observed from the channel FUNCTION menu. Select the Tick button to confirm the selection. Step 3 Copyright 2022 Baker Hughes Company. 78 | DPI610E Instruction Manual–English... -
Page 87: Rtd
“Connected” text briefly appears, to confirm successful connection. Upon disconnection, the sensor icon will disappear and the “Disconnected” text briefly appears, to confirm the connection has been lost. Copyright 2022 Baker Hughes Company. English–DPI610E Instruction Manual | 79... -
Page 88: Current
(the Off option is selected in Step 4). Step 1 Use the diagram on the left to make the necessary connections for Current Measure using the internal 24 V supply. Copyright 2022 Baker Hughes Company. 80 | DPI610E Instruction Manual–English... - Page 89 Select to confirm the selection. If Off is selected the electrical connections will not be the same as for when 24 V or 10 V is selected (see Step 1). Copyright 2022 Baker Hughes Company. English–DPI610E Instruction Manual | 81...
- Page 90 Calibrator Main Screen. Step 5 The Calibration screen will show “24V ON” in the CH2 screen area. If Off has been selected, only “Current” will be in the top of this area. Copyright 2022 Baker Hughes Company. 82 | DPI610E Instruction Manual–English...
- Page 91 Step 1 Use the diagram on the left to make the necessary connections for Current Source using the internal 10 V or 24 V supply. Select the channel. Step 2 Copyright 2022 Baker Hughes Company. English–DPI610E Instruction Manual | 83...
- Page 92 Function when Off is selected. When 24V is selected, “Current (24V)” will appear. When 10V is selected, “Current (10V)” will appear. Select the Back icon to go to the Calibrator Main screen Copyright 2022 Baker Hughes Company. 84 | DPI610E Instruction Manual–English...
- Page 93 Once a target current source value is set, the displayed value will start to flash on the main reading screen. Once the setpoint has been reached, the source value will stop flashing and remain steady. Copyright 2022 Baker Hughes Company. English–DPI610E Instruction Manual | 85...
- Page 94 Navigation keypad: push the DOWN button to select CH2, then push the OK Step 1 button to expand the channel window. Select the Setup options icon to show the Source Automation screen. Step 2 Copyright 2022 Baker Hughes Company. 86 | DPI610E Instruction Manual–English...
- Page 95 Automation screen: the default option is NUDGE. Step 3 If necessary, select the Edit softkey and then set the parameters for the selected automation. Note: Different automation options will have different parameters. Step 4 Copyright 2022 Baker Hughes Company. English–DPI610E Instruction Manual | 87...
- Page 96 UP/DOWN buttons. If necessary, tap the Up or Down screen buttons to increase or decrease the Current value. Push the Setup icon to show the Source Automation menu. Copyright 2022 Baker Hughes Company. 88 | DPI610E Instruction Manual–English...
- Page 97 Select the Tick icon/softkey to save the new values or the Back icon to not save the new values. Select the Proceed softkey to use the automation option and its automation settings. Copyright 2022 Baker Hughes Company. English–DPI610E Instruction Manual | 89...
- Page 98 Span Check cycle is automatically repeated. This happens when the automation Play softkey is used, until manually stopped. To stop the automation at any time, push the Cancel softkey. Copyright 2022 Baker Hughes Company. 90 | DPI610E Instruction Manual–English...
- Page 99 Back icon to not save the new values. Select the Proceed softkey to use the selected automation option and its automation settings. Copyright 2022 Baker Hughes Company. English–DPI610E Instruction Manual | 91...
- Page 100 Percent Step automation icon. The automation cycle is automatically repeated until manually stopped. To stop the automation at any time, push the Cancel softkey. Copyright 2022 Baker Hughes Company. 92 | DPI610E Instruction Manual–English...
- Page 101 Back icon to not save the new values. Select the Proceed softkey to use the selected automation option and its automation settings. Copyright 2022 Baker Hughes Company. English–DPI610E Instruction Manual | 93...
- Page 102 The TRAVEL time can be set to define the time for the value to go from START to END or from END to START. On the Source Automation screen tap the RAMP radio button. Select the Edit softkey to show the Ramp Automation menu screen. Step 1 Copyright 2022 Baker Hughes Company. 94 | DPI610E Instruction Manual–English...
- Page 103 Step 3 Push the Play softkey to select automation. The automation cycle continuously repeats until manually stopped. To stop the automation at any time, press the Cancel softkey. Copyright 2022 Baker Hughes Company. English–DPI610E Instruction Manual | 95...
-
Page 104: Voltage
From the Calibrator screen, select the channel 2 Setup screen (either press the screen icon or press the softkey.) Step 1 Select FUNCTION from the CH2 Setup screen. Step 2 Copyright 2022 Baker Hughes Company. 96 | DPI610E Instruction Manual–English... - Page 105 Check that Voltage mode is active. Select the Back icon to show the Calibration screen. Step 3 Check that Voltage is shown in screen. Copyright 2022 Baker Hughes Company. English–DPI610E Instruction Manual | 97...
-
Page 106: Millivolts Measure - Configuration
From the Calibrator screen, select the Channel 2 Setup (either press the screen icon or press the softkey.) Step 1 Select FUNCTION from the CH2 setup screen. Step 2 Copyright 2022 Baker Hughes Company. 98 | DPI610E Instruction Manual–English... - Page 107 Check that Voltage mode is selected. Select the Back icon to show the Calibrator screen. Step 3 Check that Millivolts appears on the screen. Copyright 2022 Baker Hughes Company. English–DPI610E Instruction Manual | 99...
-
Page 108: Hart
From the Calibrator screen, select the channel 2 Setup icon (either tap the screen icon or press the softkey.) Step 1 Select FUNCTION from the CH2 Setup screen. Step 2 Copyright 2022 Baker Hughes Company. 100 | DPI610E Instruction Manual–English... - Page 109 To cancel the HART function, to enable Step 3 the selection of another function, use the procedure given in Section 12.2 on page 237 to return to the Configuration screen. Copyright 2022 Baker Hughes Company. English–DPI610E Instruction Manual | 101...
-
Page 110: Process Options
Note: Tare is only available for Measure functions except for Barometer and HART. To enable the Tare function : Select the desired channel. Step 1 Select PROCESS. Step 2 Copyright 2022 Baker Hughes Company. 102 | DPI610E Instruction Manual–English... - Page 111 Step 5 INFORMATION When Tare is disabled, the primary reading returns to displaying the true measured value. Copyright 2022 Baker Hughes Company. English–DPI610E Instruction Manual | 103...
-
Page 112: Min/Max/Mean
INFORMATION The Min/Max/Mean function is only applicable to Measure functions with the exception of HART. To enable the Min/Max/Mean function: Select the desired channel. Step 1 Select PROCESS. Step 2 Copyright 2022 Baker Hughes Company. 104 | DPI610E Instruction Manual–English... - Page 113 INFORMATION To view Min/Max/Mean information Step 5 maximize the relevant channel window. See “Maximize and Minimize Channel Window” on page 56 for details. Copyright 2022 Baker Hughes Company. English–DPI610E Instruction Manual | 105...
- Page 114 Chapter 6. Calibrator Tasks Min/Max/Mean information appears in the maximized channel window. Step 6 Copyright 2022 Baker Hughes Company. 106 | DPI610E Instruction Manual–English...
-
Page 115: Filter
When the Filter process option is enabled, the Filter status icon is shown in the relevant channel. To enable the Filter function: Select the desired channel. Step 1 Select PROCESS. Step 2 Copyright 2022 Baker Hughes Company. English–DPI610E Instruction Manual | 107... - Page 116 Calibration Main screen. Check that the FILTER icon appears on the relevant channel window. (The FILTER icon will appear as the PROCESS option). Step 5 Copyright 2022 Baker Hughes Company. 108 | DPI610E Instruction Manual–English...
-
Page 117: Flow
Internal Pressure, External Pressure, Sum and Difference. When enabled the Flow status icon appears. To enable the Flow function: Select the desired channel. Step 1 Select PROCESS. Step 2 Copyright 2022 Baker Hughes Company. English–DPI610E Instruction Manual | 109... - Page 118 (as the PROCESS Option.) Select the Back icon to go back to the Calibration Main screen. Step 4 Check that the FLOW icon appears in the relevant channel window. Step 5 Copyright 2022 Baker Hughes Company. 110 | DPI610E Instruction Manual–English...
-
Page 119: Alarm
The user Alarm option is available with all Measure functions except for Barometer and HART. To enable and configure the user Alarm option: Select the icon as the desired channel. Step 1 Select PROCESS. Step 2 Copyright 2022 Baker Hughes Company. English–DPI610E Instruction Manual | 111... - Page 120 Press the Tick softkey to confirm the alarm settings and return to the PROCESS options screen. Note: To disable the Alarm, select the ALARM Checkbox to remove the Tick mark. Copyright 2022 Baker Hughes Company. 112 | DPI610E Instruction Manual–English...
- Page 121 ALARM icon and the measured reading flashing within the relevant channel. When the measured value falls within the normal specified range condition, the icon and measured value will stop flashing. Copyright 2022 Baker Hughes Company. English–DPI610E Instruction Manual | 113...
-
Page 122: Scaling
Observed and HART. There are two methods to activate and configure the Scaling option. 6.3.6.1 First Scaling Method Select the icon for the desired channel. Step 1 Select PROCESS. Step 2 Copyright 2022 Baker Hughes Company. 114 | DPI610E Instruction Manual–English... - Page 123 Process Options Tap the SCALING area or use the Navigation pad buttons to select it. The Scaling screen appears for the selected channel. Step 3 Copyright 2022 Baker Hughes Company. English–DPI610E Instruction Manual | 115...
- Page 124 PROCESS screen. The updated Channel Scaling parameters appear in the Scaling fields. Step 5 Press the Back button in the Channel Process screen to show the Channel Setup screen. Copyright 2022 Baker Hughes Company. 116 | DPI610E Instruction Manual–English...
- Page 125 PROCESS field and the custom unit label will appear in the UNITS field. Select the Back softkey to return to the Calibrator screen. Step 7 Copyright 2022 Baker Hughes Company. English–DPI610E Instruction Manual | 117...
- Page 126 In addition, the full-scale value will be expressed as its equivalent in the custom unit. Check that the minimum and maximum Step 8 displayed values correspond with the minimum and maximum measured values. Copyright 2022 Baker Hughes Company. 118 | DPI610E Instruction Manual–English...
- Page 127 Select the Setup softkey to view and/or change the Scaling parameters which configure the custom unit. For details on how to configure the parameters, see Section 6.3.6.1 for Method 1. Step 3 Copyright 2022 Baker Hughes Company. English–DPI610E Instruction Manual | 119...
-
Page 128: Utilities
To configure and run a Leak Test: Tap on the Tasks icon on the Dashboard to select the menu. Step 1 Copyright 2022 Baker Hughes Company. 120 | DPI610E Instruction Manual–English... - Page 129 Leak Test utility. Step 2 Note: If no compatible function is configured on CH1, the Internal Pressure function will be used automatically to run the Leak Test. Copyright 2022 Baker Hughes Company. English–DPI610E Instruction Manual | 121...
- Page 130 Press the Back softkey to return to the Leak Test screen. After the Leak Test times have been set, pressurize the system to the desired pressure using the Step 4 DPI610E pump. Copyright 2022 Baker Hughes Company. 122 | DPI610E Instruction Manual–English...
- Page 131 Step 5 When the TEST TIME has elapsed, the End pressure value is also recorded and the Leak Rate per minute is calculated and appears as the Leak Rate test result. Copyright 2022 Baker Hughes Company. English–DPI610E Instruction Manual | 123...
- Page 132 System,” on page 293.) Only the list of test result files can be viewed on the device. Details of the files can only be accessed when the files are opened on a PC. Copyright 2022 Baker Hughes Company. 124 | DPI610E Instruction Manual–English...
-
Page 133: Switch Test
Tap on the Tasks icon on the Dashboard to select the menu. Step 1 Tap the Switch Test two times if using the touchscreen or press the OK button to launch the utility. Step 2 Copyright 2022 Baker Hughes Company. English–DPI610E Instruction Manual | 125... - Page 134 Step 6 open (NO) in the test window. Vice versa, if a closed circuit is detected, the switch will be identified as Normally closed (NC) for the duration of the test. Copyright 2022 Baker Hughes Company. 126 | DPI610E Instruction Manual–English...
- Page 135 System). Only the list of test result files can be viewed on the device. Details of the files can only be accessed when the files are opened on a PC (See Section 9.6.2, “How to use a PC to view Data Log files in the DPI610E,” on page 172). Copyright 2022 Baker Hughes Company. English–DPI610E Instruction Manual | 127...
-
Page 136: Tx (Transmitter Simulation) Simulator
From the Tasks menu, select Tx Sim from the Task list. Tap the Tx Sim option again if using the touchscreen or press the Navigation pad OK button to start the utility. Step 2 Copyright 2022 Baker Hughes Company. 128 | DPI610E Instruction Manual–English... - Page 137 There is also the option for the DPI610E to provide power i.e., 10V or 24V. The default setting is Off (no power provided by the DPI610E). Press the Back softkey. Copyright 2022 Baker Hughes Company. English–DPI610E Instruction Manual | 129...
-
Page 138: Relief Valve Test
From the Tasks menu, select Relief Valve from the Task list. Tap the Relief Valve option again if using the touchscreen or press the Navigation pad OK button to launch the utility. Step 2 Copyright 2022 Baker Hughes Company. 130 | DPI610E Instruction Manual–English... - Page 139 When the Open and Close pressures are stable, select the Stop icon softkey to end the test. The results of the Relief Valve test can be saved by selecting the Save softkey. Step 8 Copyright 2022 Baker Hughes Company. English–DPI610E Instruction Manual | 131...
- Page 140 If the results are not saved, a new test cycle can be set up ready to be run. To do this, carefully vent the system (open the pressure release knob) and then select the Restart softkey. Copyright 2022 Baker Hughes Company. 132 | DPI610E Instruction Manual–English...
-
Page 141: External Sensors
Differential sensor reference port Silicon, Glass, Silicon Dioxide and RTV Adhesive 7 to 200 bar 316L Stainless Steel and Hastelloy C276 350 to 1400 bar Inconel 625 and 17-4PH Stainless Steel Copyright 2022 Baker Hughes Company. English–DPI610E Instruction Manual | 133... -
Page 142: Setup
(see bottom left of screen image below). When the sensor is disconnected, a “Disconnected” status indication appears for a few seconds in the status bar and then the external sensor icon disappears. Copyright 2022 Baker Hughes Company. 134 | DPI610E Instruction Manual–English... -
Page 143: The Zero Function
350 bar / 5000 psi / 35 MPa 700 bar / 10 000 psi / 70 MPa 1000 bar / 15 000 psi / 100 MPa 1400 bar / 20 000 psi / 140 MPa Copyright 2022 Baker Hughes Company. English–DPI610E Instruction Manual | 135... -
Page 144: Configuration Of An External Pressure Sensor
The EXTernal pressure function is similar to that of the INTernal pressure function because it supports all the Calibrator task features associated with that of the internal pressure e.g., sensor zero, pseudo-range, leak test, switch test, relief valve etc. Copyright 2022 Baker Hughes Company. 136 | DPI610E Instruction Manual–English... - Page 145 If a channel is configured for External Pressure and an unrecognised sensor is detected, a warning message appears stating the connected sensor is not compatible and the sensor icon will appear in the status bar. Copyright 2022 Baker Hughes Company. English–DPI610E Instruction Manual | 137...
- Page 146 DPI610E is already in operation. In addition, a message text “CAL DUE” will permanently be on the status bar until the sensor is disconnected or the sensor has been calibrated. Copyright 2022 Baker Hughes Company. 138 | DPI610E Instruction Manual–English...
-
Page 147: Rtd Probe And Interface
SPECIALIST RTD PROBE (resistance range) with a suitable extension (Not supplied by Druck) cable and suitable probe is 0 to 400Ω which equates to -250ºC to +650ºC for a PT100 probe. Copyright 2022 Baker Hughes Company. English–DPI610E Instruction Manual | 139... -
Page 148: Setup
When the sensor is disconnected, a “Disconnected” status indication appear for a few seconds in the status bar and the external sensor icon will disappear. Copyright 2022 Baker Hughes Company. 140 | DPI610E Instruction Manual–English... - Page 149 “- - - - -“. If the external sensor is disconnected while the function is in use an error message may appear. The full-scale value of the RTD probe is displayed as well as the RTD probe type. Copyright 2022 Baker Hughes Company. English–DPI610E Instruction Manual | 141...
-
Page 150: Configuration Of A Channel For A Rtd Sensor
Step 1 Select FUNCTION from the Channel Setup screen. Step 2 Select RTD and select the Tick icon to confirm the selections and show the Channel Setup screen. Step 3 Copyright 2022 Baker Hughes Company. 142 | DPI610E Instruction Manual–English... - Page 151 Select the Tick icon to confirm the selected RTD MODE and to go back to the channel Setup screen. The RTD Profile can now be selected if necessary. Step 5 Copyright 2022 Baker Hughes Company. English–DPI610E Instruction Manual | 143...
-
Page 152: Rtd Profiles
However, up to eight Custom profiles can be created by populating the user profile files available with the required coefficients, temperature range and label. Copyright 2022 Baker Hughes Company. 144 | DPI610E Instruction Manual–English... - Page 153 Coefficient 3 (c, C, Delta) Third coefficient value Min. Temperature Minimum temperature Max. Temperature Maximum temperature When all parameter fields are filled, use the Back softkey to go back to the RTD Profile screen. Copyright 2022 Baker Hughes Company. English–DPI610E Instruction Manual | 145...
- Page 154 When in Resistance mode, the only units available to select are Ohms (Ω) and Custom units. In Temperature mode, select from °C, °F or Custom units. Refer to Section 6.3.6 on page 114 for information about Custom units. Copyright 2022 Baker Hughes Company. 146 | DPI610E Instruction Manual–English...
-
Page 155: The Adroit Sensor
It is necessary to have the following information, which a label on the sensor must supply: Sensor pressure range. For example: 0 to 10 bar g. Electrical Output option. For example: 0 to 10 V. Copyright 2022 Baker Hughes Company. English–DPI610E Instruction Manual | 147... - Page 156 CH2 Sensor Configuration screen: the default Configuration option is Standard. The display will show the Configuration setup softkey after you select the ADROIT configuration option. Select this softkey to look at or change the configuration parameters. Copyright 2022 Baker Hughes Company. 148 | DPI610E Instruction Manual–English...
- Page 157 Default value is 0 ohm. - the voltage-drop through the resistor or resistance in the circuit. Default value is 0.5 V. diode Copyright 2022 Baker Hughes Company. English–DPI610E Instruction Manual | 149...
- Page 158 Push the plugs of the electrical leads from the ADROIT sensor into the correct electrical sockets on the DPI610E (See Current Measure with 24V page 80 or Voltage Measure with 24V electrical connection diagrams on page 96). Copyright 2022 Baker Hughes Company. 150 | DPI610E Instruction Manual–English...
- Page 159 Make sure that the electrical reading and details in the CH2 are correct: the measured value will be the minimum range value when the pressure is open to atmosphere. Make sure that the full-scale value agrees with the sensor details set in the ADROIT configuration menu. Copyright 2022 Baker Hughes Company. English–DPI610E Instruction Manual | 151...
-
Page 160: Adroit Calibration
ADROIT sensor: PERFORM CALIBRATION - Calibrate the sensor. VIEW SENSOR STATUS - Look at ADROIT pressure sensor data. Step 3 RESTORE FACTORY CALIBRATION - Use the factory (default) calibration values. Copyright 2022 Baker Hughes Company. 152 | DPI610E Instruction Manual–English... -
Page 161: Perform Calibration
149 for a description of the contents of this screen. Change the sensor data on the screen if necessary. Select the Tick icon to go to the next step of the calibration procedure. Copyright 2022 Baker Hughes Company. English–DPI610E Instruction Manual | 153... - Page 162 The screen will show a pop up window Step 3 that tells you to vent the system to atmosphere. Open the pressure release valve slowly until the system is fully vented before you select the OK button Copyright 2022 Baker Hughes Company. 154 | DPI610E Instruction Manual–English...
- Page 163 RESTART softkey lets the calibration procedure be restarted if a repeat calibration is necessary. BACK softkey exits the calibration procedure and takes the user to the Perform Calibration menu screen. Copyright 2022 Baker Hughes Company. English–DPI610E Instruction Manual | 155...
-
Page 164: Zero Adjustment
Use the DPI610E pump and/or volume adjuster to do this. When the pressure value is stable, push the Next softkey to continue. Step 1 Copyright 2022 Baker Hughes Company. 156 | DPI610E Instruction Manual–English... - Page 165 RESTART softkey lets the calibration procedure be restarted if a repeat calibration is necessary. BACK softkey exits the calibration procedure and takes the user to the Perform Calibration menu screen. Copyright 2022 Baker Hughes Company. English–DPI610E Instruction Manual | 157...
-
Page 166: View Sensor Status
You use the RESTORE FACTORY CALIBRATION function to do this. Select RESTORE FACTORY CALIBRATION from the Adroit Calibration screen. Select OK on the pop-up window to confirm restore: this operation may take several seconds. Copyright 2022 Baker Hughes Company. 158 | DPI610E Instruction Manual–English... -
Page 167: Data Log
TIME INTERVAL, LOG DURATION and DATA POINTS are only listed in the Data Log Setup menu when TRIGGER is set to PERIODIC (See Section 9.2 on page 162). Copyright 2022 Baker Hughes Company. English–DPI610E Instruction Manual | 159... -
Page 168: How To Set The Data Log Filename
Data Log Setup screen when TRIGGER is set to periodic. Step 2 Select the Eraser to delete the default data log file name. Note: The default data log file name format is: [YYYY-MMM-DD_HH-MM-SS]. Step 3 Copyright 2022 Baker Hughes Company. 160 | DPI610E Instruction Manual–English... - Page 169 Check that the new filename appears in the Data Log Setup screen. Note: TIME INTERVAL, LOG DURATION and DATA POINTS are only listed on the Data Log Setup screen when TRIGGER is set to Periodic. Step 5 Copyright 2022 Baker Hughes Company. English–DPI610E Instruction Manual | 161...
-
Page 170: Trigger Menu
(See Section 9.1.1 on page 160 for the procedure). Refer to Section 9.4 on page 168, to continue the instructions for KEY PRESS data logging. When the PERIODIC trigger is selected, more recording options become available for configuration. Copyright 2022 Baker Hughes Company. 162 | DPI610E Instruction Manual–English... -
Page 171: Periodic Trigger Options
Current / Voltage / Millivolt Measure 00:00:00.5 Current Source 00:00:01.0 HART 00:00:00.5 9.3.1.1 How to set the TIME INTERVAL Select TIME INTERVAL from the Data Log Setup screen. Step 1 Copyright 2022 Baker Hughes Company. English–DPI610E Instruction Manual | 163... - Page 172 Note: The time interval must be entered in the [HH:MM:SS.S] format in the range [00:00:01] to [23.59.9]. Step 2 Check that required interval appears in the TIME INTERVAL row of the Data Log Setup screen. Step 3 Copyright 2022 Baker Hughes Company. 164 | DPI610E Instruction Manual–English...
-
Page 173: Log Duration
Use the onscreen keypad to set the LOG DURATION value. Select to confirm. Note: The time interval must be entered in the [HHH:MM:SS] format in the range Step 2 [000:00:01] to [999.59.59]. Copyright 2022 Baker Hughes Company. English–DPI610E Instruction Manual | 165... -
Page 174: Data Points
(000:00:50) based on the unchanged time interval of 10 seconds and the new number of required data points. 9.3.3.1 How to set the DATA POINTS Select DATA POINTS from the Data Log Setup screen Step 1 Copyright 2022 Baker Hughes Company. 166 | DPI610E Instruction Manual–English... - Page 175 Use the keypad to set the number of data points. Select to confirm. Step 2 Check that required number of data points appears in the DATA POINTS field of the Data Log Setup screen. Step 3 Copyright 2022 Baker Hughes Company. English–DPI610E Instruction Manual | 167...
-
Page 176: Setting Up Manual Data Logging
Press the Start Logging Data icon to log data when wanted. To temporarily stop the testing press the Step 3 Hold icon. To restart the testing press the Hold icon again. Copyright 2022 Baker Hughes Company. 168 | DPI610E Instruction Manual–English... - Page 177 If at any point during data logging, the user selects the Dashboard, some applications that may interfere with the logging, will be disabled. Such applications will have a slash across the icon on the Dashboard. Copyright 2022 Baker Hughes Company. English–DPI610E Instruction Manual | 169...
-
Page 178: Setting Up Periodic Data Logging
If at any point during data logging, the user selects the Dashboard, some applications that may interfere with the logging, will be disabled. Such applications will have a slash across the icon on the Dashboard. Copyright 2022 Baker Hughes Company. 170 | DPI610E Instruction Manual–English... -
Page 179: Viewing & Deleting Data Log Files
Step 1 Tap on (or use the Navigation Pad) to select the required Data Log file. Step 2 Select the Clipboard icon on the Data Log File Summary. Step 3 Copyright 2022 Baker Hughes Company. English–DPI610E Instruction Manual | 171... -
Page 180: How To Use A Pc To View Data Log Files In The Dpi610E
DPI610E device to the PC (See Section 9.7 on page 176). On the PC, the DPI610E memory appears as a mass storage device or drive within Windows File Explorer. Double-tap on the DPI610E drive and select the DataLog folder from the root directory. Copyright 2022 Baker Hughes Company. 172 | DPI610E Instruction Manual–English... -
Page 181: Deleting Data Log Files
9.6.3.1 To delete a single Data Log file Select FILES from the Data Log screen. Step 1 Tap on (or use the Navigation Pad) to select the required Data Log file. Step 2 Copyright 2022 Baker Hughes Company. English–DPI610E Instruction Manual | 173... - Page 182 Chapter 9. Data Log Select the ‘single’ trash icon on the Data Log File screen. Step 3 Select OK to confirm. Step 4 Copyright 2022 Baker Hughes Company. 174 | DPI610E Instruction Manual–English...
- Page 183 9.6.3.2 To delete all Data Log files Select FILES from the Data Log screen. Step 1 Select the ‘double’ trash icon on the Data Log summary screen. Step 2 Select OK to confirm. Step 3 Copyright 2022 Baker Hughes Company. English–DPI610E Instruction Manual | 175...
-
Page 184: How To Transfer A Data Log File
If the Data Log file is to be copied to the memory of an external PC, connect a micro-USB data cable to the USB port. Step 2 PORT Copyright 2022 Baker Hughes Company. 176 | DPI610E Instruction Manual–English... - Page 185 Note: You may need to have USB access enabled on your PC to use this feature. When the copy process is confirmed, remove the cable from the DPI610E. . Step 6 Copyright 2022 Baker Hughes Company. English–DPI610E Instruction Manual | 177...
-
Page 186: Analysis
In addition, the tolerance test result is shown as a Pass or Fail. 10.2 Analysis Application Select the Analysis icon on the Dashboard to start the Analysis application. Figure 10-1: Instrument Dashboard Copyright 2022 Baker Hughes Company. 178 | DPI610E Instruction Manual–English... -
Page 187: Setup
- when the transfer characteristic is a directly proportional relationship. Square Root - when the transfer characteristic has a square-root relationship. This is commonly found in flow sensors. The default Linearity option is Linear. Copyright 2022 Baker Hughes Company. English–DPI610E Instruction Manual | 179... -
Page 188: Error Type
A live indication of the tolerance result status icon which is one of the following: PASS - the currently measured output value lies within the specified tolerance limits. FAIL - the currently measured output value lies outside the specified tolerance limits. Copyright 2022 Baker Hughes Company. 180 | DPI610E Instruction Manual–English... -
Page 189: Data Logging Within Analysis
When the testing is complete, press the Back icon to exit the Datalog and Analysis application. Datalog files can be accessed via the Data Log application (Refer to “Data Log” on page 159). Copyright 2022 Baker Hughes Company. English–DPI610E Instruction Manual | 181... -
Page 190: Documenting
11.2.1 How to select the INTERNAL PROCEDURES mode. To view, create or run internal procedures, select the INTERNAL PROCEDURES softkey from the Procedures screen. This will show a list of available internal procedure files. Step 1 Copyright 2022 Baker Hughes Company. 182 | DPI610E Instruction Manual–English... -
Page 191: How To Create An Internal Procedure
Create Procedure screen. Select the type of calibration required. Proportional is the default option. Press the Next softkey to proceed or the Previous softkey to go back one step. Step 3 Copyright 2022 Baker Hughes Company. English–DPI610E Instruction Manual | 183... - Page 192 Note: It is possible using the Toggle softkey to swap the Input and Output functions i.e., use the original Input function as the Output function and vice versa. Copyright 2022 Baker Hughes Company. 184 | DPI610E Instruction Manual–English...
- Page 193 0 POINTS DOWN. This means there will be two test points - the first test point will be the Input Start value and the second will be the Input End value. Copyright 2022 Baker Hughes Company. English–DPI610E Instruction Manual | 185...
- Page 194 In the Test Point screen, it is possible to manually adjust each test point if required by selecting the relevant test point box and changing the value. As shown in the screen below. Step 4 Cont’d Copyright 2022 Baker Hughes Company. 186 | DPI610E Instruction Manual–English...
- Page 195 It is specified as a percentage of the Input range. The default test point tolerance value is 5% and can be changed if required. Copyright 2022 Baker Hughes Company. English–DPI610E Instruction Manual | 187...
- Page 196 Chapter 11. Documenting TOLERANCE: This section refers to the deviation on the output signal or result with respect to each input signal setpoint applied. Step 5 Copyright 2022 Baker Hughes Company. 188 | DPI610E Instruction Manual–English...
- Page 197 %FS (Percent of Full-scale) • %Span (Percent of Span) • %Percent of reading) • %Fixed (Measurement units). See Section 10.3.3 on page 180 for more details. The default is % Full-scale (%FS). Copyright 2022 Baker Hughes Company. English–DPI610E Instruction Manual | 189...
- Page 198 Chapter 11. Documenting When the details of the test are completed, press the Save softkey to save the procedure. The test procedure after being saved, becomes immediately available for use. Step 6 Copyright 2022 Baker Hughes Company. 190 | DPI610E Instruction Manual–English...
-
Page 199: How To Start A Test Procedure
Note: When a Test Procedure is deleted, any asset data saved as part of the procedure file will also be deleted. Copyright 2022 Baker Hughes Company. English–DPI610E Instruction Manual | 191... -
Page 200: Starting A Test Procedure
DUT. Step 1 Maximum number of characters: 50. When the required fields have data in them select the Next screen icon to go to the next step. Copyright 2022 Baker Hughes Company. 192 | DPI610E Instruction Manual–English... - Page 201 23 to 36 in Hg). AMBIENT HUMIDITY – Enter the ambient humidity value where the test is being done. The default value is 70%. Any value entered must be between 0 and 100%. Copyright 2022 Baker Hughes Company. English–DPI610E Instruction Manual | 193...
- Page 202 Select the OK button to clear the message. This provides a checkpoint where the user may go back and check all the details of the test procedure are correct. Copyright 2022 Baker Hughes Company. 194 | DPI610E Instruction Manual–English...
- Page 203 DUT connected has an incompatible pressure range to that which is specified for the test. The next section describes the components of the Documenting Main screen. Copyright 2022 Baker Hughes Company. English–DPI610E Instruction Manual | 195...
-
Page 204: The Documenting Main Screen
Note: if the marker is not visible, check the error value as it most likely means the error is too large to be visible on the error and tolerance indicator. Copyright 2022 Baker Hughes Company. 196 | DPI610E Instruction Manual–English... - Page 205 The Documenting Main Screen Select the Add Test Point softkey to capture the datapoint. Copyright 2022 Baker Hughes Company. English–DPI610E Instruction Manual | 197...
-
Page 206: Documenting Settings
(pneumatic variants only) or sealed gauge (hydraulic variants only). To use PSEUDO RANGE, select the relevant pseudo-range option from the settings screen. The tick-box is ticked when enabled and unticked when disabled. Copyright 2022 Baker Hughes Company. 198 | DPI610E Instruction Manual–English... - Page 207 The tick-box is enabled when it has a tick mark and disabled when it does not have a tick mark. Note: These options are only available when electrical functions are used in the test procedure. Copyright 2022 Baker Hughes Company. English–DPI610E Instruction Manual | 199...
-
Page 208: Running A Test Procedure
Step 2 Go to the next step setpoint as shown in the title bar and repeat the previous step. Repeat until all steps have been completed and logged. Step 3 Copyright 2022 Baker Hughes Company. 200 | DPI610E Instruction Manual–English... - Page 209 Select the Save softkey to save the CALIBRATION REMARKS and continue. The next screen is the Procedure result summary screen. This screen gives details of the test procedure just completed. Step 6 Copyright 2022 Baker Hughes Company. English–DPI610E Instruction Manual | 201...
-
Page 210: Post Examination Of Test Procedure Results
(DUT) details is provided by using the Play softkey. Step 2 If you wish to exit, use the Back softkey to return to the Internal Files Procedure menu. Copyright 2022 Baker Hughes Company. 202 | DPI610E Instruction Manual–English... -
Page 211: Making An Adjustment On The Device Under Test (Dut)
Back softkey to return to the Procedure Summary screen. The test procedure may now be done again after adjustment. Select the Play softkey or icon to do this. Step 3 Copyright 2022 Baker Hughes Company. English–DPI610E Instruction Manual | 203... -
Page 212: How To Redo A Test Procedure
To redo the test procedure on the selected asset or Device Under Test (DUT). Select Step 3 the Play softkey from this menu screen. Copyright 2022 Baker Hughes Company. 204 | DPI610E Instruction Manual–English... -
Page 213: How To View Test Results
(i.e., As-Found or As-Left) from the procedure SUMMARY screen. The results can also be viewed by selecting the relevant Test Procedure file and required asset file. Step 1 Copyright 2022 Baker Hughes Company. English–DPI610E Instruction Manual | 205... - Page 214 Results can also be viewed when the test procedure is selected, the device under test is selected and then the relevant test result i.e., As-Found or As-Left. Step 3 Copyright 2022 Baker Hughes Company. 206 | DPI610E Instruction Manual–English...
-
Page 215: Deleting Asset Data
Step 1 This template transforms the raw calibration procedure result data to a formatted calibration certificate document. Download the certificate template either using the URL or QR code provided. Step 2 Copyright 2022 Baker Hughes Company. English–DPI610E Instruction Manual | 207... - Page 216 PDF file using the Export button on the template CSV and selecting a destination file path for it to be saved. Step 4 Copyright 2022 Baker Hughes Company. 208 | DPI610E Instruction Manual–English...
-
Page 217: Remote Documenting
(trial or Freemium version). To download test procedures from 4Sight2 on to the DPI610E, connect the instrument to the PC using the USB data cable supplied. Copyright 2022 Baker Hughes Company. English–DPI610E Instruction Manual | 209... -
Page 218: Setup And Connection
Step 3 The 4Sight2 software and the Druck CommServer must install correctly for the DPI610E to successfully connect to the 4Sight2 software. Start the 4Sight2 application on your system. Copyright 2022 Baker Hughes Company. 210 | DPI610E Instruction Manual–English... - Page 219 Select the desired procedure to proceed. Ensure the Port is set to USB. If the Test Equipment drop-down box is empty, select Get Connected Test Equipment. This will start the connection to the DPI610E. Copyright 2022 Baker Hughes Company. English–DPI610E Instruction Manual | 211...
- Page 220 Create the Test Equipment profile by filling the resulting popup screen and tap Create to complete. Select the Continue button to proceed. Copyright 2022 Baker Hughes Company. 212 | DPI610E Instruction Manual–English...
- Page 221 Note: tests that have special or Asian characters in the file name and notes cannot be uploaded to the DPI610E. Accented characters in the file name may be replaced by alternative characters without the accent symbols. Copyright 2022 Baker Hughes Company. English–DPI610E Instruction Manual | 213...
-
Page 222: Running 4Sight (Remote) Calibration Test Procedures
Tap on the row to open the procedure (or use the Enter button in the Navigation pad). There are two types of remote test procedures supported by the DPI610E: Linear or Proportional Test Procedure. Switch Test Procedure. Copyright 2022 Baker Hughes Company. 214 | DPI610E Instruction Manual–English... -
Page 223: Linear / Proportional Test Procedure
Section 11.2.2, “How to create an Internal Procedure,” on page 183. Step 2 Examine and change, if necessary, the environment details and user ID. Press the Next softkey to go to the next step. Step 3 Copyright 2022 Baker Hughes Company. English–DPI610E Instruction Manual | 215... - Page 224 Back softkey, or if the test details are acceptable, select the Proceed softkey to show the test screen. Step 5 Copyright 2022 Baker Hughes Company. 216 | DPI610E Instruction Manual–English...
- Page 225 This information is read-only and configured with 4Sight2. Select the Next softkey to show the Step 8 CALIBRATION REMARKS screen. Copyright 2022 Baker Hughes Company. English–DPI610E Instruction Manual | 217...
- Page 226 (DUT) details is provided by using the Play softkey. If you wish to exit, use the Back softkey to return to the Remote Procedure menu. Copyright 2022 Baker Hughes Company. 218 | DPI610E Instruction Manual–English...
-
Page 227: Switch Test Procedure
INITIAL STATE - the initial or normal state of the pressure switch in its normal operating pressure condition (deactuated state). This is either Normally Open or Normally Closed. Step 2 procedure continues on next page Copyright 2022 Baker Hughes Company. English–DPI610E Instruction Manual | 219... - Page 228 “How to create an Internal Procedure,” on page 183. Examine and change, if necessary, the environment details and USER ID. Press the Next softkey to go to the next step. Step 3 Copyright 2022 Baker Hughes Company. 220 | DPI610E Instruction Manual–English...
- Page 229 The choice available now is either to go back to the test information by using the Back softkey or the Proceed softkey to show the test screen. Step 5 Copyright 2022 Baker Hughes Company. English–DPI610E Instruction Manual | 221...
- Page 230 Add Test Point softkey. The title bar will show Procedure complete with the overall test result status. Select the Tick Step 7 softkey to confirm completion of the calibration. Copyright 2022 Baker Hughes Company. 222 | DPI610E Instruction Manual–English...
- Page 231 This step is optional: the CALIBRATION REMARKS field can be left blank. Maximum number of characters: 50. Select the Save softkey to save the Step 9 CALIBRATION REMARKS and continue Copyright 2022 Baker Hughes Company. English–DPI610E Instruction Manual | 223...
- Page 232 (DUT) details. To exit, select the Back softkey to return to the Remote Procedure menu. Copyright 2022 Baker Hughes Company. 224 | DPI610E Instruction Manual–English...
-
Page 233: Making An Adjustment On The Device Under Test (Dut)
Back softkey to return to the Procedure Summary screen. The test procedure may now be done again after adjustment. Select the Play softkey or icon to do this. Step 3 Copyright 2022 Baker Hughes Company. English–DPI610E Instruction Manual | 225... -
Page 234: How To View Test Results
For example, if the result of the test procedure is a Fail. Then it is possible to perform and verify an adjustment using the Analysis softkey. Step 1 Copyright 2022 Baker Hughes Company. 226 | DPI610E Instruction Manual–English... - Page 235 Error type • Test point # • Expected input of each test point • Actual input of each test point • Calculated error or deviation • Pass or Fail result status. Copyright 2022 Baker Hughes Company. English–DPI610E Instruction Manual | 227...
- Page 236 Use the Page Down softkey and Back softkey to move between screen pages. Step 5 Step 5 continues on next page Copyright 2022 Baker Hughes Company. 228 | DPI610E Instruction Manual–English...
- Page 237 How to View Test Results Step 5 Cont’d Copyright 2022 Baker Hughes Company. English–DPI610E Instruction Manual | 229...
-
Page 238: Deleting Remote Procedure Files
From the list of procedure files, tap on the desired file to delete and select the Single Delete softkey to delete this file. To delete all files present, select the Delete All softkey. Step 2 Copyright 2022 Baker Hughes Company. 230 | DPI610E Instruction Manual–English... -
Page 239: Uploading Test Results To 4Sight2
Test Equipment. Successful upload of results will be indicated with the Success text in the Operation Status area. To review results, tap on the toggle icon in the left-hand section of the screen to change from Send/Receive to Review mode. Copyright 2022 Baker Hughes Company. English–DPI610E Instruction Manual | 231... - Page 240 Select the calibration file to reveal details of the test and its results. For additional information on how to analyse or process test data within 4Sight2, please refer to the 4Sight2 User Manual 123M3138. Copyright 2022 Baker Hughes Company. 232 | DPI610E Instruction Manual–English...
-
Page 241: Hart
Setup (either tap the screen channel 2 icon or press the softkey.) Note: The HART function is only available on CH2. Step 1 Select FUNCTION from the CH2 Setup screen. Step 2 Copyright 2022 Baker Hughes Company. English–DPI610E Instruction Manual | 233... - Page 242 250-ohm resistor connected in series with the loop power supply and the HART device. Here the HART resistor should be disabled in the setup (checkbox unticked). Copyright 2022 Baker Hughes Company. 234 | DPI610E Instruction Manual–English...
-
Page 243: Starting The Hart Application (2Nd Method)
Section 12.1.1 on page 233 from step 2 forward to configure the HART function. Step 2 Select the Configuration softkey to establish communication between the instrument and the HART device. Copyright 2022 Baker Hughes Company. English–DPI610E Instruction Manual | 235... -
Page 244: Hart Device Electrical Connection
> DIRECTION > Measure > Off (see Step 4 page 234). HART when connected to an external current loop. This is when the menu selection is: HART > DIRECTION > Master (see Step 4 page 234). Copyright 2022 Baker Hughes Company. 236 | DPI610E Instruction Manual–English... -
Page 245: Hart Device Configuration
CH2 Setup screen. Note: If the HART application is already running, maximize the CH2 window to access the CH2 Setup softkey. Step 2 Procedure continues with Step 3 on next page Copyright 2022 Baker Hughes Company. English–DPI610E Instruction Manual | 237... - Page 246 Back softkey to return to the Device Poll screen. Note: A valid Poll Address value must be between 0 and 63). Step 3 procedure continues on next page Copyright 2022 Baker Hughes Company. 238 | DPI610E Instruction Manual–English...
- Page 247 Note: A valid Poll Address range must be between 0 and 63. Once the desired Poll method has been set up, select the Search softkey to begin. Step 3 procedure continues on next page Copyright 2022 Baker Hughes Company. English–DPI610E Instruction Manual | 239...
- Page 248 Select OK to connect to the selected device and return to the Calibrator screen or CANCEL to return to the Device Poll configuration screen. Step 4 continues on next page Copyright 2022 Baker Hughes Company. 240 | DPI610E Instruction Manual–English...
- Page 249 The HART device is now connected, and the Primary reading displays the Primary Variable reading from the HART device. The device Poll Address is displayed as well as its full-scale value. Step 4 Cont’d Copyright 2022 Baker Hughes Company. English–DPI610E Instruction Manual | 241...
-
Page 250: Hart Dashboard
(either tap the screen icon or press the softkey.) Step 2 A screen of HART options appears. These options are described in the rest of this chapter. Step 3 Copyright 2022 Baker Hughes Company. 242 | DPI610E Instruction Manual–English... -
Page 251: Unique Id
12.3.2 Device Information Figure 12-2: Device Information screen The HART: Device Information screen displays editable information about the device. The information options available are shown in the Figure 12-2 above. Copyright 2022 Baker Hughes Company. English–DPI610E Instruction Manual | 243... - Page 252 To edit any of the device information, select the option and enter the desired value or text. Select the Tick softkey to confirm and write this new change to the device • TAG. • POLL ADDRESS • DESCRIPTION • MESSAGE. • DATE. Copyright 2022 Baker Hughes Company. 244 | DPI610E Instruction Manual–English...
-
Page 253: Measure Variables
This screen shows the following variables (variables with a pen icon can be edited): • PV Units (Measurement units the primary variable is displayed) • PV LRV (Primary variable Lower Range Value) Copyright 2022 Baker Hughes Company. English–DPI610E Instruction Manual | 245... -
Page 254: Sensor Information
This screen shows the following variables: • Serial Number • Sensor Units • LRL (Lower Range Limit) • URL (Upper Range Limit) • Minimum Span. Note: This is a read-only screen. Copyright 2022 Baker Hughes Company. 246 | DPI610E Instruction Manual–English... -
Page 255: Hart Service Methods
DPI610E calibrator. To output a current: Select LOOP TEST from the HART: Service Methods screen. In the Loop Test screen, select the Edit softkey. Step 1 Copyright 2022 Baker Hughes Company. English–DPI610E Instruction Manual | 247... - Page 256 Repeat as required with all the desired current output values and check the measured current value. To exit the loop test, select the Back softkey. Step 4 Copyright 2022 Baker Hughes Company. 248 | DPI610E Instruction Manual–English...
-
Page 257: D/A Output Trim
Step 3 device is indicated by Make sure that the reading is stable. To perform the trim at this point, select the Trim softkey. Step 3 continues on next page Copyright 2022 Baker Hughes Company. English–DPI610E Instruction Manual | 249... - Page 258 This value can be edited if required by selecting the Edit softkey (Step 6). Step 5 If no change is required, select the Next softkey to proceed (Step 7). Procedure continues on next page Copyright 2022 Baker Hughes Company. 250 | DPI610E Instruction Manual–English...
- Page 259 D/A trim procedure. Step 8 The final step of the procedure is to verify that the D/A trim adjustment is sufficient. Procedure continues on next page Copyright 2022 Baker Hughes Company. English–DPI610E Instruction Manual | 251...
- Page 260 0 and 24 mA and check the measured values at each point. To exit the Verification screen, use the Step 10 Back softkey. Copyright 2022 Baker Hughes Company. 252 | DPI610E Instruction Manual–English...
-
Page 261: Pressure Zero Trim
Trim, or select Cancel to return to the previous step. Step 2 When the Zero Trim is complete, use the Back softkey to exit or repeat the Trim if required. Step 3 Copyright 2022 Baker Hughes Company. English–DPI610E Instruction Manual | 253... -
Page 262: Hart Error And Message Codes
Reserved Error Payload too Long No Buffer Available No Alarm/Event Buffers Available Priority too low Command Not Implemented 65-72 Multiple Meanings Error 96-111 Reserved Warning Table 12-1: HART Error Codes Copyright 2022 Baker Hughes Company. 254 | DPI610E Instruction Manual–English... -
Page 263: Instrument Calibration
Select ADVANCED at the bottom of the General Settings screen. Tap on ADVANCED or use the Navigation Pad to move to bottom row and press the Pad’s Enter key to select. Step 2 Copyright 2022 Baker Hughes Company. English–DPI610E Instruction Manual | 255... - Page 264 44, for instructions on how to use the other Advanced Menu options. Step 4 Select INSTRUMENT in the Calibration screen to show the Instrument Calibration menu. Step 5 Copyright 2022 Baker Hughes Company. 256 | DPI610E Instruction Manual–English...
-
Page 265: The Instrument Calibration Screen Options
Note: The information in this chapter is for calibrating Internal and External sensors. The configuration of external sensors, to enable the DPI610E to recognise and use external sensors, is explained in Chapter 8, “External Sensors” on page 133. Copyright 2022 Baker Hughes Company. English–DPI610E Instruction Manual | 257... -
Page 266: Perform Calibration
The editing of Current, Voltage and Millivolts options is similar in procedure. Therefore, on the following pages the procedure used for editing Current variables is the same as for Voltage and Millivolts. The Pressure and Barometer options are described separately. Copyright 2022 Baker Hughes Company. 258 | DPI610E Instruction Manual–English... - Page 267 Section 6.2.9 on page 80 for Current Measure electrical connection diagram). Select PERFORM CALIBRATION from the Instrument Calibration menu. Step 1 Select a FUNCTION option (e.g., Current). Step 2 Select a DIRECTION option if applicable (e.g., Measure). Step 3 Copyright 2022 Baker Hughes Company. English–DPI610E Instruction Manual | 259...
- Page 268 Step 6 Note: • All electrical measure functions require a 3-point calibration. • Current Source function requires a 2-point calibration. • Voltage source function requires a 1-point calibration. Copyright 2022 Baker Hughes Company. 260 | DPI610E Instruction Manual–English...
- Page 269 Step 8 Apply Steps 6 to 8, but this time begin by applying the nominal zero Current (approximately 0 mA) to the DPI610E. This completes Calibration point 2. Step 9 Copyright 2022 Baker Hughes Company. English–DPI610E Instruction Manual | 261...
- Page 270 RESTART softkey allows the calibration procedure to be restarted if a repeat calibration is required. BACK softkey exits the calibration procedure and returns the user to the Perform Calibration menu screen. Copyright 2022 Baker Hughes Company. 262 | DPI610E Instruction Manual–English...
-
Page 271: Calibration - Internal Pressure Sensor
This sensor calibration should only be done by approved service centres and personnel. Select PERFORM CALIBRATION from the Instrument Calibration menu. Step 1 Select Pressure function. Select to confirm. Step 2 Copyright 2022 Baker Hughes Company. English–DPI610E Instruction Manual | 263... - Page 272 Step 4 two valid calibration points. Enter REFERENCE VALUE 1 as displayed on the external calibrated equipment. Press the Tick softkey to confirm and return to the Calibration screen. Step 5 Copyright 2022 Baker Hughes Company. 264 | DPI610E Instruction Manual–English...
- Page 273 Select OK to apply the calibration adjustment. Otherwise, select the Cancel button to Step 8 return to the Calibration screen. Copyright 2022 Baker Hughes Company. English–DPI610E Instruction Manual | 265...
- Page 274 Step 10 Once verification is complete, select the Back icon to exit the calibration procedure or select the Restart softkey to repeat the calibration. Copyright 2022 Baker Hughes Company. 266 | DPI610E Instruction Manual–English...
-
Page 275: Calibration - Internal Barometer
Select PERFORM CALIBRATION from the Instrument Calibration menu. Step 1 Select Barometer function. Select to confirm. Step 2 Copyright 2022 Baker Hughes Company. English–DPI610E Instruction Manual | 267... - Page 276 Enter REFERENCE VALUE 1 as displayed on the external calibrated equipment. Press the Tick softkey to confirm and return to the Calibration screen. Step 4 Copyright 2022 Baker Hughes Company. 268 | DPI610E Instruction Manual–English...
- Page 277 Select OK to apply the calibration Step 7 adjustment. Otherwise, select the Cancel button to return to the Calibration screen Copyright 2022 Baker Hughes Company. English–DPI610E Instruction Manual | 269...
- Page 278 Step 9 Once verification is complete, select the Back button to exit the Calibration procedure or select the Restart softkey to repeat the calibration. Copyright 2022 Baker Hughes Company. 270 | DPI610E Instruction Manual–English...
-
Page 279: Internal Pressure Sensor Status
To access the Internal Pressure Sensor Status screen (Figure 13-2), select INTERNAL PRESSURE SENSOR STATUS from the Instrument Calibration screen as shown below: Select INTERNAL PRESSURE SENSOR STATUS from the Instrument Calibration screen. Step 1 Copyright 2022 Baker Hughes Company. English–DPI610E Instruction Manual | 271... -
Page 280: Set Calibration Date & Interval
To access the Instrument Calibration Date & Interval screen (Figure 13-3), select SET CALIBRATION DATE & INTERVAL from the Instrument Calibration menu as shown below: Select SET CALIBRATION DATE & INTERVAL from the Instrument Calibration menu. Step 1 Copyright 2022 Baker Hughes Company. 272 | DPI610E Instruction Manual–English... -
Page 281: Change Last Calibration Date
Repeat pressing of either left or right value Step 2 decreases or increases the selected current value. Select to confirm the changes. Copyright 2022 Baker Hughes Company. English–DPI610E Instruction Manual | 273... -
Page 282: Change Calibration Interval
13.4.2 Change Calibration Interval Select CALIBRATION INTERVAL from the Date & Interval Instrument Calibration screen. Step 1 Enter a calibration interval between 7 and 548 (days). Select to confirm. Step 2 Copyright 2022 Baker Hughes Company. 274 | DPI610E Instruction Manual–English... -
Page 283: Change Calibration Due Date
Repeat pressing of either left or right value Step 2 decreases or increases the selected current value. Select to confirm the changes. Copyright 2022 Baker Hughes Company. English–DPI610E Instruction Manual | 275... -
Page 284: Backup Calibration
Step 1 Select OK to confirm backup. Step 2 Check that the CALIBRATION BACKUP notification appears. If the notification does not appear, repeat steps 1 and 2. Step 3 Copyright 2022 Baker Hughes Company. 276 | DPI610E Instruction Manual–English... -
Page 285: Restore Calibration
Instrument Calibration screen. Step 1 Select OK to confirm restore. Step 2 Check that the CALIBRATION RESTORE notification appears. If the notification does not appear, repeat steps 1 and 2. Step 3 Copyright 2022 Baker Hughes Company. English–DPI610E Instruction Manual | 277... -
Page 286: Restore Factory Calibration
A valid factory calibration file will be automatically retrieved and displayed in the popup message. Select OK to confirm restore. Step 2 Check that the FACTORY CALIBRATION RESTORE notification appears. Step 3 Copyright 2022 Baker Hughes Company. 278 | DPI610E Instruction Manual–English... -
Page 287: External Pressure Sensor Calibration Menu
EXT SENSOR port on the DPI610E using the sensor cable supplied. This sensor calibration should only be done by approved service centres and personnel. Select PERFORM CALIBRATION from the External Sensor Calibration menu screen. Step 1 Copyright 2022 Baker Hughes Company. English–DPI610E Instruction Manual | 279... -
Page 288: View External Pressure Sensor Status
Figure 13-4: External Pressure Sensor Status To access the External Pressure Sensor Status screen: Select VIEW SENSOR STATUS from the External Sensor Calibration screen. Step 1 Copyright 2022 Baker Hughes Company. 280 | DPI610E Instruction Manual–English... -
Page 289: Set Calibration Date & Interval
Figure 13-5: External Sensor Calibration Date & Interval Screen To access the SET CALIBRATION DATE & INTERVAL screen: Select SET CALIBRATION DATE & INTERVAL screen from the External Sensor Calibration screen. Step 1 Copyright 2022 Baker Hughes Company. English–DPI610E Instruction Manual | 281... - Page 290 Step 2 Repeat pressing of either left or right value decreases or increases the selected value. Select to confirm the changes. Copyright 2022 Baker Hughes Company. 282 | DPI610E Instruction Manual–English...
- Page 291 13.8.3.2 Change CALIBRATION INTERVAL Select CALIBRATION INTERVAL from the External Pressure Sensor Status screen. Step 1 Enter a calibration interval between 7 and 548 (days). Select to confirm. Step 2 Copyright 2022 Baker Hughes Company. English–DPI610E Instruction Manual | 283...
- Page 292 Step 2 Repeat pressing of either left or right value decreases or increases the selected current value. Select to confirm the changes. Copyright 2022 Baker Hughes Company. 284 | DPI610E Instruction Manual–English...
-
Page 293: External Rtd Sensor Calibration Menu
Section 8 on page 133. To access the External Sensor Calibration (RTD) screen. Follow the steps below: Select PERFORM CALIBRATION from the External Sensor Calibration screen. Step 1 Copyright 2022 Baker Hughes Company. English–DPI610E Instruction Manual | 285... - Page 294 Note: RTD sensor calibration requires two valid calibration points. Enter REFERENCE VALUE 1 as displayed on the external calibrated equipment. Press the Tick softkey to confirm and return to the Calibration screen. Step 3 Copyright 2022 Baker Hughes Company. 286 | DPI610E Instruction Manual–English...
- Page 295 Step 6 Select OK to apply the calibration adjustment. Otherwise, select the Cancel button to return to the Calibration screen Copyright 2022 Baker Hughes Company. English–DPI610E Instruction Manual | 287...
- Page 296 Step 8 Once verification is complete, select the Back icon to exit the calibration procedure or select the Restart softkey to repeat the calibration. Copyright 2022 Baker Hughes Company. 288 | DPI610E Instruction Manual–English...
-
Page 297: Set Calibration Date & Interval
Figure 13-6: External Sensor Calibration (Date & Interval) Status Screen To access the External RTD Calibration Date & Interval screen: Select SET CALIBRATION DATE & INTERVAL from the External Sensor Calibration screen. Step 1 Copyright 2022 Baker Hughes Company. English–DPI610E Instruction Manual | 289... - Page 298 Repeat pressing of either left or right value Step 2 decreases or increases the selected current value. Select to confirm the changes. Copyright 2022 Baker Hughes Company. 290 | DPI610E Instruction Manual–English...
- Page 299 13.9.2.2 Change Calibration Interval Select CALIBRATION INTERVAL from the External Sensor Calibration Status screen. Step 1 Enter a calibration interval between 7 and 548 (days). Select to confirm. Step 2 Copyright 2022 Baker Hughes Company. English–DPI610E Instruction Manual | 291...
- Page 300 Repeat pressing of either left or right value Step 2 decreases or increases the selected current value. Select to confirm the changes. Copyright 2022 Baker Hughes Company. 292 | DPI610E Instruction Manual–English...
-
Page 301: Files System
14.1 How to access the Files system menu Select the Files softkey from the Dashboard. Step 1 Select the required folder from the Files menu. In this example, the Calibration folder is selected. Step 2 Copyright 2022 Baker Hughes Company. English–DPI610E Instruction Manual | 293... -
Page 302: The Files System Screen Options
Backup Calibration – if the Backup calibration feature is used (See Section 13.5 on page 276), a copy of the Current Calibration data is saved as a Backup data file. Figure 14-1: Calibration Files screen Copyright 2022 Baker Hughes Company. 294 | DPI610E Instruction Manual–English... -
Page 303: Data Log
Single Delete softkey to delete individual files or the Delete All softkey to delete all files in the sub-folder: Figure 14-3: Local Procedures files Copyright 2022 Baker Hughes Company. English–DPI610E Instruction Manual | 295... -
Page 304: Leak Test
Unwanted results files within the folder can be deleted the use of either the Single Delete softkey (to delete individual files) or the Delete All softkey (to delete all files in the sub-folder). Figure 14-5: Switch Test files screen Copyright 2022 Baker Hughes Company. 296 | DPI610E Instruction Manual–English... -
Page 305: Relief Valve
“Storage” if not already set. This allows the DPI610E device to appear as a mass storage drive labeled “DPI610E” or “DPI610E-IS” in the Windows File Explorer on the PC. Copyright 2022 Baker Hughes Company. English–DPI610E Instruction Manual | 297... -
Page 306: Favorites, Error Log And Event Log
Refer to Section 15.8 on page 305 for information about how to use the Error Log function. Refer to Section 15.9 on page 306 for information about how to use the Event Log function. Copyright 2022 Baker Hughes Company. 298 | DPI610E Instruction Manual–English... -
Page 307: Status Menu
Dashboard. Step 1 A screen of Status menu options appears. To select the row that has the required option, tap on the row or use the Navigation pad. Step 2 Copyright 2022 Baker Hughes Company. English–DPI610E Instruction Manual | 299... -
Page 308: Software Build
URL and scanable QR code. This code takes the user to where the software programming tool can be downloaded, with instructions on how to use it to do software upgrades. Step 2 Copyright 2022 Baker Hughes Company. 300 | DPI610E Instruction Manual–English... -
Page 309: Calibration
RTD function (see Section 8.2.4 on page 142) must be configured in the Calibrator menu. View the instrument (or sensor) details. Select the Back softkey to return to the Status - Calibration menu Step 3 Copyright 2022 Baker Hughes Company. English–DPI610E Instruction Manual | 301... -
Page 310: Battery
BATTERY row, to show the Status - Battery screen. Step 1 The Status - Battery screen shows the current instrument battery level and if the battery is either discharging or being charged. Step 2 Copyright 2022 Baker Hughes Company. 302 | DPI610E Instruction Manual–English... -
Page 311: Memory
MEMORY row, to show the Status - Memory screen. Step 1 The Status - Memory screen shows the current free and used space in the instrument’s internal memory. Step 2 Copyright 2022 Baker Hughes Company. English–DPI610E Instruction Manual | 303... -
Page 312: Sensor
Chapter 8 on page 133 for information. View the sensor details. Select the Back softkey to return to the Status - Sensor screen. Step 3 Copyright 2022 Baker Hughes Company. 304 | DPI610E Instruction Manual–English... -
Page 313: Error Log
“Delete all files?”. Select OK or Cancel. Step 2 Press the down icon to show one more page of available files. Press the Back icon to go back to the Status screen. Copyright 2022 Baker Hughes Company. English–DPI610E Instruction Manual | 305... -
Page 314: Event Log
“Delete all files?”. Select OK or Cancel. Step 2 Press the down icon to show one more page of available files. Press the Back icon to go back to the Status screen. Copyright 2022 Baker Hughes Company. 306 | DPI610E Instruction Manual–English... -
Page 315: Favorites Menu
TASK. See Section 16.1.1 on page 308. CREATE NEW to save a new configuration. See Section 16.1.2 on Step 3 page 310. Tap on a row to select the method. Copyright 2022 Baker Hughes Company. English–DPI610E Instruction Manual | 307... -
Page 316: Save Current Calibrator Task
Step 1 in Section 16.1 on page 307). Select the Add New softkey in the Favorites screen. Step 2 Select the SAVE CURRENT CALIBRATOR TASK option in the Add New Favorite task screen. Step 3 Copyright 2022 Baker Hughes Company. 308 | DPI610E Instruction Manual–English... - Page 317 To save the configuration select the Tick softkey. (Maximum characters: 20). Step 4 The new configuration file appears in the list in the Favorites screen. Copyright 2022 Baker Hughes Company. English–DPI610E Instruction Manual | 309...
-
Page 318: Save New Configuration As Favorite
Select any of the setup parameters to change. When the setup is complete, select the Next softkey to move to the Favorites CH2 Setup screen. Step 3 Copyright 2022 Baker Hughes Company. 310 | DPI610E Instruction Manual–English... - Page 319 Select the Tick softkey to save the configuration. (Maximum characters: 20). Step 5 The new configuration file appears in the list in the Favorites screen. Step 6 Copyright 2022 Baker Hughes Company. English–DPI610E Instruction Manual | 311...
-
Page 320: To Load A Favorites Configuration
Saved Favorites configuration files can be viewed in the File System menu by selecting the File System softkey from the Dashboard and choosing the Favorites folder. Refer to Section 14.8 on page 297 for more information. Copyright 2022 Baker Hughes Company. 312 | DPI610E Instruction Manual–English... -
Page 321: General Specification
Hydraulic version: Instrument leak rate is less than 1.5bar/minute ??(from pressure). 17.2 Open Source Software Licenses Two files are available with the software installation: 1568-notices-report-08_08_2022_17_04.txt covers DK0491 DPI610E Bootloader. 1563-notices-report-08_08_2022_16_01.txt covers DK0492 DPI610E Main Application. Copyright 2022 Baker Hughes Company. English–DPI610E Instruction Manual | 313... -
Page 322: Manufacturer
Manufacturer 18. Manufacturer 18.1 Contact details Druck Limited 2 Fir Tree Lane Groby Leicester LE6 0FH United Kingdom Tel: +44 (0)116 231 7100 www.Druck.com Copyright 2022 Baker Hughes Company. 314 | DPI610E Instruction Manual–English... - Page 323 This transmitter must not be co-located or operated in conjunction with any other antenna or transmitter. Copyright 2022 Baker Hughes Company. English–DPI610E Instruction Manual | i...
- Page 324 RF peut être augmentée si l'appareil peut être conservé aussi loin que possible du corps de l'utilisateur ou que le dispositif est réglé sur la puissance de sortie la plus faible si une telle fonction est disponible. Copyright 2022 Baker Hughes Company. ii | DPI610E Instruction Manual–English...
- Page 325 Services and Support Locations Copyright 2022 Baker Hughes Company. This material contains one or more registered trademarks of Baker Hughes Company and its subsidiaries in one or more countries. All third-party product and company names are trademarks of their respective holders.
Need help?
Do you have a question about the Druck DPI610E Series and is the answer not in the manual?
Questions and answers