Table of Contents
Advertisement
Quick Links
Advertisement
Table of Contents

Related Manuals for Baker Hughes Druck DPI612


Summary of Contents for Baker Hughes Druck DPI612
- Page 1 DPI612 Portable Pressure Calibrator Instruction Manual Druck.com...
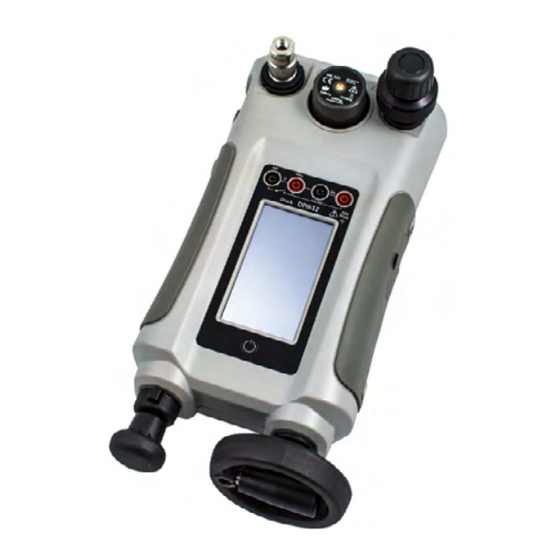
- Page 3 Introduction The Druck DPI612 Flex Series are fully self-contained pressure test and calibration systems. They have interchangeable pressure modules for flexible ranging, generate pneumatic or hydraulic pressures, measure process signals and supply loop power. They provide all the convenience of the Druck DPI610/615 series with significantly improved generation capabilities, higher accuracy and simplified touch screen operation.
- Page 4 If you need more information on the collection, reuse, and recycling systems, please contact your local or regional waste administration. Please visit the link below for take-back instructions and more information about this initiative. https://druck.com/weee Copyright 2015 Baker Hughes Company. ii | DPI612 Instruction Manual–English...
- Page 5 MSDS Material Safety Data Sheet National Pipe Thread Part Number Pounds per square inch Relative Humidity RS-232 Serial communications standard Universal Serial Bus Volts °C Degrees Celsius °F Degrees Fahrenheit Copyright 2015 Baker Hughes Company. English–DPI612 Instruction Manual | iii...
- Page 6 Copyright 2015 Baker Hughes Company. iv | DPI612 Instruction Manual–English...
-
Page 7: Table Of Contents
Power up from Standby Mode 1.13 Navigation 1.13.1 Set Date, Time and Language 1.13.2 Themes 1.13.3 Help 1.14 Software and Firmware Upgrades 1.14.1 Viewing Software Revision 1.14.2 Upgrading the Software Copyright 2015 Baker Hughes Company. English–DPI612 Instruction Manual | v... - Page 8 Set up a Leak Test 2.6.2 Set the Pressure Module to Zero 2.6.3 Error Indications Measure Pressure: IDOS Option 2.7.1 IDOS Option Assembly Instructions 2.7.2 IDOS Function Procedures Data Logging Set-up Operation Copyright 2015 Baker Hughes Company. vi | DPI612 Instruction Manual–English...
- Page 9 6.2.3 Operation 6.2.4 Cleaning Leak Test Procedure DPI612 pFlex Leak Test Procedure 7.1.1 Pressure 7.1.2 Vacuum DPI612 pFlexPro Leak Test Procedure 7.2.1 Pressure 7.2.2 Vacuum DPI612 hFlexPro Leak Test Procedure Copyright 2015 Baker Hughes Company. English–DPI612 Instruction Manual | vii...
- Page 10 General Specification Troubleshooting DPI612 pFlex Pressure Generation DPI612 pFlexPro Pressure Generation DPI612 hFlexPro Pressure Generation General Copyright 2015 Baker Hughes Company. viii | DPI612 Instruction Manual–English...
-
Page 11: Introduction
Refer to DPI612 datasheet for full list of accessories supplied with each DPI612 model. 1.2 Observance of the User Manual This manual contains safety and battery installation information for the Druck DPI612. It is the responsibility of the customer to make sure that all personnel operating and maintaining the equipment are correctly trained and qualified. -
Page 12: Warnings
To make sure the display shows the correct data, disconnect the test leads before power is set to ON or changing to another measure or source function. Keep the leads free from all contaminants. Copyright 2015 Baker Hughes Company. 2 | DPI612 Instruction Manual–English... -
Page 13: Rechargeable Battery Warnings
Otherwise, the problematic battery pack can develop electrolyte leakage, overheating, smoke emission, bursting and/or ignition. Remove the battery from the equipment when not in use. Copyright 2015 Baker Hughes Company. English–DPI612 Instruction Manual | 3... - Page 14 For further information contact the nearest distributor or representative. Retain the original product literature for future reference. Copyright 2015 Baker Hughes Company. 4 | DPI612 Instruction Manual–English...
-
Page 15: Pressure Warnings
Remove the battery cover by loosening the captive battery cover fixing screw and lifting the cover upwards. If fitted, remove white battery holder by pulling straight up to reveal charging cable. Remove foam block from battery cover (a). Copyright 2015 Baker Hughes Company. English–DPI612 Instruction Manual | 5... -
Page 16: Install Dry Cell Batteries
Disconnect the charging cable from the back of the cradle and keep it loose in the small compartment then fit battery holder. Fit the foam block (a) to the battery cover. Place the batteries (c) in the battery compartment with the correct polarity. Copyright 2015 Baker Hughes Company. 6 | DPI612 Instruction Manual–English... - Page 17 Replace the battery cover by pressing the lugs (b) inside the slots (d) and bring down the cover, securing by tightening the fixing screw. (See Figure 1-2). Figure 1-2: Fit Dry Cell Batteries Copyright 2015 Baker Hughes Company. English–DPI612 Instruction Manual | 7...
-
Page 18: Parts
Chapter 1. Introduction 1.10 Parts 1.10.1 Overview DPI612-PFX DPI612-PFP DPI612-HFP Copyright 2015 Baker Hughes Company. 8 | DPI612 Instruction Manual–English... - Page 19 Isolated CH2 connectors for: Voltage (V); 24 V loop power supply (24 V). Liquid Crystal Display (LCD): Color display with touch-screen. To make a selection, lightly tap on the applicable display area. Copyright 2015 Baker Hughes Company. English–DPI612 Instruction Manual | 9...
-
Page 20: Test Port
Figure 1-5: Pressure Release Valve This is a needle point valve that allows the release of pressure or vacuum, or seal the system. Turn clockwise to close, counter-clockwise to open. Copyright 2015 Baker Hughes Company. 10 | DPI612 Instruction Manual–English... -
Page 21: Selector (Dpi612 Pflex & Dpi612 Pflexpro)
Section 1.10.3) and use the pump to set the necessary pressure or vacuum. Fine adjustments of pressure can be made using the volume adjuster (See Section 1.10.6.1). 1.10.5.2 DPI612 pFlexPro Pump Figure 1-8: DPI612 pFlexPro Pump Copyright 2015 Baker Hughes Company. English–DPI612 Instruction Manual | 11... -
Page 22: Volume Adjuster
For maximum adjustment, turn it fully clockwise or counter-clockwise. Once the necessary pressure or vacuum has been set with the pump (See Section 1.10.5.2), use the volume adjuster to make the fine adjustments. Copyright 2015 Baker Hughes Company. 12 | DPI612 Instruction Manual–English... -
Page 23: Refill Valve
1.10.7.2 DPI612 hFlexPro Refill Valve Figure 1-13: DPI612 hFlexPro Refill Valve When pressurizing large volumes this can be used to refill the pump without releasing pressure from the DUT (see Section 2.4.7). Copyright 2015 Baker Hughes Company. English–DPI612 Instruction Manual | 13... -
Page 24: Priming Pump (Dpi612 Hflexpro)
1.11.1 Carry Case (P/N IO612-CASE-3) A tailored fabric carry case with carrying strap. 1.11.2 Rechargeable Battery Pack (P/N CC3800GE) Use in place of AA cells. The battery pack is charged within the instrument. Copyright 2015 Baker Hughes Company. 14 | DPI612 Instruction Manual–English... -
Page 25: Rechargeable Battery And Adaptor Kit (P/N Io61X-Bat-Kit)
It allows connection of an IDOS universal pressure module to the DPI612. USB Cable (P/N IO620-USB-PC) is also required to connect the converter to the DPI612 USB port. 1.11.7 USB to RS-232 Cable (P/N IO620-USB-RS232) It connects the DPI612 to an RS-232 interface. Copyright 2015 Baker Hughes Company. English–DPI612 Instruction Manual | 15... -
Page 26: Dirt Moisture Trap 20 Bar (P/N Io620-Idt621)
The trap connects directly to the pressure port and replicates the quick fit connection for compatibility with standard adaptors, adaptor kits and hoses. User instructions are in Section 6.2. Copyright 2015 Baker Hughes Company. 16 | DPI612 Instruction Manual–English... -
Page 27: Pneumatic Hose (P/N Io620-Hose-P1 / Io620-Hose-P2)
Part Number Description IOHOSE-NP1 1 m / 3.2 ft Pneumatic Hose - 20 bar (300 psi) IOHOSE-NP2 2 m / 6.4 ft Pneumatic Hose - 20 bar (300 psi) Copyright 2015 Baker Hughes Company. English–DPI612 Instruction Manual | 17... -
Page 28: Pressure Adaptor Set
Select the best pressure range for the job from an extensive list of high accuracy pressure ranges. Ranges available from 25 mbar to 1000 bar (10 inH O to 15,000 psi). Copyright 2015 Baker Hughes Company. 18 | DPI612 Instruction Manual–English... -
Page 29: Pressure Relief Valve (Prv)
Select GO TO STANDBY from the POWERDOWN OPTIONS window displayed. 1.12.3 Power up from Standby Mode When powered up from the standby mode, instrument always opens the last screen shown before going to standby mode. Copyright 2015 Baker Hughes Company. English–DPI612 Instruction Manual | 19... -
Page 30: Navigation
SETTINGS >> THEME 1.13.3 Help Select the HELP icon on the Dashboard to access the manual. All the information required to operate the Druck DPI612 is in the HELP section of the Dashboard which is accessed by selecting: DASHBOARD >>... -
Page 31: Upgrading The Software
If the unit requires calibration or is unserviceable, return it to the nearest Druck Service Centre listed at: https://druck.com/service. Contact the Service Department to obtain a Return Goods/Material Authorization (RGA or RMA). Provide the following information for a RGA or RMA: Copyright 2015 Baker Hughes Company. English–DPI612 Instruction Manual | 21... -
Page 32: Safety Precautions
Druck customer service department: https://druck.com/service 1.17 Environment The following conditions apply for both shipping and storage: • Temperature Range -20°C to +70°C (-40°F to +158°F) • Altitude up to 15,000 feet (4,570 meters). Copyright 2015 Baker Hughes Company. 22 | DPI612 Instruction Manual–English... -
Page 33: Operations
The test port uses “Quick fit” pressure adaptors; See Section 1.11.13. They are easy to remove, change and install. a. NPT b. (G)/BSPP c. (G)/BSPP Figure 2-2: Attach / Remove Pressure Connections Copyright 2015 Baker Hughes Company. English–DPI612 Instruction Manual | 23... -
Page 34: Attach A Pressure Relief Valve
Note: Before storing the PRV, make sure that it is clean and dry. Choose a clean, dry PRV with the correct pressure value for the DUT and tighten it into position (hand-tight only). Copyright 2015 Baker Hughes Company. 24 | DPI612 Instruction Manual–English... -
Page 35: Setting A Pressure Relief Valve
Before you start: • Read and understand the “Safety” section. • Make sure that there is no damage to the instrument and there are no missing items. Copyright 2015 Baker Hughes Company. English–DPI612 Instruction Manual | 25... -
Page 36: Vacuum Or Pressure Operation
Seal the system. Use the pump to set the maximum pressure or set the pressure you want to adjust. Adjust the pressure. Clockwise to decrease; counter-clockwise to increase. Copyright 2015 Baker Hughes Company. 26 | DPI612 Instruction Manual–English... -
Page 37: Release The Pressure
Make sure that there is no damage to the instrument and there are no missing items. Note: Use only original parts supplied by the manufacturer. Figure 2-5: DPI612 pFlexPro Pressure Calibrator Copyright 2015 Baker Hughes Company. English–DPI612 Instruction Manual | 27... -
Page 38: Vacuum Or Pressure Operation
Refill the pressure mechanism with the pump (≈15 cycles). 10. Wind the volume adjuster clockwise until the pressure starts to increase. 11. Continue to do steps 7 to 10 until you get the necessary pressure. Copyright 2015 Baker Hughes Company. 28 | DPI612 Instruction Manual–English... -
Page 39: Release Pressure
Figure 2-6: DPI612 hFlexPro Pressure Calibrator 2.4.2 First Use When using the DPI612 hFlexPro Pressure Calibrator for the first time, fill the reservoir with the correct hydraulic fluid. Fill and prime the pressure station. Copyright 2015 Baker Hughes Company. English–DPI612 Instruction Manual | 29... -
Page 40: Filling And Priming The Pump
12. Fit the DUT to the Test port use the existing adaptor or the applicable ‘Quick Fit’ adaptor and applicable seals. 13. Operate the Priming pump and prime the system to a maximum pressure of 10 bar (145 psi). Copyright 2015 Baker Hughes Company. 30 | DPI612 Instruction Manual–English... -
Page 41: Topping Up The Hydraulic Fluid
Operate Volume Adjuster & Refill Valve to achieve required pressure. (See Section 2.4.6) Note: If priming a long hose keep the open end of hose vertical to reduce trapping air. Copyright 2015 Baker Hughes Company. English–DPI612 Instruction Manual | 31... -
Page 42: Applying Hydraulic Pressure
Note: If it is safe and there is no risk of contamination, you can leave the hydraulic fluid inside the device. 2.4.8.1 Preparation To drain the device, we recommend these items: Copyright 2015 Baker Hughes Company. 32 | DPI612 Instruction Manual–English... -
Page 43: Drain All The Hydraulic Fluid
To flush out fluids that contain unwanted material, refill the system and repeat steps 3 and 4. Note: To prevent contamination use only one type of hydraulic fluid in the instrument. Copyright 2015 Baker Hughes Company. English–DPI612 Instruction Manual | 33... -
Page 44: Calibrator Operations
Note: Saved Function is what is currently active in the calibrator window. It is NOT a selected Task - refer to COPY TASK to copy selected Task to the Favourites. 2.5.1.2 Calibrator Select CALIBRATOR from the TASK MENU. Copyright 2015 Baker Hughes Company. 34 | DPI612 Instruction Manual–English... - Page 45 Functions can be copied to FAVOURITES by selecting as shown in Figure 2-9 and selecting Copy Task. If the required task is not available as a Default, a new task should be created using CUSTOM TASK. Copyright 2015 Baker Hughes Company. English–DPI612 Instruction Manual | 35...
- Page 46 2.5.1.4 Custom Task Select the CUSTOM TASK option from TASK MENU. This will allow you to set up the Electrical, Pressure and USB (IDOS) channels. Figure 2-11: Task Settings Menu Copyright 2015 Baker Hughes Company. 36 | DPI612 Instruction Manual–English...
-
Page 47: Set The Function Utility Options
For each function only one utility may be active. Not all source and measure functions have associated utilities. For all options, the button resets the additional readings. 2.5.2.1 Max/Min/Avg Max/Min/Avg utility is only available with measure functions. Copyright 2015 Baker Hughes Company. English–DPI612 Instruction Manual | 37... - Page 48 This utility can be used with Ramp Automation, where the rising signal causes the switch to change state and the falling signal causes the switch to resume its’ original state. Figure 2-14: Switch Test Example Copyright 2015 Baker Hughes Company. 38 | DPI612 Instruction Manual–English...
-
Page 49: Measurement Display Options
Rising Falling Maximum Maximum Minimum Minimum Figure 2-16: Relief Valve Utility 2.5.3 Measurement Display Options There are two display views in the CALIBRATOR screen when multiple channels are in use: Copyright 2015 Baker Hughes Company. English–DPI612 Instruction Manual | 39... -
Page 50: Example Procedures
2.5.4 Example Procedures 2.5.4.1 Example Procedure: Measure or Source Current with Internal Loop Power Figure 2-19 shows CH1 set-up to measure or source a current with internal loop power. Copyright 2015 Baker Hughes Company. 40 | DPI612 Instruction Manual–English... - Page 51 Figure 2-20 shows CH1 set-up to measure a DC voltage (± 30 V) or DC mV (± 2000 mV). mA 24V DPI612 Figure 2-20: Measure DC Volts or DC mV on CH1. Set the applicable software options. Complete the electrical connections and continue with the measure operation. Copyright 2015 Baker Hughes Company. English–DPI612 Instruction Manual | 41...
- Page 52 Complete the electrical connections and continue with the measure or source operation. Source only (Automation): Set the applicable output value. 2.5.4.4 Example Procedure: Switch Test Switch Test is only valid when a Pressure Function is selected. Copyright 2015 Baker Hughes Company. 42 | DPI612 Instruction Manual–English...
- Page 53 2.5.4.5 Example Procedure: Measure Voltage with Internal Voltage Source Figure 2-24 shows CH1 set-up to measure a DC voltage. (± 30 V) or DC mV (± 2000 mV) with Internal Voltage Source (e.g. for use with Resistive bridge). Copyright 2015 Baker Hughes Company. English–DPI612 Instruction Manual | 43...
-
Page 54: Pressure Calibration
Pressure Functions can also be selected through the CUSTOM TASK function. See Section 2.5.1.4 for details. If required, change the Units or the function. If necessary, set a Utility for the function: • Max/Min/Avg • Switch Test • Relief Valve Copyright 2015 Baker Hughes Company. 44 | DPI612 Instruction Manual–English... -
Page 55: Set Up A Leak Test
This utility provides a test to calculate the leak of a system. Figure 2-26: Leak Test Example To configure leak test: Set the Utility to Leak Test. Select: SETTINGS >> LEAK TEST Copyright 2015 Baker Hughes Company. English–DPI612 Instruction Manual | 45... -
Page 56: Set The Pressure Module To Zero
Optional item. An IDOS Universal Pressure Module (UPM) uses Intelligent Digital Output Sensor (IDOS) technology to measure the applied pressure and supply the data to an IDOS instrument. Before using an IDOS module, refer to instruction manual K0378. Copyright 2015 Baker Hughes Company. 46 | DPI612 Instruction Manual–English... -
Page 57: Idos Option Assembly Instructions
Measure Pressure: IDOS Option To attach an IDOS module to the Druck DPI612 use an IO620-IDOS-USB adaptor. Figure 2-27: IDOS Module 2.7.1 IDOS Option Assembly Instructions Attach one end of the adaptor IO620-IDOS-USB to the IDOS module. Push the Type A end of USB Cable into the USB socket on the instrument and the Type B end into the adaptor (IO620-IDOS-USB). - Page 58 Chapter 2. Operations Copyright 2015 Baker Hughes Company. 48 | DPI612 Instruction Manual–English...
-
Page 59: Data Logging
The data is stored in the internal memory or on a USB Flash Drive connected to the Unit until the Data Logging is stopped. 3.1 Set-up Before starting, set all channels to the correct functions. (See Chapter 2). To access the Data logging function do the following: Copyright 2015 Baker Hughes Company. English–DPI612 Instruction Manual | 49... -
Page 60: Operation
In Key press mode, a data point is taken every time the user taps the log button To stop Data Logging select The data logging indicator flashes to indicate whenever a reading is logged. Copyright 2015 Baker Hughes Company. 50 | DPI612 Instruction Manual–English... -
Page 61: File Review
Select file and tap tick bottom right on the screen to erase. • CLEAR INTERNAL Clears all internal files. 3.4.3 Memory Status The MEMORY STATUS button will show the amount of available memory in the areas that follow: • Internal Copyright 2015 Baker Hughes Company. English–DPI612 Instruction Manual | 51... -
Page 62: Data Format
1, 10 Aug 2021, 10:00:15,8.5711,24V,4,0,False 2, 10 Aug 2021, 10:00:30,8.4080,24V,4,0,False 3, 10 Aug 2021, 10:00:45,8.2475,24V,4,0,False 4, 10 Aug 2021, 10:01:00,8.0733,24V,4,0,False 5, 10 Aug 2021, 10:01:15,7.9288,24V,4,0,False Figure 3-3: Example ‘csv’ Data Log File Copyright 2015 Baker Hughes Company. 52 | DPI612 Instruction Manual–English... -
Page 63: Documentation
Analysis 4. Documentation This chapter describes the Documenting functions available with the Druck DPI612 calibrator as follows: • ANALYSIS • RUN PROCEDURE 4.1 Analysis The Analysis function takes readings from two or more DPI612 channels to calibrate the transfer characteristic of the device being tested. One channel is the Reference channel and is used as follows: •... -
Page 64: Define The Reference Channel
Tap the channel button that is to be used as the Reference channel for the analysis. Figure 4-1: Select Reference Channel Set the channel type to Reference. All other channel settings for that channel are canceled. All other active channels are set to Input. Copyright 2015 Baker Hughes Company. 54 | DPI612 Instruction Manual–English... -
Page 65: Define Each Input Channel
The test limits for the deviation from the transfer characteristic. 4.3 Analysis Function Set Input channel parameters (See Section 4.2), and return to CHANNEL SETUP screen. Select the Start button The Analysis window displays the following: Copyright 2015 Baker Hughes Company. English–DPI612 Instruction Manual | 55... -
Page 66: Run Procedure
Use the Download button in calibrator manager to Download the file to the Druck DPI612 calibrator. A communications symbol will be displayed at the bottom of the screen. - Page 67 When all the readings are complete, tap on the Exit Button . Look at the results on the display (As found/As Left). To complete the process, use the calibrator manager to Upload the file back into the 4Sight2™ database. Copyright 2015 Baker Hughes Company. English–DPI612 Instruction Manual | 57...
- Page 68 Chapter 4. Documentation Copyright 2015 Baker Hughes Company. 58 | DPI612 Instruction Manual–English...
-
Page 69: Calibration
Use only original parts supplied by the manufacturer. To do an accurate calibration, use the following: • Calibration equipment specified in Table 5-1. • Stable temperature environment: 21 ± 1°C (70 ± 2°F). Copyright 2015 Baker Hughes Company. English–DPI612 Instruction Manual | 59... -
Page 70: Procedures: Current (Measure)
Check the calibration is correct. Select the applicable Current (measure) function. Apply the values that follow: mA: -55, -25, -20, -10, -5, 0 (open circuit) mA: 0, 5, 10, 20, 25, 55 Copyright 2015 Baker Hughes Company. 60 | DPI612 Instruction Manual–English... -
Page 71: Procedures: Current (Source)
5.7 Procedures: DC mV/Volts (Measure) Do the procedure as follows: Connect the applicable calibration equipment (See Table 5-1). Let the equipment get to a stable temperature (minimum: 5 minutes since the last power on). Copyright 2015 Baker Hughes Company. English–DPI612 Instruction Manual | 61... -
Page 72: Procedures: Dc Volts (Source)
5.8 Procedures: DC Volts (Source) Do the procedure as follows: Connect the applicable calibration equipment (See Table 5-1). Let the equipment get to a stable temperature (minimum: 5 minutes since the last power on). Copyright 2015 Baker Hughes Company. 62 | DPI612 Instruction Manual–English... -
Page 73: Procedures: Pressure Indicator
Check the error is within limits. From the datasheet use the values in the Accuracy column. 5.10 Procedures: IDOS UPM (Refer: User Manual IDOS UPM). When the calibration is complete, the instrument automatically sets a new calibration date in the UPM. Copyright 2015 Baker Hughes Company. English–DPI612 Instruction Manual | 63... - Page 74 Chapter 5. Calibration Copyright 2015 Baker Hughes Company. 64 | DPI612 Instruction Manual–English...
-
Page 75: Accessory Instructions
Fit the Dirt Moisture Trap to the Test Station of the DPI612 pFlex. If moisture or particles are seen within the transparent chamber during use, dismantle and clean the trap. (See Section 6.1.4). Copyright 2015 Baker Hughes Company. English–DPI612 Instruction Manual | 65... -
Page 76: Cleaning
It should be removed from the calibrator during transit. It should be inspected internally for dirt or moisture before and after use. Check for moisture or dirt particles within the aluminum chamber before and after use. Copyright 2015 Baker Hughes Company. 66 | DPI612 Instruction Manual–English... -
Page 77: Cleaning
Wipe clean with a soft cloth or tissue paper. Re-assemble by screwing the top section (hand-tight) onto the base and chamber ensuring that the two o-ring seals are correctly located. Copyright 2015 Baker Hughes Company. English–DPI612 Instruction Manual | 67... - Page 78 Chapter 6. Accessory Instructions Copyright 2015 Baker Hughes Company. 68 | DPI612 Instruction Manual–English...
-
Page 79: Leak Test Procedure
“Wait” to 1 minute, set leak test “Test” to 1 minute. Blank off test station/pressure port with Blanking Plug (P/N 111M7272-1). Set Volume Adjuster/Fine Control to fully out (counter-clockwise). Close Refill Valve. Firmly close Release Valve. Copyright 2015 Baker Hughes Company. English–DPI612 Instruction Manual | 69... -
Page 80: Vacuum
14. Re-adjust pressure to 1000 bar. 15. Start the Leak Test noting the Leak Rate after test complete. 16. The Leak Rate over 1 minute should not exceed 1.0 bar/min. Copyright 2015 Baker Hughes Company. 70 | DPI612 Instruction Manual–English... - Page 81 8. General Specification For a full specification of the Druck DPI612 calibrator and its related accessories refer to the relevant product datasheet. The DPI612 is suitable for indoor use with the following environmental requirements. It is permitted to use the DPI612 outdoors as a portable instrument if the environmental requirements are met.
- Page 82 Chapter 8. General Specification Copyright 2015 Baker Hughes Company. 72 | DPI612 Instruction Manual–English...
- Page 83 PRV (if fitted) operating at lower Check PRV range (if fitted) and pressure. pressure than required. adjust PRV if range is suitable. Fit correct range PRV. Re-fit PRV blanking plug supplied with unit. Copyright 2015 Baker Hughes Company. English–DPI612 Instruction Manual | 73...
- Page 84 PRV (if fitted) operating at lower Check PRV range (if fitted) and pressure. pressure than required. adjust PRV if range is suitable. Fit correct range PRV. Re-fit PRV blanking plug supplied with unit. Copyright 2015 Baker Hughes Company. 74 | DPI612 Instruction Manual–English...
- Page 85 PRV (if fitted) operating at lower Check PRV range (if fitted) and pressure. pressure than required. adjust PRV if range is suitable. Fit correct range PRV. Re-fit PRV blanking plug supplied with unit. Copyright 2015 Baker Hughes Company. English–DPI612 Instruction Manual | 75...
- Page 86 Unit will not Switch On Faulty / Flat battery Try using External Power Supply. Remove Battery and replace. Unresponsive Unit Processor Lock-up Press and hold power switch. Remove Battery / Power and replace. Copyright 2015 Baker Hughes Company. 76 | DPI612 Instruction Manual–English...
- Page 88 Copyright 2015 Baker Hughes Company. This material contains one or more registered trademarks of Baker Hughes Company and its subsidiaries in one or more countries. All third- party product and company names are trademarks of their respective holders. bakerhughes.com...
Need help?
Do you have a question about the Druck DPI612 and is the answer not in the manual?
Questions and answers