
Subscribe to Our Youtube Channel
Related Manuals for Jetson Joust


Summary of Contents for Jetson Joust
- Page 1 Joust Kids' Electric Scooter. A guide for your ride. IMPORTANT: READ CAREFULLY AND RETAIN FOR FUTURE REFERENCE. MODEL SKU: JJOUST-BLU...
- Page 3 Jetson's top two riding rules: Be safe. Have fun!
-
Page 4: Table Of Contents
2. Making Moves 2.1 Riding the Joust ......................23 2.2 Using the Brake... - Page 5 3. Safe Journeying ....................28 3.1 Pre-Ride Safety Checks .
-
Page 6: Safety Warnings
Safety Warnings 1. All safety labels need to be in place and understood by the operator. 2. Persons with the following conditions shall be cautioned not to operate: Persons with any mental or physical conditions that may make them susceptible to injury or impair their physical dexterity or mental capabilities to recognize, understand, and perform all of the safety instructions and to be able to assume the hazards inherent in unit use. - Page 7 • Applying brakes too hard or too suddenly can lock up a wheel, which could cause you to lose control and fall. Sudden or excessive application of the brake may result in injury or death. • If the brake loosens, please adjust with the hexagon wrench, or please contact the Jetson Care Team. • Replace worn or broken parts immediately.
-
Page 8: Warranty Coverage
MODIFICATIONS Do not attempt to disassemble, modify, repair, or replace the unit or any components of the unit without instruction from the Jetson Care Team. This will void any warranty, and can lead to malfunctions which may cause injury. ADDITIONAL OPERATION PRECAUTIONS Do not lift the product off the ground while it is on and the wheels are in motion. -
Page 10: Product Overview
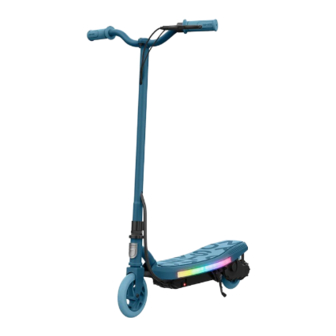
Product Overview 1. HANDLEBAR* 8. LED LIGHTS 2. HANDBRAKE 9. KICKSTAND 3. STEM* 10. MOTOR 4. FRONT WHEEL 11. REAR WHEEL 5. CHARGING PORT WITH COVER 12. ACCELERATION THROTTLE 6. POWER SWITCH 13. RESET BUTTON 7. DECK 14. CHARGER TOOLS, HARDWARE, AND PARTS INCLUDED FOR ASSEMBLY: 10MM / 8MM DOUBLE- SIDED WRENCH (10MM... - Page 11 *RIDER VIEW *RIDER VIEW *OPPOSITE SIDE OF SCOOTER NOTE: IMAGES MAY NOT REFLECT EXACT APPEARANCE OF ACTUAL PRODUCT.
-
Page 12: Product Specs
Product Specs · SPEED: UP TO 8.2 MPH* · RUN TIME: UP TO 40 MIN* (PER FULL CHARGE) · MOTOR: 120W · BATTERY: 24V, 4.5AH LEAD-ACID · CHARGING TIME: UP TO 8 HOURS · MAX CLIMBING ANGLE: 5°** · PRODUCT DIMENSIONS: 29.5” (L) × 20.5” (W) × 36.6” (H) ·... -
Page 13: Online Resources
Online Resources Scan for our most updated Joust onboarding materials and support resources. -
Page 14: Getting Started
1. Getting Started Starting Notes · KICK OFF YOUR ADVENTURE RIGHT: PRIOR TO USE OF THIS PRODUCT, CAREFULLY READ THE ENTIRE USER MANUAL, INCLUDING SAFETY WARNINGS. MAKE SURE YOU UNDERSTAND, ACCEPT, AND ADHERE TO ALL: • MANUFACTURER’S RECOMMENDATIONS. • SAFETY INSTRUCTIONS AND WARNINGS. •... -
Page 15: Assembling The Stem
Assembling the Stem STEM 1. FROM THE LOOSE HARDWARE, REMOVE THE NUTS FROM THE 2 LARGE BOLTS (B1) BY TWISTING THEM OFF COUNTERCLOCKWISE. SET THE HARDWARE ASIDE. (3RD SET IS SPARE.) 2. GENTLY GUIDING THE SEMI-ATTACHED HANDLEBAR, POSITION THE STEM VERTICALLY ABOVE THE STEM CLAMP SUCH THAT THE PIN HOLE IN THE STEM IS ABOVE THE PIN ON THE SCOOTER BASE. - Page 16 4. FROM THE LEFT SIDE OF THE SCOOTER (AS VIEWED FROM THE RIDING POSITION), INSERT ONE BOLT THROUGH THE TOP 2 HOLES OF THE STEM CLAMP. 5. REPEAT STEP 4 WITH THE 2ND BOLT IN THE BOTTOM 2 HOLES. 6. TWIST A NUT CLOCKWISE ONTO THE END OF EACH BOLT. BOLTS STEM CLAMP NUTS...
- Page 17 STEM 7. HOLD THE TOP NUT STEADY WITH THE 8MM WRENCH WHILE YOU TIGHTEN THE TOP BOLT INTO IT BY TURNING THE BOLT CLOCKWISE WITH THE 5MM ALLEN KEY. 8. REPEAT STEP 7 WITH THE OTHER BOLT AND NUT. 9. CHECK THAT THE STEM IS SECURE ON THE SCOOTER BASE. 5MM ALLEN KEY BOLTS NUTS...
-
Page 18: Assembling The Handlebar
Assembling the Handlebar 1. FROM THE LOOSE HARDWARE IN THE BOX, REMOVE THE MEDIUM NUTS FROM THE 2 MEDIUM BOLTS (B2) BY TWISTING THEM OFF COUNTERCLOCKWISE. SET THE HARDWARE ASIDE. (3RD SET IS SPARE.) 2. POSITION THE HANDLEBAR ATOP THE STEM SUCH THAT THE FOLLOWING CONDITIONS ARE MET: •... - Page 19 4. PLACE THE CLAMP TOP OVER THE CENTER OF THE HANDLEBAR SO THAT THE 2 PRE-DRILLED HOLES IN THE CLAMP TOP ARE ALIGNED WITH THE PRE-DRILLED HOLES IN THE CLAMP BASE. 5. FROM THE TOP, INSERT 1 BOLT INTO EACH SET OF ALIGNED HOLES UNTIL THE TIP EMERGES THROUGH THE CLAMP BASE. 6.
- Page 20 7. HOLD ONE NUT STEADY WITH THE 8MM WRENCH WHILE YOU TIGHTEN THE BOLT INTO THE NUT BY TURNING THE BOLT CLOCKWISE WITH THE 5MM ALLEN KEY. 8. REPEAT STEP 7 WITH THE OTHER BOLT AND NUT. 9. CHECK THAT THE HANDLEBAR IS SECURE. 5MM ALLEN KEY BOLTS NUTS...
-
Page 21: Adjusting The Handbrake Position (If Necessary)
Adjusting the Handbrake Position (if necessary) YOU WILL NEED THE 5MM ALLEN KEY. 1. LOOSEN THE BOLT ON THE HANDBRAKE CLAMP BY TURNING IT COUNTERCLOCKWISE FOR 1 – 2 ROTATIONS WITH THE 5MM ALLEN KEY. 2. ROTATE THE HANDBRAKE CLAMP AROUND THE HANDLEBAR UNTIL THE HANDBRAKE LEVER IN A POSITION AT WHICH CAN EASILY BE REACHED BY THE RIDER WHEN HOLDING ONTO THE HANDLEBAR. -
Page 22: Charging The Battery
Charging the Battery IMPORTANT: PRIOR TO THE FIRST USE OF YOUR SCOOTER, LEAVE THE SCOOTER CHARGING FOR 8 TO 10 HOURS, EVEN IF THE CHARGING INDICATOR LIGHT CHANGES FROM RED TO GREEN DURING THAT TIME. AFTER THAT, CHARGE YOUR SCOOTER ONLY UNTIL THE INDICATOR LIGHT ILLUMINATES IN GREEN, INDICATING A FULL CHARGE—ABOUT 8 HOURS FOR A FULLY DEPLETED BATTERY. - Page 23 IMPORTANT CHARGING NOTES: · ONLY USE THE INCLUDED CHARGER OR ONE OBTAINED DIRECTION THROUGH JETSON LABELED WITH FY0182400600, OR THE PART SKU PJJOUST-CH. FAILURE TO USE CORRECT CHARGER CAN RESULT IN FIRE AND EXPLOSION, RESULTING IN PROPERTY DAMAGE, INJURY, AND DEATH.
-
Page 24: Powering On & Off
Powering On & Off A SINGLE POWER SWITCH ON THE SIDE OF THE SCOOTER DECK CONTROLS BOTH YOUR SCOOTER’S MOTOR AND THE LED DECK LIGHTING. TO POWER ON: TOGGLE THE POWER SWITCH TO THE O SIDE. TO POWER OFF: TOGGLE THE POWER SWITCH TO THE — SIDE. IMPORTANT: AFTER 5 MINUTES WITHOUT USE, YOUR SCOOTER WILL AUTOMATICALLY POWER OFF. -
Page 25: Making Moves
2. Making Moves Riding the Joust IMPORTANT: THE JOUST'S MOTOR REQUIRES MOTION ACTIVATION HANDLEBAR TO START. PRIOR TO ENGAGING THE THROTTLE, PROPEL THE SCOOTER FORWARD WITH 1 - 2 CONSECUTIVE FOOT KICKS. THEN USE THE THROTTLE TO CONTINUE ACCELERATION AND MOVEMENT. -
Page 26: Using The Brake
Using the Brake SQUEEZE THE HANDBRAKE GENTLY TO SLOW DOWN. SQUEEZE MORE FORCEFULLY TO COME TO A COMPLETE STOP. TO AVOID ABRUPT MOVEMENTS, TRY TO SQUEEZE THE HANDBRAKE GRADUALLY. HANDBRAKE... -
Page 27: Using The Kickstand
Using the Kickstand TO USE THE KICKSTAND, PIVOT IT DOWN AND GENTLY TILT YOUR SCOOTER ONTO IT TO STAND. TO RAISE THE KICKSTAND, PIVOT IT BACK UP. IMPORTANT: ALWAYS RAISE THE KICKSTAND BEFORE RIDING. KICKSTAND... -
Page 28: Maximizing Speed & Run Time
INCLINE: THE MOTOR HAS TO WORK HARDER TRAVELING UPHILL THAN ON FLAT STRETCHES OR DOWNHILL. AT INCLINES STEEPER THAN 5°, THE JOUST WILL AUTOMATICALLY POWER OFF TO PROTECT THE MOTOR FROM BEING OVERWORKED. TO CONTINUE RIDING, RESET THE SCOOTER. (SECTION 2.5) ·... -
Page 29: Resetting The Joust
2. POWER OFF THE SCOOTER (SECTION 1.6). 3. WAIT AT LEAST 30 MINUTES BEFORE POWERING BACK ON AND RIDING AGAIN. RESET BUTTON * IF RESETTING THE SCOOTER DOES NOT CORRECT THE ISSUE, CONTACT THE JETSON CARE TEAM FOR FURTHER ASSISTANCE. - Page 30 3. Safe Journeying Pre-Ride Safety Checks CONDUCT THESE IMPORTANT SAFETY CHECKS BEFORE EVERY JOURNEY: BRAKE MAKE SURE THE BRAKE WORKS PROPERLY SUCH THAT: · THE HANDBRAKE LEVER IS SECURED TO THE HANDLEBAR AND LUBRICATED SO IT COMPRESSES EASILY. · ENGAGING THE HANDBRAKE BRINGS THE SCOOTER TO A STOP. FRAME ·...
- Page 31 Helmet Safety A HELMET SHOULD BE WORN BY THE RIDER AT ALL TIMES. PROPER POSITIONING: IMPROPER POSITIONING: THE FOREHEAD IS COVERED THE FOREHEAD IS EXPOSED. BY THE HELMET. A FALL COULD RESULT IN SERIOUS INJURY. * WEAR A HELMET, APPROPRIATE CLOTHING, SHOES, AND SAFETY GEAR. AVOID CLOTHING THAT CAN GET CAUGHT INTO OR UNDER THE WHEELS.
- Page 32 Care & Maintenance TAKE GOOD CARE OF YOUR E-SCOOTER TO KEEP IT RIDING SMOOTHLY AND SAFELY. HERE'S HOW: HANDLING YOUR SCOOTER · AVOID EXPOSING YOUR SCOOTER TO SEVERE VIBRATION OR INTENSE PHYSICAL IMPACT. · NEVER DISASSEMBLE THE BATTERY. · KEEP YOUR SCOOTER AWAY FROM WATER AND MOISTURE. ·...
- Page 34 Stay connected. Be sure to follow @ridejetson on social media to learn about fantastic offers, giveaways, and all the latest Jetson news. Loving your ride? Then be sure to leave a review at ridejetson.com/reviews. We can’t wait to hear from you!
- Page 36 Date Code: 07/2024 Document Edition: v1.0 © 2024, JETSON. ALL RIGHTS RESERVED. Manufactured by JETSON ELECTRIC BIKES LLC. No portion of this document, including shape, copy, graphics, and design, may be reproduced or transmitted in any form or by any means.
Need help?
Do you have a question about the Joust and is the answer not in the manual?
Questions and answers
wiring diagram for Jetson JJoust-Blu. I seam to have a ground issue, nothing operates. If I jump a ground to the foot side rail I get the lights to operate along with the off/on switch light . I have 25.4 VDC everywhere, but no ground.....Any ideas?????