Kingfisher KI 2600 Series Service Manual
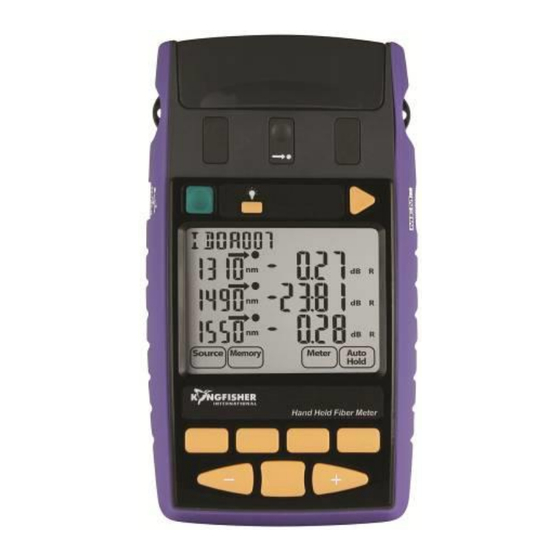
Hand held fiber meter/source, hand held loss test meter
Hide thumbs
Also See for KI 2600 Series:
- Operation and maintenance manual (74 pages) ,
- Training manual (43 pages) ,
- Quick reference manual (19 pages)
Advertisement
Table of Contents
- 1 Table of Contents
- 2 Section 1 - Tools & Other Requirements
- 3 Section 2 - Mechanical Inspection
- 4 Section 3 - Electrical Testing
- 5 Section 4 - Functional & Performance Testing
- 6 Section 5 - Internal Inspection
- 7 Section 6 - Kits™ User Interface
- 8 Section 7 - Rework Back Casing of Ki23400/Ki27400 Series Instruments
- Download this manual
KI 2600
TARGET AUDIENCE
1) The technician using this manual will be able to inspect a complex electrical device and determine basic
operating errors. Familiarity with laser optical safety and handling optical fiber is required, otherwise
expensive damage is a high probability.
2) The technician is approved his / her employer who assumes all associated risk.
3) These instructions enable general testing of common problems, but do not detail every possible problem
that may occur.
4) If a problem is found to be related to the optics or PCB component failure then the unit will be required
to be returned to Kingfisher.
5) Antistatic procedures should be followed at all times when handling internal circuits.
DISCLAIMER
Technical data is subject to change without notice and is given in good faith as part of our program of
continuous improvements. It cannot be used as the basis for claims against Kingfisher International or its
representatives, if accidental damage or inconvenience results from use or attempted repair of the equipment.
KINGFISHER INTERNATIONAL PTY LTD
720 Springvale Road, Mulgrave, Victoria 3170 Australia
Phone: +61 3 8544 1700
Fax:
+61 3 8544 1793
E-mail:
sales@kingfisher.com.au
Website:
http://www.kingfisherfiber.com
Revision: 3
KI2000 SERIES INSTRUMENT SERVICE MANUAL
KI 2600 Series (Hand Held Fiber Meter)
KI 2400/KI 2800 Series (Hand Held Fiber Source)
KI 2300/KI 2700 Series (Hand Held Loss Test Meter)
KI 2400 / KI 2800
Date: 15 Oct 2021
KI 2300 / KI 2700
Page: 1/15
Advertisement
Table of Contents

Related Manuals for Kingfisher KI 2600 Series


Summary of Contents for Kingfisher KI 2600 Series
- Page 1 Technical data is subject to change without notice and is given in good faith as part of our program of continuous improvements. It cannot be used as the basis for claims against Kingfisher International or its representatives, if accidental damage or inconvenience results from use or attempted repair of the equipment.
- Page 2 RETURNING UNITS TO KINGFISHER If an approved repairer has opened a unit that must be returned to Kingfisher for any reason, the repairer’s warranty sticker must be in place or the warranty will be void. Please fill out the Service Request Form (SRF) available from the kingfisher web site under support at http://www.kingfisherfiber.com/Customer-support.htm.
- Page 3 4) Problems with electro-optic devices, or fiber devices, typically require specialised expertise. In our experience this is best handled by Kingfisher’s own service center. 5) If appropriate, rectification can proceed.
-
Page 4: Table Of Contents
KI2000 SERIES INSTRUMENT SERVICE MANUAL TABLE OF CONTENTS SECTION 1 - TOOLS & OTHER REQUIREMENTS ................5 SECTION 2 - MECHANICAL INSPECTION ..................6 SECTION 3 - ELECTRICAL TESTING ..................... 7 SECTION 4 – FUNCTIONAL & PERFORMANCE TESTING .............. 7 SECTION 5 - INTERNAL INSPECTION.................. -
Page 5: Section 1 - Tools & Other Requirements
KI2000 SERIES INSTRUMENT SERVICE MANUAL SECTION 1 - TOOLS & OTHER REQUIREMENTS The testing tools and equipment required for maintenance and performance testing of instrument are listed below. - Optical Spectrum Analyser (for laser spectral analysis) - PC loaded with KITS program (for laser stability check) - Power Meter - Attenuator - Light Source... -
Page 6: Section 2 - Mechanical Inspection
KI2000 SERIES INSTRUMENT SERVICE MANUAL SECTION 2 - MECHANICAL INSPECTION NOTE: Exercise care as no parts are to be forced together. Use tools that fit correctly. Check the following: 1) Warranty sticker is not damaged. 2) Batteries not flat or leaking. 3) All openings are functional and in good working order. -
Page 7: Section 3 - Electrical Testing
KI2000 SERIES INSTRUMENT SERVICE MANUAL SECTION 3 - ELECTRICAL TESTING Use a multimeter (amp-meter) to check that battery power consumption is within acceptable level when instrument is turned OFF. Take note of current measurement steps below: Connect amp-meter in series with the batteries in instrument. Turn on instrument followed by turning it off, wait for 10 seconds before measurement is read from amp-meter. -
Page 8: Section 5 - Internal Inspection
KI2000 SERIES INSTRUMENT SERVICE MANUAL SECTION 5 - INTERNAL INSPECTION 1 DEASSEMBLING INSTRUMENT Note: - These instructions are common for KI2600, KI2400/KI2800, KI2300/KI2700, KI23400/KI27400 series instruments. - Place instrument face-down on a soft mat and observe static protective procedures. De-assembling Instructions Boot Cover Battery Cover This screw hole... - Page 9 KI2000 SERIES INSTRUMENT SERVICE MANUAL Flip unit over 1.5 Remove the 4 Philips screws depicted by red arrows in figure above and flip instrument over. Front Panel Front Panel Alignment pins Keypad-bumper Holes 1.6 Remove Front Panel by gently lifting it up until all its alignment pins are disengaged from the corresponding holes on instrument’s keypad-bumper.
- Page 10 KI2000 SERIES INSTRUMENT SERVICE MANUAL Backlight Backlight ➋ Pull Reflector Reflector ➊ Lift LED/Slot #1 LED/Slot #2 LED/Slot #3 1.8 Remove Backlight Reflector by first lifting it up slightly then gently pull it off the 3 LEDs which had been lodged in the slots at bottom of the reflector.
- Page 11 KI2000 SERIES INSTRUMENT SERVICE MANUAL 3.1 Re-assembling Backlight Reflector: Note 1: Cares must be taken when re-mounting Backlight Reflector in order not to damage any component on PCBA. Note2: Make sure that the top corners of Backlight Reflector are well positioned within the recess of Keypad- Bumper as depicted by the red circles in above figure.
-
Page 12: Section 6 - Kits™ User Interface
3.4 Replace and tighten the 5 Philips screws on Back Casing. Replace battery door. SECTION 6 - KITS™ USER INTERFACE Refer to http://www.kingfisherfiber.com for latest version of software KITS™ = Kingfisher International Testing Software To use: Revision: 3 Date: 15 Oct 2021 Page: 12/15... - Page 13 KI2000 SERIES INSTRUMENT SERVICE MANUAL - Load PC (Window 10 ~ XP, see more in Pre-requisites detail) with KITS™. - Connect the light source to be tested to the PC / KITS™ using a USB cable. - Run KITS and you can record and save the performance of your light source (typical KITS™ interfaces as shown in pictures below) Meter Reading Interface Data Logging Interface...
-
Page 14: Section 7 - Rework Back Casing Of Ki23400/Ki27400 Series Instruments
KI2000 SERIES INSTRUMENT SERVICE MANUAL SECTION 7 – REWORK BACK CASING OF KI23400/KI27400 SERIES INSTRUMENTS This rework instruction is only applicable to the some of the early built instruments which have been identified with LCD display problems. The problem was known to be a result of a fully or partially detached ribbon connector on PCBA. - Page 15 KI2000 SERIES INSTRUMENT SERVICE MANUAL Revision history: Editor Date Change descriptions T.O. Ng 14/10/2021 Added section 7 (Instruction for reworking of KI23400 & KI27400 series Back Casing)’. Revision: 3 Date: 15 Oct 2021 Page: 15/15...
Need help?
Do you have a question about the KI 2600 Series and is the answer not in the manual?
Questions and answers