Kingfisher KI9600 Series Training Manual
Power meter
Hide thumbs
Also See for KI9600 Series:
- Quick reference manual (15 pages) ,
- Operation & maintenance manual (52 pages)
Table of Contents
Advertisement
Quick Links
Advertisement
Table of Contents

Related Manuals for Kingfisher KI9600 Series


Summary of Contents for Kingfisher KI9600 Series
- Page 1 KI9600 Power Meter Training Manual Revision 2...
- Page 2 KI9600 SERIES POWER METER...
- Page 3 Table of Content (TOC) 6.4. Instrument Operation TYPICAL APPLICATIONS 6.4.1. Power Measurement GENERAL FEATURES 6.4.2. Modulation Frequency Measurement MODELS 6.4.3. Multifiber ID Identification PHOTODETECTOR TYPES 6.4.4. Tamperlock Function INSTRUMENT OVERVIEW AND KEYPAD LAYOUT 6.4.5. Max & Min Display Function GETTING STARTED 6.4.6.
-
Page 4: Typical Applications
1. TYPICAL APPLICATIONS ◄ Back to TOC Measuring absolute power levels • Measuring loss • MultFiber ID and Tone detection with compatible light sources • Versions for single mode, multimode POF/PCS & MPO cable • General testing & maintenance •... -
Page 5: General Features
2. GENERAL FEATURES ◄ Back to TOC Entry level skill with Tamperlock Displays dBm, dB, linear, tone Hz • • Shirt-pocket size, with spring clip • Ruggedized, water & dust resistant • Battery life: up to 300 hours Captive Dust Cap •... - Page 6 - Model with Ge5 (5 mm Ge photodetector) is suitable for 12 / 24 / 48 / 72 MPO -Model with Ge7 (7 mm Ge photodetector) is suitable 16 / 32 MPO. Refer to Kingfisher website for full list of the available models.
- Page 7 4. PHOTODETECTOR TYPES ◄ Back to TOC Several photodetector types are available for selection across the instrument model ranges to suit your application. Refer to table below to choose photodetector type that suits your field, power and wavelength requirements. Photodetector type InGaAs H series Telco &...
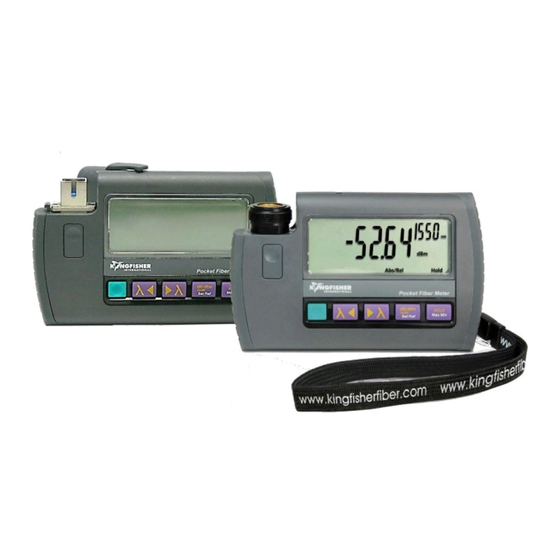
- Page 8 5. INSTRUMENT OVERVIEW AND KEYPAD LAYOUT ◄ Back to TOC Input port Instrument model, serial number & manufacturing date Spring clip display Adaptor Dust cap release button Hold display / max or min value display Battery door latch On / Off Wrist strap Battery door Measurement unit...
-
Page 9: Getting Started
6. GETTING STARTED ◄ Back to TOC 6.1. Install Batteries 6.2. Turn Instrument On / Off 6.3. Install / uninstall Adaptor On Instrument 6.4. Instrument Operation... -
Page 10: Install Batteries
6.1. Install Batteries Back to GETTING STARTED ◄ Back to TOC ◄ To install batteries: • Pinch latch and lift battery door • Insert 2 ‘ A AA’ cells • Replace battery door Battery life: Up 300 hours using Alkaline batteries. Low Battery Display: The symbol, is displayed when batteries are low. - Page 11 6.2. Turn Instrument On / Off Back to GETTING STARTED ◄ Back to TOC ◄ To turn on, To disabled auto-time-out, Press green button, Press and hold green button, when instrument is off. • Instrument will beep twice. • “Perm” will be displayed indicating Auto Time Out is disabled After beeping twice Press once Press &...
- Page 12 This model range comes with a SC/SC shown below) into instrument’s hybrid adaptor (see pic below) as ➋ Grip & pull connector port. standard accessory. adaptor up Slots on this side Kingfisher website for other available ➊ Press down Release Button hybrid adaptors.
- Page 13 For MPO adaptor, rotate it clockwise until a “click” is detached. Kingfisher website for available XL adaptors. felt. At this point the adaptor is rotationally aligned with the rectangular detector chip in the case of a...
-
Page 14: Instrument Operation
6.4. Instrument Operation Back to GETTING STARTED ◄ Back to TOC ◄ 6.4.1. Power Measurement 6.4.2. Modulation Frequency Measurement 6.4.3. Multifiber ID Identification 6.4.4. Tamperlock Function 6.4.5. Min & Max Display Function 6.4.6. Hold Display Function 6.4.7. SlowMode Function 6.4.8. Firmware Revision Display Function... -
Page 15: Power Measurement
6.4.1. Power Measurement Back to Instrument operation ◄ ◄ Back to TOC To measure steady optical power levels connected to instrument’s input port, ➊ Turn instrument on (Refer to section 6.2) Select measurement mode. ➌ Press [dB/dBm/mW Set Ref] button to toggle Absolute mode Selected Connector... - Page 16 6.4.1. Power Measurement (… continue) Back to Instrument operation ◄ Back to TOC ◄ To measure steady optical power levels connected to instrument’s input port, in Relative mode, Select Relative mode Press and hold [dB/dBm/mW Set (Refer ➊ ➋ Displayed value turns to Reference Ref ] button until, to ➌...
- Page 17 6.4.2. Modulation Frequency Measurement Back to Instrument operation ◄ Back to TOC ◄ To measure frequency of modulated light (tone) connected to instrument’s input port, Note: Scenario I: When a standard tone (270, Scenario II: When a nonstandard tones 1000, 200 Hz) from a compatible light between 200 &...
- Page 18 6.4.3. Multifiber ID Identification Back to Instrument operation ◄ Back to TOC ◄ To identify and display a Multifiber ID received from a compatible light source, When a Standard Multifiber ID (id01, id02,…….id12) from a compatible light source is detected at its input, the instrument will beep and display the corresponding id ,see e.g.
-
Page 19: Tamperlock Mode
6.4.4. Tamperlock Mode ◄ Back to TOC Back to Instrument operation ◄ This feature enable user (a supervisor) to lock instrument down at selected wavelength for a specific application. It require s user defined keystroke to activate or de-activate. To activate Tamperlock mode, With instrument turned on at selected wavelength Upon successful activation, ➌... - Page 20 6.4.4. Tamperlock Mode (… continue) Back to Instrument operation ◄ Back to TOC ◄ To deactivate Temperlock Mode, Indicating no. In case a wrong 6-key of fail attempts sequence is entered, “FAIL” ➊ Turn off instrument. will be displayed indicating unsuccessful deactivation, Instrument will then turn off...
- Page 21 6.4.5. Min & Max Display Function Back to Instrument operation ◄ Back to TOC ◄ This function is useful where measurements need to be monitored over a time period. At any measurement mode (Absolute, Linear or Relative), press and hold to toggle between instantaneous, minimum (max) and maximum (max) values in the sequence as shown below, Instantaneous value...
- Page 22 6.4.6. Hold Display Function Back to Instrument operation ◄ Back to TOC ◄ This function is useful where you needs to to note down a reading, or to show a measurement to a third party. At any measurement mode (Absolute, Linear or Relative), press will freeze the displayed value after a beep.
- Page 23 6.4.7. SlowMode Function Back to Instrument operation ◄ Back to TOC ◄ This function is used when measuring power levels on unstable signals, or signals that accidentally trigger tone detection. Slowmode function can be activated in the scenario below, Scenario When instrument is off •...
- Page 24 6.4.7. SlowMode Function (… continue) Scenario When instrument is off Back to Slowmode Function ◄ To exit SlowMode function, Press & hold , then press Turn instrument off and than back on. “▶”& “B”is displayed ➊ Press & hold alternatively indicating SlowMode ➋...
- Page 25 6.4.7. SlowMode Function (… continue) Scenario When instrument is on & measuring steady power levels Back to Slowmode Function ◄ To exit SlowMode function, Press & hold , then press Turn instrument off and than back on. “▶”& “B”is displayed alternatively indicating ➊...
- Page 26 6.4.7. SlowMode Function (… continue) Scenario III: When instrument is on & detecting frequency or Multifiber ID Back to Slowmode Function ◄ To exit SlowMode function & return to frequency/Multifiber ID detection, Press & hold , then press “▶”& “B”is displayed alternatively indicating SlowMode function is activated...
- Page 27 6.4.8. Firmware Revision Display Function Back to Instrument operation ◄ Back to TOC ◄ This function displays the firmware version of instrument Firmware version After releasing ➊ Press & hold Press & hold ➋ Press to turn on instrument...
-
Page 28: Instrument Care
7. INSTRUMENT CARE Back to Instrument operation ◄ Back to TOC ◄ Keep the instrument in a carry case during storage and transport • Use only high quality batteries. • For prolonged storage remove batteries. • The instrument is resistant to normal dust and moisture, however it is not waterproof. •... -
Page 29: Application Notes
◄ Back to TOC Application Notes Comprehensive selection available at https://www.kingfisherfiber.com/Application-Notes.aspx... - Page 30 ◄ Back to TOC The End Prepared by: TO Ng @kingfisherfiber kingfisherfiber.com Date prepared: 11 Dec 2017...
Need help?
Do you have a question about the KI9600 Series and is the answer not in the manual?
Questions and answers