Table of Contents
Advertisement
Quick Links
SMART MANUAL WALKING TREADMILL
SF-T1407 SMART
USER MANUAL
IMPORTANT! Please retain owner's manual for maintenance and adjustment instructions.
Your satisfaction is very important to us, PLEASE DO NOT RETURN UNTIL YOU HAVE
CONTACTED US: support@sunnyhealthfitness.com or 1- 877 - 90SUNNY (877-907-8669).
Advertisement
Table of Contents

Related Manuals for Sunny Health & Fitness SF-T1407 SMART


Summary of Contents for Sunny Health & Fitness SF-T1407 SMART
- Page 1 SMART MANUAL WALKING TREADMILL SF-T1407 SMART USER MANUAL IMPORTANT! Please retain owner’s manual for maintenance and adjustment instructions. Your satisfaction is very important to us, PLEASE DO NOT RETURN UNTIL YOU HAVE CONTACTED US: support@sunnyhealthfitness.com or 1- 877 - 90SUNNY (877-907-8669).
-
Page 2: Important Safety Information
IMPORTANT SAFETY INFORMATION We thank you for choosing our product. To ensure your safety and health, please use this equipment correctly. It is important to read this entire manual before assembling and using the equipment. Safe and effective use can only be achieved if the equipment is assembled, maintained, and used properly. -
Page 3: Pre-Assembly Check List
PRE-ASSEMBLY CHECK LIST Description Spec. Qty. Description Spec. Qty. Main Frame Lock Knob Left Flywheel Cover Base Frame Right Flywheel Cover Hardware Package Right Upright Support Battery Left Upright Support Thank You Card Handlebar User Manual Decorative Cover Oil Bottle Computer... -
Page 4: Hardware Package
HARDWARE PACKAGE Ordering Replacement Parts (U.S. and Canadian Customers only) Please provide the following information in order for us to accurately identify the part(s) needed: ✓ The model number (found on cover of manual) ✓ The product name (found on cover of manual) ✓... - Page 5 ASSEMBLY INSTRUCTIONS We value your experience using Sunny Health and Fitness products. For assistance with parts or troubleshooting, please contact us at support@sunnyhealthfitness.com or 1-877-90SUNNY (877- 907-8669). STEP 1: Note: To complete steps that involve assembling heavy components, have a second person help with the assembly process.
- Page 6 We value your experience using Sunny Health and Fitness products. For assistance with parts or troubleshooting, please contact us at support@sunnyhealthfitness.com or 1-877-90SUNNY (877- 907-8669). STEP 3: Attach the Main Frame (No. 1) to the Right & Left Upright Supports (No. 4 & No. 5) using 2 Flat Washers (No.
-
Page 7: Lubricating The Treadmill
LUBRICATING THE TREADMILL IMPORTANT NOTE: You will need to lubricate your treadmill before the first use! RUNNING BELT & TREADMILL LUBRICANT: Lubricating the Running Board (No. 26) and Running Belt (No. 2) is essential as the friction affects the life span and operations of the treadmill. Inspect the Running Board (No. 26) and Running Belt (No. -
Page 8: Folding Instructions
3. Over time the Running Belt (No. 2) will loosen. To tighten the Running Belt (No. 2), turn both the Adjustable Bolts (No. 40) on the left and right sides one full turn clockwise. Check the tension of the Running Belt (No. 2). Continue this process until Running Belt (No. 2) is at the correct tension. - Page 9 WARNING! 1. When folding or unfolding the treadmill, always ensure that the Lock Knob (No. 10) is inserted correctly and properly tightened. 2. For their safety, children should be kept away from the equipment, even when folded. 3. A folded treadmill should not be operated. 4.
-
Page 10: Exercise Computer
EXERCISE COMPUTER BLUETOOTH 1. The Bluetooth icon will flash when the computer is on or wakes from sleep mode. If no Bluetooth connection is established within 1 minute, the Bluetooth icon will turn off. 2. The Bluetooth icon will stay on when it is connected. 3. -
Page 11: Battery Installation And Replacement
SPECIFICATIONS: TIME---------------------------------------------------- 00:00-99:59 MIN: SEC SPEED------------------------------------------------- 0.0-999.9 M (Miles) /H CALORIE---------------------------------------------- 0.0-999.9 KCAL ODOMETER------------------------------------------ 0.00-9999.9 M (Miles) DISTANCE-------------------------------------------- 0.0-999.9 M (Miles) PULSE------------------------------------------------- 30-240 (Beats)/Min FUNCTIONS SCAN: After power on or press the mode button, automatically scan through each function value in sequence every 6 seconds. -
Page 12: Troubleshooting
before installing. 3. Press the buckle of battery cover, then put the battery cover back to the back of the Computer (No. 8). The replacement is complete! NOTE: Always change both batteries at the same time. Do not mix battery types and do not mix old and new batteries. - Page 13 APP CONNECTION: CONNECT SMART EQUIPMENT TO SUNNYFIT APP: 1. Scan to download SunnyFit from the app store. 2. Ensure that the Bluetooth function is turned on from your mobile device. 3. If this is your first time using the SunnyFit app, follow the in-app instructions to register for your free SunnyFit account and log in.
-
Page 14: Parts List
PARTS LIST Description Spec. Qty. Description Spec. Qty. Main Frame Running Board Running Belt Front Roller Left Flywheel Cover Rear Roller Right Flywheel Cover Side Rail Right Upright Support Anti-slip Cloth Left Upright Support Left Side Rail Block Handlebar Right Side Rail Block Decorative Cover Foot Cover Computer... -
Page 15: Exploded Diagram
EXPLODED DIAGRAM Version: 1.0...
Need help?
Do you have a question about the SF-T1407 SMART and is the answer not in the manual?
Questions and answers
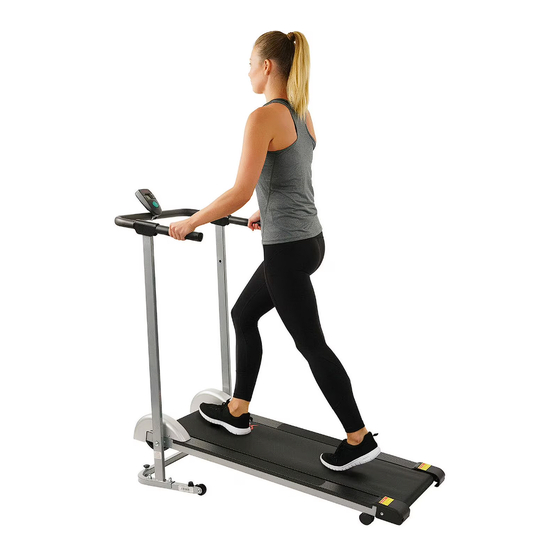
How do I start the treadmill
To start the Sunny Health & Fitness SF-T1407 SMART treadmill:
1. Ensure the treadmill is on a flat, solid surface with 2 feet of space around it.
2. Unfold the treadmill by turning the Lock Knob (No. 10) counter-clockwise, removing it from the upper hole of the Right Upright Support (No. 4), lowering the Main Frame (No. 1), then reinserting and tightening the Lock Knob into the lower hole.
3. Hold the handrails for safety.
4. The treadmill monitor turns on automatically when the belt moves or the mode button is pressed.
5. Use the mode button to select desired function (Time, Speed, Distance, or Calories).
The treadmill is now ready for use.
This answer is automatically generated